


 本文介绍了在Idea2020版本中实现Java代码热部署的方法。包括在项目pom.xml添加依赖和插件、设置自动编译、开启相关编译选项、设置项目启动加载等步骤。若部署不成功可安装JRebel插件,还说明了其安装及使用方法,设置后修改代码无需重启站点。
这个是idea2020版本
1.项目中pom.xml中添加依赖和插件
依赖
<!-- spring-boot-devtools -->
		<dependency>
			<groupId>org.springframework.boot</groupId>
			<artifactId>spring-boot-devtools</artifactId>
			<optional>true</optional> <!-- 表示依赖不会传递 -->
		</dependency>
插件
<plugins>
			<plugin>
				<groupId>org.springframework.boot</groupId>
				<artifactId>spring-boot-maven-plugin</artifactId>
				<configuration>
					<fork>true</fork> <!-- 如果没有该配置,devtools不会生效 -->
				</configuration>
			</plugin>
		</plugins>
2.设置自动编译
File-Settings-Compiler-Build Project automatically

3.Ctrl+Shift+Alt+/

打开后找到Compiler autoMake allow when app running

4.设置项目的启动加载
Run->Edit Configuration

找到spring boot下的 On ‘Update’ action 和 On frame deactivation ,选择 Update classes and resources

这样就部署成功了
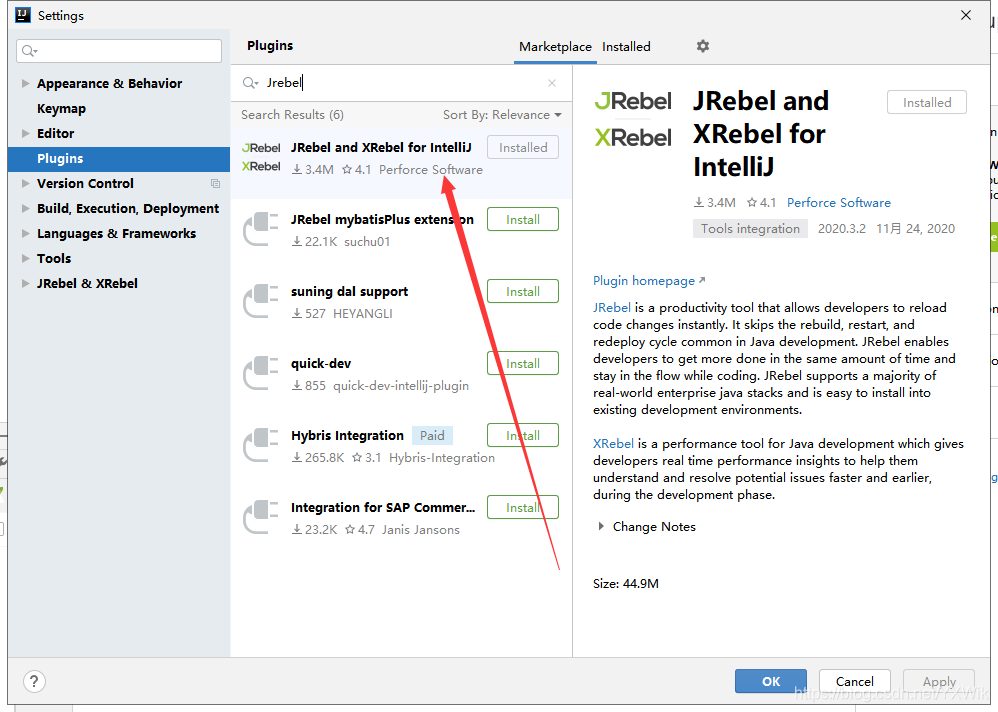
如果还不可以那就再安装个插件JRebel
安装:
在线GUID地址:在线生成GUID
生成地址:https://www.guidgen.com/
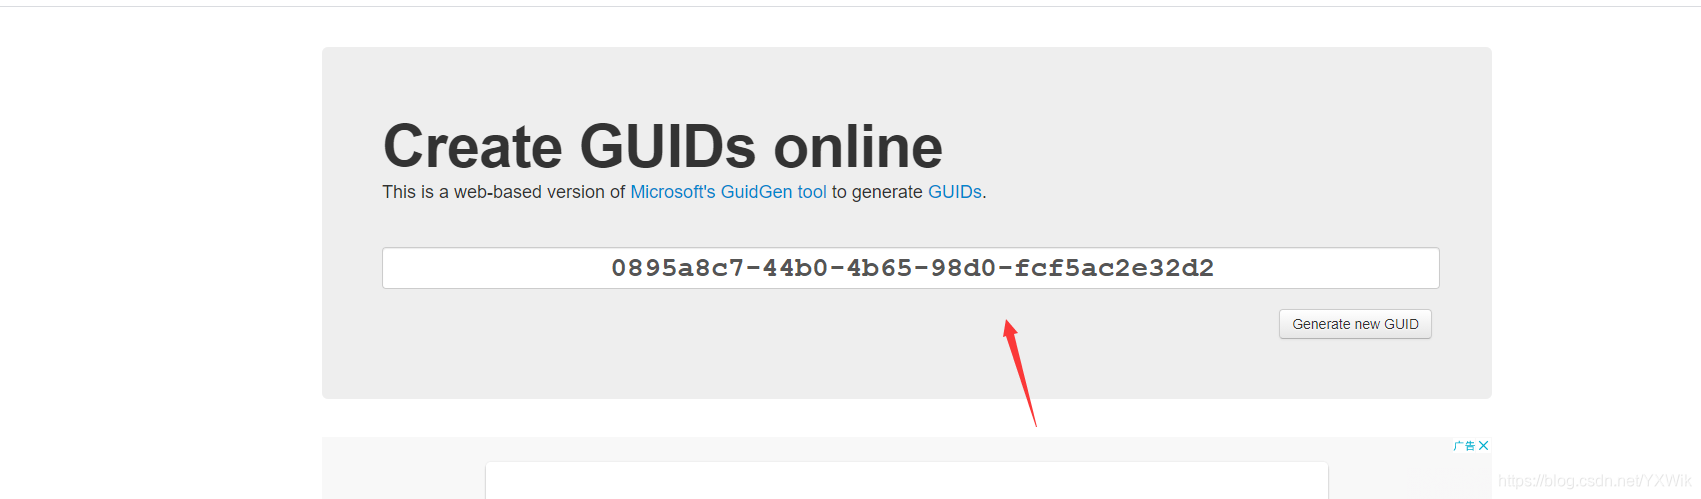
如果失效刷新GUID替换就可以了
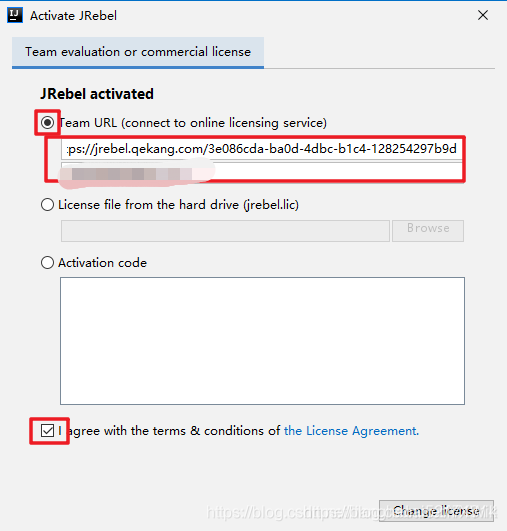
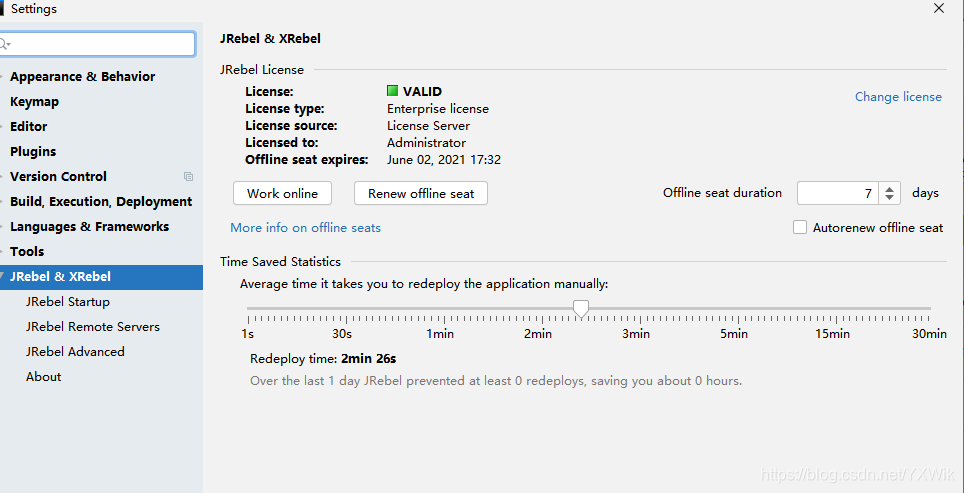
打开jrebel 如下所示面板,选择Connect to online licensing service
第一行粘贴GUID
第二行输入邮箱
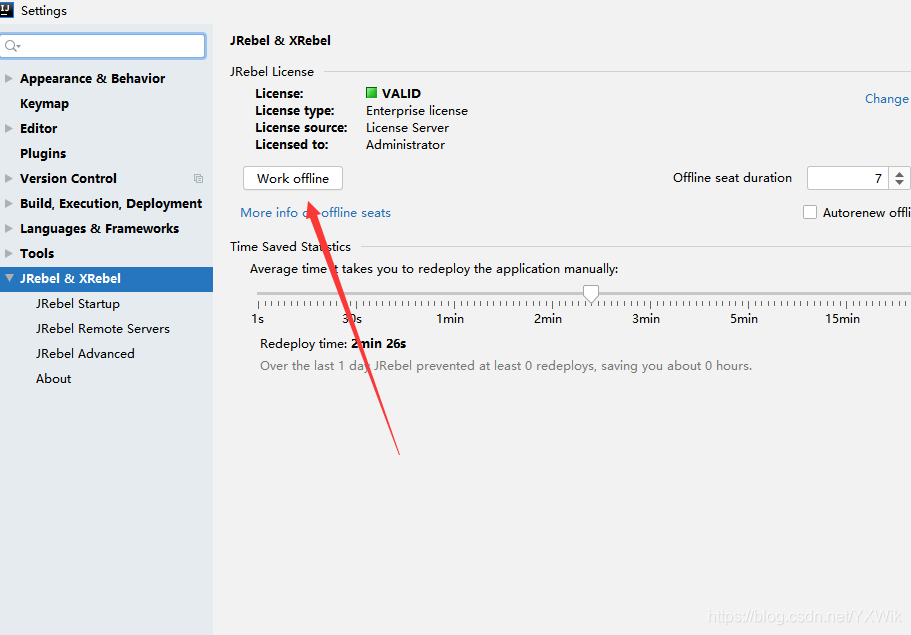
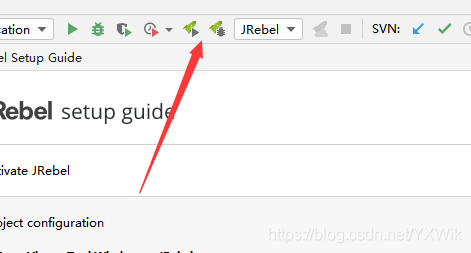
这样修改完Java代码后,就可以通过快捷键 Ctrl+shift+F9 而不再需要重启站点这样繁琐浪费时间的操作了
设置成离线工作模式
点击之后变成
这样就完成了
启动项目如下,第二哥就是debug运行。


 951
951

 被折叠的 条评论
为什么被折叠?
被折叠的 条评论
为什么被折叠?
 到【灌水乐园】发言


