


前提:配置好Nginx的负载均衡&&Keepalived实现Nginx负载均衡的高可用
文章链接如下
https://blog.youkuaiyun.com/Xuanyi_54/article/details/133776107?spm=1001.2014.3001.55021.NAT 模式配置
分别在DS1和DS2上面添加第二块网卡
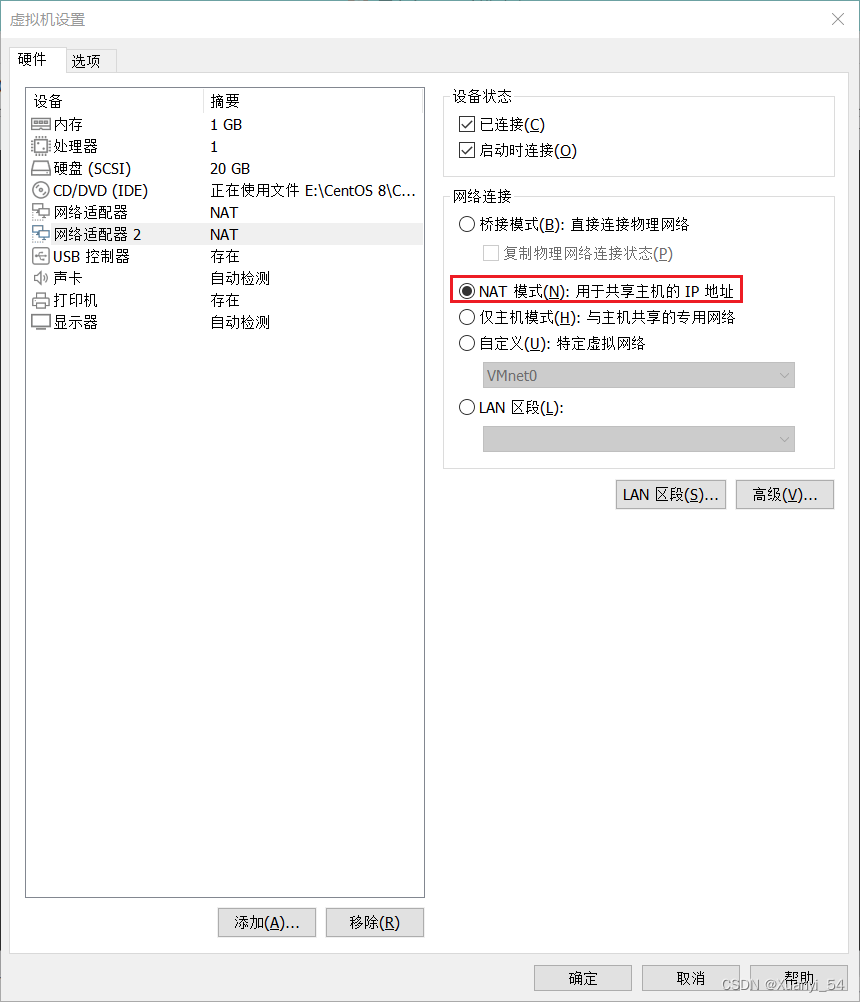
图1-1 添加一块桥接网卡,NAT模式也行,在这里我添加的是NAT模式的
[root@LiKe-DS1 ~]# ip a s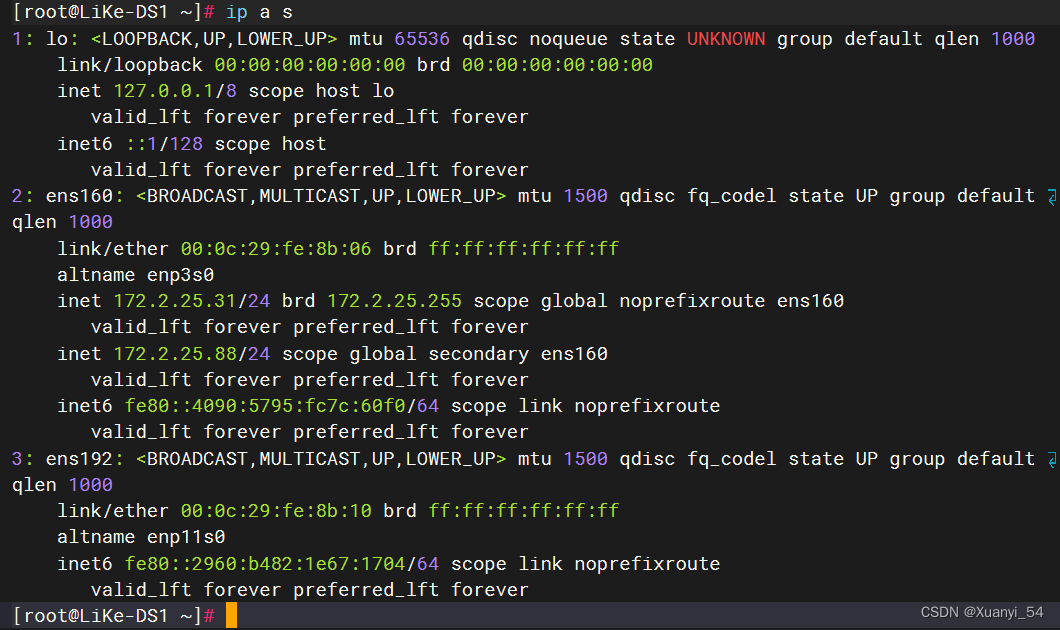
图1-2 查看新添加的网卡名称为ens192
1-1 给新添加的网卡添加网络连接
[root@LiKe-DS1 ~]# nmcli c add type ethernet ifname ens192 con-name ens192 ipv4.method manual ipv4.addresses 172.2.0.25/24 ipv4.gateway 172.2.0.2
[root@LiKe-DS1 ~]# nmcli c s
[root@LiKe-DS1 ~]# systemctl restart NetworkManager
在DS1上面添加新网卡设置的IP地址为172.2.0.25
在DS2上面添加新网卡设置的IP地址为172.2.0.35
可以不用跟我一样但是注意网段,不能和主网卡的IP地址一样
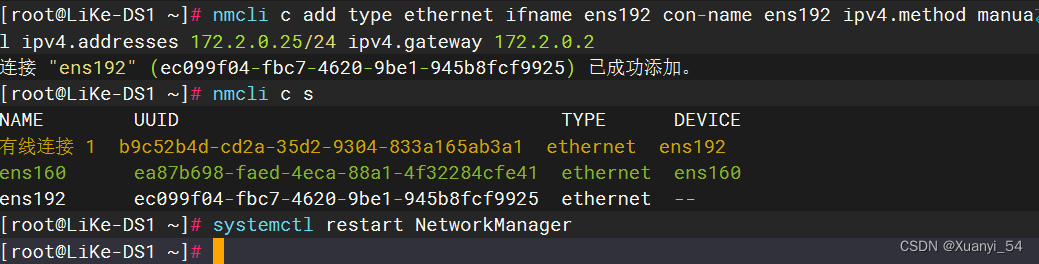
图1-3 分别给新网卡添加网络链接
[root@LiKe-DS1 ~]# ip a s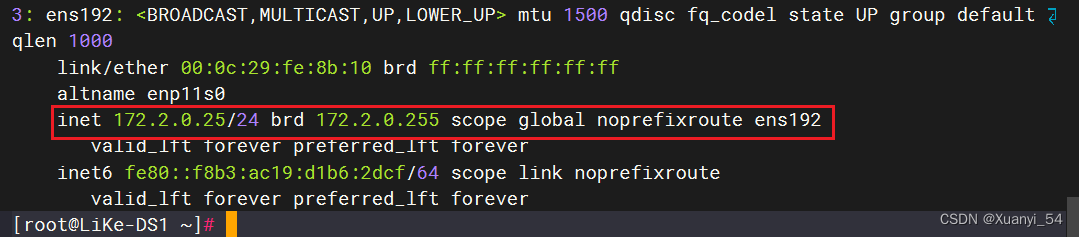
图1-4 查看第二块网卡的IP地址
1-2 在两台DS 服务器上打开路由转发功能
[root@LiKe-DS1 ~]# echo 'net.ipv4.ip_forward = 1' >> /etc/sysctl.conf
[root@LiKe-DS1 ~]# sysctl -p
图1-5 开启路由转发功能,多的在文件里面删了就行
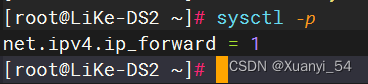
图1-6 最后的效果是这样的
2.修改配置文件
2-1 DS1 配置文件
[root@LiKe-DS1 ~]# cat /etc/keepalived/keepalived.conf
! Configuration File for keepalived

global_defs {
   router_id HA1
}

vrrp_instance VI_out {
    state MASTER
    nopreempt
    interface ens192        # 我的第二张网卡是ens192,可以根据自己的网卡名称进行修改
    virtual_router_id 70
    priority 100
    advert_int 1
    authentication {
        auth_type PASS
        auth_pass 1111
    }
    virtual_ipaddress {
        172.2.0.4/24        # 第二张网卡虚拟出的IP
    }
}
vrrp_instance VI_1 {
    state MASTER
    nopreempt
    interface ens160        # 第一张的网卡是ens160,可以根据自己的网卡进行修改
    virtual_router_id 51
    priority 80
    advert_int 1
    authentication {
        auth_type PASS
        auth_pass 1111
    }
    virtual_ipaddress {
        172.2.25.88/24        #第一张网卡虚拟出的IP
    }
}

virtual_server 172.2.0.4 80 {    # 这里的IP是第二张网卡虚拟出的IP
    delay_loop 6
   lb_algo rr
    lb_kind NAT
    net_mask 255.255.255.0
   # persistence_timeout 50
    protocol TCP

    real_server 172.2.25.33 80 {    # 真实服务器1的IP地址
        weight 1
        HTTP_GET {
            url {
              path /
      status_code 200
            }
            connect_timeout 3
            retry 3
            delay_before_retry 3
        }
    }
     real_server 172.2.25.34 80 {    # 真实服务器2的IP地址
        weight 1
        HTTP_GET {
            url {
              path /
      status_code 200
            }
            connect_timeout 3
            retry 3
            delay_before_retry 3
        }
    }

}
2-2 DS2 配置文件
DS2的配置文件和DS1的基本一样,因为如果在DS1出现故障的时候DS2就开启调度
[root@LiKe-DS2 ~]# cat /etc/keepalived/keepalived.conf
! Configuration File for keepalived

global_defs {
   router_id HA2    # 和DS1不同
}

vrrp_instance VI_out {
    state BACKUP    # DS1是MASTER代表的是主调度,DS2是备用调度
    nopreempt
    interface ens192
    virtual_router_id 70
    priority 80     # DS1优先级为100 DS2的优先级比DS1低,在这里我设置的是80
    advert_int 1
    authentication {
        auth_type PASS
        auth_pass 1111
    }
    virtual_ipaddress {
        172.2.0.4/24
    }
}
vrrp_instance VI_1 {
    state BACKUP
    nopreempt
    interface ens160
    virtual_router_id 51
    priority 70
    advert_int 1
    authentication {
        auth_type PASS
        auth_pass 1111
    }
    virtual_ipaddress {
        172.2.25.88/24
    }
}

virtual_server 172.2.0.4 80 {
    delay_loop 6
    #lb_algo rr
    lb_kind NAT
    net_mask 255.255.255.0
   # persistence_timeout 50
    protocol TCP

    real_server 172.2.25.33 80 {
        weight 1
        HTTP_GET {
            url {
              path /
      status_code 200
            }
            connect_timeout 3
            retry 3
            delay_before_retry 3
        }
    }
     real_server 172.2.25.34 80 {
        weight 1
        HTTP_GET {
            url {
              path /
      status_code 200
            }
            connect_timeout 3
            retry 3
            delay_before_retry 3
        }
    }

}
2-3 为真实服务器设置网关
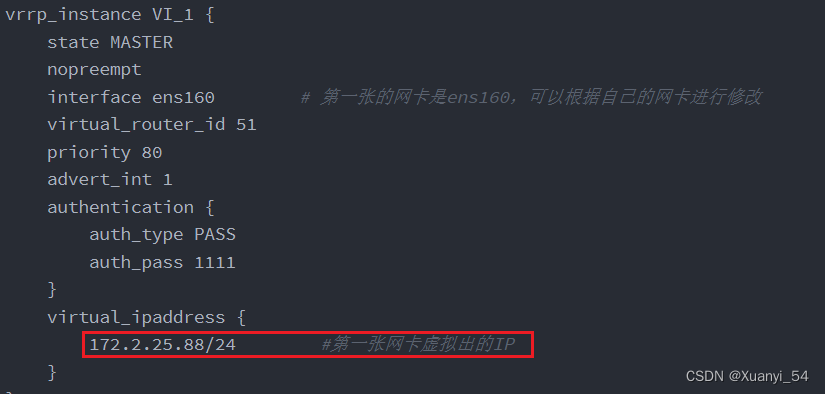
图2-1 查看自己第一张网卡虚拟出的IP
我们需要在真实服务器设置网关,网关和第一张网卡虚拟出来的IP一样
在RS1和RS2里面更改网关
最好删除网络连接重新添加
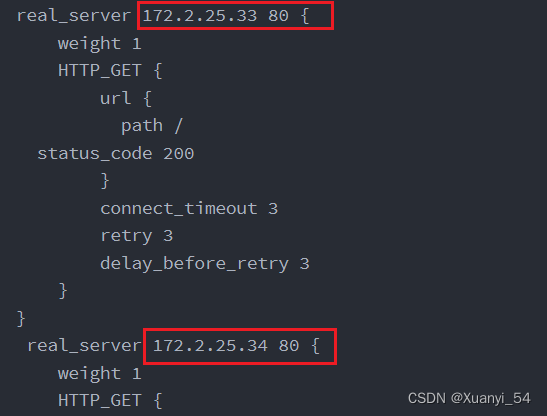
图2-2 RS1和RS2的IP地址
nmcli c add type ethernet ifname ens160 con-name ens192 ipv4.method manual ipv4.addresses 172.2.25.33/24 ipv4.gateway 172.2.0.88 ipv4.dns 8.8.8.8[root@LiKe-RS1 ~]# ip r s
图2-3 在RS1和RS2查看网关
3.测试
[root@LiKe-DS1 ~]# curl 172.2.0.4
RS1
[root@LiKe-DS1 ~]# curl 172.2.0.4
RS2
[root@LiKe-DS1 ~]# curl 172.2.0.4
RS1
[root@LiKe-DS1 ~]# curl 172.2.0.4
RS2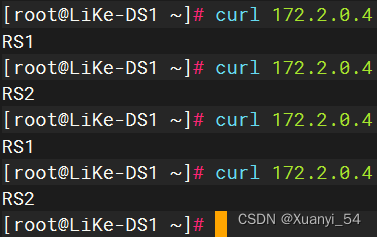
图3-1 curl第二块网卡虚拟出的IP地址


 被折叠的 条评论
为什么被折叠?
被折叠的 条评论
为什么被折叠?
 到【灌水乐园】发言


