


 该博客详细介绍了如何在TensorFlow2.0中利用VGG16进行迁移学习,包括数据预处理、模型训练、模型保存和评估。作者对图像数据进行了归一化和one-hot编码,并通过随机打乱数据集来创建训练、验证和测试集。模型训练使用了epochs=60,batch_size=32,同时应用了回调函数进行模型保存和tensorboard可视化。最后,对模型进行了评估,包括分类报告、混淆矩阵以及ROC和AUC曲线的绘制。
数据预处理+VGG16迁移学习
开发环境jupyter、tensorflow2.0
1、加载数据库
%matplotlib inline
import matplotlib as mpl
import matplotlib.pyplot as plt
import numpy as np
import os
import pandas as pd
import sklearn
import sys
import tensorflow as tf
#import time
import cv2
#import glob
# from PIL import Image
# import matplotlib.patches as patch
# import json
from tensorflow import keras
from tensorflow.keras.utils import to_categorical
from tensorflow.keras.applications import VGG16, VGG19
from tensorflow.keras.models import load_model
from tensorflow.keras import layers, models
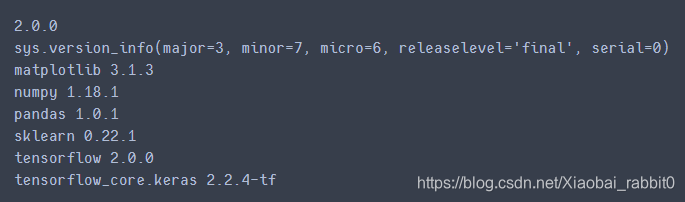
print(tf.__version__)
print(sys.version_info)
for module in mpl,np,pd,sklearn,tf,keras:
print(module.__name__,module.__version__)
from tensorflow.keras.utils import to_categorical
from tensorflow.keras.applications import VGG16, VGG19
from tensorflow.keras.models import load_model
from tensorflow.keras import layers, models
from tensorflow.compat.v1 import graph_util
from tensorflow.python.keras import backend as K
tf.compat.v1.disable_eager_execution()
K.set_learning_phase(0)
2、参数设置
preprocessedFolder = 'H:\\jupyter_project1\\模式识别作业\\ClassificationData\\'
outModelFileName = 'H:\\jupyter_project1\\模式识别作业\\'
ImageWidth = 512
ImageHeight = 320
ImageNumChannels = 3
TrainingPercent = 70
ValidationPercent = 15
3、读取文件中的图片
def read_dl_classifier_data_set(preprocessedFolder):
img_list = []
label_list = []
cnt_class = 0 #存放每个图像的label
cnt_img = 0
for directory in os.listdir(preprocessedFolder):
cnt_class += 1
tmp_dir = preprocessedFolder + directory
for image in os.listdir(tmp_dir):
cnt_img += 1
tmp_img_filepath = tmp_dir + '\\'+image
tmp_img = cv2.imread(tmp_img_filepath)
tmp_img = cv2.resize(tmp_img,(ImageWidth, ImageHeight))
img_list.append(tmp_img)
label_list.append(cnt_class)
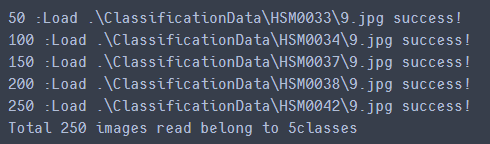
if cnt_img % 50 ==0:
print(str(cnt_img) + " :Load " + tmp_img_filepath + " success!")
print("Total " + str(cnt_img) + " images read belong to " + str(cnt_class) + "classes" )
return np.array(img_list),np.array(label_list)
if __name__ == "__main__":
#使用相对路径,改为绝对路径后,也可直接运行
preprocessedFolder = '.\\ClassificationData\\'
outModelFileName = '.\\ClassificationData\\'
ImageWidth = 512
ImageHeight = 320
ImageNumChannels = 3
TrainingPercent = 70
ValidationPercent = 15
all_data,all_label = read_dl_classifier_data_set(preprocessedFolder)
4、对数据进行预处理
1、将图像数据像素值压缩至0.0-1.0之间
2、对label使用one-hot编码
def preprocess_dl_Image(all_data< 最低0.47元/天 解锁文章


 4780
4780


 到【灌水乐园】发言


