


 本文深入讲解Spring框架中Bean的配置细节,包括id和name的区别,作用范围的设定,以及属性注入的各种方式,如构造方法注入、set方法注入和对象类型注入。
Bean的相关的配置
< bean>标签的id和name的配置
- id :使用了约束中的唯一约束。里面不能出现特殊字符的。
- name :没有使用约束中的唯一约束(理论上可以出现重复的,但是实际开发不能出现的)。里面可以出现特殊字符。
- < bean name=”/user” class=””/>
Bean的作用范围的配置(重点)
- scope :Bean的作用范围
- singleton :默认的,Spring会采用单例模式创建这个对象。
- prototype :多例模式。(Struts2和Spring整合一定会用到)
- request :应用在web项目中,Spring创建这个类以后,将这个类存入到request范围中。
- session :应用在web项目中,Spring创建这个类以后,将这个类存入到session范围中。
- globalsession :应用在web项目中,必须在porlet环境下使用。但是如果没有这种环境,相对于session。
Spring的属性注入
1、构造方法的方式的属性注入
构造方法
package com.java.spring.demo1;

public class Car {
	private String name;
	private Double price;
	public Car(String name, Double price) {
		super();
		this.name = name;
		this.price = price;
	}
	@Override
	public String toString() {
		return "Car [name=" + name + ", price=" + price + "]";
	}
}
applicationContext.xml文件
<!-- spring属性注入的方式 	使用构造方法的方式-->
	<bean id="car" class="com.java.spring.demo1.Car" >
		<constructor-arg name="name" value="宝马" />
		<constructor-arg name="price" value="80000"/>
	</bean>
测试类
public void test_demo1() {
		//创建工厂
		ApplicationContext applicationContext = new ClassPathXmlApplicationContext("applicationContext.xml");
		Car car = (Car)applicationContext.getBean("car");//applicationContext.xml中bean的id
		System.out.println(car);
	}
2、Set方法属性注入
set 构造方法
package com.java.spring.demo1;

public class Car2 {
	private String name;
	private Double price;
	public void setName(String name) {
		this.name = name;
	}
	public void setPrice(Double price) {
		this.price = price;
	}
	@Override
	public String toString() {
		return "Car2 [name=" + name + ", price=" + price + "]";
	}

}
applicationContext.xml文件
<!-- set方法的方式 -->
	<bean id="car2" class="com.java.spring.demo1.Car2" >
		<property name="name" value="奔驰"/>
		<property name="price" value="90000"/>
	</bean>
测试类
/*
	 * set方法的方式的注入
	 */
	public void test_demo2() {
		//创建工厂
		ApplicationContext applicationContext = new ClassPathXmlApplicationContext("applicationContext.xml");
		Car2 car2 = (Car2)applicationContext.getBean("car2");//applicationContext.xml中bean的id
		System.out.println(car2);
	}
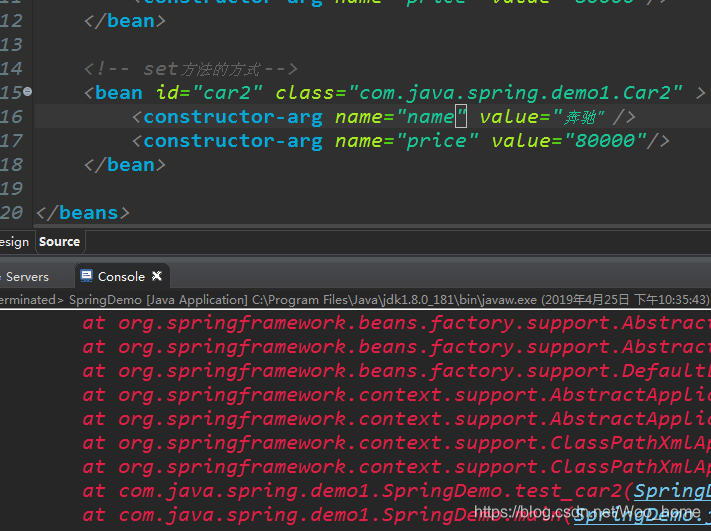
注意:set构造方法的属性注入bean里面不能用 < constructor-arg />
不然会报错
3、Set方法设置对象类型的属性
set 方法
package com.java.spring.demo1;

public class Employee {
	private String name;
	private Car2 car2;//应用Car2
	public void setName(String name) {
		this.name = name;
	}
	public void setCar2(Car2 car2) {
		this.car2 = car2;
	}
	@Override
	public String toString() {
		return "Employee [name=" + name + ", car2=" + car2 + "]";
	}

}
applicationContext.xml文件
<!-- set方法注入对象类型的属性 -->
	<bean id="employee" class="com.java.spring.demo1.Employee">
		<!-- value:设置普通类型的值       ref:设置其他类的id或name -->
		<property name="name" value="张三"/>
		<property name="car2" ref="car2"/>
	</bean>
测试类
/*
	 * set方法注入对象类型
	 */
	public void test_demo3() {
		//创建工厂
		ApplicationContext applicationContext = new ClassPathXmlApplicationContext("applicationContext.xml");
		Employee employee = (Employee)applicationContext.getBean("employee");//applicationContext.xml中bean的id
		System.out.println(employee);
	}


 169
169

 被折叠的 条评论
为什么被折叠?
被折叠的 条评论
为什么被折叠?
 到【灌水乐园】发言


