


 本文介绍了如何在SpringBoot项目中使用Swagger进行API接口文档的可视化展示,包括添加依赖、创建配置类、使用注解标记API及其详细步骤。
Swagger优势:
- 可视化界面 http://localhost:8001/swagger-ui.html
- 和Postman一样,可以发送http请求测试API
- 在线接口文档
使用步骤:
1.在pom.xml文件中添加依赖
        <!--swagger-->
        <dependency>
            groupId>io.springfox</groupId>
            <artifactId>springfox-swagger2</artifactId>
        </dependency>
        <dependency>
            <groupId>io.springfox</groupId>
            <artifactId>springfox-swagger-ui</artifactId>
        </dependency>
2.创建配置类,编写配置类
        @Configuration//配置类
        @EnableSwagger2//swagger注解
        public class SwaggerConfig {
            @Bean
            public Docket webApiConfig(){
                return new Docket(DocumentationType.SWAGGER_2)
                        .groupName("webApi")
                        .apiInfo(webApiInfo())
                        .select()
                        .paths(Predicates.not(PathSelectors.regex("/admin/.*")))
                        .paths(Predicates.not(PathSelectors.regex("/error.*")))
                        .build();
            }

            private ApiInfo webApiInfo(){
                        return new ApiInfoBuilder()
                        .title("xxx文档")
                        .description("微服务接口文档")
                        .version("1.0")
                        .contact(new Contact("Helen", "http://12345.com",         "xxxxx@qq.com"))
                        .build();
            }
        }
3.接下来就可以用注解标记API了,以下是常用注解
@API("xx模块接口") 用于Controller上,备注该Controller类中文名(后面下同)。
@ApiOperation(value = "查询信息") 用于Controller下的方法上。
@ApiParam(name = "id",value = "设备ID") 用于入参列表,标注的接口入参名称。
@ApiModelProperty(value = "讲师ID") 用于实体类上
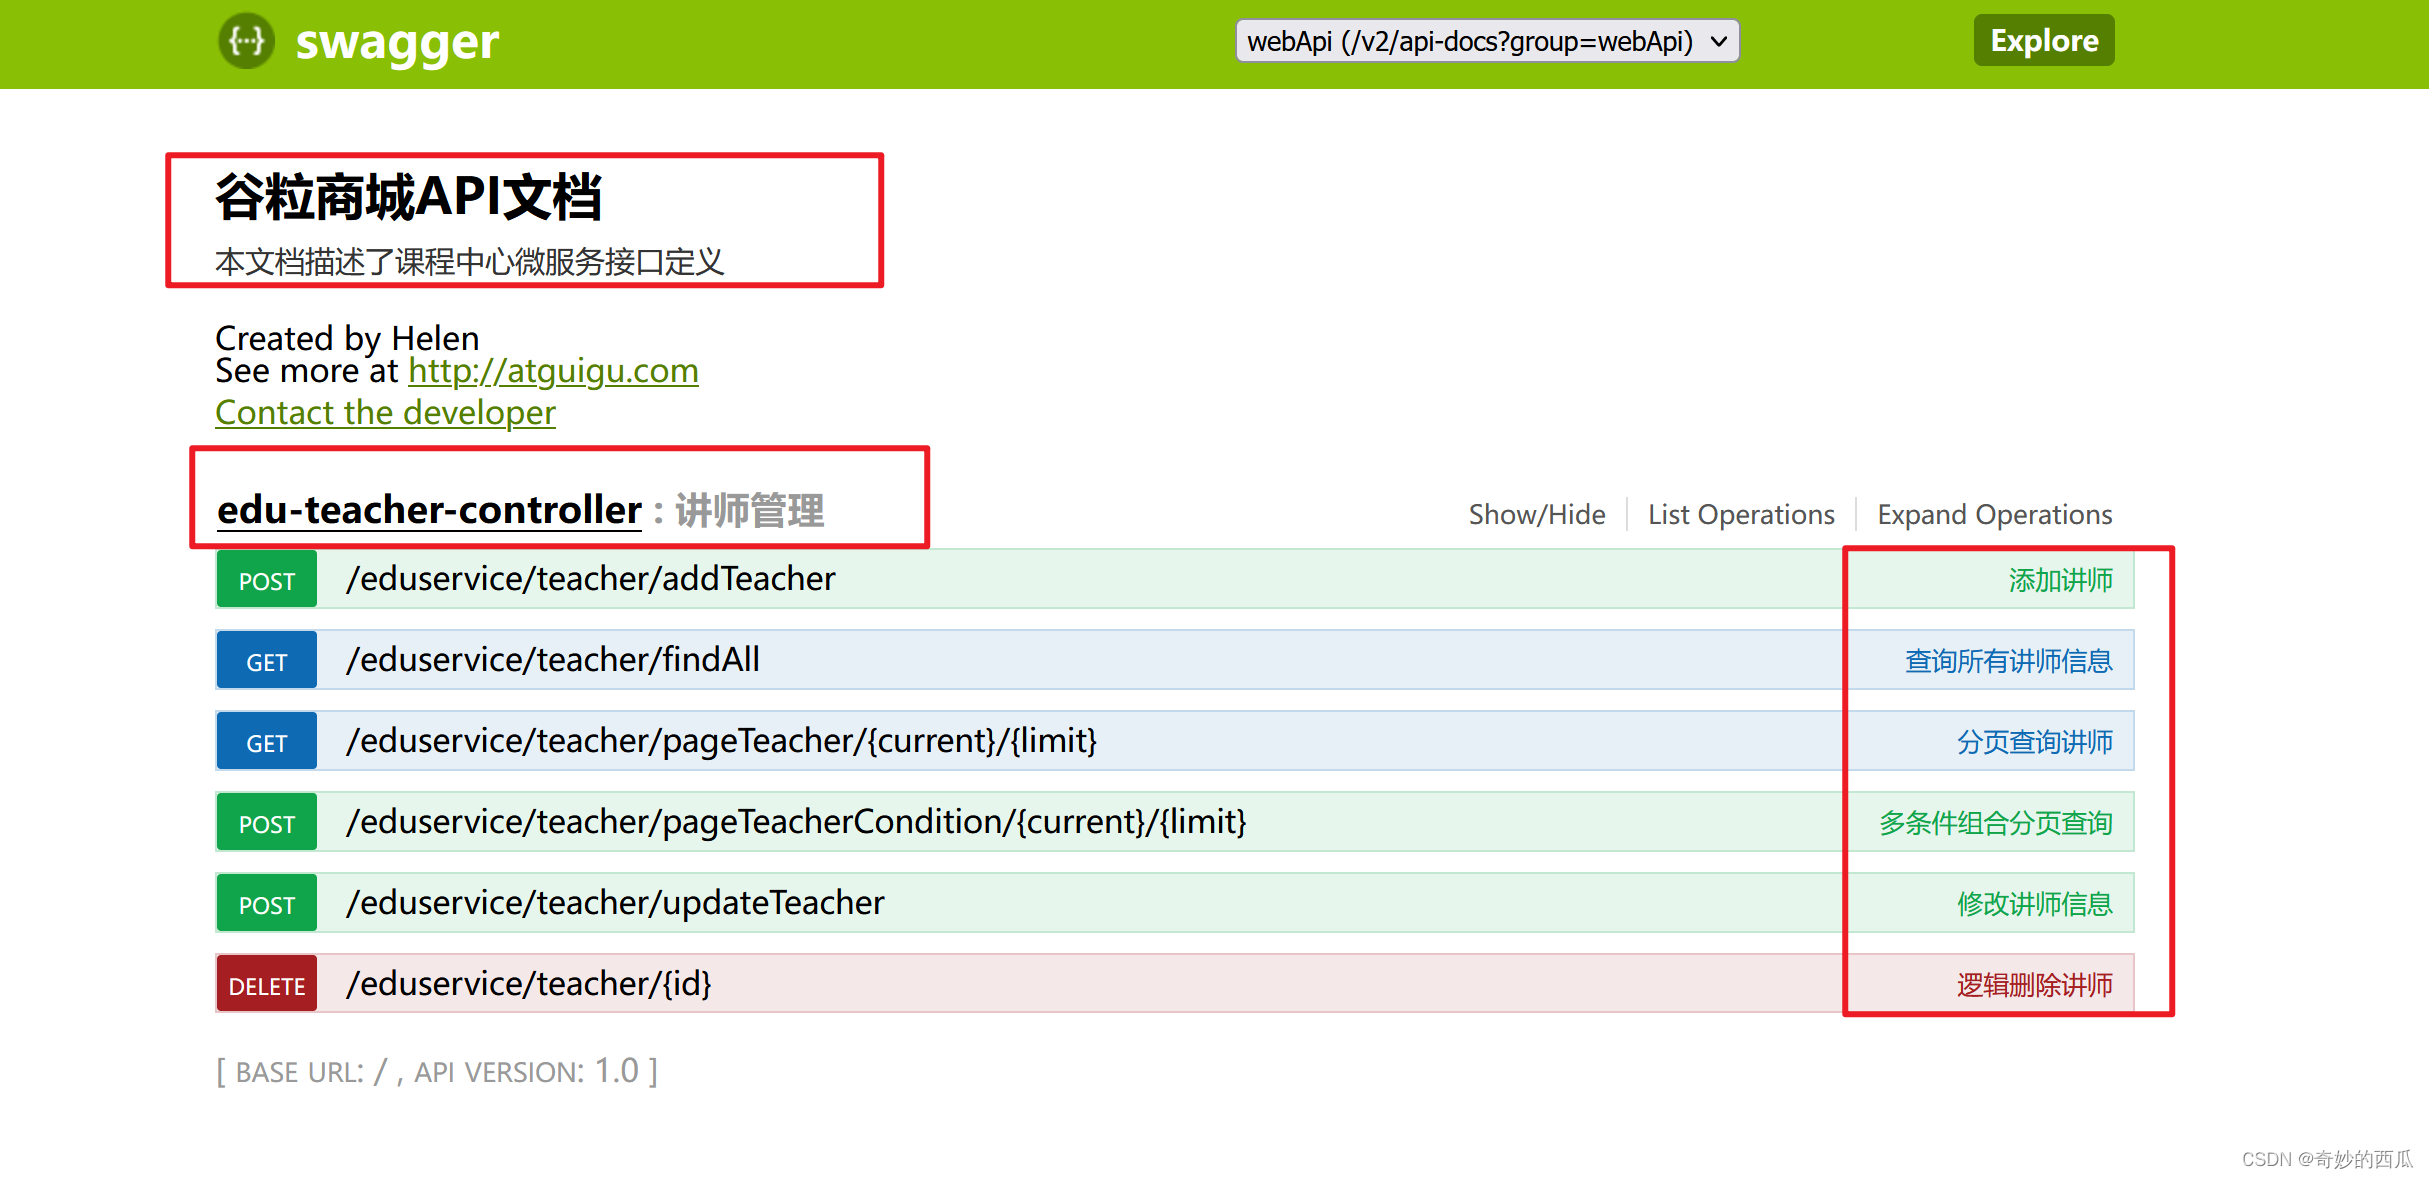
效果:


 1892
1892

 被折叠的 条评论
为什么被折叠?
被折叠的 条评论
为什么被折叠?
 到【灌水乐园】发言


