


官方地址:https://square.github.io/okhttp/
参考文章链接:https://juejin.cn/post/7033307467199021086,有很多有注释的源码都是作者大大写的,万分感谢!!!!
部份图片来自小林coding:图解网络介绍 | 小林coding,万分感谢!!!!!
本文是笔者自己的一个学习经历,写成文章的形式也是笔者的一种学习方式,若有不足,可以私信或者评论区指出,笔者会积极改进!!!
写在前面,理解okhttp3需要理解的几个点
1、关键类:OkHttpClient,Request,Call,RealCall,AsyncCall,Dispatcher,各种拦截器
2、设计模式:建造者模式,工厂模式,责任链模式
3、必备计网知识,其实任何一款网络库都需要你懂计网知识才能融会贯通,因为这些网络库就是计网理论的代码实现
整体流程
创建OkHttpClient对象进行一些参数配置,再创建Request请求对象,设置url,method,header,body,再通过OkHttpClient.newCall方法进行同步或者异步请求,同步请求则会借助RealCall.execute方法直接通过getResponseWithInterceptorChain发起请求,而异步请求多了一步线程的调度:借助RealCall里实现了Runable接口的内部类AsyncCall,将任务添加到调度器Dispatcher提供的线程池里,从而将getResponseWithInterceptorChain放到线程池中执行实现线程的切换。开始执行请求后,通过RealInterceptorChain.proceed方法来遍历Interceptor集合,对请求进行处理并返回数据。
- 自定义拦截器(应用拦截器):提供给用户的定制的拦截器。
- 失败和重试拦截器(RetryAndFollowUpInterceptor):负责请求失败的重试工作与重定向,同时它会对连接做一些初始化工作。
- 桥接拦截器(BridgeInterceptor):主要用来构造请求,客户端与服务器之间的沟通桥梁,负责将用户构建的请求转换为服务器需要的请求。
- 缓存拦截器(CacheInterceptor):通过OkHttpClient.cache来配置缓存,缓存拦截器通过CacheStrategy来判断是使用网络还是缓存来构建response。逻辑为:如果禁用了网络连接,就尝试从缓存中获取对应请求的Response,如果没禁用,但服务端返回错误码为304,也会从缓存中构建Response,如果请求成功,把Response放入到缓存中。
- 连接拦截器(ConnectInterceptor):负责客户端与服务器真正建立起连接。逻辑为:先尝试获取已经分配给该RealCall的链接(在请求失败后重试时会获取到),获取不到后尝试不带路由不多路复用,获取链接,再尝试带路由不带多路复用,再尝试不带路由带多路复用,再尝试两个都带。还是获取不到连接的情况下,就先进行TCP和TLS握手(如果是Https),握手后再尝试从连接池中获取连接,获取不到就把新创建的连接放入连接池,获取到就把连接释放了。
- 网络拦截器 (networkInterceptors):和interceptors一样也是由用户自定义的,它们的不同源自它们的位置不同。应用拦截器处在拦截器的首要位置,每次请求都必定会执行,而且只会执行一次。而网络拦截位置比较靠后,它可能因为异常而不会执行,同时,也可能由于RetryAndFollowUpInterceptor不断重试,导致执行多次。
- 网络请求拦截器(CallServerInterceptor):负责发起网络请求解析网络返回的数据
基础用法
private final OkHttpClient client = new OkHttpClient();
    Request request = new Request.Builder()
      .url("https://github.com/")
      .build();
    //同步请求
    Response response = client.newCall(request).execute();
    //todo handle response

    //异步请求
    client.newCall(request).enqueue(new Callback() {
      @Override
      public void onFailure(@NotNull Call call, @NotNull IOException e) {
	  //todo handle request failed
      }

      @Override
      public void onResponse(@NotNull Call call, @NotNull Response response) throws IOException {
          //todo handle Response
      }
    });
关键类
OkHttpClient
open class OkHttpClient internal constructor(
  builder: Builder
) : Cloneable, Call.Factory, WebSocket.Factory {

  constructor() : this(Builder())

  class Builder constructor() {
    //调度器
    internal var dispatcher: Dispatcher = Dispatcher()
    //连接池
    internal var connectionPool: ConnectionPool = ConnectionPool()
    //整体流程拦截器
    internal val interceptors: MutableList<Interceptor> = mutableListOf()
    //网络流程拦截器
    internal val networkInterceptors: MutableList<Interceptor> = mutableListOf()
    //流程监听器
    internal var eventListenerFactory: EventListener.Factory = EventListener.NONE.asFactory()
    //连接失败时是否重连
    internal var retryOnConnectionFailure = true
    //服务器认证设置
    internal var authenticator: Authenticator = Authenticator.NONE
    //是否重定向
    internal var followRedirects = true
    //是否从HTTP重定向到HTTPS
    internal var followSslRedirects = true
    //cookie设置
    internal var cookieJar: CookieJar = CookieJar.NO_COOKIES
    //缓存设置
    internal var cache: Cache? = null
    //DNS设置
    internal var dns: Dns = Dns.SYSTEM
    //代理设置
    internal var proxy: Proxy? = null
    //代理选择器设置
    internal var proxySelector: ProxySelector? = null
    //代理服务器认证设置
    internal var proxyAuthenticator: Authenticator = Authenticator.NONE
    //socket配置
    internal var socketFactory: SocketFactory = SocketFactory.getDefault()
    //https socket配置
    internal var sslSocketFactoryOrNull: SSLSocketFactory? = null
    internal var x509TrustManagerOrNull: X509TrustManager? = null
    internal var connectionSpecs: List<ConnectionSpec> = DEFAULT_CONNECTION_SPECS
    //协议
    internal var protocols: List<Protocol> = DEFAULT_PROTOCOLS
    //域名校验
    internal var hostnameVerifier: HostnameVerifier = OkHostnameVerifier
    internal var certificatePinner: CertificatePinner = CertificatePinner.DEFAULT
    internal var certificateChainCleaner: CertificateChainCleaner? = null
    //请求超时
    internal var callTimeout = 0
    //连接超时
    internal var connectTimeout = 10_000
    //读取超时
    internal var readTimeout = 10_000
    //写入超时
    internal var writeTimeout = 10_000
    internal var pingInterval = 0
    internal var minWebSocketMessageToCompress = RealWebSocket.DEFAULT_MINIMUM_DEFLATE_SIZE
    internal var routeDatabase: RouteDatabase? = null

      省略代码……
提供很多参数给开发者配置,采用了建造者模式
Request
class Request internal constructor(
  @get:JvmName("url") val url: HttpUrl,
  @get:JvmName("method") val method: String,
  @get:JvmName("headers") val headers: Headers,
  @get:JvmName("body") val body: RequestBody?,
  internal val tags: Map<Class<*>, Any>
) {

  open class Builder {
    //请求的URL
    internal var url: HttpUrl? = null
    //请求方法,如:GET、POST..
    internal var method: String
    //请求头
    internal var headers: Headers.Builder
    //请求体
    internal var body: RequestBody? = null
  ···省略代码···
把用户友好的请求转成Http友好的请求,同样提供了参数配置,采用了建造者模式
一般要配置的都是常见参数,比如请求体,请求头,GET/POST方法,目标URL
Call
interface Call : Cloneable {
  /** 返回发起此调用的原始请求 */
  fun request(): Request

  /**
   * 同步请求,立即执行。
   *
   * 抛出两种异常:
   * 1. 请求失败抛出IOException;
   * 2. 如果在执行过一回的前提下再次执行抛出IllegalStateException;*/
  @Throws(IOException::class)
  fun execute(): Response

  /**
   * 异步请求,将请求安排在将来的某个时间点执行。
   * 如果在执行过一回的前提下再次执行抛出IllegalStateException */
  fun enqueue(responseCallback: Callback)

  /** 取消请求。已经完成的请求不能被取消 */
  fun cancel()

  /** 是否已被执行  */
  fun isExecuted(): Boolean

  /** 是否被取消   */
  fun isCanceled(): Boolean

  /** 一个完整Call请求流程的超时时间配置,默认选自[OkHttpClient.Builder.callTimeout] */
  fun timeout(): Timeout

  /** 克隆这个call,创建一个新的相同的Call */
  public override fun clone(): Call

  /** 利用工厂模式来让 OkHttpClient 来创建 Call对象 */
  fun interface Factory {
    fun newCall(request: Request): Call
  }
}
请求调用接口,表示这个请求已经准备好可以执行,也可以取消,只能执行一次,主要实现类就是下面的RealCall
有同步请求execute和异步请求enqueue两种请求办法,异步请求也是基于execute方法实现,只不过实现结果通过回调获取
采用工厂模式来让OkHttpClient 来创建 Call对象

再看OkHttpClient的接口实现,不仅有Call的,还有WebSocket,都是工厂模式
RealCall
文档描述
来自有道翻译:
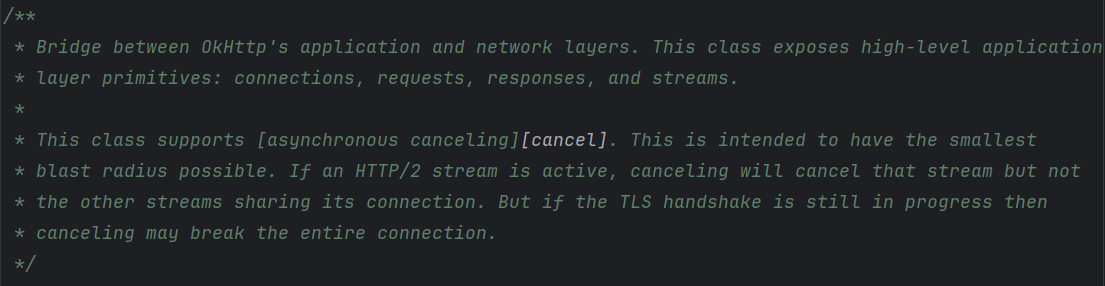
OkHttp 应用层与网络层之间的桥梁。此类公开了高级应用层原语:连接、请求、响应和流。
此类支持[异步取消][取消]。其旨在将影响范围控制到最小。如果 HTTP/2 流处于活动状态,取消操作将取消该流,但不会取消共享其连接的其他流。但如果 TLS 握手仍在进行中,则取消操作可能会中断整个连接

作为Call的主要实现类,它的作用就是连接网络层和应用层,调用execute和enqueue请求方法,展示请求数据(大概就是刚才的Request),连接数据,响应Respose等。
AsyncCall
inner class AsyncCall(
//用户传入的响应回调方法
private val responseCallback: Callback
) : Runnable {
//同一个域名的请求次数,volatile + AtomicInteger 保证在多线程下及时可见性与原子性
@Volatile var callsPerHost = AtomicInteger(0)
private set
fun reuseCallsPerHostFrom(other: AsyncCall) {
this.callsPerHost = other.callsPerHost
}
···省略代码···
fun executeOn(executorService: ExecutorService) {
client.dispatcher.assertThreadDoesntHoldLock()
var success = false
try {
//调用线程池执行
executorService.execute(this)
success = true
} catch (e: RejectedExecutionException) {
val ioException = InterruptedIOException("executor rejected")
ioException.initCause(e)
noMoreExchanges(ioException)
//请求失败,调用 Callback.onFailure() 方法
responseCallback.onFailure(this@RealCall, ioException)
} finally {
if (!success) {
//请求失败,调用调度器finish方法
client.dispatcher.finished(this) // This call is no longer running!
}
}
}
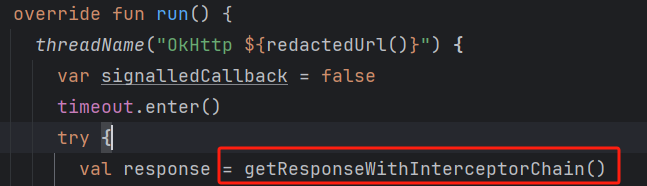
override fun run() {
threadName("OkHttp ${redactedUrl()}") {
var signalledCallback = false
timeout.enter()
try {
//请求成功,获取到服务器返回的response
val response = getResponseWithInterceptorChain()
signalledCallback = true
//调用 Callback.onResponse() 方法,将 response 传递出去
responseCallback.onResponse(this@RealCall, response)
} catch (e: IOException) {
if (signalledCallback) {
// Do not signal the callback twice!
Platform.get().log("Callback failure for ${toLoggableString()}", Platform.INFO, e)
} else {
//请求失败,调用 Callback.onFailure() 方法
responseCallback.onFailure(this@RealCall, e)
}
} catch (t: Throwable) {
//请求出现异常,调用cancel方法来取消请求
cancel()
if (!signalledCallback) {
val canceledException = IOException("canceled due to $t")
canceledException.addSuppressed(t)
//请求失败,调用 Callback.onFailure() 方法
responseCallback.onFailure(this@RealCall, canceledException)
}
throw t
} finally {
//请求结束,调用调度器finish方法
client.dispatcher.finished(this)
}
}
}
}其实就是一个Runnable,交由调度器Dispatcher,去给调度器中的线程池执行
这两个Call是怎么拿到返回的Response呢?
AsyncCall
RealCall
getResponseWithInterceptorChain
这些都是拦截器,责任链模式
Dispatcher
class Dispatcher constructor() {
  @get:Synchronized
  @get:JvmName("executorService") val executorService: ExecutorService
    get() {
      if (executorServiceOrNull == null) {
        //创建一个缓存线程池,来处理请求调用
        executorServiceOrNull = ThreadPoolExecutor(0, Int.MAX_VALUE, 60, TimeUnit.SECONDS,
            SynchronousQueue(), threadFactory("$okHttpName Dispatcher", false))
      }
      return executorServiceOrNull!!
    }

  /** 已准备好的异步请求队列 */
  @get:Synchronized
  private val readyAsyncCalls = ArrayDeque<AsyncCall>()

  /** 正在运行的异步请求队列, 包含取消但是还未finish的AsyncCall */
  private val runningAsyncCalls = ArrayDeque<AsyncCall>()

  /** 正在运行的同步请求队列, 包含取消但是还未finish的RealCall */
  private val runningSyncCalls = ArrayDeque<RealCall>()

···省略代码···
}
同步请求
基础用法
client.newCall(request).execute();client是okhttpclient,我们来看一下这条链式调用
newcall
/**
Prepares the [request] to be executed at some point in the future.
*/
override fun newCall(request: Request): Call = RealCall(this, request, forWebSocket = false)
其实刚才已经看过了,它接受一个参数Request,直接返回一个RealCall实例,所以我们来看一下RealCall的execute方法
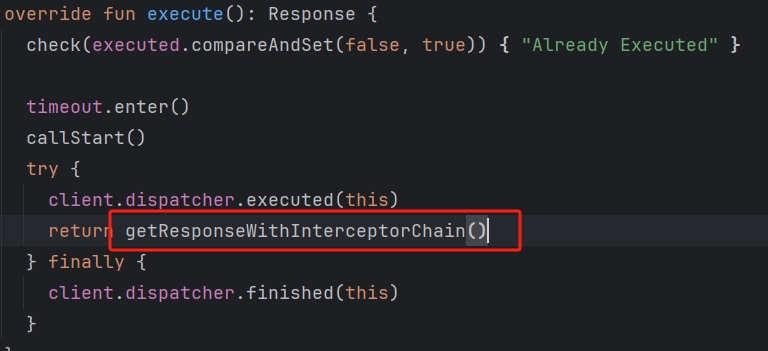
override fun execute(): Response {
    check(executed.compareAndSet(false, true)) { "Already Executed" }

    timeout.enter()
    callStart()
    try {
      client.dispatcher.executed(this)
      return getResponseWithInterceptorChain()
    } finally {
      client.dispatcher.finished(this)
    }
  }
比较简洁的一个函数,返回一个Response对象
check(executed.compareAndSet(false, true)) { "Already Executed" }

private val executed = AtomicBoolean()
executed的定义,是一个原子类,compareAndSet就是多线程中的CAS概念,保证数据的原子性,这里就是保证了任务只能被执行一次
timeout.enter()

private val timeout = object : AsyncTimeout() {
    override fun timedOut() {
      cancel()
    }
  }.apply {
    timeout(client.callTimeoutMillis.toLong(), MILLISECONDS)
  }
timeout是一个异步计时器,设置一个时间,超时就回调方法,这里把client设置的时间作为超时时间,如果超时就调用cancel方法取消任务
callstart()

private fun callStart() {
    this.callStackTrace = Platform.get().getStackTraceForCloseable("response.body().close()")
    eventListener.callStart(this)
}

internal val eventListener: EventListener = client.eventListenerFactory.create(this)

@get:JvmName("eventListenerFactory") val eventListenerFactory: EventListener.Factory =
      builder.eventListenerFactory

internal var eventListenerFactory: EventListener.Factory = EventListener.NONE.asFactory()

companion object {
    @JvmField
    val NONE: EventListener = object : EventListener() {
    }
  }
callStackerTrace是堆栈追踪,对象是当前的Call的Response,但是这里是开始追踪,如果请求成功结束后,没有及时关闭,那么就可以追踪到。其实这个更多的是存在于开发阶段的调试,我们关注下面的代码eventListener.callStart(this),这是监听器开始监听请求,但是EventListener是一个抽象类,我们找到它的实现,发现是一个空实现,最终也只是返回一个自己的伴生对象,也就是说这里是交由开发者自己配置的。
ps:我刚开始会觉得空实现有什么用啊?后面发现原来这开源保证代码的拓展性(应该吧……
client.dispatcher.executed(this)

  /** Used by [Call.execute] to signal it is in-flight. */
  @Synchronized internal fun executed(call: RealCall) {
    runningSyncCalls.add(call)
  }

    /** Running synchronous calls. Includes canceled calls that haven't finished yet. */
  private val runningSyncCalls = ArrayDeque<RealCall>()

    /** Used by [Call.execute] to signal it is in-flight. */
  @Synchronized internal fun executed(call: RealCall) {
    runningSyncCalls.add(call)
  }
调度器把准备好的请求加入队列ArrayDeque<RealCall>,后面调度器的任务就是从这些队列里取的
return getResponseWithInterceptorChain()

 @Throws(IOException::class)
  internal fun getResponseWithInterceptorChain(): Response{
      ……
  }
这个才是真正处理请求的逻辑,前面都是一些准备工作,这也算是OkHttp3的核心逻辑,就是拦截器Interceptor,所以放到下面说
client.dispatcher.finished(this)

  /** Used by [Call.execute] to signal completion. */
  internal fun finished(call: RealCall) {
    finished(runningSyncCalls, call)
  }

private fun <T> finished(calls: Deque<T>, call: T) {
    val idleCallback: Runnable?
    synchronized(this) {
      if (!calls.remove(call)) throw AssertionError("Call wasn't in-flight!")
      idleCallback = this.idleCallback
    }

    val isRunning = promoteAndExecute()

    if (!isRunning && idleCallback != null) {
      idleCallback.run()
    }
}
在finally块中结束任务
calls就是刚才的队列,结束自然就把队列里的任务移除
idleCallback是一个在dispatcher空闲的时候会执行的Runnable,但是目前还没看到有定义它的地方,姑且算个空实现
promoteAndExecute():(针对异步,放到下面说)返回Dispatcher是否空闲,用于判断是否执行idleCallback空闲任务
ps:可以看到这里都是对异步队列进行操作和判断,我认为是因为同步任务是在上一层就已经移除队列了,调用这个方法是因为要同时考虑到异步队列才能判断调度器是否空闲
异步请求
基础用法
//异步请求
    client.newCall(request).enqueue(new Callback() {
      @Override
      public void onFailure(@NotNull Call call, @NotNull IOException e) {
	  //todo handle request failed
      }

      @Override
      public void onResponse(@NotNull Call call, @NotNull Response response) throws IOException {
          //todo handle Response
      }
    });
newcall
同上
enqueue
override fun enqueue(responseCallback: Callback) {
    check(executed.compareAndSet(false, true)) { "Already Executed" }

    callStart()
    client.dispatcher.enqueue(AsyncCall(responseCallback))
  }
前两行代码同上,我们来关注下面一行代码
client.dispatcher.enqueue(AsyncCall(responseCallback))我们看一下这个链式调用
dispatcher

@get:JvmName("dispatcher") val dispatcher: Dispatcher = builder.dispatcher

internal var dispatcher: Dispatcher = Dispatcher()
就是一个Dispatcher实例
enqueue(AsyncCall(responseCallback))

  internal fun enqueue(call: AsyncCall) {
    synchronized(this) {
      readyAsyncCalls.add(call)

      // Mutate the AsyncCall so that it shares the AtomicInteger of an existing running call to
      // the same host.
      if (!call.call.forWebSocket) {
        val existingCall = findExistingCallWithHost(call.host)
        if (existingCall != null) call.reuseCallsPerHostFrom(existingCall)
      }
    }
    promoteAndExecute()
  }

  /**
   * Promotes eligible calls from [readyAsyncCalls] to [runningAsyncCalls] and runs them on the
   * executor service. Must not be called with synchronization because executing calls can call
   * into user code.
   *
   * @return true if the dispatcher is currently running calls.
   */
  private fun promoteAndExecute(): Boolean {
    this.assertThreadDoesntHoldLock()

    val executableCalls = mutableListOf<AsyncCall>()
    val isRunning: Boolean
    synchronized(this) {
      val i = readyAsyncCalls.iterator()
      while (i.hasNext()) {
        val asyncCall = i.next()

        if (runningAsyncCalls.size >= this.maxRequests) break // Max capacity.
        if (asyncCall.callsPerHost.get() >= this.maxRequestsPerHost) continue // Host max capacity.

        i.remove()
        asyncCall.callsPerHost.incrementAndGet()
        executableCalls.add(asyncCall)
        runningAsyncCalls.add(asyncCall)
      }
      isRunning = runningCallsCount() > 0
    }

    for (i in 0 until executableCalls.size) {
      val asyncCall = executableCalls[i]
      asyncCall.executeOn(executorService)
    }

    return isRunning
  }
涉及到运行/准备队列,所以先上锁
- readyAsyncCalls.add(call),先加入就绪队列
- val existingCall = findExistingCallWithHost(call.host) 这个是找有没有跟当前请求的目标主机相同的请求
- if (existingCall != null) call.reuseCallsPerHostFrom(existingCall),这里其实主要是为了复用目标主机的请求计数器,因为重复连接同一个主机是有次数限制的
- 接着就是 promoteAndExecute()
-
- this.assertThreadDoesntHoldLock() 确保当前线程没有持有Dispatcher的锁
- synchronized(this),然后自己上锁。因为这些任务队列是共享的,要保证线程安全
- if (runningAsyncCalls.size >= this.maxRequests) break 达到running队列的最大容量就不往里面添加任务,退出循环
- if (asyncCall.callsPerHost.get() >= this.maxRequestsPerHost) continue 当前任务请求次数达到限制,不加入运行队列
- 分别添加到临时准备列表executableCalls和运行列表runningAsyncCalls
- asyncCall.executeOn(executorService),遍历刚刚添加的任务加入线程池里执行
- executeOn(executorService)
      /**
     * Attempt to enqueue this async call on [executorService]. This will attempt to clean up
     * if the executor has been shut down by reporting the call as failed.
     */
    fun executeOn(executorService: ExecutorService) {
      client.dispatcher.assertThreadDoesntHoldLock()

      var success = false
      try {
        executorService.execute(this)
        success = true
      } catch (e: RejectedExecutionException) {
        val ioException = InterruptedIOException("executor rejected")
        ioException.initCause(e)
        noMoreExchanges(ioException)
        responseCallback.onFailure(this@RealCall, ioException)
      } finally {
        if (!success) {
          client.dispatcher.finished(this) // This call is no longer running!
        }
      }
    }

    //配置线程池的逻辑
  private var executorServiceOrNull: ExecutorService? = null

  @get:Synchronized
  @get:JvmName("executorService") val executorService: ExecutorService
    get() {
      if (executorServiceOrNull == null) {
        executorServiceOrNull = ThreadPoolExecutor(0, Int.MAX_VALUE, 60, TimeUnit.SECONDS,
            SynchronousQueue(), threadFactory("$okHttpName Dispatcher", false))
      }
      return executorServiceOrNull!!
}- client.dispatcher.assertThreadDoesntHoldLock(),保证当前线程没有持有锁
- executorService.execute(this),放入线程池里执行
- responseCallback.onFailure(this@RealCall, ioException),出错了就回调
- 最后如果没有成功,官方这里说直接结束这个请求
- 为什么要有这个success判断呢?我们接着往下看
- run
既然asyncCall是一个runnable,那么线程池就是执行它的run方法
override fun run() {
      threadName("OkHttp ${redactedUrl()}") {
        var signalledCallback = false
        timeout.enter()
        try {
          val response = getResponseWithInterceptorChain()
          signalledCallback = true
          responseCallback.onResponse(this@RealCall, response)
        } catch (e: IOException) {
          if (signalledCallback) {
            // Do not signal the callback twice!
            Platform.get().log("Callback failure for ${toLoggableString()}", Platform.INFO, e)
          } else {
            responseCallback.onFailure(this@RealCall, e)
          }
        } catch (t: Throwable) {
          cancel()
          if (!signalledCallback) {
            val canceledException = IOException("canceled due to $t")
            canceledException.addSuppressed(t)
            responseCallback.onFailure(this@RealCall, canceledException)
          }
          throw t
        } finally {
          client.dispatcher.finished(this)
        }
      }
    }
还是一步步来
- 给线程命名,进入线程
- 开启超时机制timeout.enter()
- val response = getResponseWithInterceptorChain(),跟同步请求一样,获取到Response
- responseCallback.onResponse(this@RealCall, response) 请求成功回调
- responseCallback.onFailure(this@RealCall, e),请求失败回调
- cancel() 取消任务
- signalledCallback是用来标记是否有回调的,但是看代码好像没这个必要啊?别忘了try-catch块是有可能会提前终止的
- 一样的,finally块结束请求,这里也会调用finished办法结束任务,所以解答了上面的问题
这里有个疑问?我们日常开发中,往往都是针对一个主机发出请求,那这样对请求次数限制不就显得不合理了吗?我们先了解一下对同一个主机请求过多会有什么影响
1、服务器过载 2、网络资源紧张(TCP连接等) 3、客户端性能问题(CPU、内存) 4、资源分配不公平
我们再来解决疑问,其实这个就是Http长连接,Http长连接不受次数限制,因为不用重复连接,而代码 if (!call.call.forWebSocket)就是判断是否是长连接,本质上是TCP保持连接
getResponseWithInterceptorChain
写到这里有点累了,请容许我休息一下
无论是同步还是异步,都是用这个方法来获取到Response的,我们这里还处于流程分析阶段,所以我们先不关注拦截器的实现,毕竟是整个okhttp3的核心和难点
先贴源代码
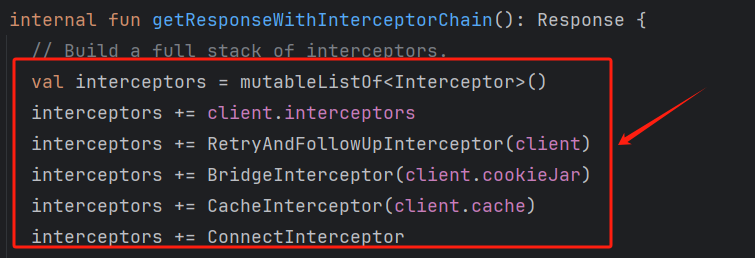
@Throws(IOException::class)
  internal fun getResponseWithInterceptorChain(): Response {
    // Build a full stack of interceptors.
    val interceptors = mutableListOf<Interceptor>()
    interceptors += client.interceptors
    interceptors += RetryAndFollowUpInterceptor(client)
    interceptors += BridgeInterceptor(client.cookieJar)
    interceptors += CacheInterceptor(client.cache)
    interceptors += ConnectInterceptor
    if (!forWebSocket) {
      interceptors += client.networkInterceptors
    }
    interceptors += CallServerInterceptor(forWebSocket)

    val chain = RealInterceptorChain(
        call = this,
        interceptors = interceptors,
        index = 0,
        exchange = null,
        request = originalRequest,
        connectTimeoutMillis = client.connectTimeoutMillis,
        readTimeoutMillis = client.readTimeoutMillis,
        writeTimeoutMillis = client.writeTimeoutMillis
    )

    var calledNoMoreExchanges = false
    try {
      val response = chain.proceed(originalRequest)
      if (isCanceled()) {
        response.closeQuietly()
        throw IOException("Canceled")
      }
      return response
    } catch (e: IOException) {
      calledNoMoreExchanges = true
      throw noMoreExchanges(e) as Throwable
    } finally {
      if (!calledNoMoreExchanges) {
        noMoreExchanges(null)
      }
    }
  }
前面一整块都是在构建拦截器列表,我们先跳过,从chain开始,这个chain就是责任链
class RealInterceptorChain(
  internal val call: RealCall,
  private val interceptors: List<Interceptor>,
  private val index: Int,
  internal val exchange: Exchange?,
  internal val request: Request,
  internal val connectTimeoutMillis: Int,
  internal val readTimeoutMillis: Int,
  internal val writeTimeoutMillis: Int
) : Interceptor.Chain {

···省略代码···
  private var calls: Int = 0
  override fun call(): Call = call
  override fun request(): Request = request

  @Throws(IOException::class)
  override fun proceed(request: Request): Response {
    check(index < interceptors.size)

    calls++

    if (exchange != null) {
      check(exchange.finder.sameHostAndPort(request.url)) {
        "network interceptor ${interceptors[index - 1]} must retain the same host and port"
      }
      check(calls == 1) {
        "network interceptor ${interceptors[index - 1]} must call proceed() exactly once"
      }
    }

    //index+1, 复制创建新的责任链,也就意味着调用责任链中的下一个处理者,也就是下一个拦截器
    val next = copy(index = index + 1, request = request)
    //取出当前拦截器
    val interceptor = interceptors[index]

    //执行当前拦截器的拦截方法
    @Suppress("USELESS_ELVIS")
    val response = interceptor.intercept(next) ?: throw NullPointerException(
        "interceptor $interceptor returned null")

    if (exchange != null) {
      check(index + 1 >= interceptors.size || next.calls == 1) {
        "network interceptor $interceptor must call proceed() exactly once"
      }
    }

    check(response.body != null) { "interceptor $interceptor returned a response with no body" }

    return response
  }
}
简单看一下RealInterceptorChain这个类,它实现了Interceptor.Chain接口,实现的方法大概就是对 连接成功,连接超时,链式调用下一环节,执行当前拦截器的方法……等方法
观察上面的代码发现是调用chain的proceed方法得到response的,然后接下来就是一些错误处理,所以我们重点来看proceed方法
@Throws(IOException::class)
  override fun proceed(request: Request): Response {
    check(index < interceptors.size)

    calls++

    if (exchange != null) {
      check(exchange.finder.sameHostAndPort(request.url)) {
        "network interceptor ${interceptors[index - 1]} must retain the same host and port"
      }
      check(calls == 1) {
        "network interceptor ${interceptors[index - 1]} must call proceed() exactly once"
      }
    }

    //index+1, 复制创建新的责任链,也就意味着调用责任链中的下一个处理者,也就是下一个拦截器
    val next = copy(index = index + 1, request = request)
    //取出当前拦截器
    val interceptor = interceptors[index]

    //执行当前拦截器的拦截方法
    @Suppress("USELESS_ELVIS")
    val response = interceptor.intercept(next) ?: throw NullPointerException(
        "interceptor $interceptor returned null")

    if (exchange != null) {
      check(index + 1 >= interceptors.size || next.calls == 1) {
        "network interceptor $interceptor must call proceed() exactly once"
      }
    }

    check(response.body != null) { "interceptor $interceptor returned a response with no body" }

    return response
  }
理解它的一个链式调用不难,但是前面的参数是什么意思呢?我们还是逐行代码来看一下
- check(index < interceptors.size),check是kotlin自带的拓展函数,如果传入的值是false,则会抛出异常,终止方法,保证不会越界
@kotlin.internal.InlineOnly
public inline fun check(value: Boolean): Unit {
    contract {
        returns() implies value
    }
    if (!value) {
        throw IllegalStateException("Check failed.")
    }
}- call++,用于跟踪拦截器是否正确使用了proceed(使用proceed的次数有规定吗?这是一个问题)
- exchange,这个参数是传进来的,所以一开始是null的,我们后续还需要看看在哪里会有赋值,光看这里的代码,好像是拦截器要保持相同的主机名和端口,然后exchange记录了这些主机名和端口,还有proceed至少要被调用一次(我们后面再找找原因,这里存疑),因为初始化exchange是null的,如果理想状态下,后面exchange被赋值,每个拦截器都正确调用proceed,这两行信息是不会被抛出的
- val next = copy(index = index + 1, request = request),index+1, 复制创建新的责任链,也就意味着调用责任链中的下一个处理者,也就是下一个拦截器,还是对同一个Request对象进行操作
- val interceptor = interceptors[index],取出当前拦截器
- check(index + 1 >= interceptors.size || next.calls == 1),又是exchange和call,我们继续存疑???
- 检查返回体Response是否为空,随后返回返回体
言归正传,我们回到主角getResponseWithInterceptorChain
var calledNoMoreExchanges = false
    try {
      val response = chain.proceed(originalRequest)
      if (isCanceled()) {
        response.closeQuietly()
        throw IOException("Canceled")
      }
      return response
    } catch (e: IOException) {
      calledNoMoreExchanges = true
      throw noMoreExchanges(e) as Throwable
    } finally {
      if (!calledNoMoreExchanges) {
        noMoreExchanges(null)
      }
    }
在获取了,返回体后,对是否取消请求做了判断,如果被取消了就抛出异常,做一些异常处理,这里不多赘述,我们看到变量calledNoMoreExchanges……看到这里我们对刚才的call和exchange好像有了点初步的感觉,但是这里先不说,因为我也还不会
拦截器
看到这里,你会发现刚才的分析都很难找到答案,因为我们还未曾揭开拦截器责任链真正的面纱……
休整一下我们继续出发
我们初次接触拦截器是哪里?就是刚才的getResponseWithInterceptorChain方法,只不过我们跳过了而已,我们现在开始分析
Interceptor
/**
 * Observes, modifies, and potentially short-circuits requests going out and the corresponding
 * responses coming back in. Typically interceptors add, remove, or transform headers on the request
 * or response.
 *
 * Implementations of this interface throw [IOException] to signal connectivity failures. This
 * includes both natural exceptions such as unreachable servers, as well as synthetic exceptions
 * when responses are of an unexpected type or cannot be decoded.
 *
 * Other exception types cancel the current call:
 *
 *  * For synchronous calls made with [Call.execute], the exception is propagated to the caller.
 *
 *  * For asynchronous calls made with [Call.enqueue], an [IOException] is propagated to the caller
 *    indicating that the call was canceled. The interceptor's exception is delivered to the current
 *    thread's [uncaught exception handler][Thread.UncaughtExceptionHandler]. By default this
 *    crashes the application on Android and prints a stacktrace on the JVM. (Crash reporting
 *    libraries may customize this behavior.)
 *
 * A good way to signal a failure is with a synthetic HTTP response:
 *
 * ```
 *   @Throws(IOException::class)
 *   override fun intercept(chain: Interceptor.Chain): Response {
 *     if (myConfig.isInvalid()) {
 *       return Response.Builder()
 *           .request(chain.request())
 *           .protocol(Protocol.HTTP_1_1)
 *           .code(400)
 *           .message("client config invalid")
 *           .body("client config invalid".toResponseBody(null))
 *           .build()
 *     }
 *
 *     return chain.proceed(chain.request())
 *   }
 * ```
 */
fun interface Interceptor {
  @Throws(IOException::class)
  fun intercept(chain: Chain): Response

  companion object {
    /**
     * Constructs an interceptor for a lambda. This compact syntax is most useful for inline
     * interceptors.
     *
     * ```
     * val interceptor = Interceptor { chain: Interceptor.Chain ->
     *     chain.proceed(chain.request())
     * }
     * ```
     */
    inline operator fun invoke(crossinline block: (chain: Chain) -> Response): Interceptor =
      Interceptor { block(it) }
  }

  interface Chain {
    fun request(): Request

    @Throws(IOException::class)
    fun proceed(request: Request): Response

    /**
     * Returns the connection the request will be executed on. This is only available in the chains
     * of network interceptors; for application interceptors this is always null.
     */
    fun connection(): Connection?

    fun call(): Call

    fun connectTimeoutMillis(): Int

    fun withConnectTimeout(timeout: Int, unit: TimeUnit): Chain

    fun readTimeoutMillis(): Int

    fun withReadTimeout(timeout: Int, unit: TimeUnit): Chain

    fun writeTimeoutMillis(): Int

    fun withWriteTimeout(timeout: Int, unit: TimeUnit): Chain
  }
}
发现这里还有刚才的Chin接口,所以我们可以试着联系起来分析,先看文档的翻译
/**
 * 观察、修改并可能短路发出请求和接收的相应响应。通常拦截器会在请求或响应上添加、移除或转换头部。
 *
 * 该接口的实现会抛出 [IOException] 以表示连接失败。
 * 这包括自然异常(如服务器不可达)以及合成异常(当响应的类型不符合预期或无法解码时)。
 *
 * 其他类型的异常会取消当前调用:
 *
 *  * 对于通过 [Call.execute] 进行的同步调用,异常会传播给调用者。
 *
 *  * 对于通过 [Call.enqueue] 进行的异步调用,会向调用者传播一个 [IOException],指示调用被取消。
 *  * 拦截器的异常会传递给当前线程的 [uncaught exception handler][Thread.UncaughtExceptionHandler]。
 *  * 默认情况下,这会在 Android 上导致应用崩溃,在 JVM 上打印堆栈跟踪。(崩溃报告库可能会自定义此行为。)
 *
 * 一个好的方式是通过合成 HTTP 响应来表示失败:
 *
 * ```
 *   @Throws(IOException::class)
 *   override fun intercept(chain: Interceptor.Chain): Response {
 *     if (myConfig.isInvalid()) {
 *       return Response.Builder()
 *           .request(chain.request())
 *           .protocol(Protocol.HTTP_1_1)
 *           .code(400)
 *           .message("client config invalid")
 *           .body("client config invalid".toResponseBody(null))
 *           .build()
 *     }
 *
 *     return chain.proceed(chain.request())
 *   }
 * ```
 */

/**
 * 为 lambda 构造一个拦截器。这种简洁的语法最适合内联拦截器。
 *
 * ```
 * val interceptor = Interceptor { chain: Interceptor.Chain ->
 *     chain.proceed(chain.request())
 * }
 * ```
 */
文档更多的是对异常处理的描述,在对伴生对象的描述中有非常简单的使用介绍,我们了解完文档后接着往下看
client.interceptors
interceptors += client.interceptors

@get:JvmName("interceptors") val interceptors: List<Interceptor> =
      builder.interceptors.toImmutableList()

internal val interceptors: MutableList<Interceptor> = mutableListOf()
最后找到是在builder中的interceptors,那builder是哪里来的,我们好像还没有什么印象,这里给出一种用法
class HeaderInterceptor implements Interceptor {
    @Override
    public Response intercept(Chain chain) throws IOException {
        Request request = chain.request().newBuilder()
                .addHeader("device-android", "xxxxxxxxxxx")
                .addHeader("country-code", "ZH")
                .build();
        return chain.proceed(request);
    }
}

//然后在 OkHttpClient 中加入
OkHttpClient client = new OkHttpClient.Builder()
    .connectTimeout(60, TimeUnit.SECONDS)
    .readTimeout(15, TimeUnit.SECONDS)
    .writeTimeout(15, TimeUnit.SECONDS)
    .cookieJar(new MyCookieJar())
    .addInterceptor(new HeaderInterceptor())//添加自定义Header拦截器
    .build();
用户自定义的拦截器一般都是根据需求,在请求头上加上一些什么,不过注意这里是获取chain里Request,然后对request进行操作,然后把新的request传给下一个拦截器处理并得到response,构建好了拦截器就传入client的builder中(有点像计算机网络的四层模型,层层封装,然后又拆开……)
RetryAndFollowUpInterceptor
结合一下计网的知识,可以推测这是一个重定向拦截器
interceptors += RetryAndFollowUpInterceptor(client)

class RetryAndFollowUpInterceptor(private val client: OkHttpClient) : Interceptor{
    @Throws(IOException::class)
    override fun intercept(chain: Interceptor.Chain): Response{
            …………
    }

}
可以看到同样是实现了Interceptor接口,重写了intercept方法,对chain操作,因为request,读写操作,连接等一些重要的信息和操作都是在Chain里的,我们主要来看一下它的intercept方法实现
@Throws(IOException::class)
  override fun intercept(chain: Interceptor.Chain): Response {
    val realChain = chain as RealInterceptorChain
    var request = chain.request
    val call = realChain.call
    var followUpCount = 0
    var priorResponse: Response? = null
    var newExchangeFinder = true
    var recoveredFailures = listOf<IOException>()
    while (true) {
      //这里会新建一个ExchangeFinder,ConnectInterceptor会使用到
      call.enterNetworkInterceptorExchange(request, newExchangeFinder)

      var response: Response
      var closeActiveExchange = true
      try {
        if (call.isCanceled()) {
          throw IOException("Canceled")
        }

        try {
          response = realChain.proceed(request)
          newExchangeFinder = true
        } catch (e: RouteException) {
          //尝试通过路由连接失败。该请求将不会被发送。
          if (!recover(e.lastConnectException, call, request, requestSendStarted = false)) {
            throw e.firstConnectException.withSuppressed(recoveredFailures)
          } else {
            recoveredFailures += e.firstConnectException
          }
          newExchangeFinder = false
          continue
        } catch (e: IOException) {
          //尝试与服务器通信失败。该请求可能已发送。
          if (!recover(e, call, request, requestSendStarted = e !is ConnectionShutdownException)) {
            throw e.withSuppressed(recoveredFailures)
          } else {
            recoveredFailures += e
          }
          newExchangeFinder = false
          continue
        }

        // Attach the prior response if it exists. Such responses never have a body.
        //尝试关联上一个response,注意:body是为null
        if (priorResponse != null) {
          response = response.newBuilder()
              .priorResponse(priorResponse.newBuilder()
                  .body(null)
                  .build())
              .build()
        }

        val exchange = call.interceptorScopedExchange
        //会根据 responseCode 来判断,构建一个新的request并返回来重试或者重定向
        val followUp = followUpRequest(response, exchange)

        if (followUp == null) {
          if (exchange != null && exchange.isDuplex) {
            call.timeoutEarlyExit()
          }
          closeActiveExchange = false
          return response
        }
        //如果请求体是一次性的,不需要再次重试
        val followUpBody = followUp.body
        if (followUpBody != null && followUpBody.isOneShot()) {
          closeActiveExchange = false
          return response
        }

        response.body?.closeQuietly()

        //最大重试次数,不同的浏览器是不同的,比如:Chrome为21,Safari则是16
        if (++followUpCount > MAX_FOLLOW_UPS) {
          throw ProtocolException("Too many follow-up requests: $followUpCount")
        }

        request = followUp
        priorResponse = response
      } finally {
        call.exitNetworkInterceptorExchange(closeActiveExchange)
      }
    }
}- 简单概述一下前几行,
把传入的chain接口转成它的实现类RealInterceptorChain(目的是获取到call)
从chain里获取到request
realchain获取到任务call
定义重定向次数
priorResponse是存储前一次重定向并把它附加到新的响应(毕竟我得知道上一次重定向是什么情况才能进行下一次重定向吧)
newExchangeFinder是标志是否需要创建新的ExchangeFinder(控制是否需要寻找新的网络连接)
最后一个是重定向成功或者失败的列表 - 进入重定向循环
- 作者大大的注释:这里会新建一个ExchangeFinder,ConnectInterceptor会使用到
- closeActiveExchange:标志是否需要关闭当前 Exchange
- 来到try-catch块,任务取消抛出异常
- 下一个try-catch块:把request传入下一个拦截器执行,得到response,标记newExchangeFinder为true(因为重定向成功,肯定就要找新的网络连接了)
- RouteException(路由连接失败),recover检查是否可以恢复,我们进来看看逻辑
  /**
   * Report and attempt to recover from a failure to communicate with a server. Returns true if
   * `e` is recoverable, or false if the failure is permanent. Requests with a body can only
   * be recovered if the body is buffered or if the failure occurred before the request has been
   * sent.
   */
/**
 * 报告并尝试从与服务器通信失败中恢复。
 * 返回 `true` 表示 `e` 是可恢复的异常,返回 `false` 表示失败是永久性的。
 * 对于带有请求体的请求,只有当请求体已被缓冲或失败发生在请求发送之前时,才可以恢复。
 */
  private fun recover(
    e: IOException,
    call: RealCall,
    userRequest: Request,
    requestSendStarted: Boolean
  ): Boolean {
    // The application layer has forbidden retries.
    if (!client.retryOnConnectionFailure) return false

    // We can't send the request body again.
    if (requestSendStarted && requestIsOneShot(e, userRequest)) return false

    // This exception is fatal.
    if (!isRecoverable(e, requestSendStarted)) return false

    // No more routes to attempt.
    if (!call.retryAfterFailure()) return false

    // For failure recovery, use the same route selector with a new connection.
    return true
}-
- 表示用户禁止连接重试,直接返回false(不恢复)
- 不能够重复发送请求体的情况:requestSendStarted检查请求是否已经发送,requestIsOneShot 检查请求体是否不可重复发送(例如大文件流)如果请求已发送且 body 是一次性的,返回 false(不恢复)。(像POST方法的请求我们还是尽量避免发送两次)
- 检查异常是否可以恢复,来看看逻辑:列举了一些不能够恢复的情况,属于计网知识,不多赘述
  private fun isRecoverable(e: IOException, requestSendStarted: Boolean): Boolean {
    // If there was a protocol problem, don't recover.
      // 如果是协议问题,不进行恢复。
    if (e is ProtocolException) {
      return false
    }

    // If there was an interruption don't recover, but if there was a timeout connecting to a route
    // we should try the next route (if there is one).
    // 如果发生中断(interruption),不恢复;但如果是连接到路由时的超时,
    //我们应该尝试下一个路由(如果有)。
    if (e is InterruptedIOException) {
      return e is SocketTimeoutException && !requestSendStarted
    }

    // Look for known client-side or negotiation errors that are unlikely to be fixed by trying
    // again with a different route.
    // 查找已知的客户端或协商错误,这些错误通过尝试不同路由不太可能修复。
    if (e is SSLHandshakeException) {
      // If the problem was a CertificateException from the X509TrustManager,
      // do not retry.
      if (e.cause is CertificateException) {
        return false
      }
    }
    if (e is SSLPeerUnverifiedException) {
      // e.g. a certificate pinning error.
      return false
    }
    // An example of one we might want to retry with a different route is a problem connecting to a
    // proxy and would manifest as a standard IOException. Unless it is one we know we should not
    // retry, we return true and try a new route.
    // 例如,代理连接问题可能表现为标准 IOException。
    // 除非明确知道不应重试,我们返回 true 并尝试新路由。
    return true
  }
-
- retryAfterFailure检查是否还有其他路由地址,我们也来看看逻辑,简单看看就好了,深入太多会迷失,简单概括情况:
-
-
- 是否有失败记录(refusedStreamCount、connectionShutdownCount、otherFailureCount)
- 是否有缓存的路由(nextRouteToTry)
- 是否有备用路由(retryRoute)
- 是否有未尝试的路由(routeSelection 或 routeSelector)
-
  /**
   * Returns true if the current route has a failure that retrying could fix, and that there's
   * a route to retry on.
   */
  /**
   * 如果当前路由有可通过重试修复的失败,并且存在可重试的路由,则返回 true。
   */
  fun retryAfterFailure(): Boolean {
    if (refusedStreamCount == 0 && connectionShutdownCount == 0 && otherFailureCount == 0) {
      return false // Nothing to recover from.
    }

    if (nextRouteToTry != null) {
      return true
    }

    //调用 retryRoute() 获取可重试的路由
    val retryRoute = retryRoute()
    if (retryRoute != null) {
      // Lock in the route because retryRoute() is racy and we don't want to call it twice.
      nextRouteToTry = retryRoute
      return true
    }

    // If we have a routes left, use 'em.
    //检查是否还有未尝试的路由
    if (routeSelection?.hasNext() == true) return true

    // If we haven't initialized the route selector yet, assume it'll have at least one route.
    val localRouteSelector = routeSelector ?: return true

    // If we do have a route selector, use its routes.
    return localRouteSelector.hasNext()
}- 书接上回,
不可恢复:抛出 e.firstConnectException,附加 recoveredFailures。
可恢复:将异常添加到 recoveredFailures,继续循环。newExchangeFinder = false - IOException:通信失败(请求可能已发送)。
- requestSendStarted = e !is ConnectionShutdownException:检查是否发送了请求。
- 不可恢复:抛出异常,附加 recoveredFailures。
- 可恢复:记录异常,继续循环。
- if块:如果存在前一个响应(priorResponse),将其附加到当前响应,保留重定向链的历史响应
- val exchange = call.interceptorScopedExchange,获取网络连接状态,判断是否为双工等……
- val followUp = followUpRequest(response, exchange),根据状态码生成后续请求,就是那些301,302,401……,实现代码很繁琐,我们就不看了,大多数还是计网的知识
- if块:
- 如果 exchange 是双工(如 WebSocket),调用 timeoutEarlyExit 提前退出超时
- 设置 closeActiveExchange = false,保留连接
- 返回当前 response
- 注释:如果请求体是一次性的,不需要再次重试
- response.body?.closeQuietly(),关闭当前响应的response,释放资源
- 注释:最大重试次数,不同的浏览器是不同的,比如:Chrome为21,Safari则是16
- request = followUp,更新请求
- priorResponse = response,前一个请求为当前请求
- call.exitNetworkInterceptorExchange(closeActiveExchange),closeActiveExchange决定是否关闭连接(释放exchange)
os:一个拦截器就要看这么多源码,不知道是不是我的方式有问题…………
BridgeInterceptor
就两个方法,必须重写的intercept,还有个自带的cookieHeader
/**
* Bridges from application code to network code.
* First it builds a network request from a user request.
* Then it proceeds to call the network.
* Finally it builds a user response from the network
* response.
*/
/**
* 将应用层代码桥接到网络层代码。
* 首先,它从用户请求构建网络请求。
* 然后,它调用网络层。
* 最后,它从网络响应构建用户响应。
*/
class BridgeInterceptor(private val cookieJar: CookieJar) : Interceptor {
@Throws(IOException::class)
override fun intercept(chain: Interceptor.Chain): Response {
val userRequest = chain.request()
val requestBuilder = userRequest.newBuilder()
val body = userRequest.body
if (body != null) {
val contentType = body.contentType()
if (contentType != null) {
requestBuilder.header("Content-Type", contentType.toString())
}
val contentLength = body.contentLength()
if (contentLength != -1L) {
requestBuilder.header("Content-Length", contentLength.toString())
requestBuilder.removeHeader("Transfer-Encoding")
} else {
requestBuilder.header("Transfer-Encoding", "chunked")
requestBuilder.removeHeader("Content-Length")
}
}
if (userRequest.header("Host") == null) {
requestBuilder.header("Host", userRequest.url.toHostHeader())
}
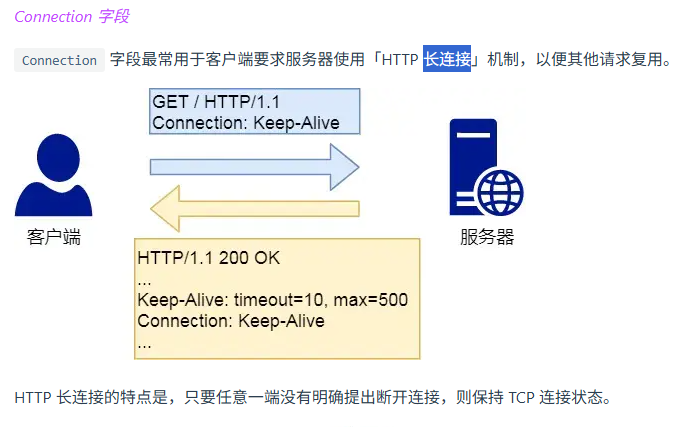
if (userRequest.header("Connection") == null) {
requestBuilder.header("Connection", "Keep-Alive")
}
// If we add an "Accept-Encoding: gzip" header field we're responsible for also decompressing
// the transfer stream.
var transparentGzip = false
if (userRequest.header("Accept-Encoding") == null && userRequest.header("Range") == null) {
transparentGzip = true
requestBuilder.header("Accept-Encoding", "gzip")
}
val cookies = cookieJar.loadForRequest(userRequest.url)
if (cookies.isNotEmpty()) {
requestBuilder.header("Cookie", cookieHeader(cookies))
}
if (userRequest.header("User-Agent") == null) {
requestBuilder.header("User-Agent", userAgent)
}
val networkResponse = chain.proceed(requestBuilder.build())
cookieJar.receiveHeaders(userRequest.url, networkResponse.headers)
val responseBuilder = networkResponse.newBuilder()
.request(userRequest)
if (transparentGzip &&
"gzip".equals(networkResponse.header("Content-Encoding"), ignoreCase = true) &&
networkResponse.promisesBody()) {
val responseBody = networkResponse.body
if (responseBody != null) {
val gzipSource = GzipSource(responseBody.source())
val strippedHeaders = networkResponse.headers.newBuilder()
.removeAll("Content-Encoding")
.removeAll("Content-Length")
.build()
responseBuilder.headers(strippedHeaders)
val contentType = networkResponse.header("Content-Type")
responseBuilder.body(RealResponseBody(contentType, -1L, gzipSource.buffer()))
}
}
return responseBuilder.build()
}
/** Returns a 'Cookie' HTTP request header with all cookies, like `a=b; c=d`. */
private fun cookieHeader(cookies: List<Cookie>): String = buildString {
cookies.forEachIndexed { index, cookie ->
if (index > 0) append("; ")
append(cookie.name).append('=').append(cookie.value)
}
}
}先来看一下cookieHeader吧,主要为什么是这样实现,这里给出一个cookie就能明白了,都是 名称 = 值 + 分号
cookie=MUSIC_A_T=1535825764761; Max-Age=2147483647; Expires=Sun, 26 Jul 2093 12:45:53 GMT; Path=/api/feedback;;MUSIC_R_T=1535825858859; Max-Age=2147483647; Expires=Sun, 26 Jul 2093 12:45:53 GMT; Path=/weapi/feedback;;MUSIC_A_T=1535825764761; Max-Age=2147483647; Expires=Sun, 26 Jul 2093 12:45:53 GMT; Path=/eapi/clientlog;;MUSIC_R_T=1535825858859; Max-Age=2147483647; Expires=Sun, 26 Jul 2093 12:45:53 GMT; Path=/wapi/clientlog;;MUSIC_R_T=1535825858859; Max-Age=2147483647; Expires=Sun, 26 Jul 2093 12:45:53 GMT; Path=/weapi/clientlog;;MUSIC_A_T=1535825764761; Max-Age=2147483647; Expires=Sun, 26 Jul 2093 12:45:53 GMT; Path=/api/clientlog;;MUSIC_R_T=1535825858859; Max-Age=2147483647; Expires=Sun, 26 Jul 2093 12:45:53 GMT; Path=/neapi/feedback;;MUSIC_R_T=1535825858859; Max-Age=2147483647; Expires=Sun, 26 Jul 2093 12:45:53 GMT; Path=/api/clientlog;;MUSIC_A_T=1535825764761; Max-Age=2147483647; Expires=Sun, 26 Jul 2093 12:45:53 GMT; Path=/neapi/feedback;;MUSIC_R_T=1535825858859; Max-Age=2147483647; Expires=Sun, 26 Jul 2093 12:45:53 GMT; Path=/eapi/clientlog;;MUSIC_R_T=1535825858859; Max-Age=2147483647; Expires=Sun, 26 Jul 2093 12:45:53 GMT; Path=/openapi/clientlog;;MUSIC_R_T=1535825858859; Max-Age=2147483647; Expires=Sun, 26 Jul 2093 12:45:53 GMT; Path=/neapi/clientlog;;MUSIC_A_T=1535825764761; Max-Age=2147483647; Expires=Sun, 26 Jul 2093 12:45:53 GMT; Path=/openapi/clientlog;;__csrf=f29accb83f3d47d9934863d82dc1f219; Max-Age=1296010; Expires=Wed, 23 Jul 2025 09:31:56 GMT; Path=/;;MUSIC_A_T=1535825764761; Max-Age=2147483647; Expires=Sun, 26 Jul 2093 12:45:53 GMT; Path=/wapi/clientlog;;MUSIC_U=00D57500EBDC16F4DB6A0C032F4C8043975F7F6341E559B518DCC0EAD4ECDEBDD29EF0B91A932EE02ABC0DCBADF307E1A95E37EECE7132CD1E8FB6305105A6883B7906509E58B673C0FE932D82E1F903A0559BFC6194F574B9DD41BF2D67B8DC2216FEDC535D13293472135E9F3623827526419C5935E2F4F7B017489C3CD8E40A6E865BCC3D8E133A0DC78D1322F9AAA0D9440632B8D76A852D3EAE3D8A4489BE27904F9EBC4CABD154DECFB5A4CE9E40D1B45BE388EC184B261E5B71864AD98934BFF6EF0387986756B3C417EA54D2B67614635ED211C57C91A92FEBED8C6729E72A2DAE12E7A9C80F9BE2CF4F3F8A877C6961982E1C7EB1DEEB360D25B8C1E7B068FF8C89A5AB78FD6226BB7DA15168FCCA22B36E138CD5C9A4B059C6985C0E1A9CED292BDB9AFDE9C68387506DB290156CD0A421E765EACD85CEB34EBC93BA11516077750DDBCAE44F5E658A8FE8CF; Max-Age=15552000; Expires=Sun, 04 Jan 2026 09:31:46 GMT; Path=/;;MUSIC_SNS=; Max-Age=0; Expires=Tue, 08 Jul 2025 09:31:46 GMT; Path=/;MUSIC_A_T=1535825764761; Max-Age=2147483647; Expires=Sun, 26 Jul 2093 12:45:53 GMT; Path=/neapi/clientlog;;NMTID=00O534kdJ1-VFeRwUbkvYlfJ0ch46kAAAGX6WCFJA; Max-Age=315360000; Expires=Fri, 06 Jul 2035 09:31:46 GMT; Path=/;;MUSIC_A_T=1535825764761; Max-Age=2147483647; Expires=Sun, 26 Jul 2093 12:45:53 GMT; Path=/eapi/feedback;;MUSIC_A_T=1535825764761; Max-Age=2147483647; Expires=Sun, 26 Jul 2093 12:45:53 GMT; Path=/weapi/feedback;;MUSIC_R_T=1535825858859; Max-Age=2147483647; Expires=Sun, 26 Jul 2093 12:45:53 GMT; Path=/eapi/feedback;;MUSIC_A_T=1535825764761; Max-Age=2147483647; Expires=Sun, 26 Jul 2093 12:45:53 GMT; Path=/wapi/feedback;;MUSIC_R_T=1535825858859; Max-Age=2147483647; Expires=Sun, 26 Jul 2093 12:45:53 GMT; Path=/wapi/feedback;;MUSIC_A_T=1535825764761; Max-Age=2147483647; Expires=Sun, 26 Jul 2093 12:45:53 GMT; Path=/weapi/clientlog;;MUSIC_R_T=1535825858859; Max-Age=2147483647; Expires=Sun, 26 Jul 2093 12:45:53 GMT; Path=/api/feedback;然后我们看几个字段就可以明白这个拦截器做了什么工作
以 val networkResponse = chain.proceed(requestBuilder.build()) 为分界线,也就是对request进行操作
- Content-Type
- Content-Length(规定长度)
- Transfer-Encoding (分块传输)
- Host
- Connection
- Accept-Encoding
- Cookie
- User-Agent
可以发现这些字段都是添加到请求头的,还是以字符串的形式,(ps:可以发现有一些字段是判断有无,有的话就转成字符串形式,有的字段是检查它如果没有的话,就添加一些默认通用的值)IO流主要分为字节流和字符流,这其实就是把用户友好型数据转换成了网络友好型数据
接下来把新的request传给下一个拦截器,获取到networkResponse,接下来就是对response进行操作
- 先来看这一行代码
val responseBuilder = networkResponse.newBuilder().request(userRequest)
为什么是是userRequest,也就是旧的请求?
其实是因为,用户发起的请求,有自己的逻辑所在,他们当然希望自己的request是保持一致的,这样才能更好地编写业务逻辑。在这个拦截器中,可以看到是有修改用户的request的,但是这些都是不会影响到用户的原始request的,也就是说不必关注细节实现,大概是这么一个说法……………… - gzip,这是一个计网的知识,可以理解为这里是在解压缩
- 接下来就比较好理解,也是关注几个字段,他们是传入了remove方法里。因为刚才是添加这些数据到头部去了,现在要移除,为什么?
因为返回的数据是网络友好型的,我要转成用户友好型才能让用户有良好的体验,如果还需要用户手动转的话,那么OkHttp很难成为一个优秀的网络库
最后说一下cookieJar这个参数,其实就是拿来管理cookie的,这个拦截器有负责处理cookie字段,自然就把跟cookie有关的更新操作交给它
这个拦截器内容不多,我们继续前进
CacheInterceptor
一看就是跟缓存有关的,我们直接发车
它的代码稍微多一点,不过我们也是重点关注interceot方法的实现,因为其他的都只是辅助函数而已
@Throws(IOException::class)
  override fun intercept(chain: Interceptor.Chain): Response {
    val call = chain.call()
    //通过request从OkHttpClient.cache中获取缓存
    val cacheCandidate = cache?.get(chain.request())

    val now = System.currentTimeMillis()
    //创建一个缓存策略,用来确定怎么使用缓存
    val strategy = CacheStrategy.Factory(now, chain.request(), cacheCandidate).compute()
    //为空表示不使用网络,反之,则表示使用网络
    val networkRequest = strategy.networkRequest
    //为空表示不使用缓存,反之,则表示使用缓存
    val cacheResponse = strategy.cacheResponse
    //追踪网络与缓存的使用情况
    cache?.trackResponse(strategy)
    val listener = (call as? RealCall)?.eventListener ?: EventListener.NONE
    //有缓存但不适用,关闭它
    if (cacheCandidate != null && cacheResponse == null) {
      cacheCandidate.body?.closeQuietly()
    }

    //如果网络被禁止,但是缓存又是空的,构建一个code为504的response,并返回
    if (networkRequest == null && cacheResponse == null) {
      return Response.Builder()
          .request(chain.request())
          .protocol(Protocol.HTTP_1_1)
          .code(HTTP_GATEWAY_TIMEOUT)
          .message("Unsatisfiable Request (only-if-cached)")
          .body(EMPTY_RESPONSE)
          .sentRequestAtMillis(-1L)
          .receivedResponseAtMillis(System.currentTimeMillis())
          .build().also {
            listener.satisfactionFailure(call, it)
          }
    }

    //如果我们禁用了网络不使用网络,且有缓存,直接根据缓存内容构建并返回response
    if (networkRequest == null) {
      return cacheResponse!!.newBuilder()
          .cacheResponse(stripBody(cacheResponse))
          .build().also {
            listener.cacheHit(call, it)
          }
    }
    //为缓存添加监听
    if (cacheResponse != null) {
      listener.cacheConditionalHit(call, cacheResponse)
    } else if (cache != null) {
      listener.cacheMiss(call)
    }

    var networkResponse: Response? = null
    try {
      //责任链往下处理,从服务器返回response 赋值给 networkResponse
      networkResponse = chain.proceed(networkRequest)
    } finally {
      //捕获I/O或其他异常,请求失败,networkResponse为空,且有缓存的时候,不暴露缓存内容。
      if (networkResponse == null && cacheCandidate != null) {
        cacheCandidate.body?.closeQuietly()
      }
    }

    //如果有缓存
    if (cacheResponse != null) {
      //且网络返回response code为304的时候,使用缓存内容新构建一个Response返回。
      if (networkResponse?.code == HTTP_NOT_MODIFIED) {
        val response = cacheResponse.newBuilder()
            .headers(combine(cacheResponse.headers, networkResponse.headers))
            .sentRequestAtMillis(networkResponse.sentRequestAtMillis)
            .receivedResponseAtMillis(networkResponse.receivedResponseAtMillis)
            .cacheResponse(stripBody(cacheResponse))
            .networkResponse(stripBody(networkResponse))
            .build()

        networkResponse.body!!.close()

        // Update the cache after combining headers but before stripping the
        // Content-Encoding header (as performed by initContentStream()).
        cache!!.trackConditionalCacheHit()
        cache.update(cacheResponse, response)
        return response.also {
          listener.cacheHit(call, it)
        }
      } else {
        //否则关闭缓存响应体
        cacheResponse.body?.closeQuietly()
      }
    }

    //构建网络请求的response
    val response = networkResponse!!.newBuilder()
        .cacheResponse(stripBody(cacheResponse))
        .networkResponse(stripBody(networkResponse))
        .build()

    //如果cache不为null,即用户在OkHttpClient中配置了缓存,则将上一步新构建的网络请求response存到cache中
    if (cache != null) {
      //根据response的code,header以及CacheControl.noStore来判断是否可以缓存
      if (response.promisesBody() && CacheStrategy.isCacheable(response, networkRequest)) {
        // 将该response存入缓存
        val cacheRequest = cache.put(response)
        return cacheWritingResponse(cacheRequest, response).also {
          if (cacheResponse != null) {
            listener.cacheMiss(call)
          }
        }
      }
      //根据请求方法来判断缓存是否有效,只对Get请求进行缓存,其它方法的请求则移除
      if (HttpMethod.invalidatesCache(networkRequest.method)) {
        try {
          //缓存无效,将该请求缓存从client缓存配置中移除
          cache.remove(networkRequest)
        } catch (_: IOException) {
          // The cache cannot be written.
        }
      }
    }

    return response
}- call 先拿到任务call
- cacheCandidate 由cache的get方法获取,我们看一下get方法
  internal fun get(request: Request): Response? {
    val key = key(request.url)
    val snapshot: DiskLruCache.Snapshot = try {
      cache[key] ?: return null
    } catch (_: IOException) {
      return null // Give up because the cache cannot be read.
    }

    val entry: Entry = try {
      Entry(snapshot.getSource(ENTRY_METADATA))
    } catch (_: IOException) {
      snapshot.closeQuietly()
      return null
    }

    val response = entry.response(snapshot)
    if (!entry.matches(request, response)) {
      response.body?.closeQuietly()
      return null
    }

    return response
  }

//将 request.url(HttpUrl)转换为缓存的唯一标识(如 URL 的 MD5 哈希)
@JvmStatic
fun key(url: HttpUrl): String = url.toString().encodeUtf8().md5().hex()- 将 request.url(HttpUrl)转换为缓存的唯一标识key
- 根据key找到对应的缓存快照snapshot,注意这里是DiskLruCache磁盘缓存
- 将缓存快照转换为结构化的Entry,表示缓存的请求-响应对
- 根据获取到的entry,再获取到缓存的response
- 检查request和response是否匹配
- 返回response
- strategy,创建一个缓存策略
- networkRequest,为空表示不使用网络,反之,则表示使用网络
- cacheResponse,为空表示不使用缓存,反之,则表示使用缓存
- cache?.trackResponse(strategy),跟踪缓存策略的统计信息,记录请求和缓存命中情况
- listener,这个监听器(evenlistener)其实是对部分事件进行了监听,包括缓存是否命中等事件
- if块:有缓存,但是找不到对应的response(可能是决策禁用了),关闭
- if块:如果网络被禁止,但是缓存又是空的,构建一个code为504的response,并返回,504意思是网关超时
- if块:如果我们禁用了网络不使用网络,且有缓存,直接根据缓存内容构建并返回response
我在这里产生了一个疑问,stripBody(cacheResponse)是把cacheResponse的body转成null,存入cacheResponse的cacheResponse字段中,那这个没有body的response有什么用呢?
我自己的解答是,Response已经有body字段了,如果cacheResponse也带上body的数据,这不是白白浪费资源嘛……
- if块:cacheResponse不为空(条件命中),cacheResponse为空(缓存为命中)
- try-catch块,进行一次网络请求,捕获异常
这里我有个疑问:上面已经有可能时缓存条件命中了,还需要进行网络请求吗?
其实networkRequest!=null时,不管你缓存有没有命中,策略就是要求你请求一次,因为你命中的数据有可能是脏的,需要再次请求看看是怎么个事,所以上面的事件监听是cacheConditionalHit缓存条件命中
- if块:如果有缓存
- networkResponse?.code == HTTP_NOT_MODIFIED,
网络请求结果返回304,表示资源没被修改,可以直接使用缓存的数据,构建一个新的Response
疑问:资源没有变,为什么还需要构建新的Response?
回答:body的数据是不变的,但是有些细小的Header数据会变化,比如更新数据过期的时间,让客户端更好管理缓存,所以这里需要再更新一下头部,可以看到这里的combine方法就是做这件事的
-
- 释放网络请求回来的body(因为缓存有效,就不需要了,节约资源)
- 调用 cache.trackConditionalCacheHit 记录条件命中
- 更新缓存(cache.update)
- 返回response并记录命中事件
- 否则关闭缓存响应体(缓存不可用,释放资源)
- 构建网络请求的response
- if块:
如果用户自己在client配置了缓存,根据response的code,header以及CacheControl.noStore来判断是否可以缓存
根据请求方法来判断缓存是否有效,只对Get请求进行缓存,其它方法的请求则移除
其实这一步就是对缓存的更新 - 返回最后的response
整个拦截器做了很多判断,对策略的判断,缓存状态的判断,网络请求响应码的判断,缓存是否可用的判断……做这么多判断是无可厚非的,因为复用缓存相对来说还是一件比较严谨的事情,在缓存可以复用的情况下,又去进行网络请求数据,浪费了资源;在缓存不可用的情况下,不及时更新,把旧的数据呈现给用户,用户体验感较差。所以对缓存的处理也是一门学问……
ConnectInterceptor
这……这……这是什么拦截器,intercept方法只有四行代码,太舒服了吧(看到findConnection方法后我收回这句话)
直接上代码
object ConnectInterceptor : Interceptor {
  @Throws(IOException::class)
  override fun intercept(chain: Interceptor.Chain): Response {
    val realChain = chain as RealInterceptorChain
    val exchange = realChain.call.initExchange(chain)
    val connectedChain = realChain.copy(exchange = exchange)
    return connectedChain.proceed(realChain.request)
  }
}- realChain,获取到责任链
- exchange,初始化一个Exchange对象,关于这个Exchange,我们最早好像是在重定向拦截器RetryAndFollowUpInterceptor那里看到的,我们只需要回顾它的一行代码,其中newExchangeFinder是控制是否需要找新的连接,那connectInterpretor就是来找连接的
//这里会新建一个ExchangeFinder,ConnectInterceptor会使用到
call.enterNetworkInterceptorExchange(request, newExchangeFinder)- 进入到initExchange方法一探究竟
/** Finds a new or pooled connection to carry a forthcoming request and response. */
/** 查找新的或复用的连接,以承载即将进行的请求和响应。 */
  internal fun initExchange(chain: RealInterceptorChain): Exchange {
    synchronized(this) {
      check(expectMoreExchanges) { "released" }
      check(!responseBodyOpen)
      check(!requestBodyOpen)
    }

    val exchangeFinder = this.exchangeFinder!!
    val codec = exchangeFinder.find(client, chain)
    val result = Exchange(this, eventListener, exchangeFinder, codec)
    this.interceptorScopedExchange = result
    this.exchange = result
    synchronized(this) {
      this.requestBodyOpen = true
      this.responseBodyOpen = true
    }

    if (canceled) throw IOException("Canceled")
    return result
}- 首先给call上锁,验证 RealCall 状态,防止在错误状态下(如已释放或流已打开)创建 Exchange
- exchangeFinder 是 RealCall 的成员,负责查找或创建网络连接,可以理解为管理连接池的,然后Exchange 是管理请求和响应的对象,封装连接和编解码逻辑
- codec,find 方法选择或创建连接(如 TCP 或 WebSocket),返回 ExchangeCodec(用于 HTTP/1.1 或 HTTP/2 的编解码),作者选择在这里深入find方法,那我们也来(见下)
- 封装一个Exchange对象,准备发送请求和接收响应
- interceptorScopedExchange,用于拦截器链的 Exchange 引用,确保所有拦截器访问一致的Exchange
- exchange,RealCall 的主 Exchange 引用,管理生命周期
- 更新 RealCall 状态,跟踪流的使用,防止重复打开或遗漏关闭
- 检查调用是否被取消,确保取消的请求不会执行
- 返回Exchange
- connectedChain,更新连接逻辑,其实就是Exchange对象
- chain继续链式调用,返回response
findConnection
  /**
   * Returns a connection to host a new stream. This prefers the existing connection if it exists,
   * then the pool, finally building a new connection.
   *
   * This checks for cancellation before each blocking operation.
   */
  @Throws(IOException::class)
  private fun findConnection(
    connectTimeout: Int,
    readTimeout: Int,
    writeTimeout: Int,
    pingIntervalMillis: Int,
    connectionRetryEnabled: Boolean
  ): RealConnection {
    if (call.isCanceled()) throw IOException("Canceled")

    // Attempt to reuse the connection from the call.
    //第一次,尝试重连 call 中的 connection,不需要去重新获取连接
    val callConnection = call.connection // This may be mutated by releaseConnectionNoEvents()!
    if (callConnection != null) {
      var toClose: Socket? = null
      synchronized(callConnection) {
        if (callConnection.noNewExchanges || !sameHostAndPort(callConnection.route().address.url)) {
          toClose = call.releaseConnectionNoEvents()
        }
      }

      // If the call's connection wasn't released, reuse it.
      // 如果 call 中的 connection 还没有释放,就重用它。
      // We don't call connectionAcquired() here because we already acquired it.
      if (call.connection != null) {
        check(toClose == null)
        return callConnection
      }

      // The call's connection was released.
      //如果 call 中的 connection 已经被释放,关闭Socket.
      toClose?.closeQuietly()
      eventListener.connectionReleased(call, callConnection)
    }

    // We need a new connection. Give it fresh stats.
    //需要一个新的连接,所以重置一些状态
    refusedStreamCount = 0
    connectionShutdownCount = 0
    otherFailureCount = 0

    // Attempt to get a connection from the pool.
    //第二次,尝试从连接池中获取一个连接,不带路由,不带多路复用
    if (connectionPool.callAcquirePooledConnection(address, call, null, false)) {
      val result = call.connection!!
      eventListener.connectionAcquired(call, result)
      return result
    }

    // Nothing in the pool. Figure out what route we'll try next.
    val routes: List<Route>?
    val route: Route
    if (nextRouteToTry != null) {
      // Use a route from a preceding coalesced connection.
      routes = null
      route = nextRouteToTry!!
      nextRouteToTry = null
    } else if (routeSelection != null && routeSelection!!.hasNext()) {
      // Use a route from an existing route selection.
      routes = null
      route = routeSelection!!.next()
    } else {
      // Compute a new route selection. This is a blocking operation!
      var localRouteSelector = routeSelector
      if (localRouteSelector == null) {
        localRouteSelector = RouteSelector(address, call.client.routeDatabase, call, eventListener)
        this.routeSelector = localRouteSelector
      }
      val localRouteSelection = localRouteSelector.next()
      routeSelection = localRouteSelection
      routes = localRouteSelection.routes

      if (call.isCanceled()) throw IOException("Canceled")

      // Now that we have a set of IP addresses, make another attempt at getting a connection from
      // the pool. We have a better chance of matching thanks to connection coalescing.
      // 第三次,再次尝试从连接池中获取一个连接,带路由,不带多路复用
      if (connectionPool.callAcquirePooledConnection(address, call, routes, false)) {
        val result = call.connection!!
        eventListener.connectionAcquired(call, result)
        return result
      }

      route = localRouteSelection.next()
    }

    // Connect. Tell the call about the connecting call so async cancels work.
    //第四次,手动创建一个新连接
    val newConnection = RealConnection(connectionPool, route)
    call.connectionToCancel = newConnection
    try {
      newConnection.connect(
          connectTimeout,
          readTimeout,
          writeTimeout,
          pingIntervalMillis,
          connectionRetryEnabled,
          call,
          eventListener
      )
    } finally {
      call.connectionToCancel = null
    }
    call.client.routeDatabase.connected(newConnection.route())

    // If we raced another call connecting to this host, coalesce the connections. This makes for 3
    // different lookups in the connection pool!
    // 第五次,再次尝试从连接池中获取一个连接,带路由,带多路复用。
    // 这一步主要是为了校验一下,比如已经有了一条连接了,就可以直接复用,而不用使用手动创建的新连接。
    if (connectionPool.callAcquirePooledConnection(address, call, routes, true)) {
      val result = call.connection!!
      nextRouteToTry = route
      newConnection.socket().closeQuietly()
      eventListener.connectionAcquired(call, result)
      return result
    }

    synchronized(newConnection) {
    //将手动创建的新连接放入连接池
      connectionPool.put(newConnection)
      call.acquireConnectionNoEvents(newConnection)
    }

    eventListener.connectionAcquired(call, newConnection)
    return newConnection
}- 我们直接来关注核心方法findConnection的实现,代码量有的多,能力有限,我就直接粘贴作者的了
- 在代码中可以看出,一共做了5次尝试去得到连接:
-
- 第一次,尝试重连 call 中的 connection,不需要去重新获取连接。
- 第二次,尝试从连接池中获取一个连接,不带路由,不带多路复用。
- 第三次,再次尝试从连接池中获取一个连接,带路由,不带多路复用。
- 第四次,手动创建一个新连接。
- 第五次,再次尝试从连接池中获取一个连接,带路由,带多路复用。
到这里就已经是为这次请求建立起连接了,关于findConnection,我可能会在后面重温的时候补充,我真得感觉我越写越多了,废话很多
client.networkInterceptors
粘贴自作者
if (!forWebSocket) {
      interceptors += client.networkInterceptors
}该拦截器称为网络拦截器,与client.interceptors一样也是由用户自己定义的,同样是以列表的形式存在OkHttpClient中。
那这两个拦截器有什么不同呢?
其实他两的不同都是由于他们所处的位置不同所导致的,应用拦截器处于第一个位置,所以无论如何它都会被执行,而且只会执行一次。而网络拦截器处于倒数第二的位置,它不一定会被执行,而且可能会被执行多次,比如:在RetryAndFollowUpInterceptor失败或者CacheInterceptor直接返回缓存的情况下,我们的网络拦截器是不会被执行的。
那我有个问题,为什么使用了WebSocket协议,就不能添加这个网络拦截器networkInterceptors?
以下回答来自Grok,如果真想搞懂,还得学多点计网
WebSocket 协议的特殊性:
- 初始握手:WebSocket 通过 HTTP/1.1 协议进行握手(发送 Upgrade: websocket 头部,接收 101 响应),但随后切换到 WebSocket 协议(参考你提到的 WebSocket 问题)。
- 数据帧:WebSocket 使用数据帧(frame)传输消息(文本、二进制、ping/pong),而不是 HTTP 的请求-响应模型。
- 网络拦截器不适用:网络拦截器设计为处理 HTTP 请求/响应的元数据(如头部、状态码、压缩体),但 WebSocket 的数据帧不遵循 HTTP 格式,拦截器可能无法正确解析或处理。
潜在干扰:
- 修改头部:网络拦截器可能添加或修改 HTTP 头部(如 Authorization),但 WebSocket 握手后头部不再适用,可能会导致协议错误。
- 处理响应体:网络拦截器可能尝试读取或修改响应体,但 WebSocket 的响应体是空的(101 响应)或后续是数据帧,拦截器操作可能引发异常。
- 日志或监控:网络拦截器常用于记录 HTTP 响应(如状态码),但 WebSocket 的消息帧(如文本消息)不符合 HTTP 响应格式,日志逻辑可能失败。
- 性能开销:为 WebSocket 应用网络拦截器会增加不必要的处理,影响实时通信的低延迟特性。
为什么 HTTP 请求需要 networkInterceptors?
- HTTP 请求:
-
- 网络拦截器处理底层 HTTP 数据(如压缩后的响应体、HTTP/2 帧)。
- 适合场景:
-
-
- 记录网络请求的原始数据(未解压的 gzip 响应)。
- 修改底层头部(如添加调试信息)。
- 监控网络性能(如连接时间)。
-
- WebSocket 请求:
-
- 握手后,通信基于 WebSocket 帧,networkInterceptors 的 HTTP 逻辑不适用。
- 跳过 networkInterceptors 确保 WebSocket 连接高效且无干扰。
CallServerInterceptor
终于来到最后一个拦截器了啊……话不多说直接开始,再吐槽一句,这源码真需要点能力才能看得下去……
这是最后一个拦截器,所以它获取response的方式不再是调用下一个拦截器,所以我们要重点关注一下是怎么获取response的
  @Throws(IOException::class)
  override fun intercept(chain: Interceptor.Chain): Response {
    val realChain = chain as RealInterceptorChain
    val exchange = realChain.exchange!!
    val request = realChain.request
    val requestBody = request.body
    val sentRequestMillis = System.currentTimeMillis()

    var invokeStartEvent = true
    var responseBuilder: Response.Builder? = null
    var sendRequestException: IOException? = null
    try {
      exchange.writeRequestHeaders(request)

      if (HttpMethod.permitsRequestBody(request.method) && requestBody != null) {
        // If there's a "Expect: 100-continue" header on the request, wait for a "HTTP/1.1 100
        // Continue" response before transmitting the request body. If we don't get that, return
        // what we did get (such as a 4xx response) without ever transmitting the request body.
        //当请求头为"Expect: 100-continue"时,在发送请求体之前需要等待服务器返回"HTTP/1.1 100 Continue" 的response,如果没有等到该response,就不发送请求体。
        //POST请求,先发送请求头,在获取到100继续状态后继续发送请求体
        if ("100-continue".equals(request.header("Expect"), ignoreCase = true)) {
          exchange.flushRequest()
          responseBuilder = exchange.readResponseHeaders(expectContinue = true)
          exchange.responseHeadersStart()
          invokeStartEvent = false
        }
        if (responseBuilder == null) {
          if (requestBody.isDuplex()) {
            // Prepare a duplex body so that the application can send a request body later.
            exchange.flushRequest()
            val bufferedRequestBody = exchange.createRequestBody(request, true).buffer()
            requestBody.writeTo(bufferedRequestBody)
          } else {
            // Write the request body if the "Expect: 100-continue" expectation was met.
            val bufferedRequestBody = exchange.createRequestBody(request, false).buffer()
            requestBody.writeTo(bufferedRequestBody)
            bufferedRequestBody.close()
          }
        } else {
          exchange.noRequestBody()
          if (!exchange.connection.isMultiplexed) {
            // If the "Expect: 100-continue" expectation wasn't met, prevent the HTTP/1 connection
            // from being reused. Otherwise we're still obligated to transmit the request body to
            // leave the connection in a consistent state.
            exchange.noNewExchangesOnConnection()
          }
        }
      } else {
        exchange.noRequestBody()
      }

      if (requestBody == null || !requestBody.isDuplex()) {
        exchange.finishRequest()
      }
    } catch (e: IOException) {
      if (e is ConnectionShutdownException) {
        throw e // No request was sent so there's no response to read.
      }
      if (!exchange.hasFailure) {
        throw e // Don't attempt to read the response; we failed to send the request.
      }
      sendRequestException = e
    }

    try {
      if (responseBuilder == null) {
        responseBuilder = exchange.readResponseHeaders(expectContinue = false)!!
        if (invokeStartEvent) {
          exchange.responseHeadersStart()
          invokeStartEvent = false
        }
      }
      var response = responseBuilder
          .request(request)
          .handshake(exchange.connection.handshake())
          .sentRequestAtMillis(sentRequestMillis)
          .receivedResponseAtMillis(System.currentTimeMillis())
          .build()
      var code = response.code

      if (shouldIgnoreAndWaitForRealResponse(code)) {
        responseBuilder = exchange.readResponseHeaders(expectContinue = false)!!
        if (invokeStartEvent) {
          exchange.responseHeadersStart()
        }
        response = responseBuilder
            .request(request)
            .handshake(exchange.connection.handshake())
            .sentRequestAtMillis(sentRequestMillis)
            .receivedResponseAtMillis(System.currentTimeMillis())
            .build()
        code = response.code
      }

      exchange.responseHeadersEnd(response)

      response = if (forWebSocket && code == 101) {
        // Connection is upgrading, but we need to ensure interceptors see a non-null response body.
        response.newBuilder()
            .body(EMPTY_RESPONSE)
            .build()
      } else {
        response.newBuilder()
            .body(exchange.openResponseBody(response))
            .build()
      }
      if ("close".equals(response.request.header("Connection"), ignoreCase = true) ||
          "close".equals(response.header("Connection"), ignoreCase = true)) {
        exchange.noNewExchangesOnConnection()
      }
      if ((code == 204 || code == 205) && response.body?.contentLength() ?: -1L > 0L) {
        throw ProtocolException(
            "HTTP $code had non-zero Content-Length: ${response.body?.contentLength()}")
      }
      return response
    } catch (e: IOException) {
      if (sendRequestException != null) {
        sendRequestException.addSuppressed(e)
        throw sendRequestException
      }
      throw e
    }
}- 初始化变量
- realChain:将 chain 转为 RealInterceptorChain
- exchange:从 realChain 获取 Exchange,由 initExchange 创建
- request:当前请求
- requestBody:请求体(可能为 null,如 GET 请求)
- sentRequestMillis:记录请求发送时间
- 初始化状态变量
- invokeStartEvent:控制是否触发 responseHeadersStart 事件。
- responseBuilder:用于构建响应。
- sendRequestException:记录发送请求时的异常
- exchange.writeRequestHeaders(request),写入请求头
- if块:允许有请求体并且请求体不为空
- Expect: 100-continue,请求无服务确认是否接受请求体
-
- flushRequest:发送头部并刷新。
- readResponseHeaders(expectContinue = true):读取服务器的 100 Continue 响应(或错误响应)。
- responseHeadersStart:触发事件,标记响应头部开始。
- responseBuilder == null 未收到100continue响应(可能是服务器拒绝)
-
- requestBody.isDuplex():处理双工请求(如 WebSocket),创建缓冲请求体,允许异步写入
- else块:普通请求,直接写入
- 无 100 Continue:调用 noRequestBody,标记无请求体;若非多路复用(如 HTTP/1.1),禁止连接复用(noNewExchangesOnConnection)。
- else块:调用 noRequestBody,标记无请求体
fun noRequestBody() {
    call.messageDone(this, requestDone = true, responseDone = false, e = null)
}- if块:标记请求发送完成
- if块:responseBuilder为空时(即无100 Continue响应)读取响应头
- 构建初始response
- code,获取响应状态码
- if块:shouldIgnoreAndWaitForRealResponse(code)处理需要忽略的响应,确保获取真实的响应(非临时状态码),然后重新构建response
- exchange.responseHeadersEnd(response),触发响应头结束事件,通知监听器响应头部处理完成
- 为响应设置body
- WebSocket(forWebSocket && code == 101):设置空响应体(EMPTY_RESPONSE),因为 WebSocket 握手无 body。
- 普通 HTTP:通过 openResponseBody 获取响应体(如 JSON 数据)。、
- 头部字段:Connection = “close”,检查是否关闭连接
- 204(无内容)或 205(重置内容)不应有 body,若有则抛出异常
- 处理异常,返回response
太长了,这里总结一下:
CallServerInterceptor 主要负责了向 TCP 连接中写入数据,并获取返回值。它的核心是通过 Http1ExchangeCodec 和 Http2ExchangeCodec 实现,它会将 Request 中的数据写入,将数据读取到 Response,OkHttp 中的超时机制是通过 Okio 的 Timeout 机制实现的。
CallServerInterceptor的处理流程如下:
- 调用
exchange.writeRequestHeaders()写入请求头 - 调用
exchange.createRequestBody()获取输出流Sink - 调用
reqeustBody.write(bufferedRequestBody)写入请求体 - 调用
exchange.readResponseHeaders()读入响应头 - 调用
exchange.openResponseBody()读取响应体
那这个拦截器是怎么拿到response的呢?我们知道主要是readResponseHeaders和openResponseBody()这两个方法来构建response的,我们一直追下去看看
responseBuilder = exchange.readResponseHeaders(expectContinue = false)!!

val result = codec.readResponseHeaders(expectContinue)

/**
* Parses bytes of a response header from an HTTP transport.
*
* @param expectContinue true to return null if this is an intermediate response with a "100"
* response code. Otherwise this method never returns null.
*/
@Throws(IOException::class)
fun readResponseHeaders(expectContinue: Boolean): Response.Builder?
//来找这个方法的实现类
找到这两个类都实现了这个方法,我这里计网知识太欠缺了,暂时不能准确说出,我这里贴一些东西说一下吧

Http1ExchangedCodec
Http1ExchangeCodec对HTTP/1.1的分块传输机制进行了支持。
对于Request会通过ChunkedSink完成数据写入,将数据以分块传输格式写入(第一行为16进制的size,第二行为具体的数据)。定长数据通过KnownLengthSink直接写入。
对于Response会通过ChunkedSource完成数据读取,会按照分块传输格式进行读取。
Http2ExchangeCodec
Http2ExchangeCodec 实现了 HTTP/2 中的多路复用,它会构造一个个的 Frame,例如写入时会首先构造一个 Header 帧,在构造 Header 帧时会进行 Hpack 压缩。
Http2ExchangeCodec 对 HTTP/2 的流量控制进行了支持,发送 Data Frame 需要通过 emitFrame 方法,它会阻塞直到流量控制窗口有足够的大小。对于数据会最终写入一个 DATA 帧。
而数据的读取实际上是通过连接建立时创建的 ReaderRunnable 不断调用 nextFrame 读取实现的,根据streamId将数据分发到对应的stream上,然后根据帧类型进行对应的处理。在读取时,每当读取到数据都会向对方发送 WINDOW_UPDATE 帧通知对方增加窗口大小。
总结与反思
真是好漫长的一场旅途啊,这应该算是我第一次读这么多的源码,经验欠缺,借鉴了很多大神和师兄们的文章和资料,也有用到AI,我知道这样一行一行读源码可能不是一个很好的方式,但是我也必须这样去做,我自己的方式,期待后面能改进吧!!!
与大家共勉!


 954
954

 被折叠的 条评论
为什么被折叠?
被折叠的 条评论
为什么被折叠?
 到【灌水乐园】发言


