


背景:
我们现在都在使用大模型修改图片,写代码,问问题,写作业等等。一直有个疑问,他是怎样被训练的呢?今天尝试了下微调参数。
环境:
魔乐社区(https://modelers.cn)注册账号,申请加入体验组织,并申请NPU卡。
详细过程:
//0.假设上述步骤都完成了。
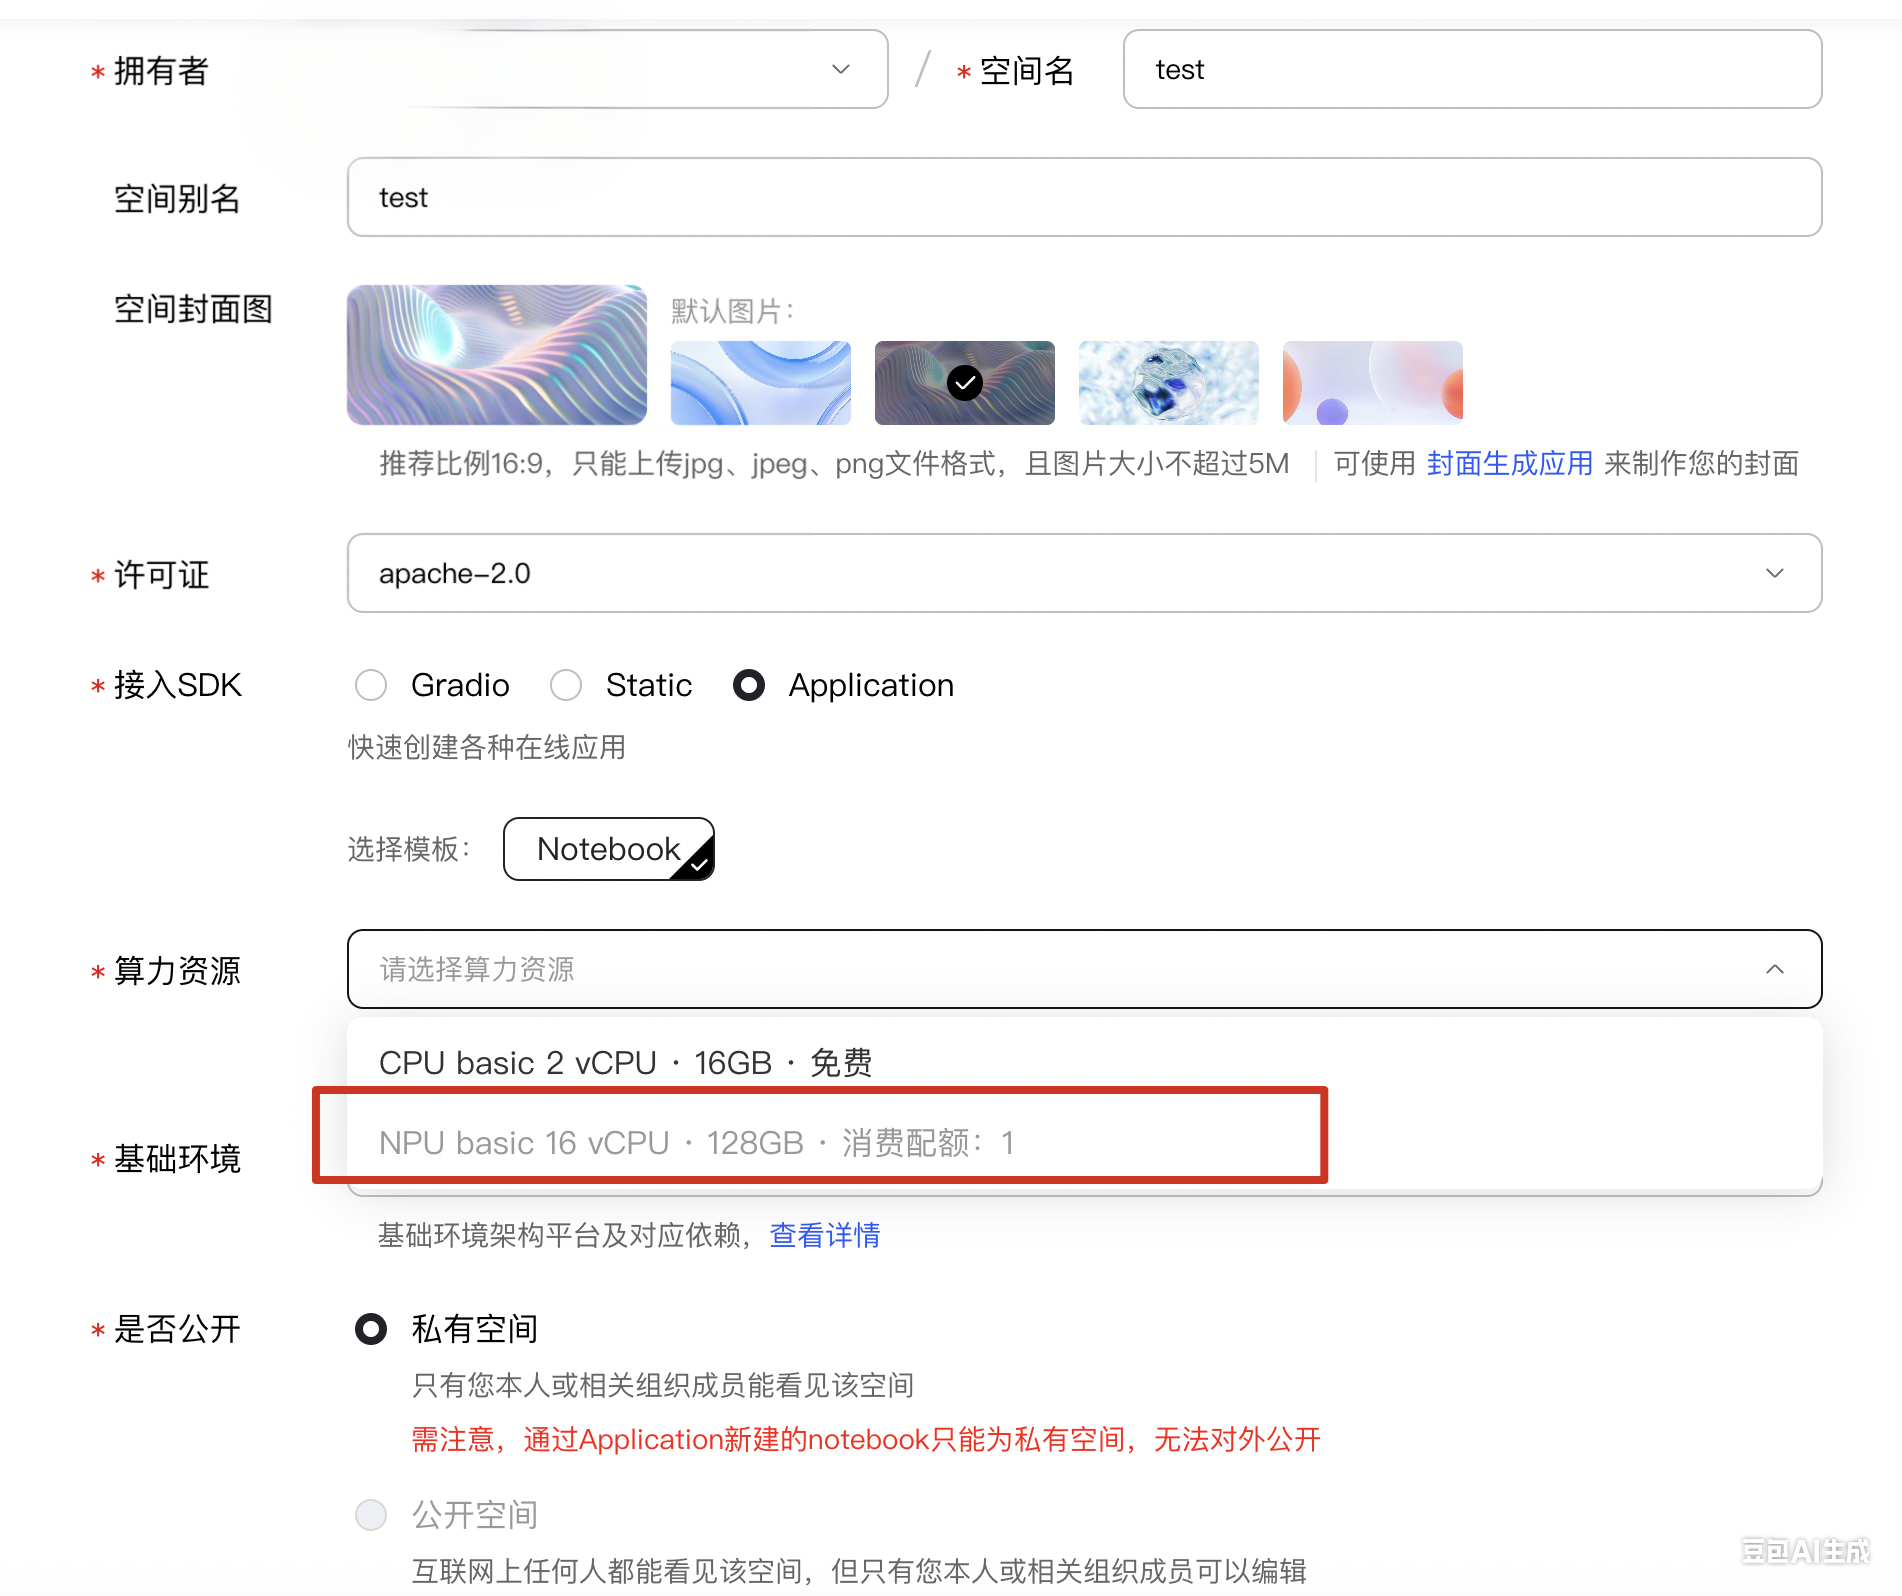
(如果不可选,联系组织。)
A.点击设置,往下找到环境变量,修改token登录密码。

B.登录Jupyter notebook,使用终端更新openmind(随机的版本旧).
- clone openmind源码:
cd ~
git clone https://gitee.com/ascend/openmind.git
- 安装openmind:进入到openmind代码仓根目录,执行
pip install .[pt] -i https://mirrors.aliyun.com/pypi/simple/
3.配置环境变量,在~/.bashrc末尾添加
vi ~/.bashrc
export PATH=/home/openmind/.local/bin:$PATH
source ~/.bashrc
4.检查openmind安装成功。
终端输入:
python
...
>>>import openmind
>>>...
>>>openmind.__version__
>>>1.2.0dev
看到版本号就为成功了。
5.微调:本次微调我们基于Qwen2.5-0.5B进行,采用sft全参微调,微调数据集采用identity数据集,以上模型权重和数据集均可从魔乐社区下载。
1)权重链接:openMind-ecosystem/Qwen2.5-0.5B
这里采用命令行pipeline方式下载模型到openmind,继续接着执行上面的python界面执行:
>>>from openmind import pipeline
>>>pipe = pipeline("text-generation", model="openMind-ecosystem/Qwen2.5-0.5B", framework="pt")
>>>pipe("Give me some advice on how to stay healthy.")
2)数据集链接: AI-Research/identity
cd ~
git clone https://modelers.cn/AI-Research/identity.git
通过如下命令可以将Who are you的回复修改为张三, author变为OpenMind:
sed -i 's/{{name}}/张三/g'  identity/conversations.jsonl
sed -i 's/{{author}}/OpenMind/g'   identity/conversations.jsonl
这样,数据集就准备好了。
3)新建一个test目录,进入该目录,将上述内容保存为sft.yaml
cd ~
mkdir test
cd test
vi sft.yaml
sft.yaml内容:
# model
# model_id: Qwen2.5-7B   # 由于openmind没有内置Qwen2.5-0.5B的模型,本处我们采用model_name_or_path来传入模型路径
model_name_or_path: openMind-ecosystem/Qwen2.5-0.5B


# method
stage: sft
do_train: true
finetuning_type: full
deepspeed: /home/openmind/openmind/examples/deepspeed/ds_z2_config.json    # 此处修改为clone的openmind仓库的地址, 如果是0.5B这种小模型,可以不启用deepspeed,注释掉这一行即可

#由于版本更新,此处应当增加一个template配置,相关信息可以参照文档
template: qwen

# dataset
dataset: /home/openmind/identity/conversations.jsonl   # 传入文件路径
cutoff_len: 1024
max_length: 1024

# output
output_dir: saves/qwen2.5_0.5b_full
logging_steps: 1
save_steps: 20000
overwrite_output_dir: true

# train
per_device_train_batch_size: 2
gradient_accumulation_steps: 2
learning_rate: 1.0e-5
lr_scheduler_type: cosine
warmup_ratio: 0.1
bf16: true
max_steps: 500  # 此处配置微调步数, 可按需配置,本次示例以500步为例
seed: 1234      # 固定随机数种子,使得微调的loss结果可复现

4)然后,在test目录中,通过openmind-cli train sft.yaml启动微调。训练完成后,模型保存在saves目录下。
5)推理:
微调完成后,将chat.yaml文件中的模型路径修改为保存的权重路径,执行openmind-cli chat chat.yaml开始推理。
chat.yaml内容:
model_name_or_path: /home/openmind/test/saves/qwen2.5_0.5b_full2  # 微调后的权重保存路径
template: qwen
backend: "transformers"
或者,直接通过命令行传参,也可以启动chat会话,直接在终端执行如下命令即可进入chat交互界面:
openmind-cli chat --model_name_or_path /home/openmind/test/saves/qwen2.5_0.5b_full --template qwen --backend transformers
可以看到,模型微调后,推理过程中成功将identity变为张三了。

总结:简单的模型微调可以大致了解模型训练的整个流程,知道了模型是如何产生的。至于模型产生的原理和算法,等以后再说吧!下班了。


 1204
1204

 被折叠的 条评论
为什么被折叠?
被折叠的 条评论
为什么被折叠?
 到【灌水乐园】发言


