


 本文解析了Vue CLI项目的文件结构及运作原理,包括main.js、app.vue和router配置等核心文件的作用,帮助初学者理解并高效使用Vue CLI。
前言:此文已经默认配置了node.js开发环境等必要条件,关于vue cli的安装教程这里不多赘述,但是其他博客都没有为vue cli安装之后项目开发后的关键文件,app.vue、main.js、router文件夹做详细的解答,导致部分初学者在安装之后无法熟练的使用,本文就是为了帮助初学者,快速、熟练并且理解的使用vue cli。
vue cli是项目开发的几乎必要的开发工具
1、安装完之后都会有src这个文件夹,文件夹中有以下文件
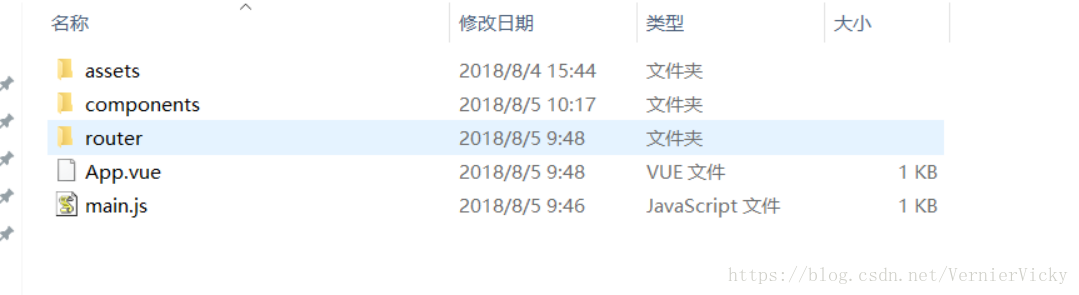
这里主要介绍components文件夹、router文件夹和app.vue以及main.js。
这两个文件夹分别是用来存放组件以及路由文件,以为规范的项目开发一般是通main.js引入router文件中的路由文件,再由路由文件中的路径引导组件。
我们直接看经过我修改之后的代码,更加直观的看到这个项目是如何运作的
main.js
import Vue from 'vue'
import App from './App'
import router from './router'

Vue.config.productionTip = false

/* eslint-disable no-new */
new Vue({
  el: '#app',
  router,
  components: { App },
  template: '<App/>'
})
main.js的作用大致为整合路径创建实例,因为单个组件只是注册了并没有实例化,就像java中创建了类却没有声明对象。
该文件将app.vue引入了进来通过new Vue实例化。可能是因为版本的问题,本人的index.html在src包外,内容如下:
<!DOCTYPE html>
<html>
  <head>
    <meta charset="utf-8">
    <meta name="viewport" content="width=device-width,initial-scale=1.0">
    <title>vueex</title>
  </head>
  <body>
    <div id="app">

    </div>
    <!-- built files will be auto injected -->
  </body>
</html>
这下一目了然了,但是他的main.js的写法比较奇怪:
new Vue({
  el: '#app',
  router,
  components: { App },
  template: '<App/>'
})
他在实例化对象时却用了template标签,如果将这一行注释掉,页面上什么都没有了~,
我们对他进行一些改动main.js改动如下(将template注释):
// The Vue build version to load with the `import` command
// (runtime-only or standalone) has been set in webpack.base.conf with an alias.
import Vue from 'vue'
import App from './App'
import router from './router'

Vue.config.productionTip = false

/* eslint-disable no-new */
new Vue({
  el: '#app',
  router,
  components: { App:App},
/*  template: '<App/>'*/
})
在index.html中改动如下:
<!DOCTYPE html>
<html>
  <head>
    <meta charset="utf-8">
    <meta name="viewport" content="width=device-width,initial-scale=1.0">
    <title>vueex</title>
  </head>
  <body>
    <div id="app">
    	<App></App> /*改动的地方*/
    </div>
    <!-- built files will be auto injected -->
  </body>
</html>
达到的效果是一样的。
总结一下:大致的逻辑是这样的。index.html是我们这个项目开发的主页面,我们localhost:8080端口展示的就是这个文件,main.js绑定到了index.html,就相当于index.html的<script>标签部分,怎么个绑定法还不知道。我们再看router文件夹中的路由配置。
index.js下我稍稍做了改动:
import Vue from 'vue'
import Router from 'vue-router'
import PI from '@/components/PI'
import HelloWorld from '@/components/HelloWorld'

Vue.use(Router)

export default new Router({
  routes: [
    {
      path: '/bar',
      name: 'PI',
      component: PI
    },
    {
      path: '/foo',
      name: 'HelloWorld',
      component: HelloWorld
    }
  ]
})
这里为了能够实现组件件互相调用,所以设置的路由。实现了app.vue调用了component文件夹下的helloworld和PI组件,我们来看看App.vue中的代码:
<template>
  <div id="app">
  <router-link to="/foo">hello</router-link>
  <router-link to="/bar">hi</router-link>
  <router-view/>
  </div>
</template>

<script>
export default {
  name: 'App'
}
</script>

<style>
#app {
  font-family: 'Avenir', Helvetica, Arial, sans-serif;
  -webkit-font-smoothing: antialiased;
  -moz-osx-font-smoothing: grayscale;
  text-align: center;
  color: #2c3e50;
  margin-top: 0px;
  margin-left: 0px;
  width: 100%;
}
</style>
我么通过<router-link to>标签为App.vue组件创造了路由,在通过router文件夹下的index.js去配置路由。最后页面通过8080端口展示的时候,main.js实例化了对象,同时路由也被实例化了。当然你也可以使用一下方式去替换main.js实例化router的方法
import router from '/router/index.js'   /*注意这里的router只是一个形参用来接收index.js中的参数*/
var router = new VueRouter()
最后我们对本文进行最后的总结:
本文理清了整个项目开发的思路,localhost:8080端口展示的是src文件夹 外 的index.html,main.js相当于index.html的<script>标签的部分,绑定的方式未知。在控制台输入npm run dev指令后,自然就调用了main.js。从而main.js开始import各个路由文件和少数组件(一般为父组件),路由文件又配置了组件之间的调动关系实现组件嵌套。(注:这里说父子组件其实不太严格,只是组件嵌套比较类似于这种关系。父子组件个人理解为单个组件文件中存在多个组件,子组件是该文件中的局部组件或者通过import。本文中的子组件全部独立为一个文件通过路由实现调用)
*转载此文请标明作者以及出处


 被折叠的 条评论
为什么被折叠?
被折叠的 条评论
为什么被折叠?
 到【灌水乐园】发言


