


目录
一、项目结构
1,主应用:vue3-vite
2,子应用:vue3-vite
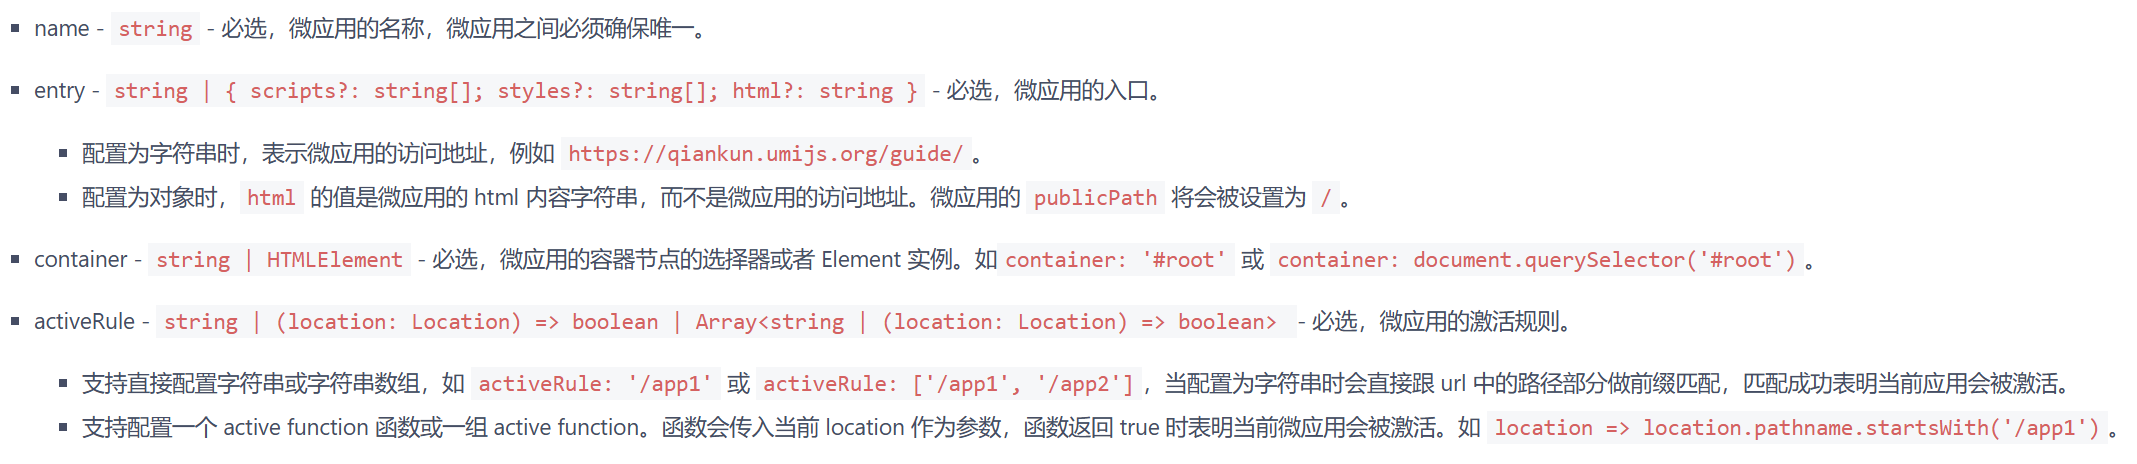
二、配置导入和配置文件
1、主应用下载乾坤包:
npm install qiankun
1) 乾坤配置文件:
文件位置:src > micro > index.ts。可以不在main.ts 里面写,导入即可。
entry如果是开发环境,就写localhost:5173,但如果是生产环境,就必须是 /hr/ ,所以用三元判断来写。
import { registerMicroApps, start } from "qiankun";
import type { ObjectType, RegistrableApp } from "qiankun";
import { getToken } from '@/utils/auth'
import { reactive } from "vue";

import router from "../router";

const appConfig: RegistrableApp<ObjectType>[] = [
  {
    name: 'hr',
    entry: process.env.NODE_ENV === 'production' ? '/hr/' : 'http://localhost:5173/',
    container: '#subapp-container',
    activeRule: '/hr',
    props: { token: getToken() },
  },
];

export function registerQiankunApps () {

  registerMicroApps(appConfig,
    {
      // 挂载前回调
      beforeLoad: [
        app => {
          console.log('before load', app)
        }
      ],
      // 挂载后回调
      beforeMount: [
        app => {
          console.log('before mount', app)
        }
      ],
      // 卸载后回调
      afterUnmount: [
        app => {
          console.log('after unload', app);
        }
      ]
    }
  );

  router.isReady().then(() => {
    // 确保在 start() 调用中正确配置 excludeAssetFilter
    start({
      sandbox: {
        strictStyleIsolation: false
      },
      excludeAssetFilter: (assetUrl) => {
        const excludePatterns = [
          /vue-devtools/,
          /vue-inspector/,
          /@id\/virtual:/,
          /@vite\/client/,
          /src_main_ts__app\.js/,
          /\.hot-update\.js$/
        ];
        return excludePatterns.some(pattern => pattern.test(assetUrl));
      }
    });
    console.log('Qiankun started after router is ready.');
  }).catch((err) => {
    console.error('Router readiness error:', err);
  });
}
讲解一下appConfig:
具体的官网可以直接看 https://qiankun.umijs.org/zh/api#registermicroappsapps-lifecycles
主要是props,这是主 - > 子 数据,子 - > 主 数据的根本,里面可以传数据,传方法。
子利用props的数据得到主给子的数据,子调用props的方法,给主传数据
2)路由:
在你的router/index.ts里面加上子应用的路由,component所对应的组件,是你上面乾坤文件中,container所绑定的#subapp-container的组件。
当然,如果你是后端返回的路由,就不用写了
  {
    path: '/hr',
    name: '人力资源',
    meta: {
      title: '人力资源',
    },
    component: Layout,
  },
3) 绑定id:subapp-container
官网说绑定入口文件,也就是App.vue,但大部分情况App.vue都用<router-view />,看你想要的子应用效果:
如果你是想子应用直接覆盖掉父应用页面,你就在App.vue直接:
  <div id="subapp-container">
      <router-view />
  </div>
如果你是想子应用嵌入到父应用中,如:
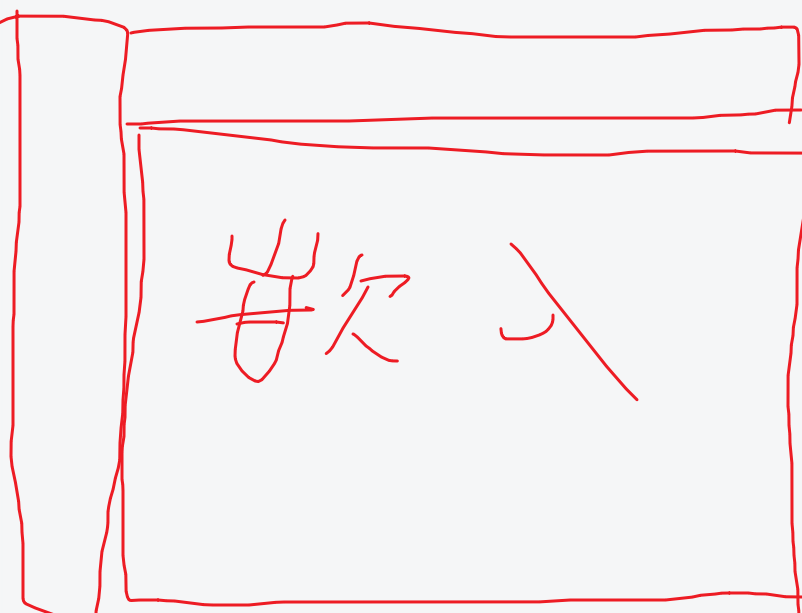
那你就在layout/index.vue里面绑定你的subapp-container,也在这里调用你的qiankun注册微应用的函数。
<template>
  <div :class="classObj" class="app-wrapper" :style="{ '--current-color': theme }">
    <div v-if="device === 'mobile' && sidebar.opened" class="drawer-bg" @click="handleClickOutside"/>
    <sidebar v-if="!sidebar.hide" class="sidebar-container" />
    <div :class="{ hasTagsView: needTagsView, sidebarHide: sidebar.hide }" class="main-container">
      <div :class="{ 'fixed-header': fixedHeader }">
        <navbar @setLayout="setLayout" />
        <tags-view v-if="needTagsView" />
      </div>
      <div id="subapp-container" >
      </div>
      <app-main />
      <settings ref="settingRef" />
    </div>
  </div>
</template>
<script setup>
import { useWindowSize } from '@vueuse/core'
import Sidebar from './components/Sidebar/index.vue'
import { AppMain, Navbar, Settings, TagsView } from './components'
import useAppStore from '@/store/modules/app'
import useSettingsStore from '@/store/modules/settings'
import { onMounted } from 'vue'
import {registerQiankunApps } from '@/micro'

// 这里开始注册微应用
onMounted(() => {
  registerQiankunApps()
})
</script>
2、子应用导入
npm install vite-plugin-qiankun --save-dev
子应用配置文件:
1)main.ts
// import './public-path'
import { createApp, ref, reactive, inject, provide } from 'vue'
import { createPinia } from 'pinia'
import App from './App.vue'
import router from './router'
import {
  renderWithQiankun,
  qiankunWindow,
  type QiankunProps,
} from "vite-plugin-qiankun/dist/helper";
import ElementPlus from 'element-plus';
import 'element-plus/dist/index.css'

let app: null | any = null;

// 注意,我这里以函数形式来写,是为了方便每次主应用进入子应用时,重新渲染
const createNewApp = () => {
  app = createApp(App)
  app.use(createPinia())
  app.use(ElementPlus)
  app.use(router)
  return app
}

let appInstance: ReturnType<typeof createNewApp> | null = null // 用于保存当前应用实例
let routerInstance: any = null // 用于保存路由实例,便于彻底销毁

function render(props: QiankunProps = {}) {
  const { container } = props;
  appInstance = createNewApp();

  const targetContainer = container ? container.querySelector("#app") : document.getElementById("app");
  if (targetContainer) {
    appInstance.mount(targetContainer);
  }
}

function initApp() {
  if (!qiankunWindow.__POWERED_BY_QIANKUN__) {
    console.log("%c 独立渲染", "color: red; font-size: 20px;");
    render();
    return;
  }
  renderWithQiankun({

    async mount(props) {
      await render(props);
      console.log("%c qiankun 渲染", "color: red; font-size: 20px;");
    },
    bootstrap() {
      console.log("bootstrap");
    },
    async unmount(props) {
      console.log("unmount");
      // 在卸载时,彻底销毁应用实例和内部状态
      if (appInstance) {
        appInstance.unmount(); // 卸载应用
        appInstance = null;
      }
      // 清理路由状态
      if (routerInstance) {
        routerInstance = null;
      }
      // 强制清理挂载点内部的 HTML
      const container = props.container ? props.container.querySelector("#app") : document.getElementById("app");
      if (container) {
        container.innerHTML = '';
      }
      app.unmount();
      app._container = "";
      app = null;
    },
    update(props) {
      console.log("update");
    },
  });
}

initApp();
2)在 src 目录新增 public-path.js,main里面导入,这是为了防止子应用的静态资源404,当然,这是子应用是webpack项目的写法。
if (window.__POWERED_BY_QIANKUN__) {
  __webpack_public_path__ = window.__INJECTED_PUBLIC_PATH_BY_QIANKUN__;
}
但是我这个vite的子应用,需要在vite.config.ts中:
设置serve的origin就行了。
3)vite.config
import { fileURLToPath, URL } from 'node:url'
import { defineConfig, loadEnv } from 'vite'
import vue from '@vitejs/plugin-vue'
import vueDevTools from 'vite-plugin-vue-devtools'
import qiankun from "vite-plugin-qiankun";
import { viteMockServe } from 'vite-plugin-mock';

export default defineConfig(({ mode, command }) => {
  const env = loadEnv(mode, process.cwd())

  return {
    plugins: [
      vue(),
      qiankun('graduation', {
        useDevMode: true
      }),
      // viteMockServe({
      //   mockPath: "mock",
      //   enabled: command === "serve",
      // }),
    ],
    base: '/graduation/',
    server: {
      port: 5175,
      cors: true,
      origin : 'http://localhost:5175',
      headers: {
        'Access-Control-Allow-Origin': '*',
        'Access-Control-Allow-Methods': 'GET, POST, PUT, DELETE, PATCH, OPTIONS',
        'Access-Control-Allow-Headers': 'X-Requested-With, content-type, Authorization'
      },
      proxy: {
        '/dev-api': {
          target: 'http://172.16.13.11:8080',
          changeOrigin: true,
          rewrite: (p) => p.replace(/^\/dev-api/, '')
        }
      }
    },
    build: {
      assetsDir: 'static',
      rollupOptions: {
        output: {
        }
      }
    },
    resolve: {
      alias: {
        '@': fileURLToPath(new URL('./src', import.meta.url))
      },
    },
  }
})
注意,base与主应用的entry要一致,我这里子应用的路由是hash,只需一致就行了,如果你的是history,设置 history: createWebHistory('/子应用/')。history更方便于主子应用的通信的,使用route就可以实现主子跳转了。
好了,到这里,就已经可以了,如果你只想试一下qiankun,下面这个适合你,很简单就可以实现微前端:
https://blog.youkuaiyun.com/m0_61747600/article/details/148068342
三、主 -> 子 数据、方法
我这里时模仿了这位的文章里面的方法,直接看他的就行:
[微前端][vue3 + vite + qiankun] 使用详解
大概就是主应用props传数据,子应用在mount用全局变量接收
四、部署
我这里是主,子应用都在同一个服务器上,在主应用的dist文件下,新建文件夹用于存放子应用:随后在child/hr/中,存放子应用的dist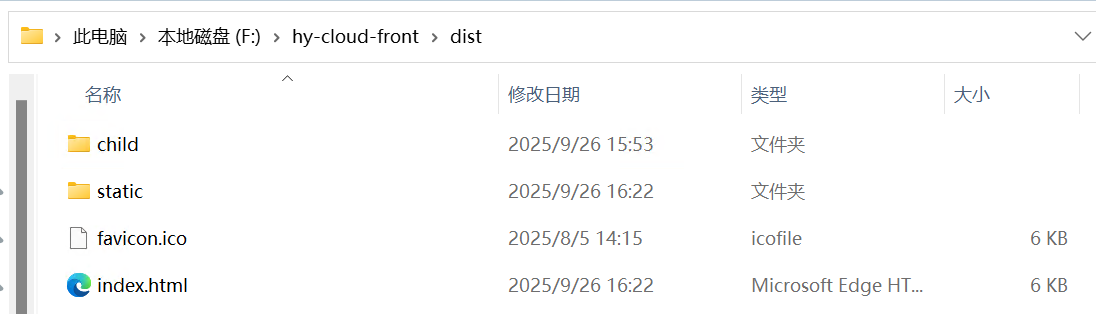
修改nginx的配置文件:
        location  /hr {
           alias 这里是你存放子应用的dist的文件地址;
           index index.html index.htm;
           try_files $uri $uri/ /index.html;
        }
示例:
        location / {
            root   F:\hy-cloud-front\dist;
            try_files $uri $uri/ /index.html;
            index  index.html index.htm;
        }

        location  /hr {
           alias F:\hy-cloud-front\dist\child\hr\dist;
           index index.html index.htm;
           try_files $uri $uri/ /index.html;
        }
注意前面qiankun的entry和子应用在生产环境的base,在生产环境下,就不能是localhost了。
最后,在nginx目录下:
nginx -s reload这样就部署好了
注意,部署时,子应用在vite.config设置的base与entry一致。
这样你直接进入 你的 http//ip:port/ 就是你的主应用,直接进入你的http//ip:port/hr 就是你的子应用。这样,主、子就分别单独独立运行了。
当然,你也可以另起一个port来单独运行你的子应用,设置如下:
server {
    listen       81;
    server_name  172.16.13.11;


    # 这样子 你 http://ip:port/ 进来
    location / {
        alias F:/hy-cloud-front/dist/child/hr/dist/;
        try_files $uri $uri/ /index.html;
        index  index.html index.htm;
    }

    # 这样子 就算你 http://ip:port/hr 也一样能进来
    location /hr {
        alias F:/hy-cloud-front/dist/child/hr/dist/;
        try_files $uri $uri/ /index.html;
        index  index.html index.htm;
    }

    location /dev-api/ {
        proxy_set_header Host $http_host;
        proxy_set_header X-Real-IP $remote_addr;
        proxy_set_header REMOTE-HOST $remote_addr;
        proxy_set_header X-Forwarded-For $proxy_add_x_forwarded_for;
        proxy_pass http://backend/;
    }

    # 避免actuator暴露
    if ($uri ~ "/actuator") {
        return 403;
    }

    error_page   500 502 503 504  /50x.html;
    location = /50x.html {
        root   html;
    }
}


 1501
1501

 被折叠的 条评论
为什么被折叠?
被折叠的 条评论
为什么被折叠?
 到【灌水乐园】发言


