


 本文详细介绍了SpringSecurity权限框架的使用方法,从环境搭建到权限控制的实现,包括配置依赖、自定义登录页、实现角色访问控制、自定义访问拒绝处理、记住我功能等关键步骤。
spring security 权限框架的使用
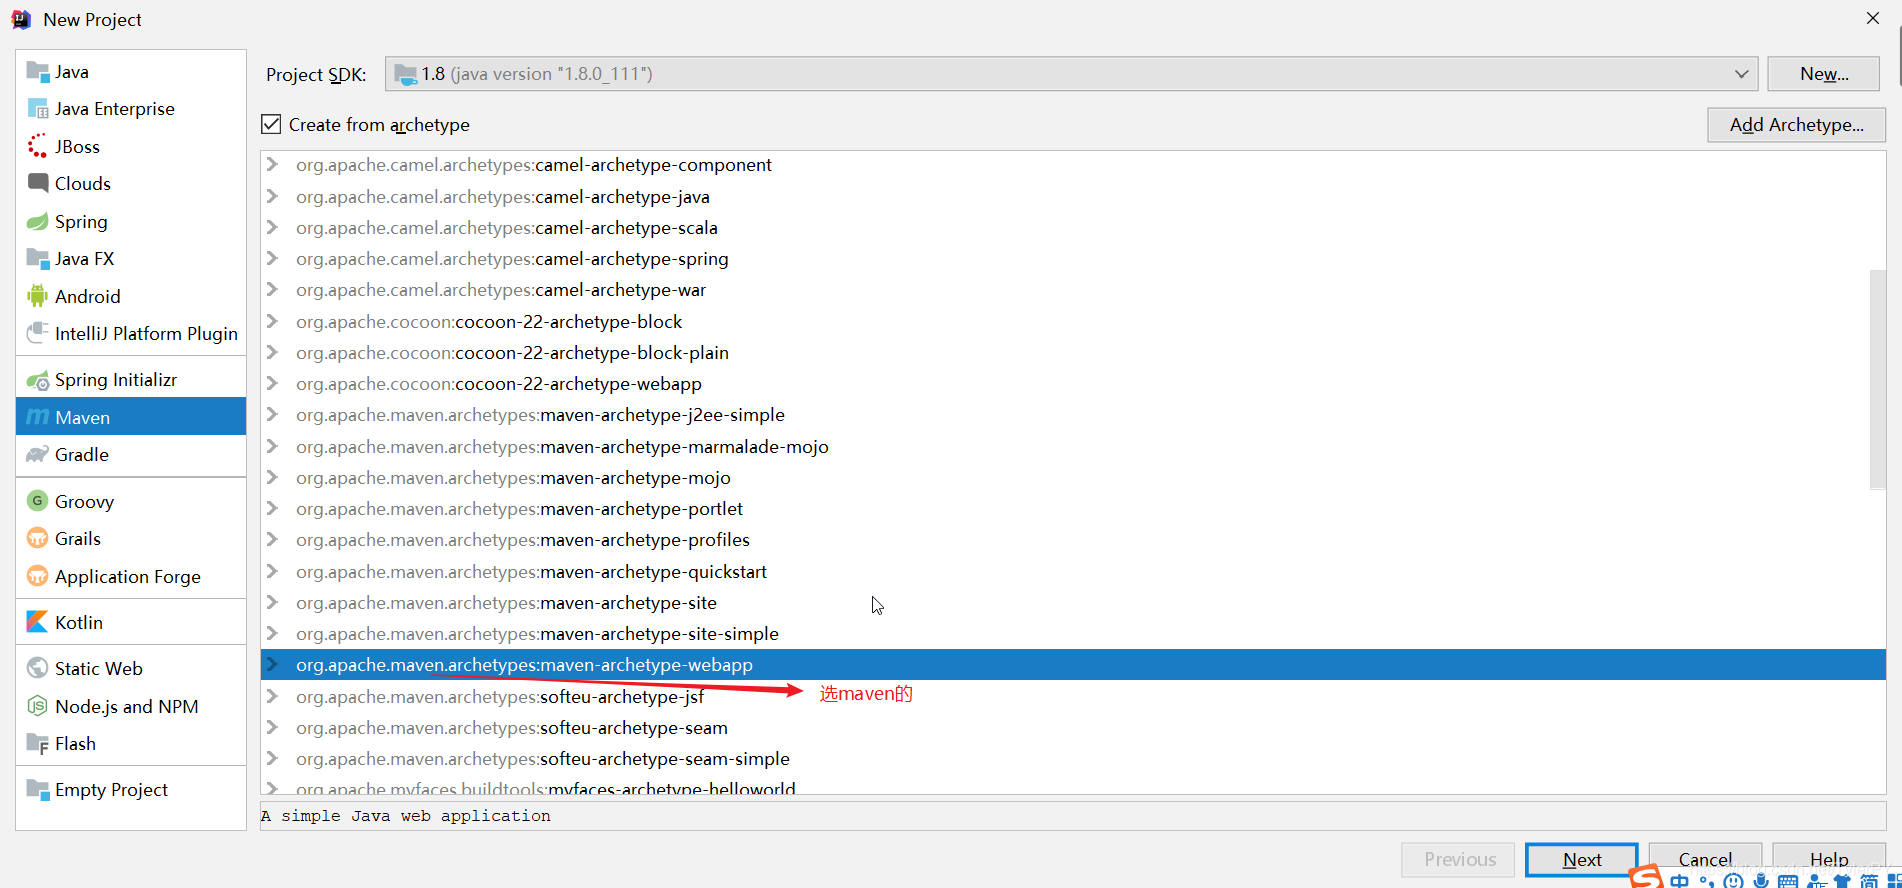
1. 环境搭建
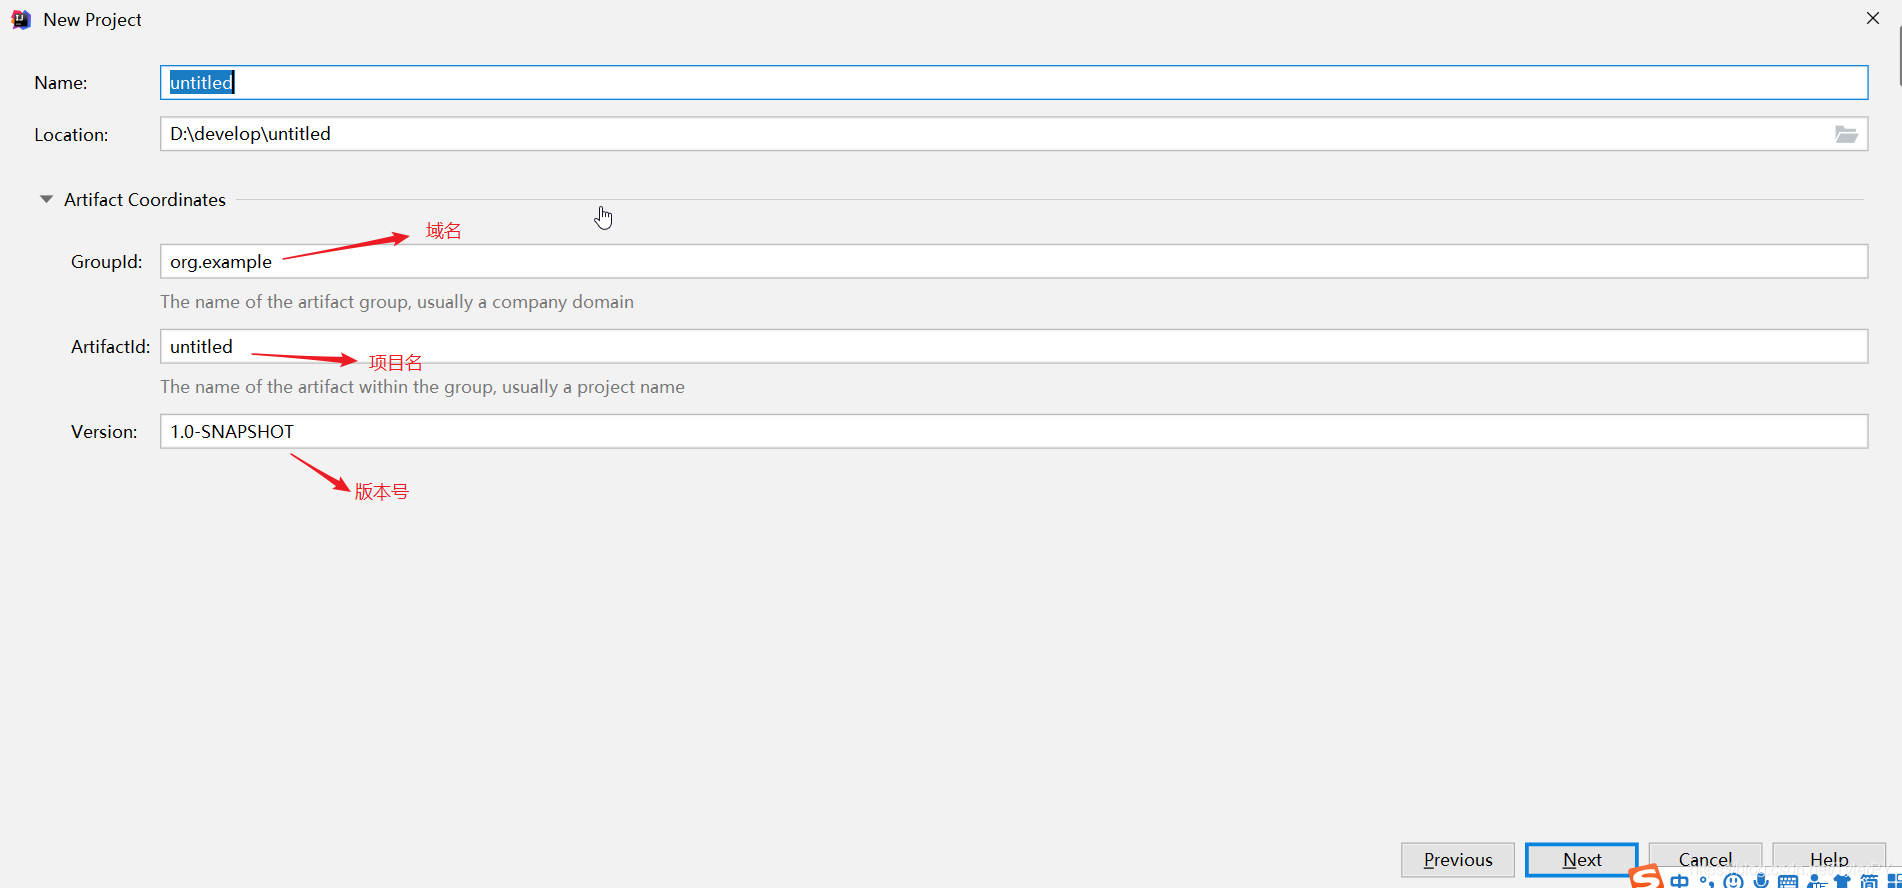
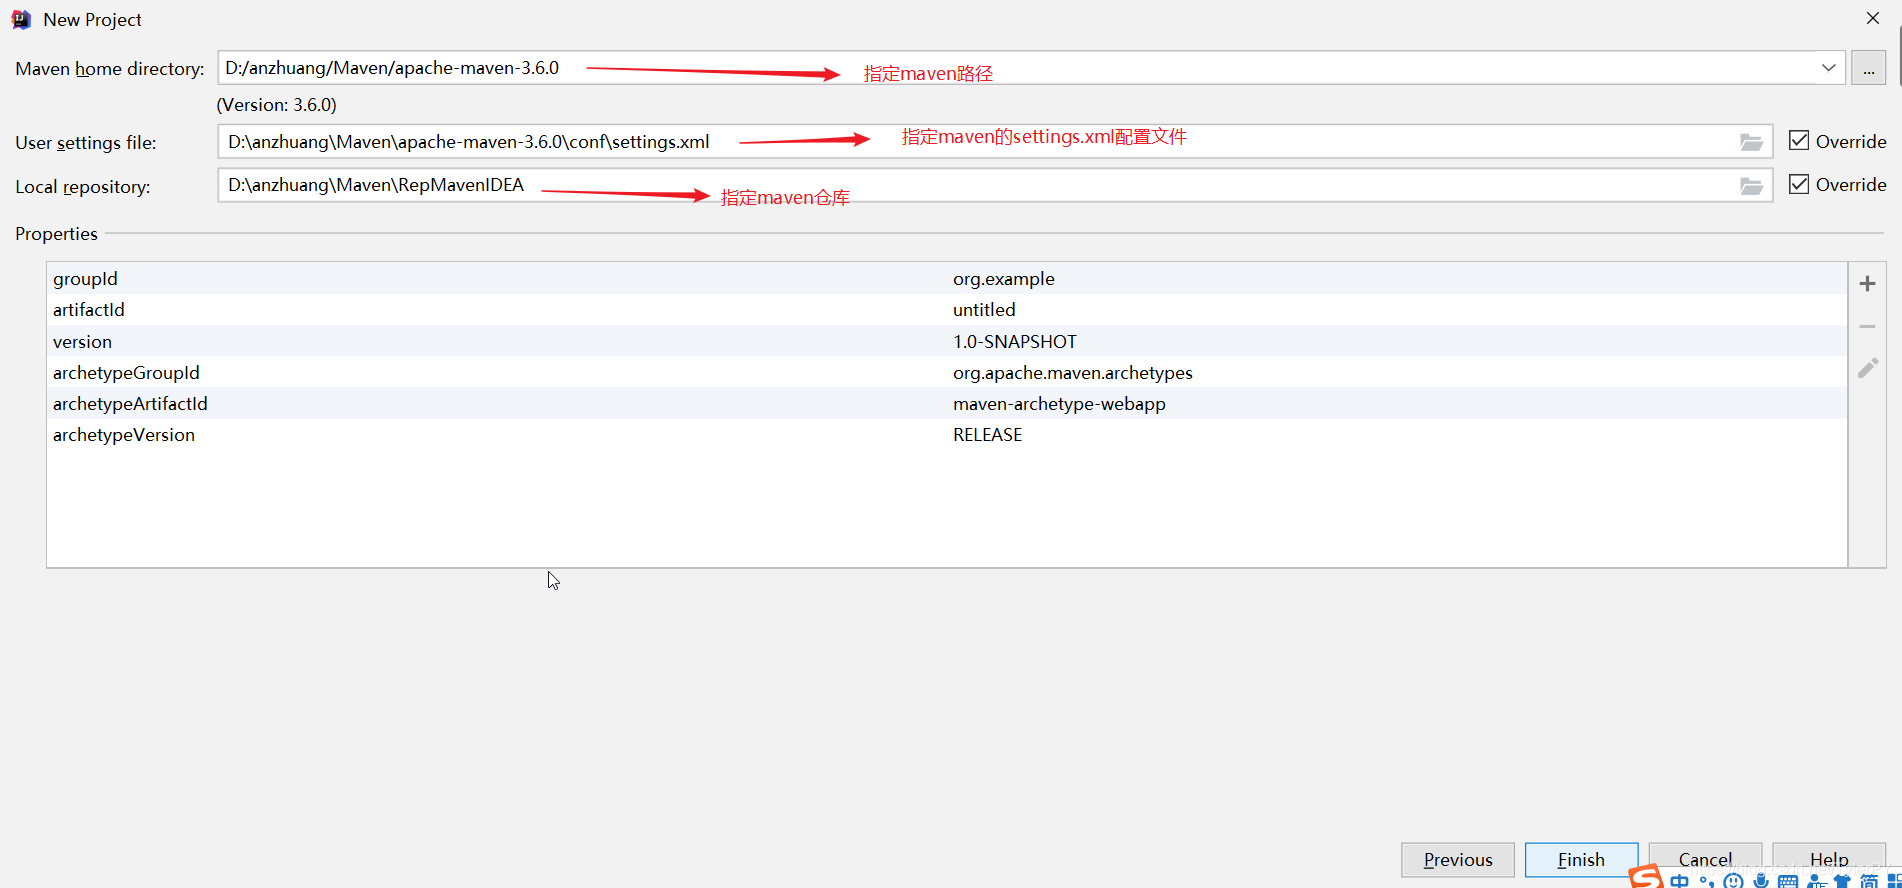
创建maven webapp工程。
pom文件增加依赖
<?xml version="1.0" encoding="UTF-8"?>

<project xmlns="http://maven.apache.org/POM/4.0.0" xmlns:xsi="http://www.w3.org/2001/XMLSchema-instance"
  xsi:schemaLocation="http://maven.apache.org/POM/4.0.0 http://maven.apache.org/xsd/maven-4.0.0.xsd">
  <modelVersion>4.0.0</modelVersion>

  <groupId>com.atguigu.springsecurity</groupId>
  <artifactId>spring-security-helloworld</artifactId>
  <version>1.0-SNAPSHOT</version>
  <packaging>war</packaging>

  <name>spring-security-helloworld Maven Webapp</name>
  <!-- FIXME change it to the project's website -->
  <url>http://www.example.com</url>

  <properties>
    <project.build.sourceEncoding>UTF-8</project.build.sourceEncoding>
    <maven.compiler.source>1.7</maven.compiler.source>
    <maven.compiler.target>1.7</maven.compiler.target>
  </properties>

  <dependencies>
    <dependency>
      <groupId>org.springframework</groupId>
      <artifactId>spring-webmvc</artifactId>
      <version>4.3.20.RELEASE</version>
    </dependency>
    <dependency>
      <groupId>javax.servlet.jsp</groupId>
      <artifactId>jsp-api</artifactId>
      <version>2.2</version>
      <scope>provided</scope>
    </dependency>
    <dependency>
      <groupId>javax.servlet</groupId>
      <artifactId>servlet-api</artifactId>
      <version>2.5</version>
      <scope>provided</scope>
    </dependency>
    <dependency>
      <groupId>javax.servlet</groupId>
      <artifactId>jstl</artifactId>
      <version>1.2</version>
    </dependency>

    <dependency>
      <groupId>org.springframework.security</groupId>
      <artifactId>spring-security-web</artifactId>
      <version>4.2.10.RELEASE</version>
    </dependency>
    <dependency>
      <groupId>org.springframework.security</groupId>
      <artifactId>spring-security-config</artifactId>
      <version>4.2.10.RELEASE</version>
    </dependency>
    <!-- 标签库 -->
    <dependency>
      <groupId>org.springframework.security</groupId>
      <artifactId>spring-security-taglibs</artifactId>
      <version>4.2.10.RELEASE</version>
    </dependency>
  </dependencies>


</project>
web.xml配置
<?xml version="1.0" encoding="UTF-8"?>
<web-app xmlns:xsi="http://www.w3.org/2001/XMLSchema-instance" xmlns="http://java.sun.com/xml/ns/javaee" xsi:schemaLocation="http://java.sun.com/xml/ns/javaee http://java.sun.com/xml/ns/javaee/web-app_2_5.xsd" version="2.5">
  <display-name>spring-security-01</display-name>
  <welcome-file-list>
    <welcome-file>index.jsp</welcome-file>
  </welcome-file-list>

  <!-- The front controller of this Spring Web application, responsible for handling all application requests -->
	<servlet>
		<servlet-name>springDispatcherServlet</servlet-name>
		<servlet-class>org.springframework.web.servlet.DispatcherServlet</servlet-class>
		<init-param>
			<param-name>contextConfigLocation</param-name>
			<param-value>classpath:spring.xml</param-value>
		</init-param>
		<load-on-startup>1</load-on-startup>
	</servlet>

	<!-- Map all requests to the DispatcherServlet for handling -->
	<servlet-mapping>
		<servlet-name>springDispatcherServlet</servlet-name>
		<url-pattern>/</url-pattern>
	</servlet-mapping>


</web-app>
spring配置:spring.xml
建议手写,复制会出错。
<?xml version="1.0" encoding="UTF-8"?>
<beans xmlns="http://www.springframework.org/schema/beans"
       xmlns:xsi="http://www.w3.org/2001/XMLSchema-instance"
       xmlns:context="http://www.springframework.org/schema/context"
       xmlns:mvc="http://www.springframework.org/schema/mvc"
       xsi:schemaLocation="http://www.springframework.org/schema/mvc http://www.springframework.org/schema/mvc/spring-mvc-4.3.xsd
		http://www.springframework.org/schema/beans http://www.springframework.org/schema/beans/spring-beans.xsd
		http://www.springframework.org/schema/context http://www.springframework.org/schema/context/spring-context-4.3.xsd">

    <context:component-scan base-package="com.atguigu.security"></context:component-scan>

    <bean class="org.springframework.web.servlet.view.InternalResourceViewResolver">
        <property name="prefix" value="/WEB-INF/views/"/>
        <property name="suffix" value=".jsp"/>
    </bean>

    <mvc:default-servlet-handler/>
    <mvc:annotation-driven></mvc:annotation-driven>

</beans>
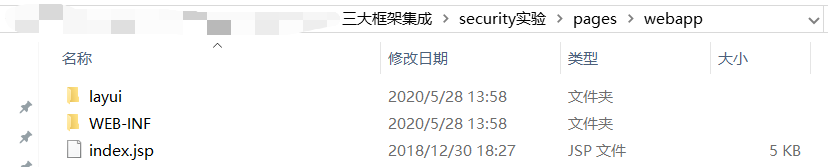
导入资源
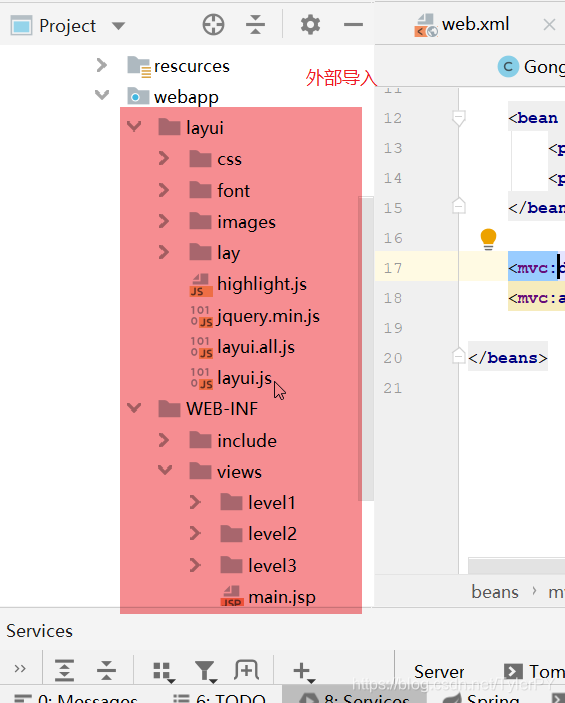
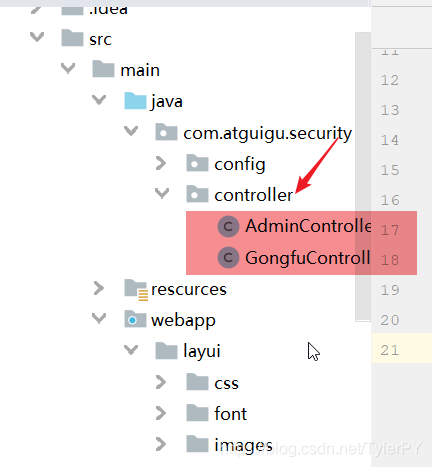
导入controller
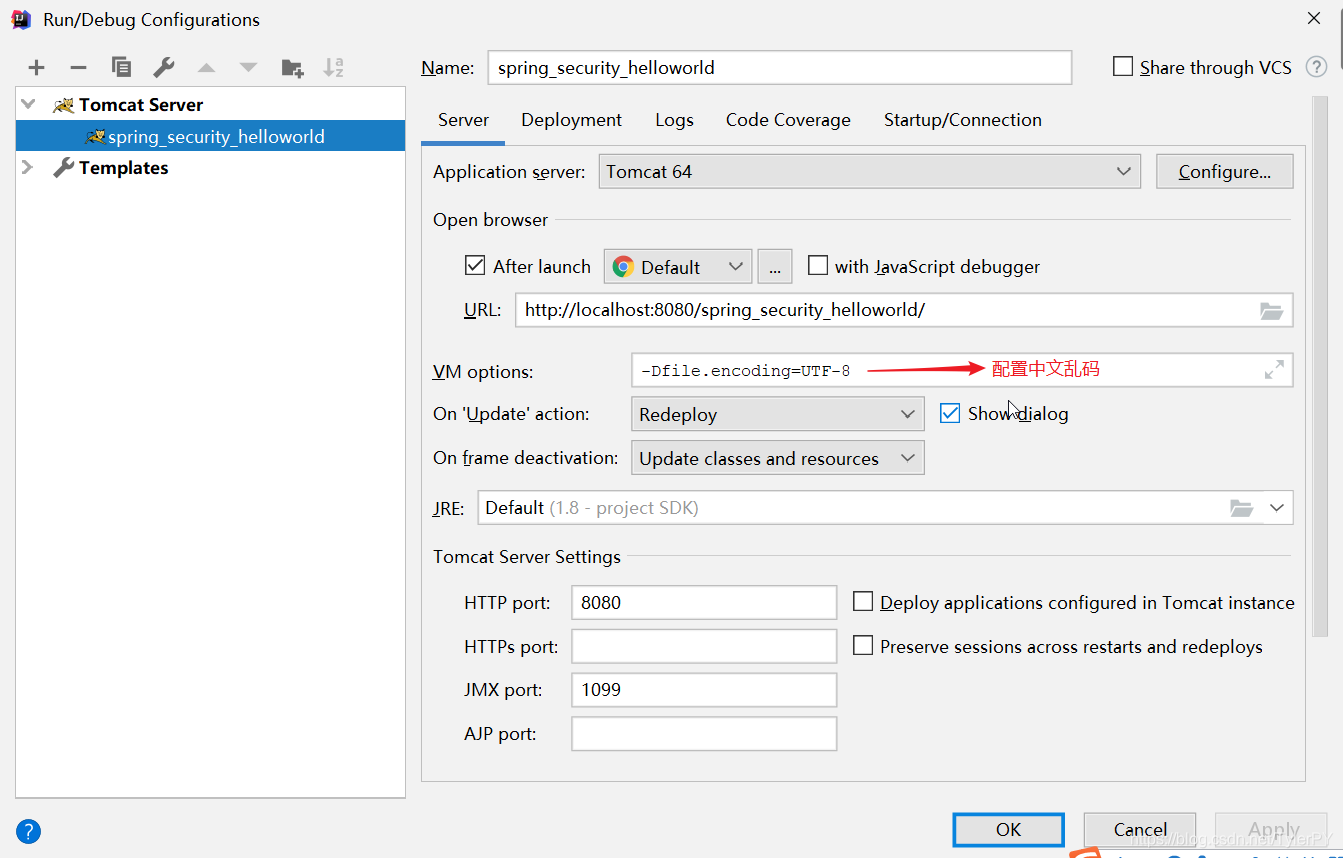
tomcat配置:
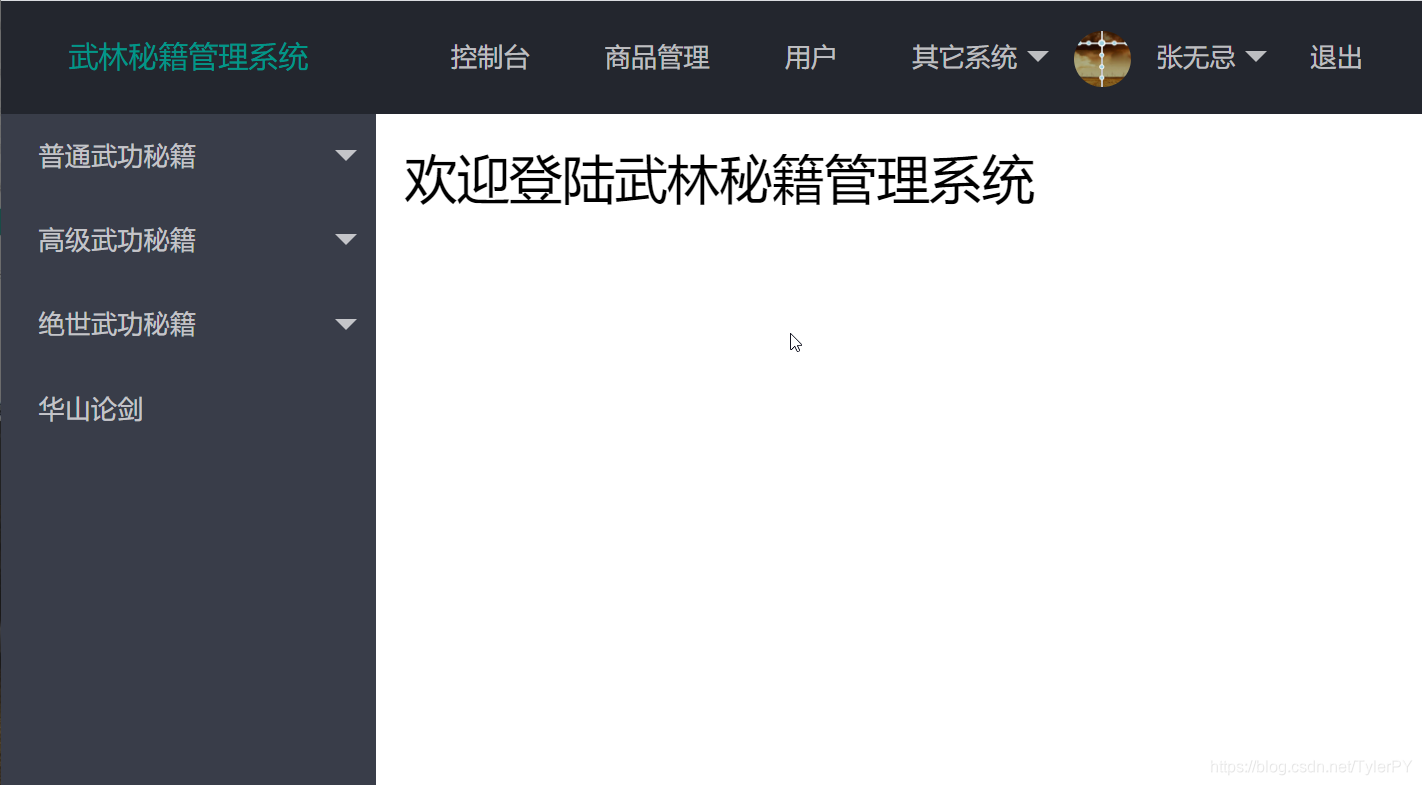
启动登录页面

直接就能登录,这样安全性很低,所有会用权限框架控制权限,增强了安全性。
引入SpringSecurity框架
2.1 添加security-pom依赖
上面的pom文件中已有
<dependency>
<groupId>org.springframework.security</groupId>
<artifactId>spring-security-web</artifactId>
<version>4.2.10.RELEASE</version>
</dependency>
<dependency>
<groupId>org.springframework.security</groupId>
<artifactId>spring-security-config</artifactId>
<version>4.2.10.RELEASE</version>
</dependency>
<!-- 标签库 -->
<dependency>
<groupId>org.springframework.security</groupId>
<artifactId>spring-security-taglibs</artifactId>
<version>4.2.10.RELEASE</version>
</dependency>
2.2 web.xml中添加SpringSecurity的Filter进行安全控制
<!--权限框架入口:用于系统的权限控制-->
<filter>
		<filter-name>springSecurityFilterChain</filter-name>
		<filter-class>org.springframework.web.filter.DelegatingFilterProxy</filter-class>
</filter>
<filter-mapping>
		<filter-name>springSecurityFilterChain</filter-name>
		<url-pattern>/*</url-pattern>
</filter-mapping>
2.3 加入SpringSecurity配置类
@Configuration  //用于声明为配置类,相当于.xml文件
@EnableWebSecurity
public class AppWebSecurityConfig extends WebSecurityConfigurerAdapter {
}
2.4 启动测试效果
所有资源访问受限(包括静态资源)
需要一个默认的登录页面(框架自带的)
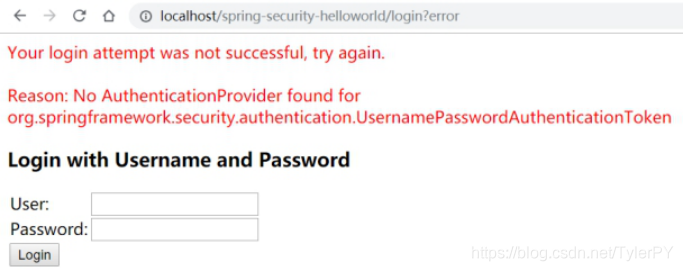
账号密码错误会有提示
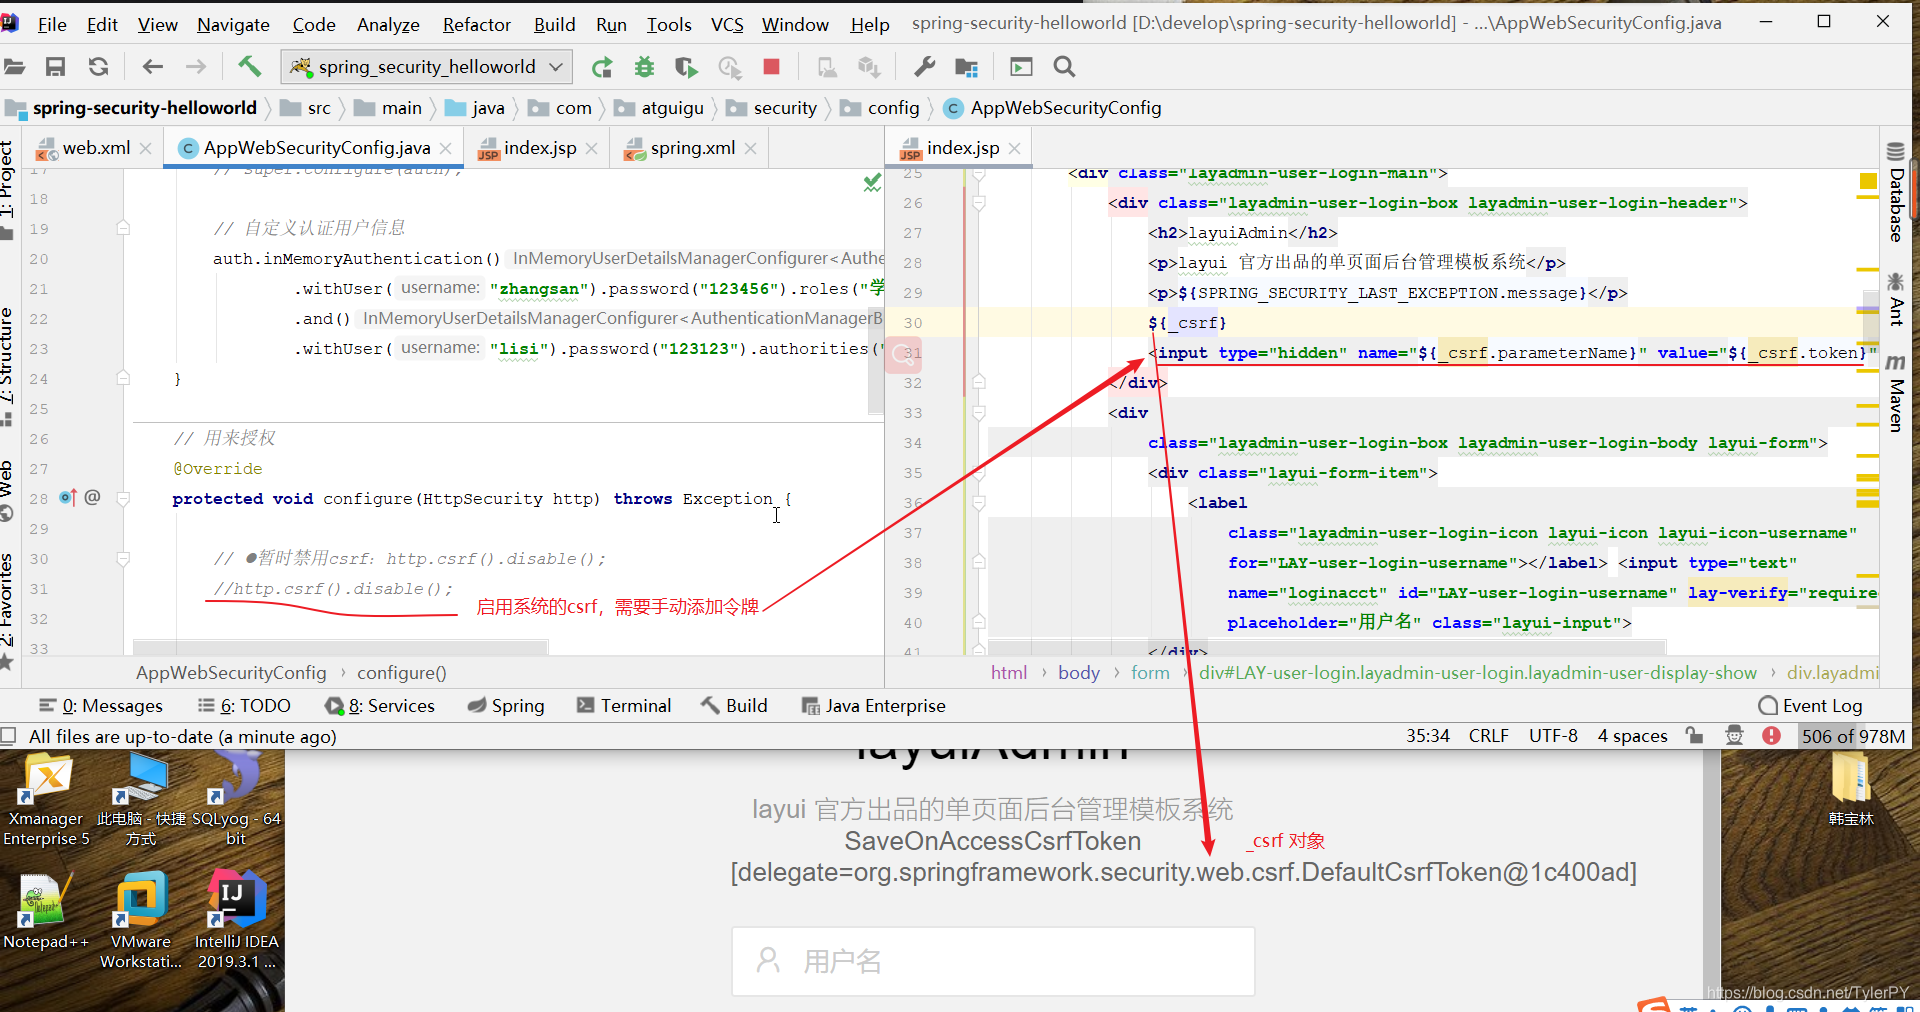
查看登录页面的源码,发现有个hidden-input;name="_csrf" 这是SpringSecurity帮我们防止“跨站请求伪造”攻击;还可以防止表单重复提交。
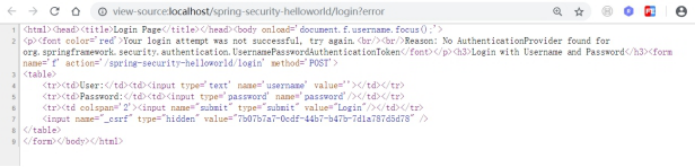
http://localhost:8080/spring-security-helloworld/login?error
配置类(AppWebSecurityConfig extends WebSecurityConfigurerAdapter)
重写configure(HttpSecurity http)方法
package com.atguigu.security.config;

import org.springframework.context.annotation.Configuration;
import org.springframework.security.config.annotation.web.builders.HttpSecurity;
import org.springframework.security.config.annotation.web.configuration.EnableWebSecurity;
import org.springframework.security.config.annotation.web.configuration.WebSecurityConfigurerAdapter;

@Configuration // 用于声明为配置类
@EnableWebSecurity // 启用权限框架
public class AppWebSecurityConfig extends WebSecurityConfigurerAdapter {

    // 用来授权
    @Override
    protected void configure(HttpSecurity http) throws Exception {
       // 权限框架默认权限控制,不允许访问任何资源 ,跳转默认登录页
        // super.configure(http);
    }
}
SpringSecurity-实验
1. 授权首页和静态资源
package com.atguigu.security.config;

import org.springframework.context.annotation.Configuration;
import org.springframework.security.config.annotation.web.builders.HttpSecurity;
import org.springframework.security.config.annotation.web.configuration.EnableWebSecurity;
import org.springframework.security.config.annotation.web.configuration.WebSecurityConfigurerAdapter;

@Configuration // 用于声明为配置类
@EnableWebSecurity // 启用权限框架
public class AppWebSecurityConfig extends WebSecurityConfigurerAdapter {

    // 用来授权
    @Override
    protected void configure(HttpSecurity http) throws Exception {
       // 权限框架默认权限控制,不允许访问任何资源 ,跳转默认登录页
        // super.configure(http);

        // 3.1授权首页和静态资源
        // ant路径风格, 用于匹配路径
        // ? 匹配一个字符
        // * 匹配当前资源
        // ** 匹配任意路径资源
        http.authorizeRequests()
                // 将匹配到的资源进行放行
                .antMatchers("/index.jsp","/layui/**").permitAll()
                //将其他没有匹配上的资源进行认证,才能访问
                .anyRequest().authenticated();
    }
}
2 .默认及自定义登录页
package com.atguigu.security.config;
import org.springframework.context.annotation.Configuration;
import org.springframework.security.config.annotation.web.builders.HttpSecurity;
import org.springframework.security.config.annotation.web.configuration.EnableWebSecurity;
import org.springframework.security.config.annotation.web.configuration.WebSecurityConfigurerAdapter;
@Configuration // 用于声明为配置类
@EnableWebSecurity // 启用权限框架
public class AppWebSecurityConfig extends WebSecurityConfigurerAdapter {
// 3.2实验二:默认及自定义登录页
// http.formLogin(); // 默认用户名和密码参数:username和password
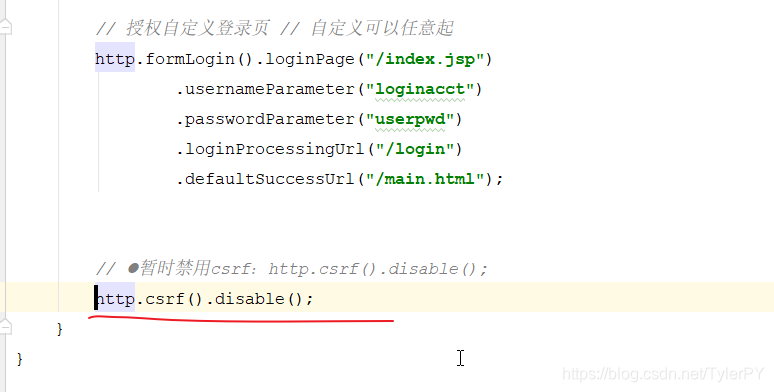
// 授权自定义登录页 // 自定义可以任意起
http.formLogin().loginPage("/index.jsp")
.usernameParameter("loginacct")
.passwordParameter("userpwd")
.loginProcessingUrl("/login")
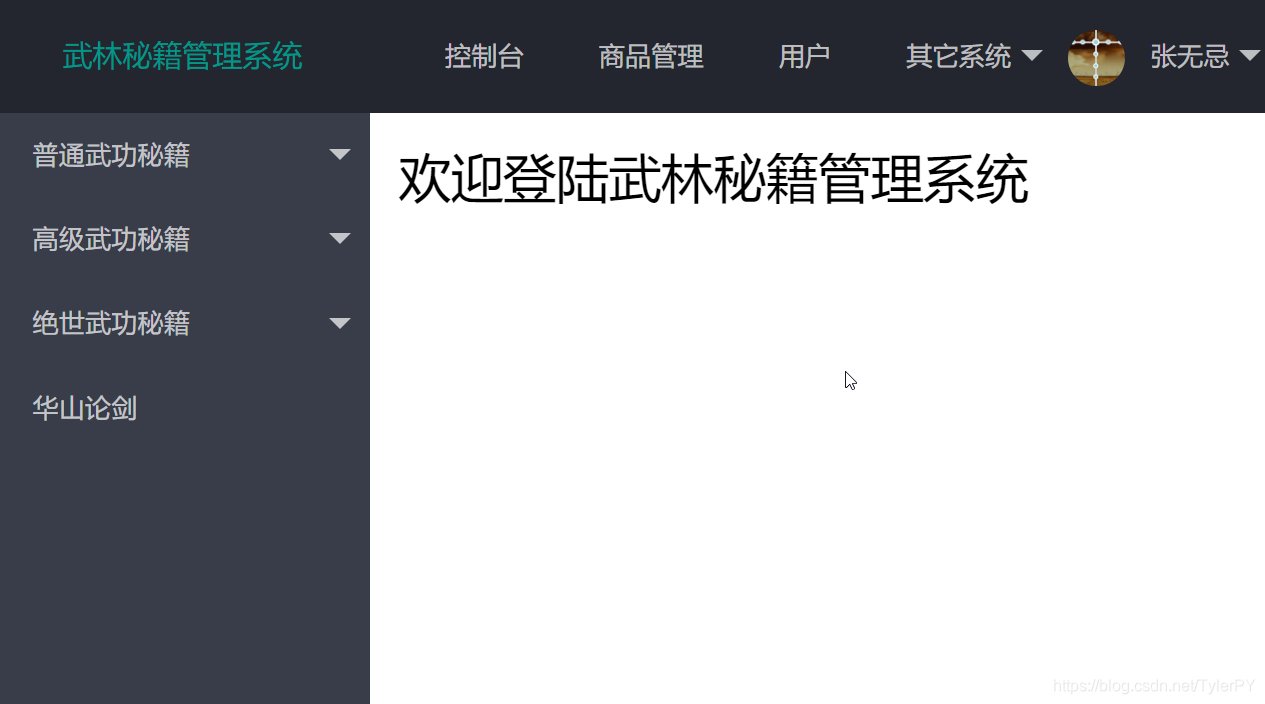
.defaultSuccessUrl("/main.html");
}
}
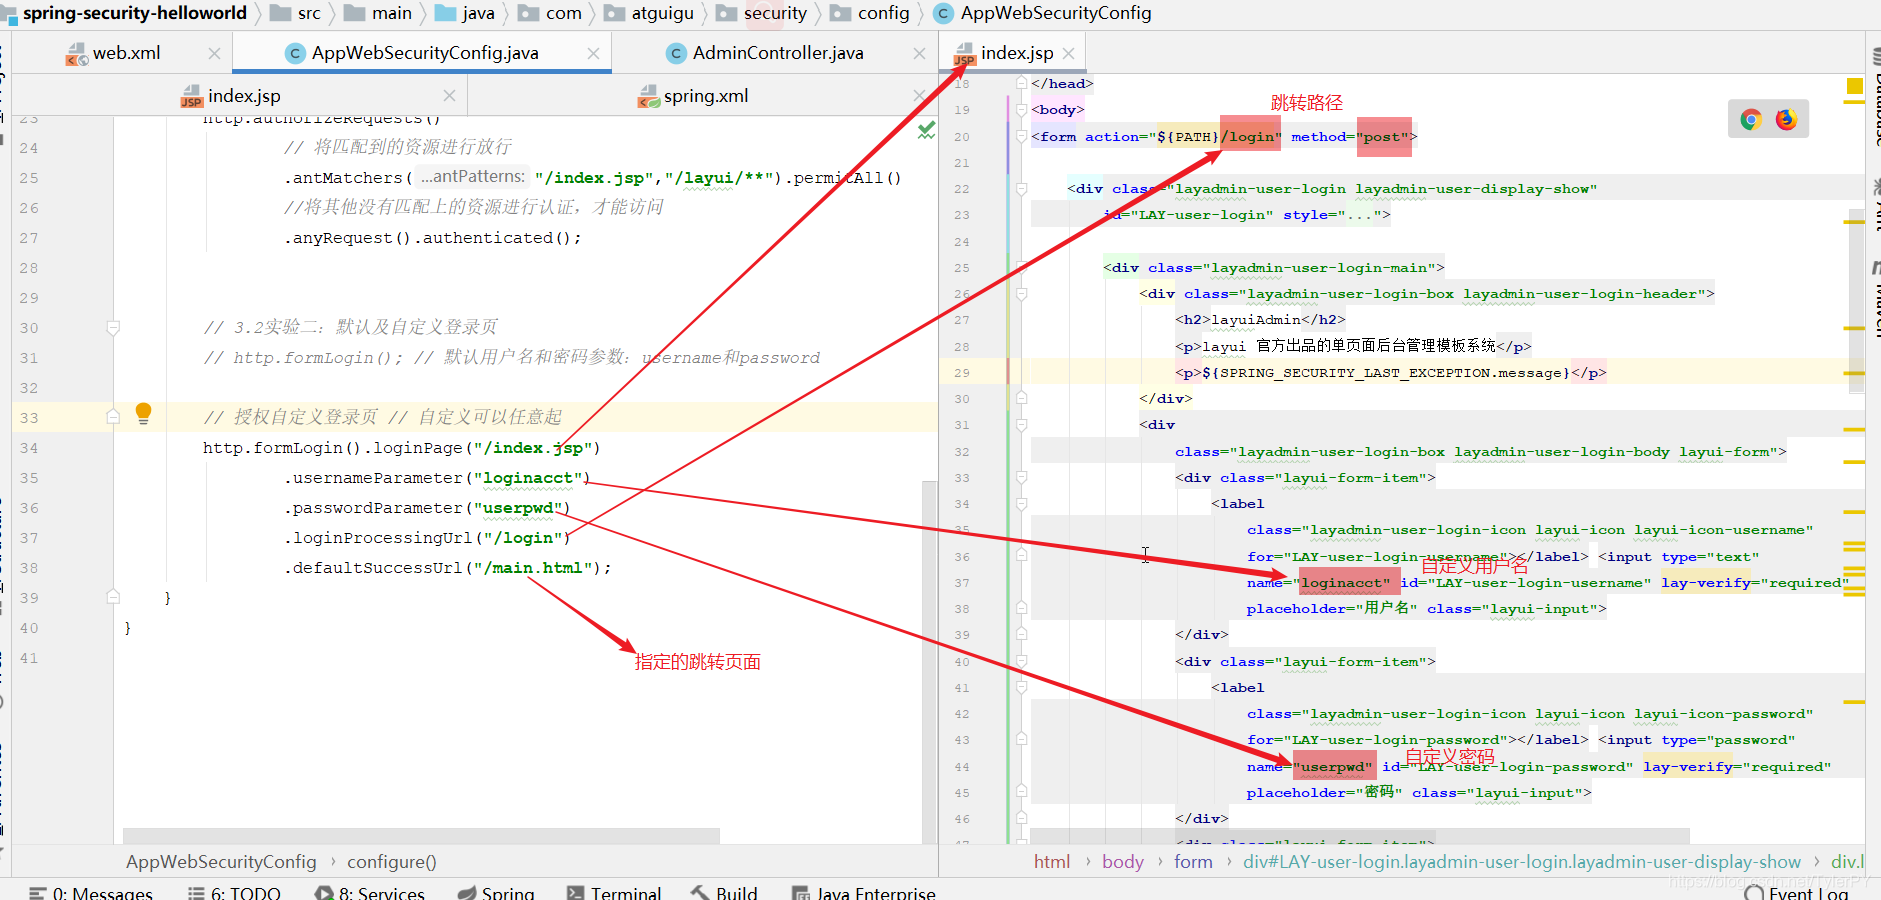
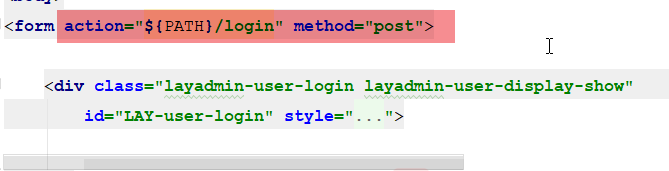
3. 自定义表单登录逻辑分析
表单提交地址:${PATH }/index.jsp
表单提交请求方式:post
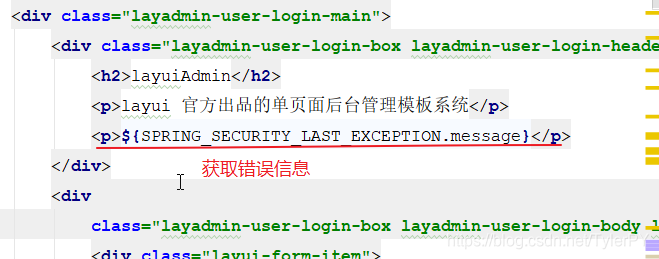
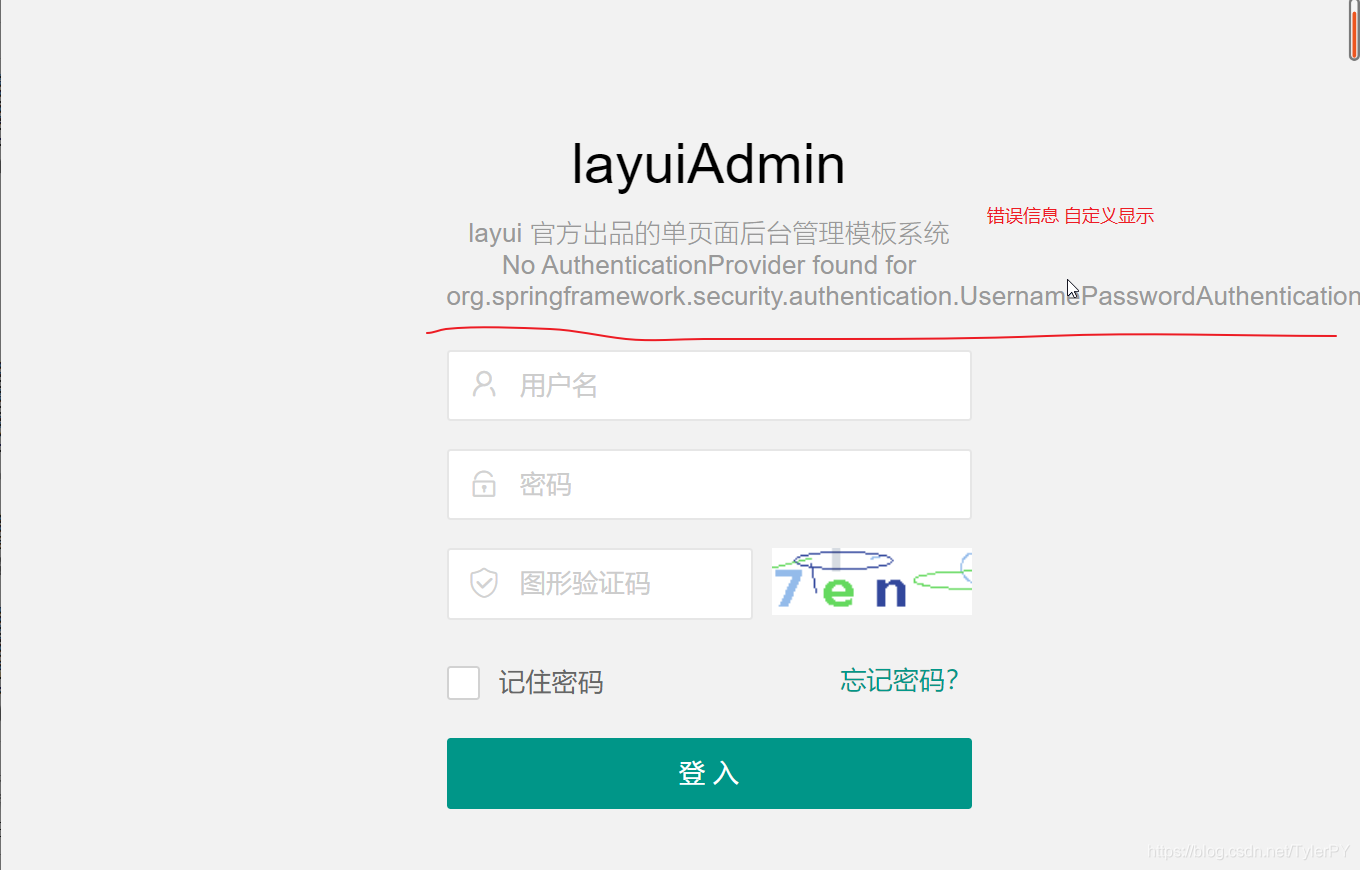
表单提交请求失败,提取错误消息:
${SPRING_SECURITY_LAST_EXCEPTION.message}
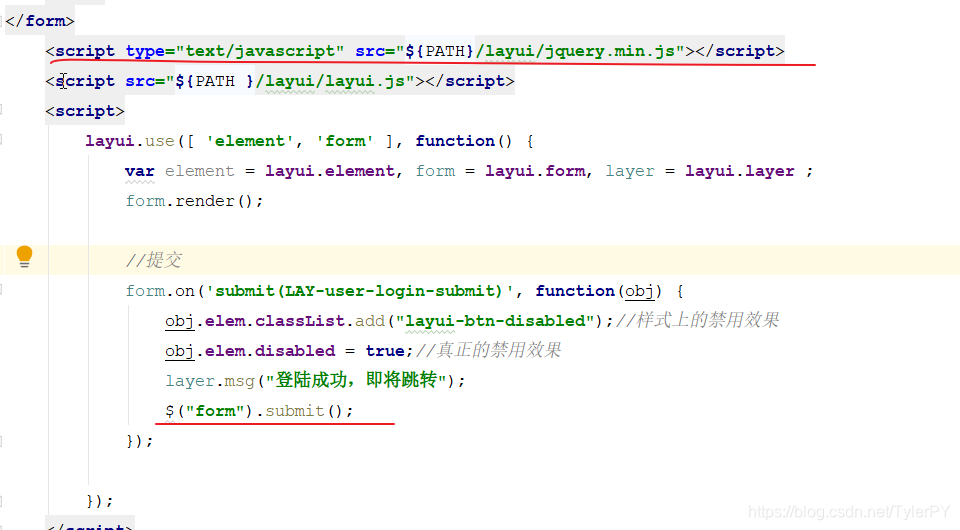
如何提交表单:
引入jquery:
$(“form”).submit();
表单提交参数名称: username password
提交请求被拒绝
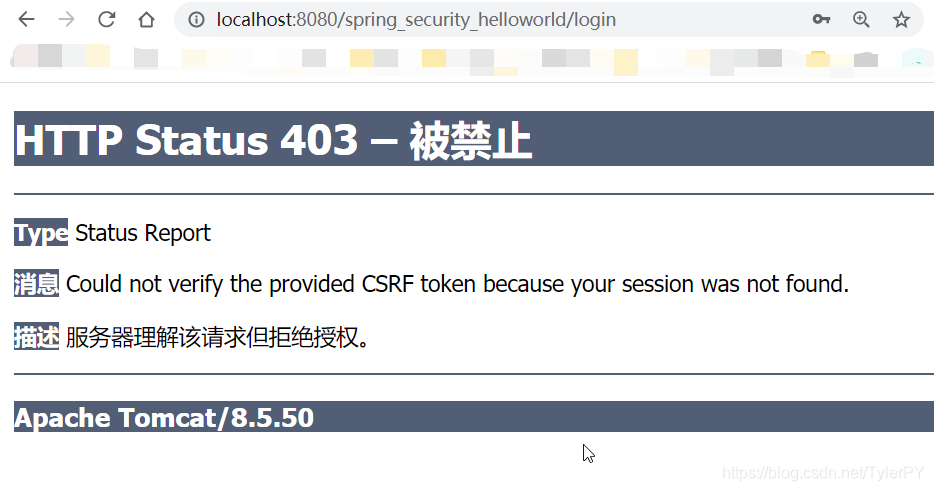
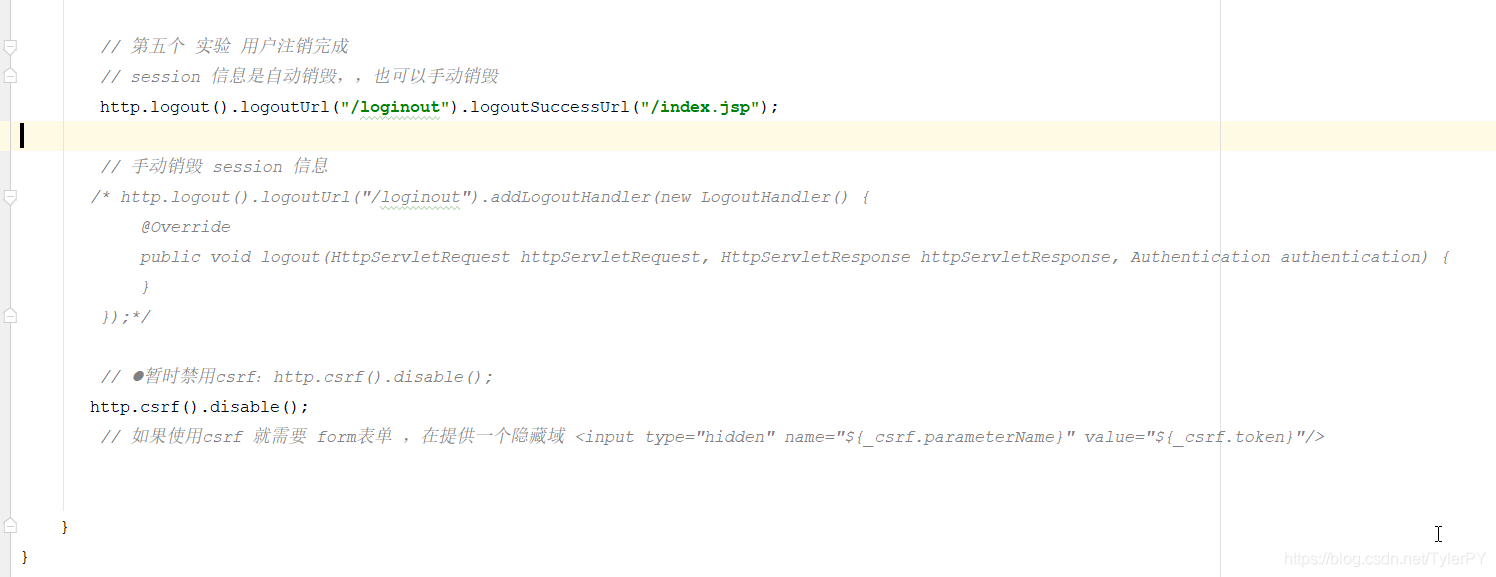
暂时禁用csrf:http.csrf().disable();
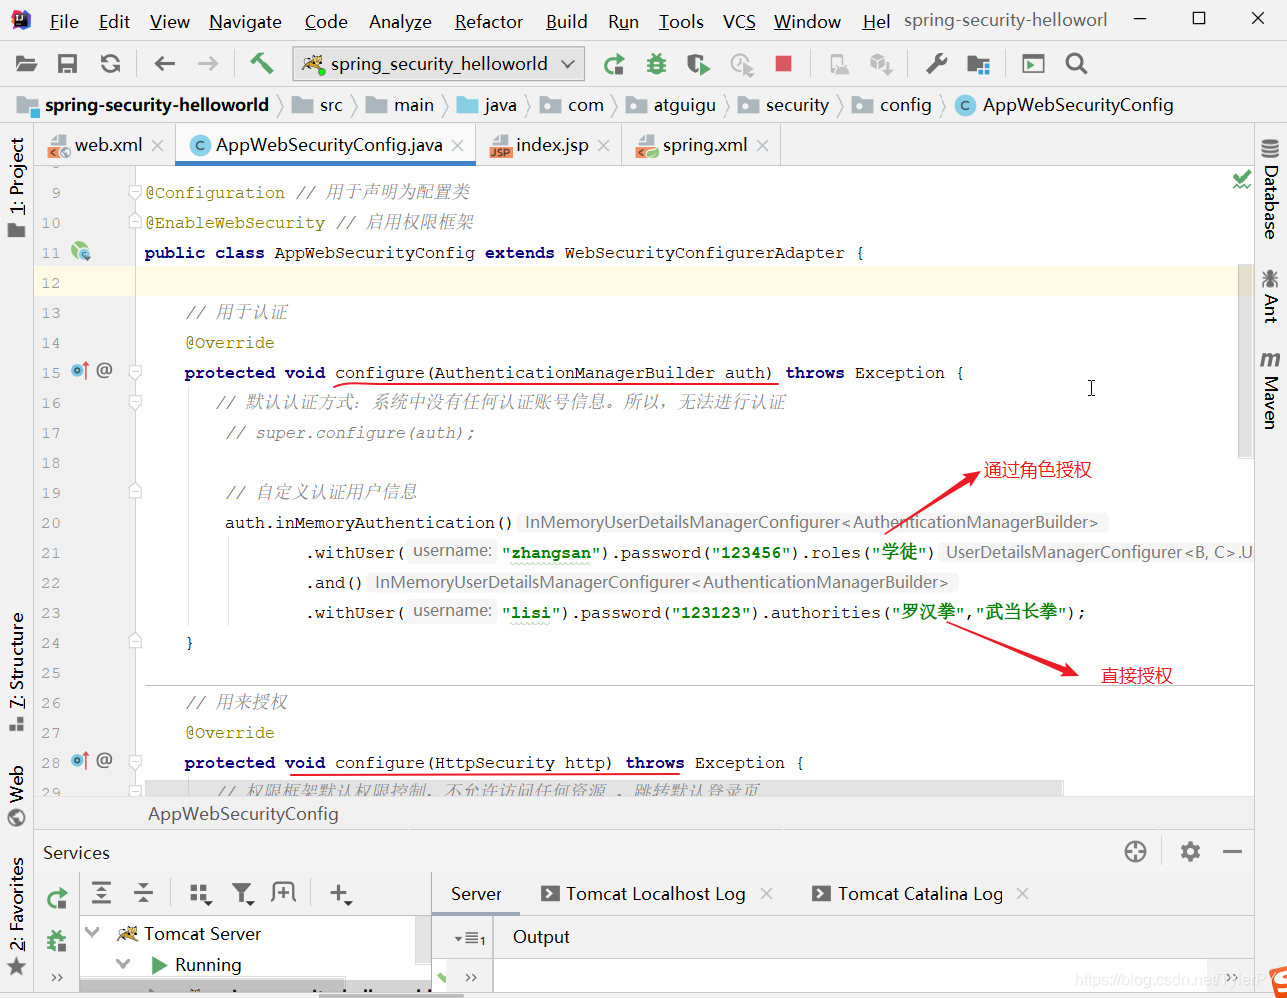
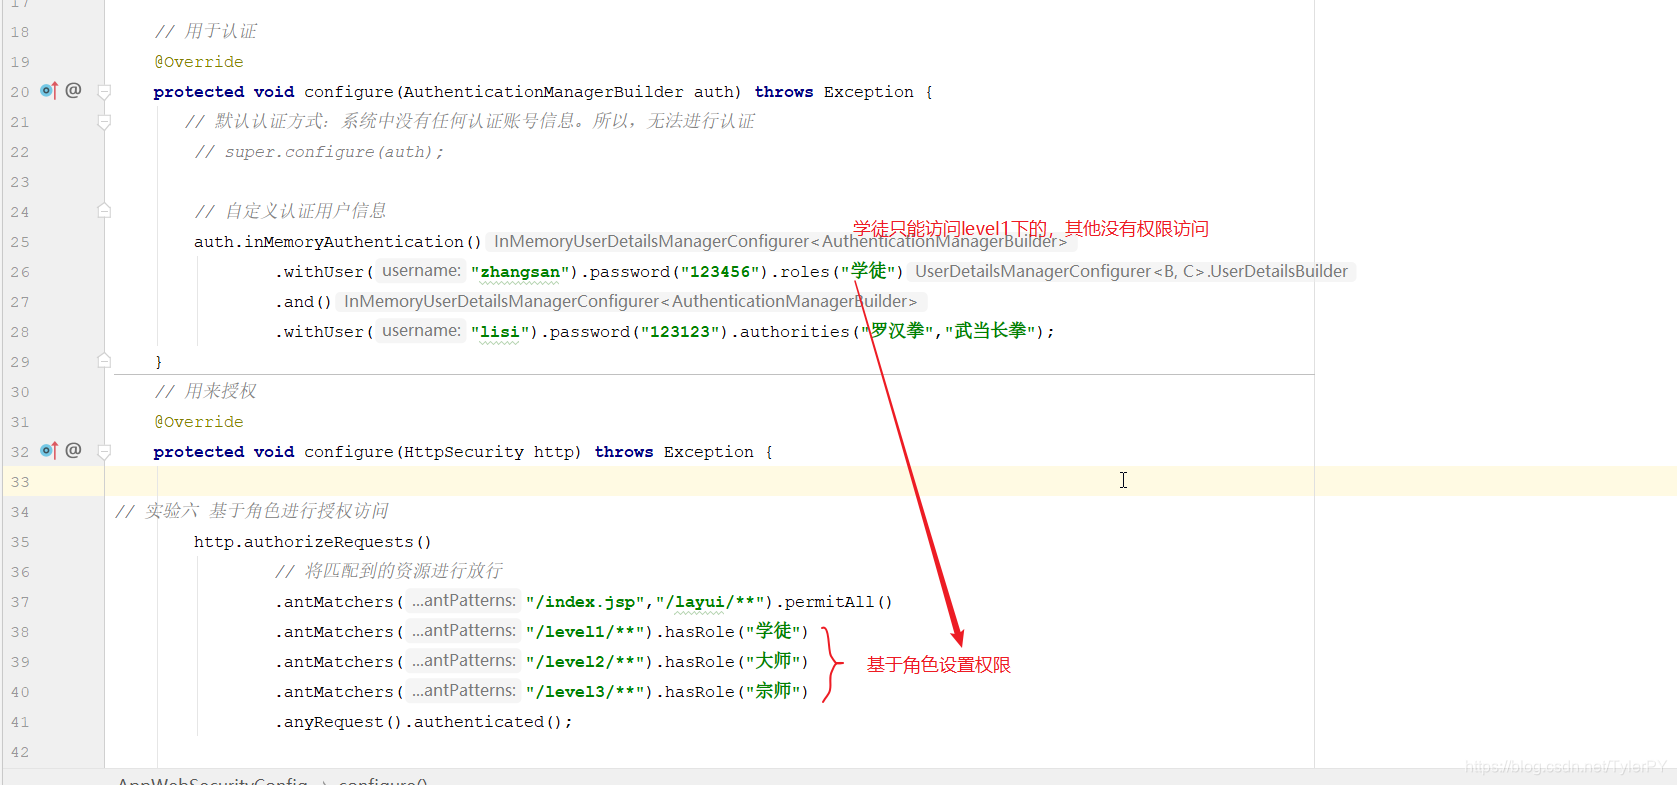
4. 自定义认证用户信息
只能通过指定的用户名登入。
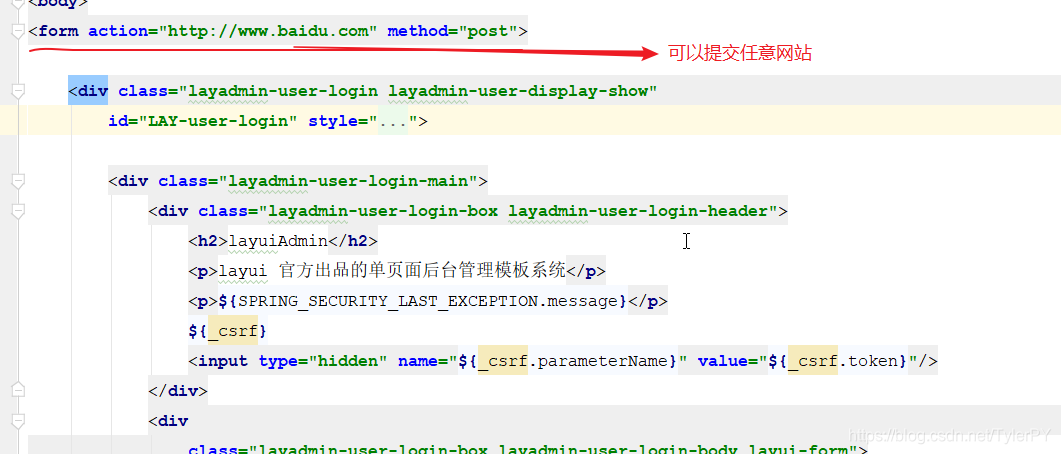
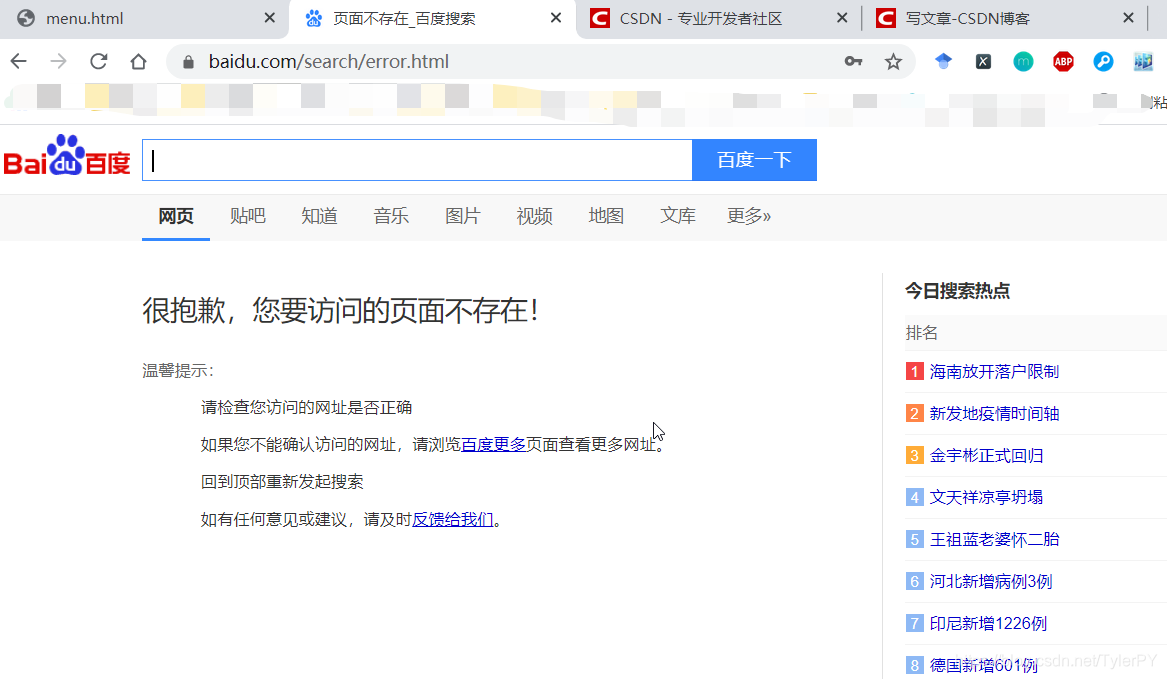
可以提交到任意网站:
跳转结果:
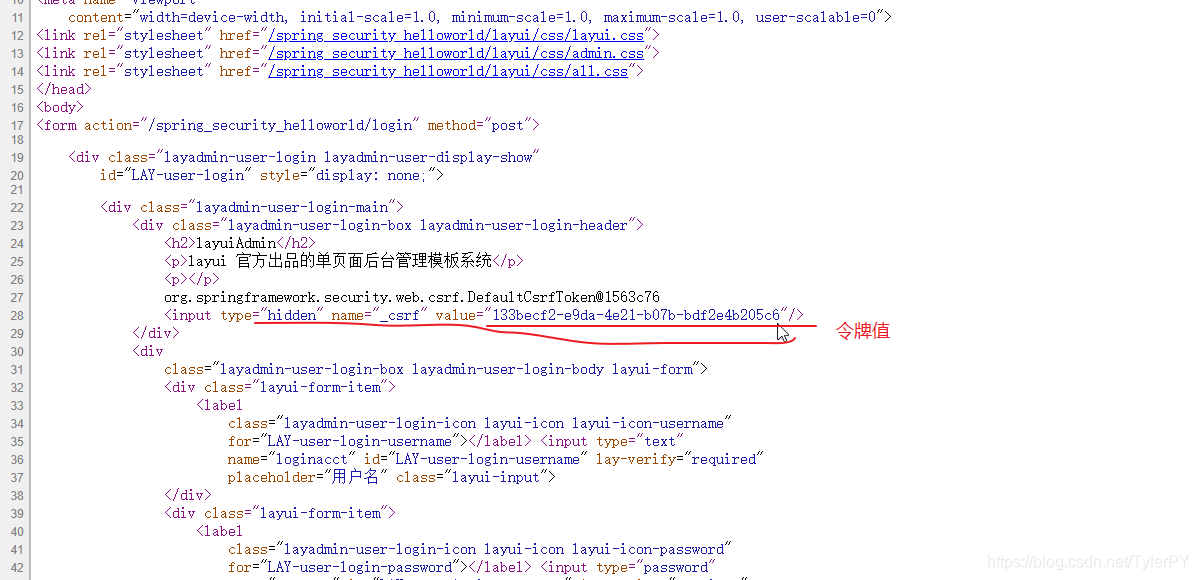
令牌值:
打个比喻,好比你有一个购物优惠卡,用了购物优惠卡购物,优惠卡就没了,下次就点用新的优惠卡,如果超市关门了,你的优惠卡没用了,下次买的时候还能用。令牌就是登陆之前的值不会改变,登陆进入后令牌的值会被删除。
令牌值变化:
如果登录成功(用户名,密码正确),令牌会被删除,
重新回到登录页或后退网页,令牌会重新生成;
如果登录失败(用户名,密码错误),令牌不变。
刷新登录页,令牌值也不变
5. 用户注销完成
添加注销功能(logout)http.logout()默认规则
-
/logout:退出系统
-
如果csrf开启,必须post方式的/logout请求,表单中需要增加csrf token
-
logoutUrl();退出系统需要发送的请求
-
logoutSuccessUrl();退出系统成功以后要跳转的页面地址
-
addLogoutHandler():自定义注销处理器
-
deleteCookies():指定需要删除的cookie
invalidateHttpSession():session失效(DEBUG)

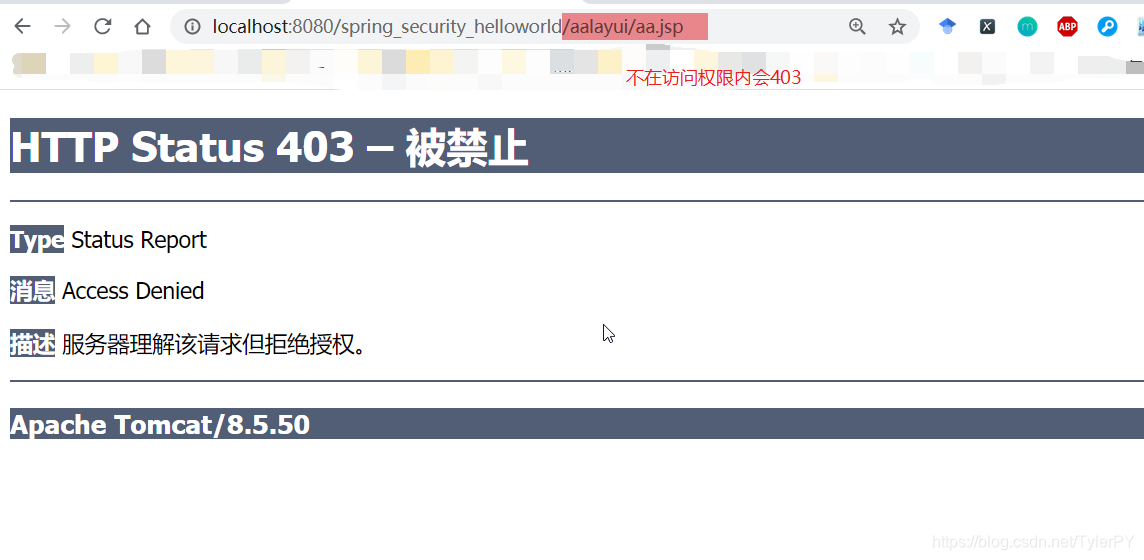
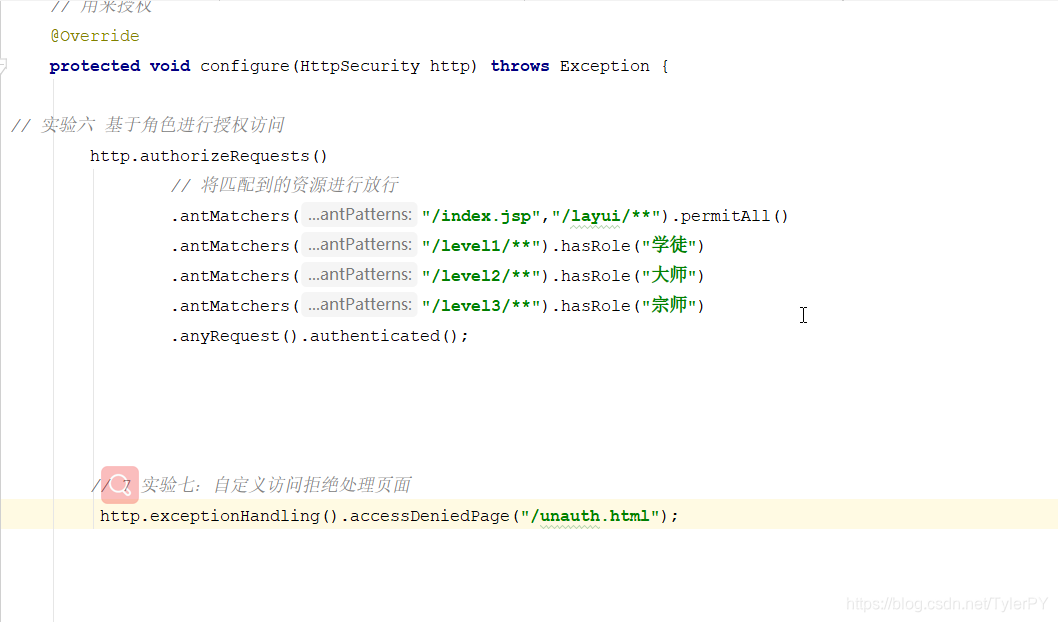
6. 基于角色的访问控制

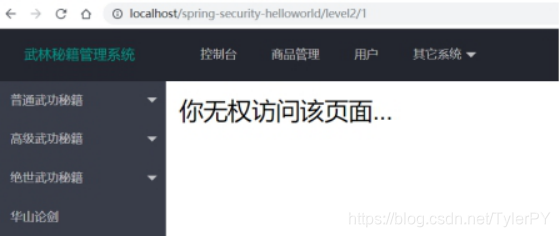
没有权限访问结果:

注意:
将.anyRequest().authenticated()错误的设置在前面,后面的设置就不起作用了。
设置所有,"/**"都可以访问,其他再进行的设置就不会起作用了
设置匿名访问/level3/** 可以不用登录,匿名访问:.anyRequest().anonymous();
拥有该角色的资源可以访问,否则不可以访问
auth.inMemoryAuthentication()
.withUser("zhangsan").password("123456").roles("ADMIN","学徒","宗师")
.and()
.withUser("自定义访问拒绝处理页面,lisi").password("111111").authorities("USER","MANGER");
7. 自定义访问拒绝处理页面
直接增加处理映射界面
在控制器类中增加映射处理
@RequestMapping("/unauth.html")
public String unauth(){
return "unauth";
}
增加显示页面,将main.jsp复制,命名为unauth.jsp,增加一句提示信息
你无权访问该页面...
自定义异常处理器
在授权防范里面:
http.exceptionHandling().accessDeniedHandler(new AccessDeniedHandler() {
@Override
public void handle(HttpServletRequest request, HttpServletResponse response,
AccessDeniedException accessDeniedException) throws IOException, ServletException {
request.setAttribute("message", accessDeniedException.getMessage());
request.getRequestDispatcher("/WEB-INF/views/unauth.jsp").forward(request, response);
}
});
8. 记住我功能-Cookie版
http.rememberMe();
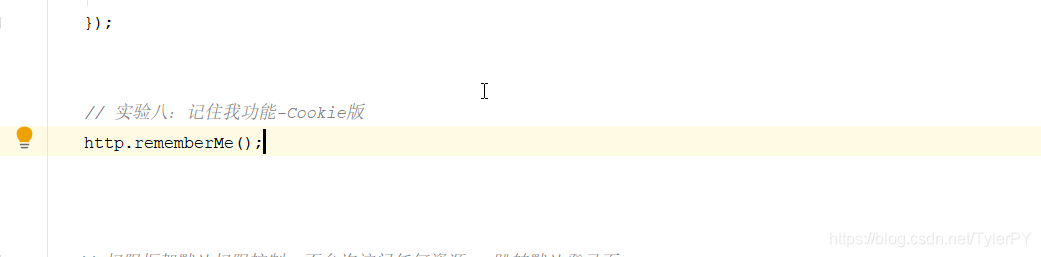
默认规则
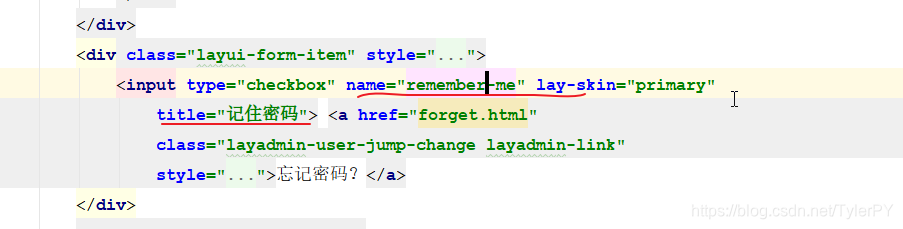
页面checkbox提交remember-me参数
默认记住2周:AbstractRememberMeServices
会在cookie中保存名为:remember-me的cookie

服务器端重启tomcat失效。
9. 记住我功能-数据库版
服务器端重启tomcat也没事。
引入pom文件。
<dependency>
	<groupId>org.springframework</groupId>
	<artifactId>spring-orm</artifactId>
	<version>4.3.20.RELEASE</version>
</dependency>
<dependency>
	<groupId>com.alibaba</groupId>
	<artifactId>druid</artifactId>
	<version>1.1.12</version>
</dependency>
<!-- mysql驱动 -->
<dependency>
    <groupId>mysql</groupId>
    <artifactId>mysql-connector-java</artifactId>
    <version>8.0.16</version>
</dependency>
配置数据源
<!-- 配置数据源 -->
<bean id="dataSource" class="com.alibaba.druid.pool.DruidDataSource">
<property name="username" value="root"></property>
<property name="password" value="111111"></property>
<property name="url" value="jdbc:mysql://localhost:3306/scw?useSSL=false&useUnicode=true&characterEncoding=UTF-8&serverTimezone=Asia/Shanghai"></property>
<property name="driverClassName" value="com.mysql.cj.jdbc.Driver"></property>
</bean>
<!-- jdbcTemplate-->
<bean id="jdbcTemplate" class="org.springframework.jdbc.core.JdbcTemplate">
<property name="dataSource" ref="dataSource"></property>
</bean>
创建表:
create table persistent_logins (
	username varchar(64) not null,
	series varchar(64) primary key,
	token varchar(64) not null,
	last_used timestamp not null)
设置记住我:
@Autowired
DataSource dataSource;
@Override
protected void configure(HttpSecurity http) throws Exception {
//记住我
JdbcTokenRepositoryImpl ptr = new JdbcTokenRepositoryImpl();
ptr.setDataSource(dataSource);
http.rememberMe().tokenRepository(ptr);
}
只要不是主动退出和去浏览器控制台的application中删除cookie信息。下次就可以直接访问。


 465
465

 被折叠的 条评论
为什么被折叠?
被折叠的 条评论
为什么被折叠?
 到【灌水乐园】发言


