一 简介
默认情况下,每个沙盒(sandbox)含有3个文件夹:Documents, Library 和 tmp。因为应用的沙盒机制,应用只能在几个目录下读写文件:
Documents:苹果建议将程序中建立的或在程序中浏览到的文件数据保存在该目录下,iTunes备份和恢复的时候会包括此目录;
Library:存储程序的默认设置或其它状态信息;
Library/Caches:存放缓存文件,iTunes不会备份此目录,此目录下文件不会在应用退出删除;
tmp:提供一个即时创建临时文件的地方。
iTunes在与iPhone同步时,备份所有的Documents和Library文件。
iPhone在重启时,会丢弃所有的tmp文件。
iOS开发中读写临时数据,只有存储在Documents中才可以将数据保存下来。
二 路径打印与对比
iOS中NSSearchPathForDirectoriesInDomains函数参数 NSDocumentDirectory, NSDocumentationDirectory, NSDownloadsDirectory的区别。刚在写程序的时候把所有参数都测试了下,这样自己可以记住,下面是测试结果:
NSDocumentDirectory
    -(NSString *) dataFilePath {
        NSArray *paths = NSSearchPathForDirectoriesInDomains(NSDocumentDirectory, NSUserDomainMask, YES);
        NSString *documentsDirectory=[paths objectAtIndex:0];
        return [documentsDirectory stringByAppendingPathComponent:@"data.plist"];
      }
return value:
NSDocumentationDirectory
-(NSString *) dataFilePath {
     NSArray *paths = NSSearchPathForDirectoriesInDomains(NSDocumentationDirectory , NSUserDomainMask, YES);
     NSString *documentsDirectory=[paths objectAtIndex:0];
     return [documentsDirectory stringByAppendingPathComponent:@"data.plist" ];
 }
return value:
path:/Users/admin/Library/Application Support/iPhone Simulator/5.0/Applications/4BC5DA66-B3CA-4056-927B-999BC4DBF3CE/Library/Documentation/data.plist
NSDownloadsDirectory
-(NSString *) dataFilePath {
   NSArray *paths = NSSearchPathForDirectoriesInDomains(NSDownloadsDirectory, NSUserDomainMask, YES);
   NSString *documentsDirectory=[paths objectAtIndex:0];
   return [documentsDirectory stringByAppendingPathComponent:@"data.plist" ];
 }
return value:
path:/Users/admin/Library/Application Support/iPhone Simulator/5.0/Applications/4BC5DA66-B3CA-4056-927B-999BC4DBF3CE/Downloads/data.plist
注意:NSDocumentDirectory 是指程序中对应的Documents路径,而NSDocumentionDirectory对应于程序中的Library/Documentation路径,这个路径是没有读写权限的,所以看不到文件生成。
转自:http://marshal.easymorse.com/archives/3340
三 iOS中对文件的操作
1)在Documents目录下创建文件
代码如下:
NSArray *paths=NSSearchPathForDirectoriesInDomains(NSDocumentDirectory
                                            , NSUserDomainMask
                                            , YES);
NSLog(@"Get document path: %@",[paths objectAtIndex:0]);

NSString *fileName=[[paths objectAtIndex:0] stringByAppendingPathComponent:@"myFile"];

NSString *content=@"a";
NSData *contentData=[content dataUsingEncoding:NSASCIIStringEncoding];
if ([contentData writeToFile:fileName atomically:YES]) {
 NSLog(@">>write ok.");
}
可以通过ssh登录设备看到Documents目录下生成了该文件。
上述是创建ascii编码文本文件,如果要带汉字,比如:
NSString *fileName=[[paths objectAtIndex:0] stringByAppendingPathComponent:@"myFile"];
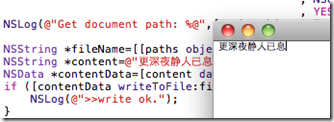
NSString *content=@"更深夜静人已息";
NSData *contentData=[content dataUsingEncoding:NSUnicodeStringEncoding];
if ([contentData writeToFile:fileName atomically:YES]) {
    NSLog(@">>write ok.");
}
如果还用ascii编码,将不会生成文件。这里使用NSUnicodeStringEncoding就可以了。
通过filezilla下载到创建的文件打开,中文没有问题:
2)在其他目录下创建文件
如果要指定其他文件目录,比如Caches目录,需要更换目录工厂常量,上面代码其他的可不变:
NSArray *paths=NSSearchPathForDirectoriesInDomains(NSCachesDirectory
, NSUserDomainMask
, YES);
使用NSSearchPathForDirectoriesInDomains只能定位Caches目录和Documents目录。
tmp目录,不能按照上面的做法获得目录了,有个函数可以获得应用的根目录:
NSHomeDirectory()
也就是Documents的上级目录,当然也是tmp目录的上级目录。那么文件路径可以这样写:
NSString *fileName=[NSHomeDirectory() stringByAppendingPathComponent:@"tmp/myFile.txt"];
或者,更直接一点,可以用这个函数:
NSTemporaryDirectory()
不过生成的路径将可能是:
…/tmp/-Tmp-/myFile.txt
3)使用资源文件
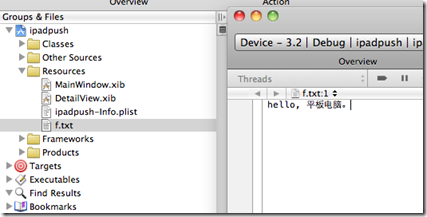
在编写应用项目的时候,常常会使用资源文件,比如:
安装到设备上后,是在app目录下的:
以下代码演示如何获取到文件并打印文件内容:
NSString *myFilePath = [[NSBundle mainBundle] pathForResource:@"f" ofType:@"txt"];
NSString *myFileContent=[NSString stringWithContentsOfFile:myFilePathencoding:NSUTF8StringEncoding error:nil];
NSLog(@"bundel file path: %@ \n file content:%@",myFilePath,myFileContent);
代码运行效果:


 本文介绍了iOS应用程序的沙盒机制,详细讲解了Documents、Library、tmp目录的作用,以及如何在这些目录下进行文件操作。重点讨论了NSDocumentDirectory与NSDocumentationDirectory的区别,并提供了在不同目录创建文件的代码示例,包括读取资源文件的方法。


 1919
1919

 被折叠的 条评论
为什么被折叠?


