


 本文介绍了Spring AOP的概念,它作为面向切面编程的实现,降低了业务逻辑间的耦合度,提高了代码的可重用性。通过代理模式,AOP在不修改原有代码的情况下实现功能增强。文章详细讲解了AOP的术语,如连接点、切入点、通知等,并提及了Spring AOP与AspectJ框架的结合使用。最后,展示了如何配置和测试Spring AOP的应用。
在学习AOP之前,首先我们要知道什么叫作AOP,AOP为Aspect Oriented Programming的缩写,也就是面向切面编程,AOP实际并不是什么新技术,而是一种思想,属于OOP的延续。我们利用AOP可以对业务逻辑的各个部分进行隔离,从而使得业务逻辑各部分之间的耦合度降低,提高程序的可重用性,同时提高开发效率。
在开发过程中,我们经常会遇到功能添加的问题。举个例子,在业务设计时,客户并没有考虑到在保存前加权限校验,突然有一天,项目经理和你说客户需要在保存前增加权限校验,而此时的你已经把类都写完了,你心中一定是万马奔腾,在心中骂骂咧咧,但是活还是要干呀。于是老老实实的在类中添加权限验证的方法,如果类不多还好,类多的话简直头皮发麻。当然有经验的开发人员,会做一个权限校验的类,里面就只有一个权限校验的方法,然后让需要添加权限校验的类去继承权限校验的类,并在保存前添加调用权限校验的方法即可。但是不管怎么,添加校验方法的时候还是需要我们去修改原来的方法,于是我们想有什么方法可以添加方法时不用去修改原来的方法呢?于是AOP隆重登场了,它的原理实际就是使用代理模式,将原来的类交给代理类来管理,然后添加方法时值只需要在代理类中实现,这样就可以实现即不用修改原来的类和方法,又可以完成客户的需求。
AOP采用横向抽取的机制代替了传统的纵向继承,实现在不破坏原来的类,生成一个代理类,达到对原来的类进行增强的目的,这样就可以随时添加、取消添加的功能
- AOP的相关术语
- 连接点(joinpoint):可以被拦截的方法以及可以被增强的方法,这些方法就叫做连接点
- 切入点(Pointcut):真正被拦截的方法以及真正被增强的方法
- 通知(Advice):增加的内容,通常是封装成一个方法,这个方法就称为通知
- 引介(Introduction):类层面的增加、给原有的类添加一些新的属性方法,通常在开发中都是给方法进行增加
- 被增加的对象(Target):一般就是指被增强的那个类
- 织入(Weaving):将通知应用到目标对象的过程
- 代理对象(Proxy)
- 切面(Aspect):多个通知和多个切入点的集合
随着使用的增加,我们会逐步增加对这些术语的理解
- AOP的使用
Spring的AOP有自己的实现方式,但是这种方式使用起来非常的繁琐,因此我们使用一个AspectJ的AOP框架。
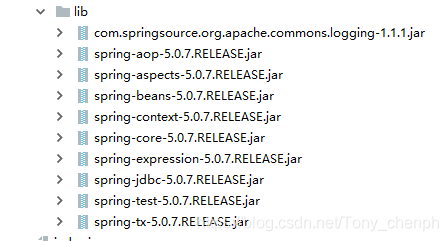
- 引入spring的基本jar包
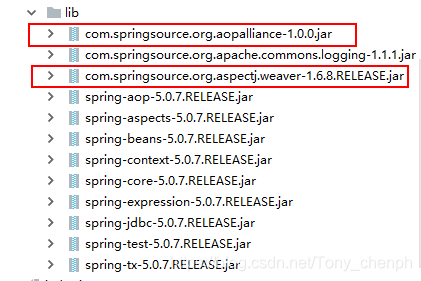
- 引入aop开发的相关jar包
- 配置文件中引入aop约束
xmlns:aop="http://www.springframework.org/schema/aop"
xsi:schemaLocation=" http://www.springframework.org/schema/aop
http://www.springframework.org/schema/aop/spring-aop.xsd"
<?xml version="1.0" encoding="UTF-8"?>
<beans xmlns="http://www.springframework.org/schema/beans"
       xmlns:p="http://www.springframework.org/schema/p"
       xmlns:aop="http://www.springframework.org/schema/aop"
       xmlns:context="http://www.springframework.org/schema/context"
       xmlns:xsi="http://www.w3.org/2001/XMLSchema-instance"
       xsi:schemaLocation="http://www.springframework.org/schema/beans
        http://www.springframework.org/schema/beans/spring-beans.xsd
        http://www.springframework.org/schema/context
        http://www.springframework.org/schema/context/spring-context.xsd
        http://www.springframework.org/schema/aop
        http://www.springframework.org/schema/aop/spring-aop.xsd">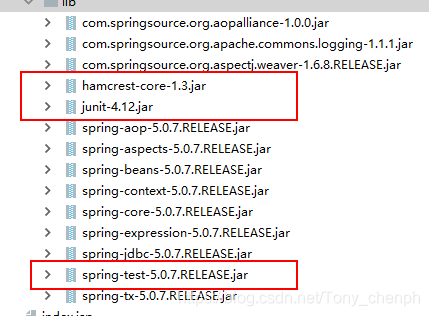
</beans>- Spring测试支持jar包
通过添加spring-test后不需要每次获取工厂进行测试
Junit用以支持单元测试,这样就不用编写主方法进行测试
Harmcrest用于支持注解
- 编写good类
public class Goods {
    public void save(){
        System.out.println("执行保存方法");
    }
}- 编写切面类myAspect
public class myAspect {
    public void check(){
        System.out.println("权限校验");
    }
}- 将good类和myAspects交给spring管理,并配置AOP完成对目标产生代理
ApplicationContext.xml配置文件如下
<?xml version="1.0" encoding="UTF-8"?>
<beans xmlns="http://www.springframework.org/schema/beans"
       xmlns:p="http://www.springframework.org/schema/p"
       xmlns:aop="http://www.springframework.org/schema/aop"
       xmlns:context="http://www.springframework.org/schema/context"
       xmlns:xsi="http://www.w3.org/2001/XMLSchema-instance"
       xsi:schemaLocation="http://www.springframework.org/schema/beans
        http://www.springframework.org/schema/beans/spring-beans.xsd
        http://www.springframework.org/schema/context
        http://www.springframework.org/schema/context/spring-context.xsd
        http://www.springframework.org/schema/aop
        http://www.springframework.org/schema/aop/spring-aop.xsd">

    <context:annotation-config/>
    <bean id="goods" class="com.ph.demo2.Goods"/>
    <bean id="myaspect" class="com.ph.demo2.myAspect"/>
    <!--配置AOP完成对目标产生代理-->
    <aop:config>
        <!--配置切入点,也就是需要被增强的方法-->
        <aop:pointcut id="pointcut" expression="execution(* com.ph.demo2.Goods.save())"/>
       <!--配置切面,也就是增加的内容(通知)ref为哪一个类-->
        <aop:aspect ref="myaspect">
            <!--method为添加哪一个 方法 pointcut-ref表示添加到哪一个切入点-->
            <!--aop:before为通知类型,表示前置通知-->
            <aop:after-returning method="check" pointcut-ref="pointcut"/>
        </aop:aspect>
    </aop:config>
</beans>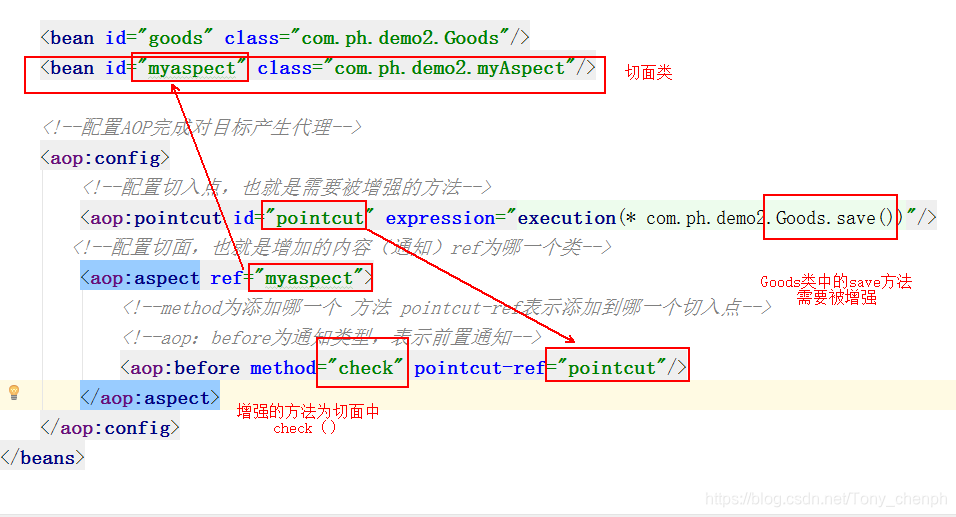
- 编写测试类
使用传统方式编写测试类
public class testClass {
    @Test
    public void test() {
        ClassPathXmlApplicationContext classPathXmlApplicationContext = new ClassPathXmlApplicationContext("applicationContext.xml");
        Goods goods = (Goods) classPathXmlApplicationContext.getBean("goods");
        goods.save();
    }
}
使用注解方式编写测试类
@RunWith(SpringJUnit4ClassRunner.class)
@ContextConfiguration("classpath:applicationContext.xml")
public class testClass {
    @Autowired
    private Goods goods;
   @Test
    public void test(){
       goods.save();
   }
}@RunWith(SpringJUnit4ClassRunner.class)
@ContextConfiguration("classpath:applicationContext.xml")
实际上相当于new ClassPathXmlApplicationContext("applicationContext.xml");
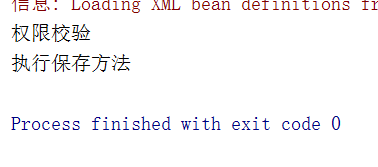
运行结果


 343
343

 被折叠的 条评论
为什么被折叠?
被折叠的 条评论
为什么被折叠?
 到【灌水乐园】发言


