


 本文介绍了在微服务架构下如何通过创建一个独立模块来集中管理Swagger接口文档,包括创建管理模块、配置Swagger、编写接口、继承并实现接口、配置启动类以及访问Swagger UI的方法。在微服务中正确配置Swagger有助于提升接口文档的管理和维护效率。
优快云停更,所有博客已搬至 rainofshadow.top 个人服务器。 最新文章,移至 https://rainofshadow.top/
最近武汉瘟疫挺严重的,学校被封了.....在家完全没什么状态,感觉整个人都废了...昨天开始动工,记录一下微服务如何配置swagger和遇到的问题。
1.在工程下创建一个模块,用来统一管理swagger的api

没有启动类,在其他服务的pom中要依赖api这个模块。
swagger的maven依赖
  <dependency>
           <groupId>io.springfox</groupId>
           <artifactId>springfox-swagger2</artifactId>
            <version>2.8.0</version>
     </dependency>
  <dependency>
          <groupId>io.springfox</groupId>
          <artifactId>springfox-swagger-ui</artifactId>
          <version>2.8.0</version>
   </dependency>
2.配置Swagger

@Configuration
@EnableSwagger2
public class SwaggerConfig {
    @Bean
    public Docket createRestApi() {
        return new Docket(DocumentationType.SWAGGER_2)
                .apiInfo(apiInfo())
                .select()
                .apis(RequestHandlerSelectors.basePackage("com.recommend"))
                .paths(PathSelectors.any())
                .build();
    }

    private ApiInfo apiInfo() {
        return new ApiInfoBuilder()
                .title("个性化学习推荐系统api文档")
                .description("个性化学习推荐系统api文档")
//                .termsOfServiceUrl("http://localhost:8502/")
                .version("1.0")
                .build();
    }
}
3.在api模块中写各个微服务的接口
举个例子
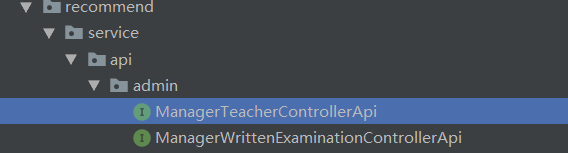
@Api(value = "管理员微服务",description = "发布试题与岗位公司")
public interface ManagerWrittenExaminationControllerApi {

    @ApiOperation("上传试题")
    @ApiImplicitParams({
            @ApiImplicitParam(name="file",value = "excel文件",required=true,paramType="file"),
    })
    public Result uploadProblems(MultipartFile file);

    @ApiOperation("修改题")
    public Result updateProblemById(Problem p);


    @ApiOperation("根据Id删除题")
    @ApiImplicitParams({
            @ApiImplicitParam(name="id",value = "题id",required=true,paramType="path",dataType="Integer")
    })
    public Result deleteProblemById(Integer id);


    @ApiOperation("添加岗位")
    public Result addPosition(Position position);

    @ApiOperation("删除岗位")
    public Result deletePosition(Integer id);

    @ApiOperation("添加公司")
    public Result addCompany(Company company);

    @ApiOperation("删除公司")
    public Result deleteCompany(Integer id);
}
4.在其他的微服务controller继承api接口

然后实现对应的方法,值得注意的是,没有写方法的请求路径,swagger-ui访问后是什么也没有的。
5.微服务启动类的配置
一定要扫描到 api 模块中 api下的接口 ,和自身的controller层的接口,不然swagger无法访问之类的问题
@SpringBootApplication
@EnableEurekaClient
@ComponentScan(basePackages={"com.recommend.service.api"})
@ComponentScan(basePackages={"com.recommend.service.written"})
@MapperScan(basePackages = {"com.recommend.common.mapper", "com.recommend.service.written.mapper"})
public class ServiceWrittenApplication {

    public static void main(String[] args) {
        SpringApplication.run(ServiceWrittenApplication.class);
    }
    @Bean
    public JwtUtil jwtUtil(){return  new JwtUtil();}
}
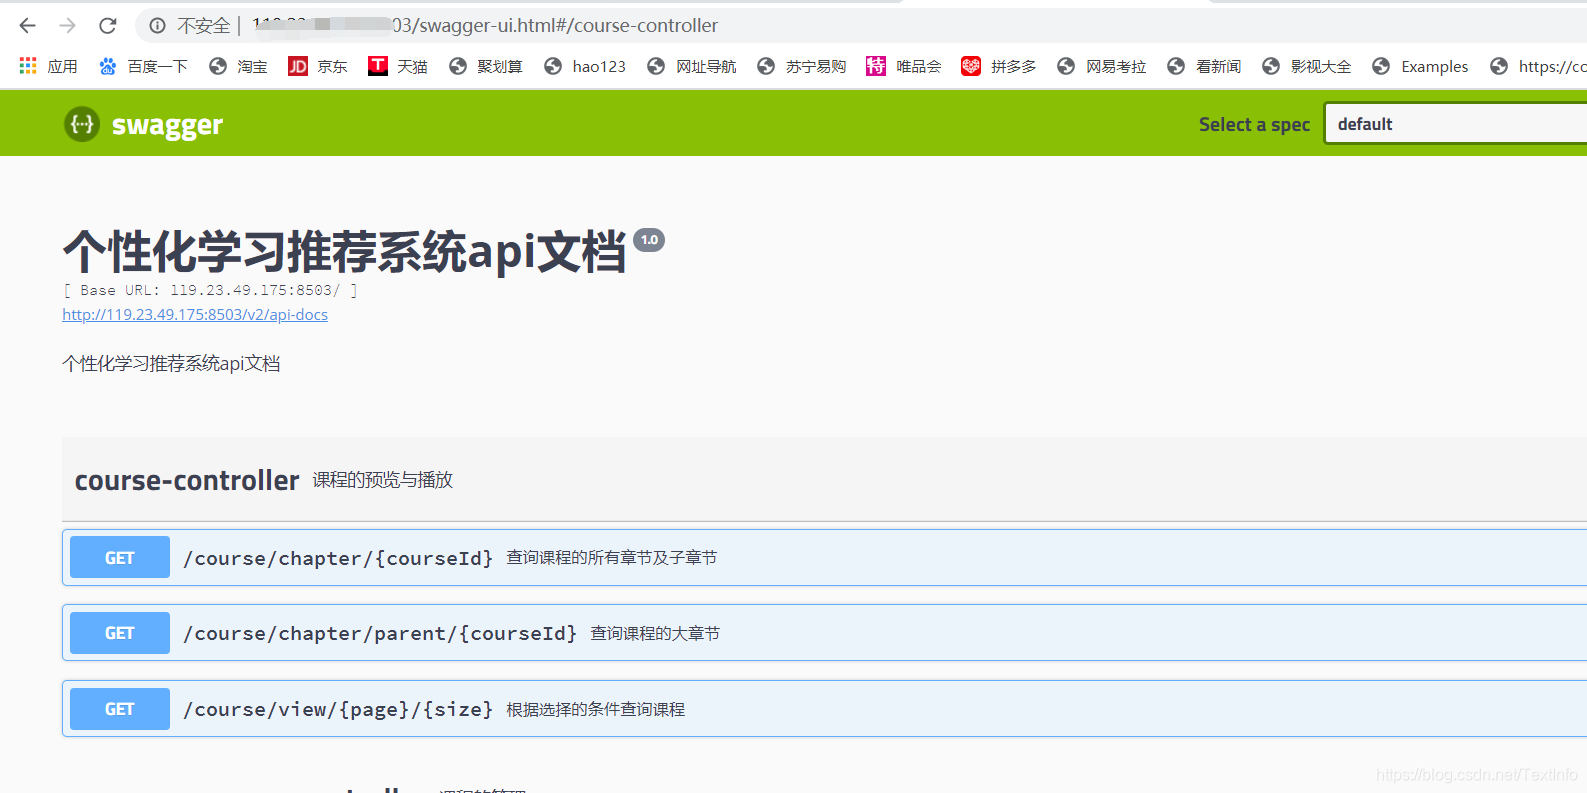
6.启动微服务访问swagger-ui页面
本地就 localhost: 端口号/swagger-ui.html,
不同的微服务接口就改变不同的端口号就行.


 3279
3279

 被折叠的 条评论
为什么被折叠?
被折叠的 条评论
为什么被折叠?
 到【灌水乐园】发言


