


 本文详细解析了Log4j配置文件log4j.properties的加载过程,特别是如何通过配置控制日志输出级别。从demo代码入手,深入探讨log4j.rootLogger配置项的作用,以及它如何影响日志的输出。同时,文章通过源码分析,揭示了日志级别检查的具体实现。
一问:log4j.properties 字段如何加载?
二问:如何控制日志输出级别?
1、先看 demo 代码:
package indi.sword.demo;

import org.apache.log4j.Logger;

/**
 * @author jeb_lin
 * 3:35 PM 28/02/2019
 */
public class Demo {
    private static final Logger LOGGER = Logger.getLogger(Demo.class);

    public static void main(String[] args) {
        LOGGER.debug("abc");
    }
}
2、再看log4j.properties 配置
log4j.rootLogger=info,stdout,rollingLog

log4j.appender.stdout=org.apache.log4j.ConsoleAppender
log4j.appender.stdout.layout=org.apache.log4j.PatternLayout
log4j.appender.stdout.layout.ConversionPattern=%d{yyyy-MM-dd HH:mm:ss,SSS} %5p (%c{1}#%M:%L) %t - %m%n
log4j.appender.stdout.Threshold=debug

## rolling log file
log4j.appender.rollingLog.File=/Users/Documents/temp/logs/rolling.log
log4j.appender.rollingLog.MaxFileSize=512MB
log4j.appender.rollingLog.MaxBackupIndex=12
log4j.appender.rollingLog.Threshold=debug
log4j.appender.rollingLog.layout=org.apache.log4j.PatternLayout
log4j.appender.rollingLog.layout.ConversionPattern=%d{yyyy-MM-dd HH:mm:ss,SSS} %5p (%c{1}#%M:%L) %t - %m%n
log4j.appender.rollingLog=org.apache.log4j.RollingFileAppender
3、提问:为什么我以下设置 ,就可以控制整体的日志级别,源码怎么看?
log4j.rootLogger=info,stdout,rollingLog

log4j.appender.stdout.Threshold=debug
log4j.appender.rollingLog.Threshold=debug

LOGGER.debug("abc");无法打印。只能把下面的info 改成 debug 才能打印。为什么?
log4j.rootLogger=info,stdout,rollingLog
一、学习方法很重要,调试技巧很重要。
1、直接在入口加断点,进入方法
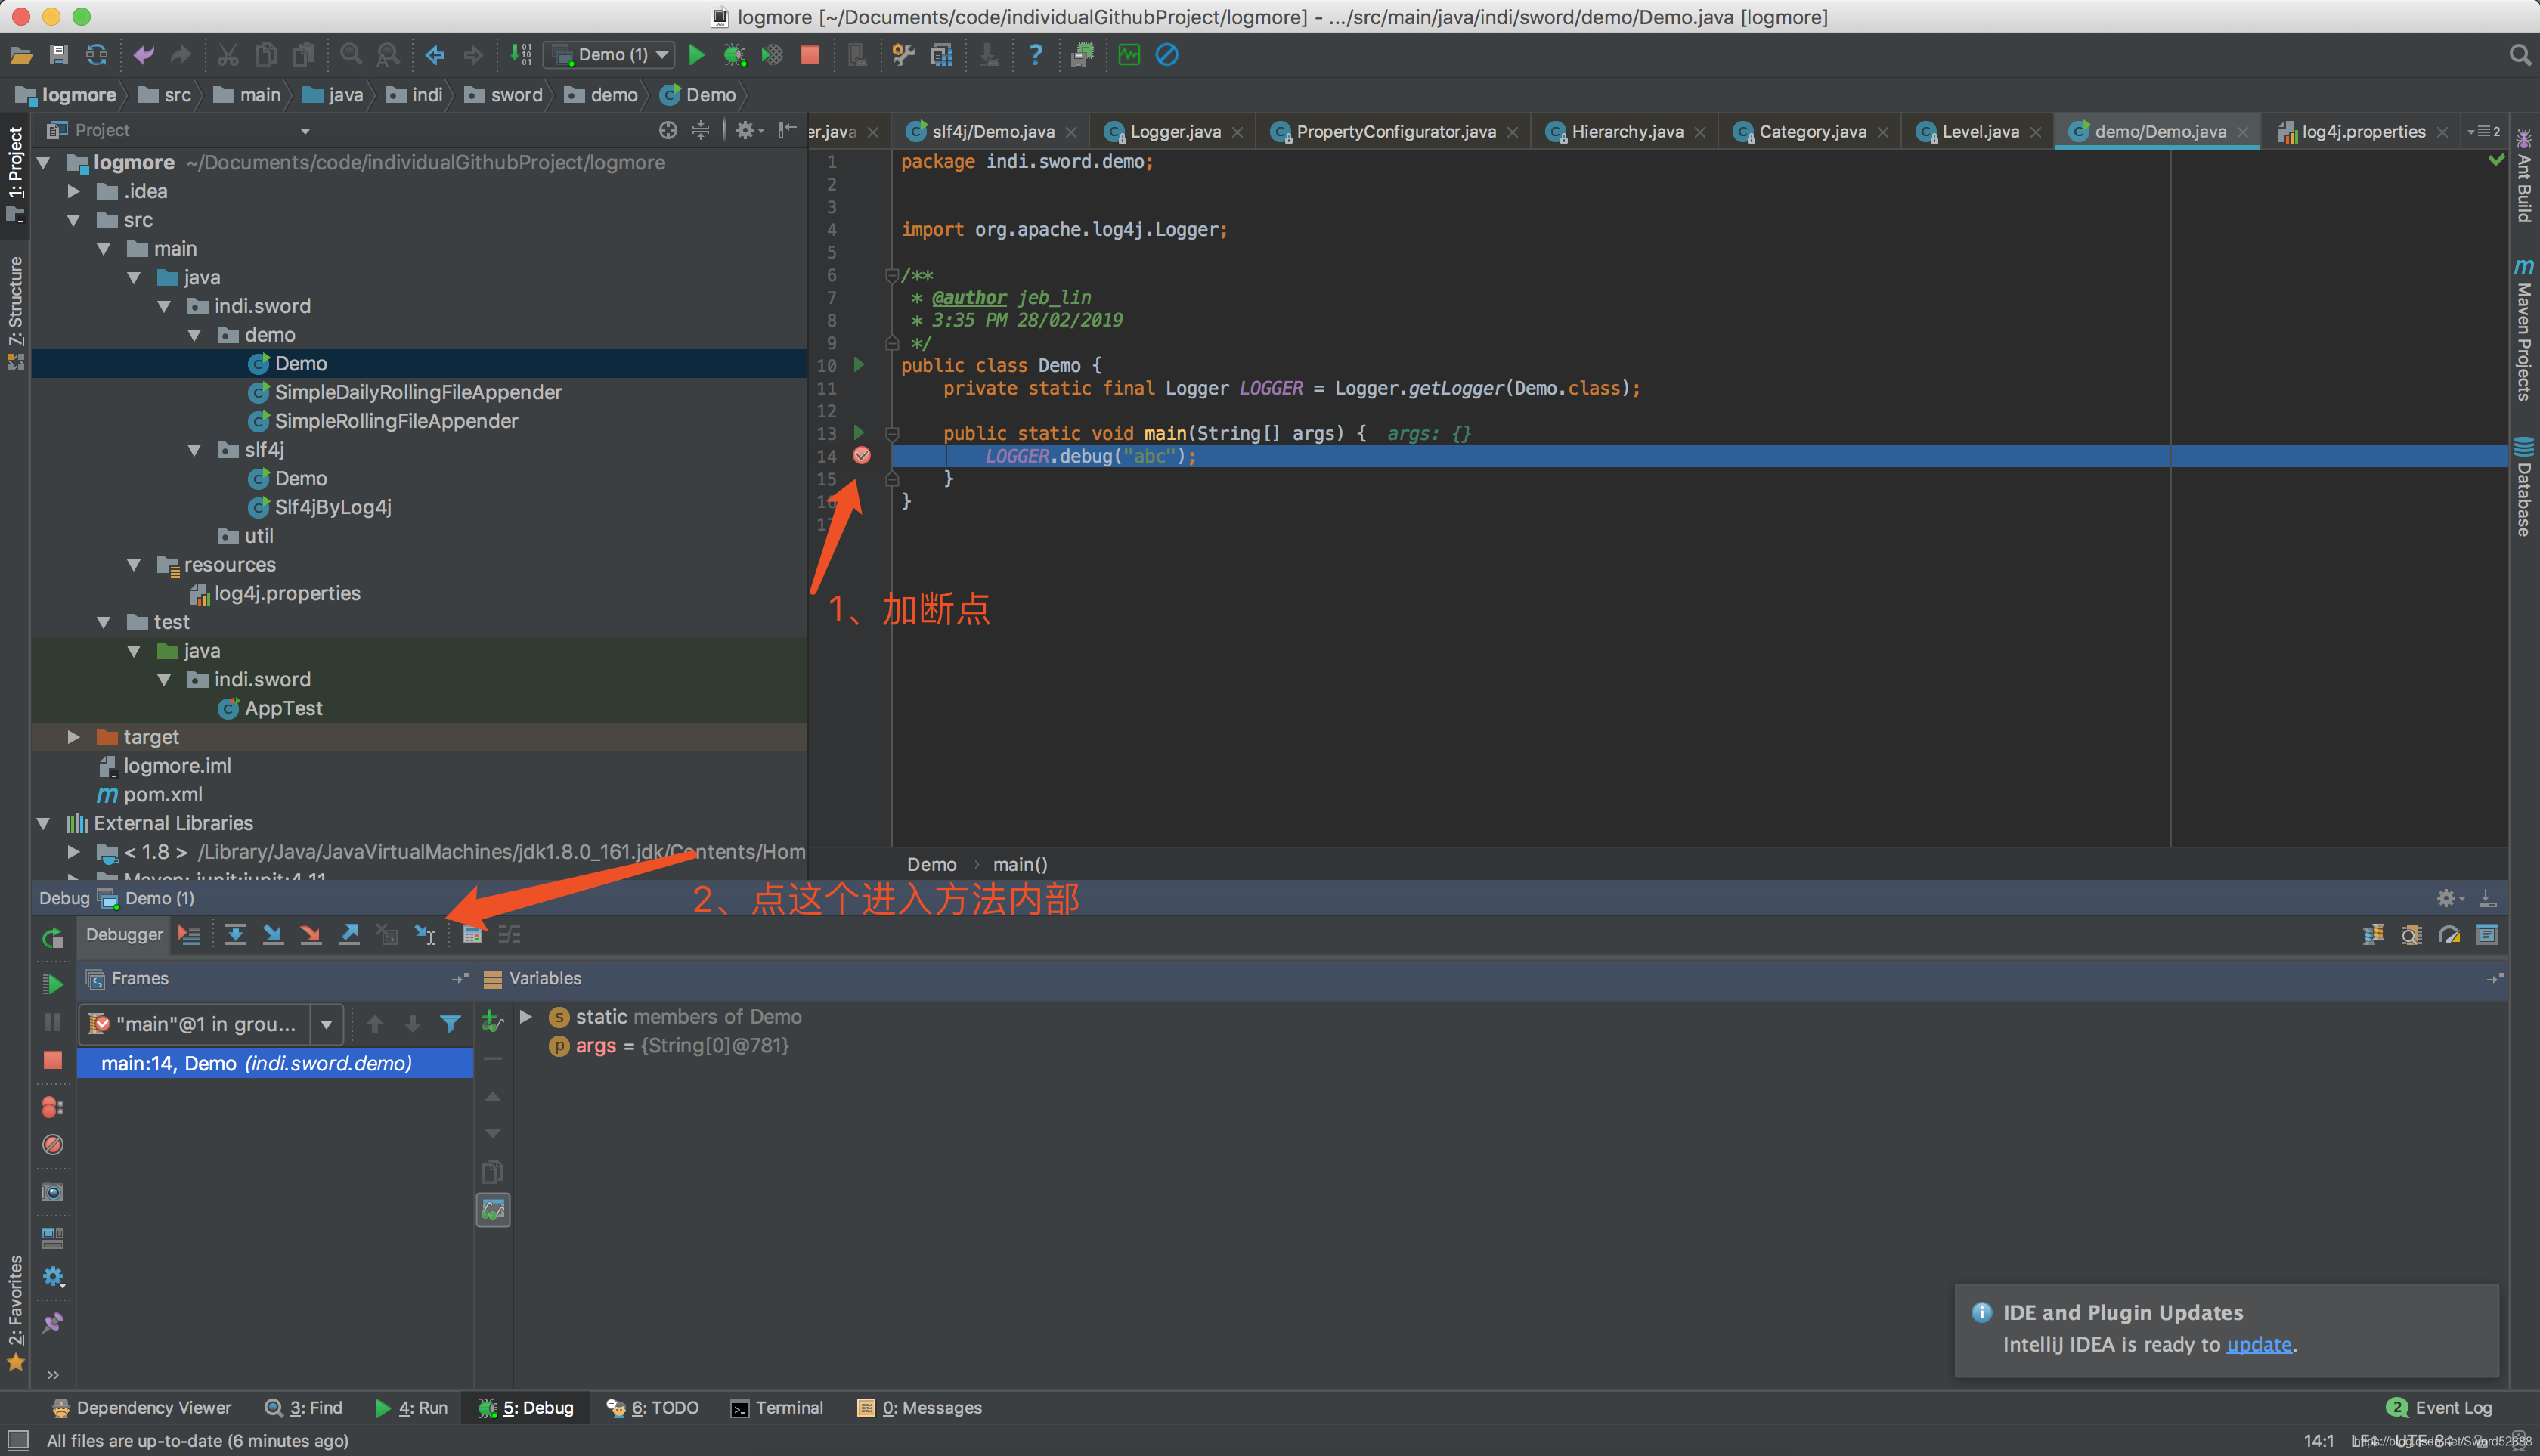
2、根据debug跳转,直接看代码
public class Category implements AppenderAttachable {
...
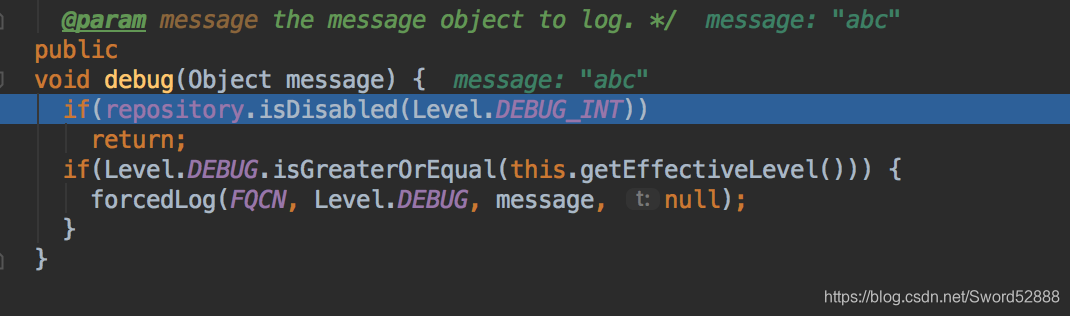
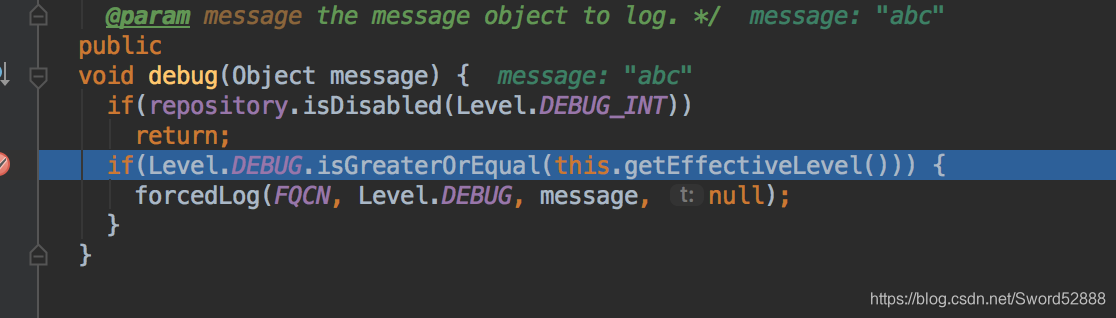
public void debug(Object message) {
if(repository.isDisabled(Level.DEBUG_INT))
return;
if(Level.DEBUG.isGreaterOrEqual(this.getEffectiveLevel())) {
forcedLog(FQCN, Level.DEBUG, message, null);
}
}
...
}
3、直接看关键代码
if(Level.DEBUG.isGreaterOrEqual(this.getEffectiveLevel())) {
      forcedLog(FQCN, Level.DEBUG, message, null);
    }
这一段代码表示如果当前的代码 LOGGER.debug(“abc”); 中的 debug 级别大于等于 this.getEffectiveLevel(),那么就打印。
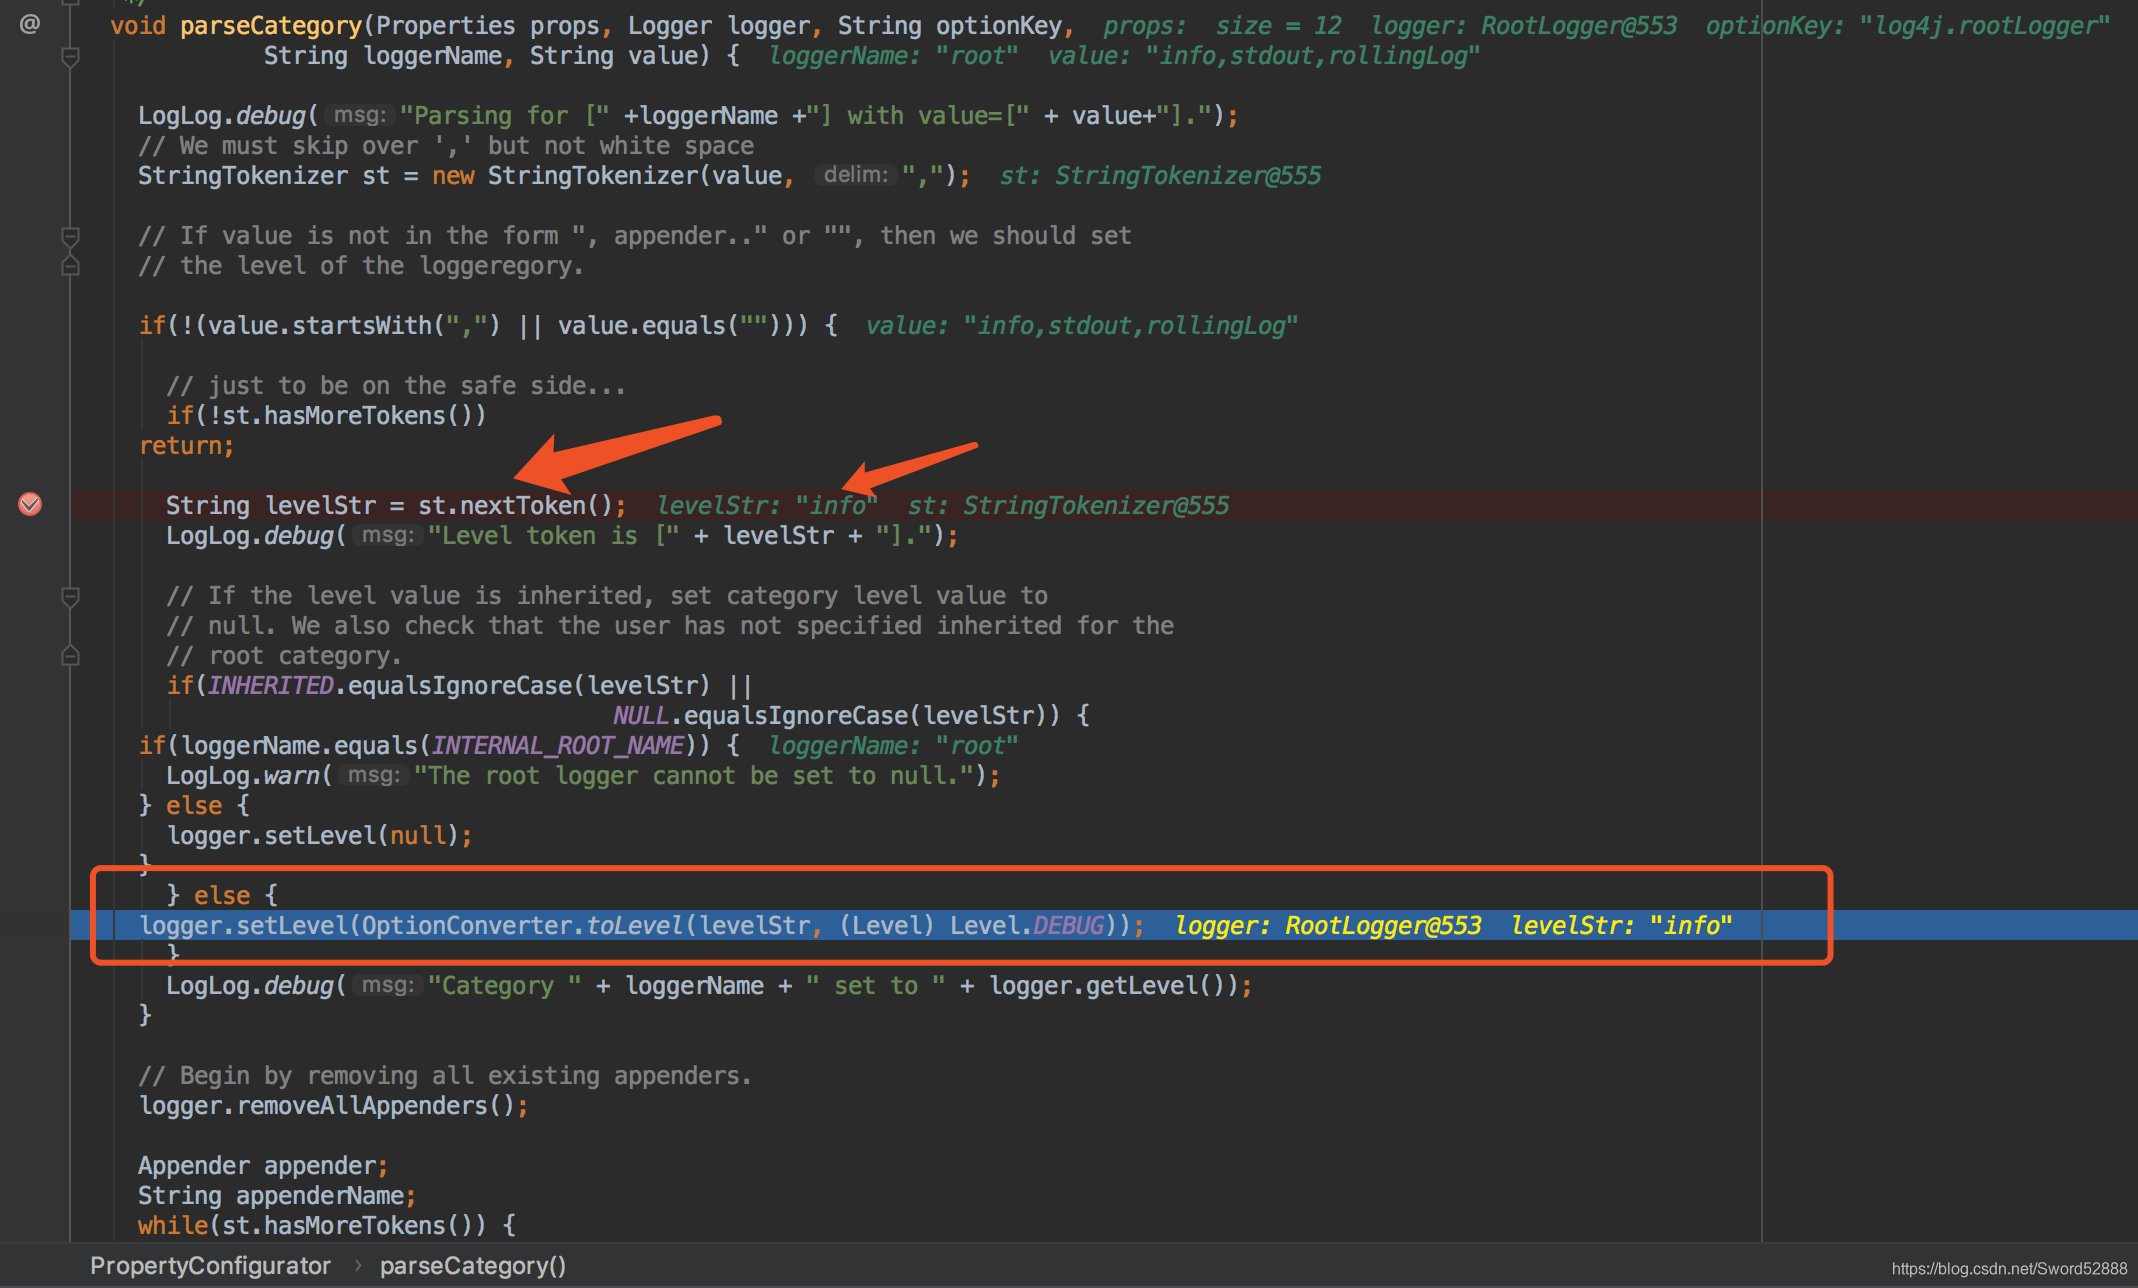
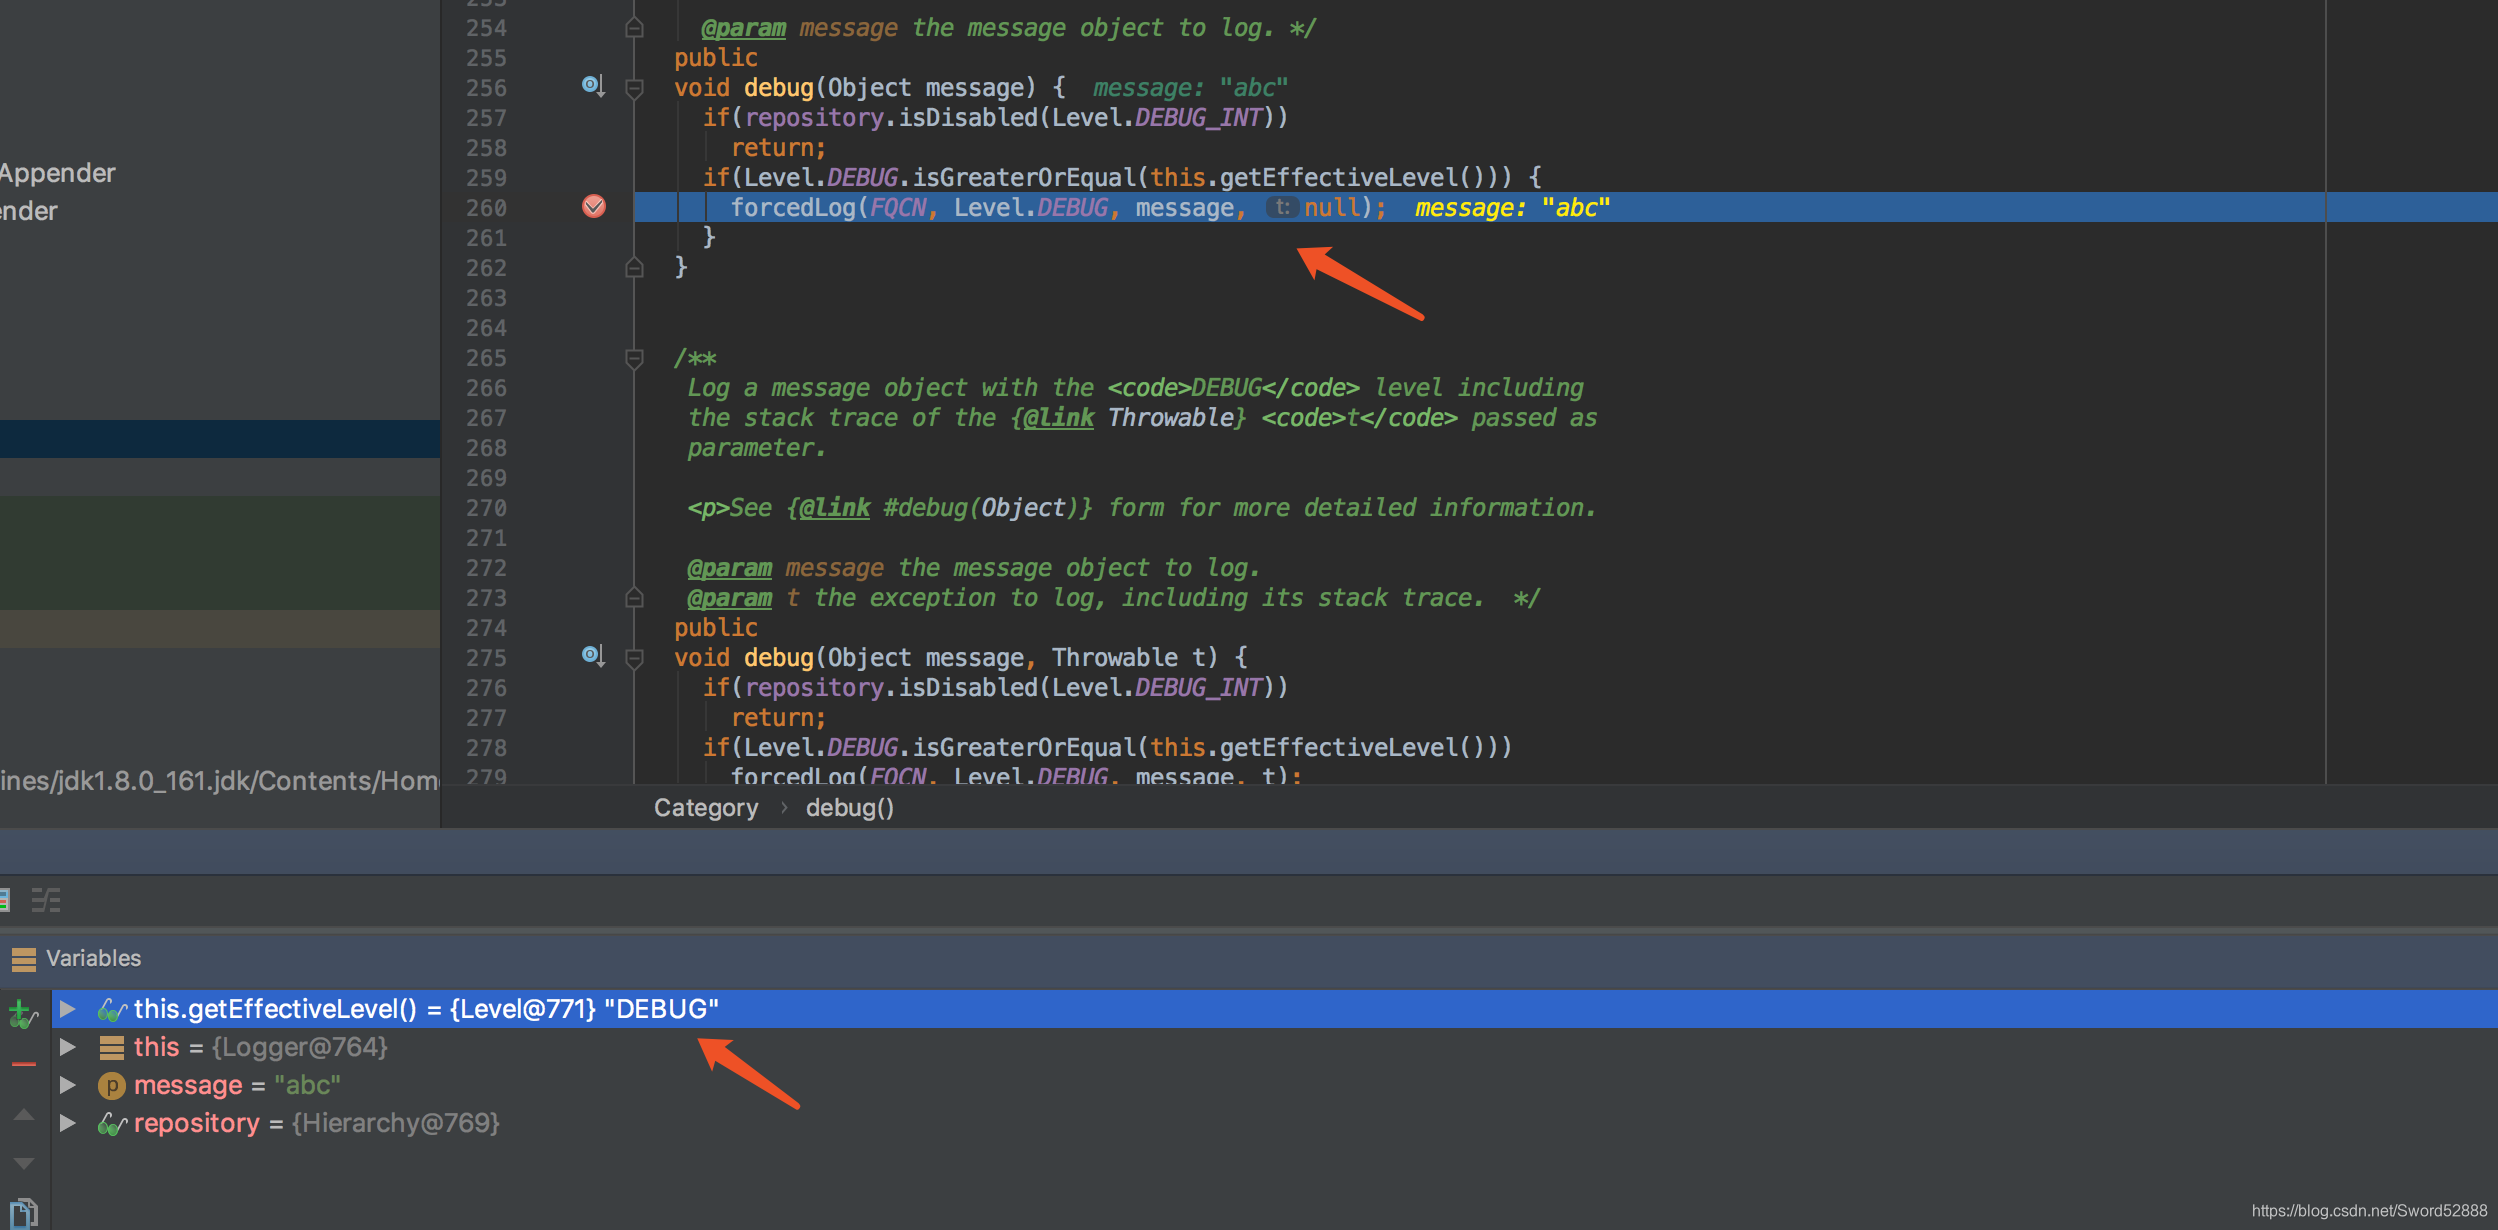
4、好了,看到这,就可以知道this.getEffectiveLevel()就是log4j.properties中log4j.rootLogger=info 这个info值。
5、接下来肯定产生疑问,怎么跑到 Category 这个类来的,还有就是 this.getEffectiveLevel() 这个是啥。
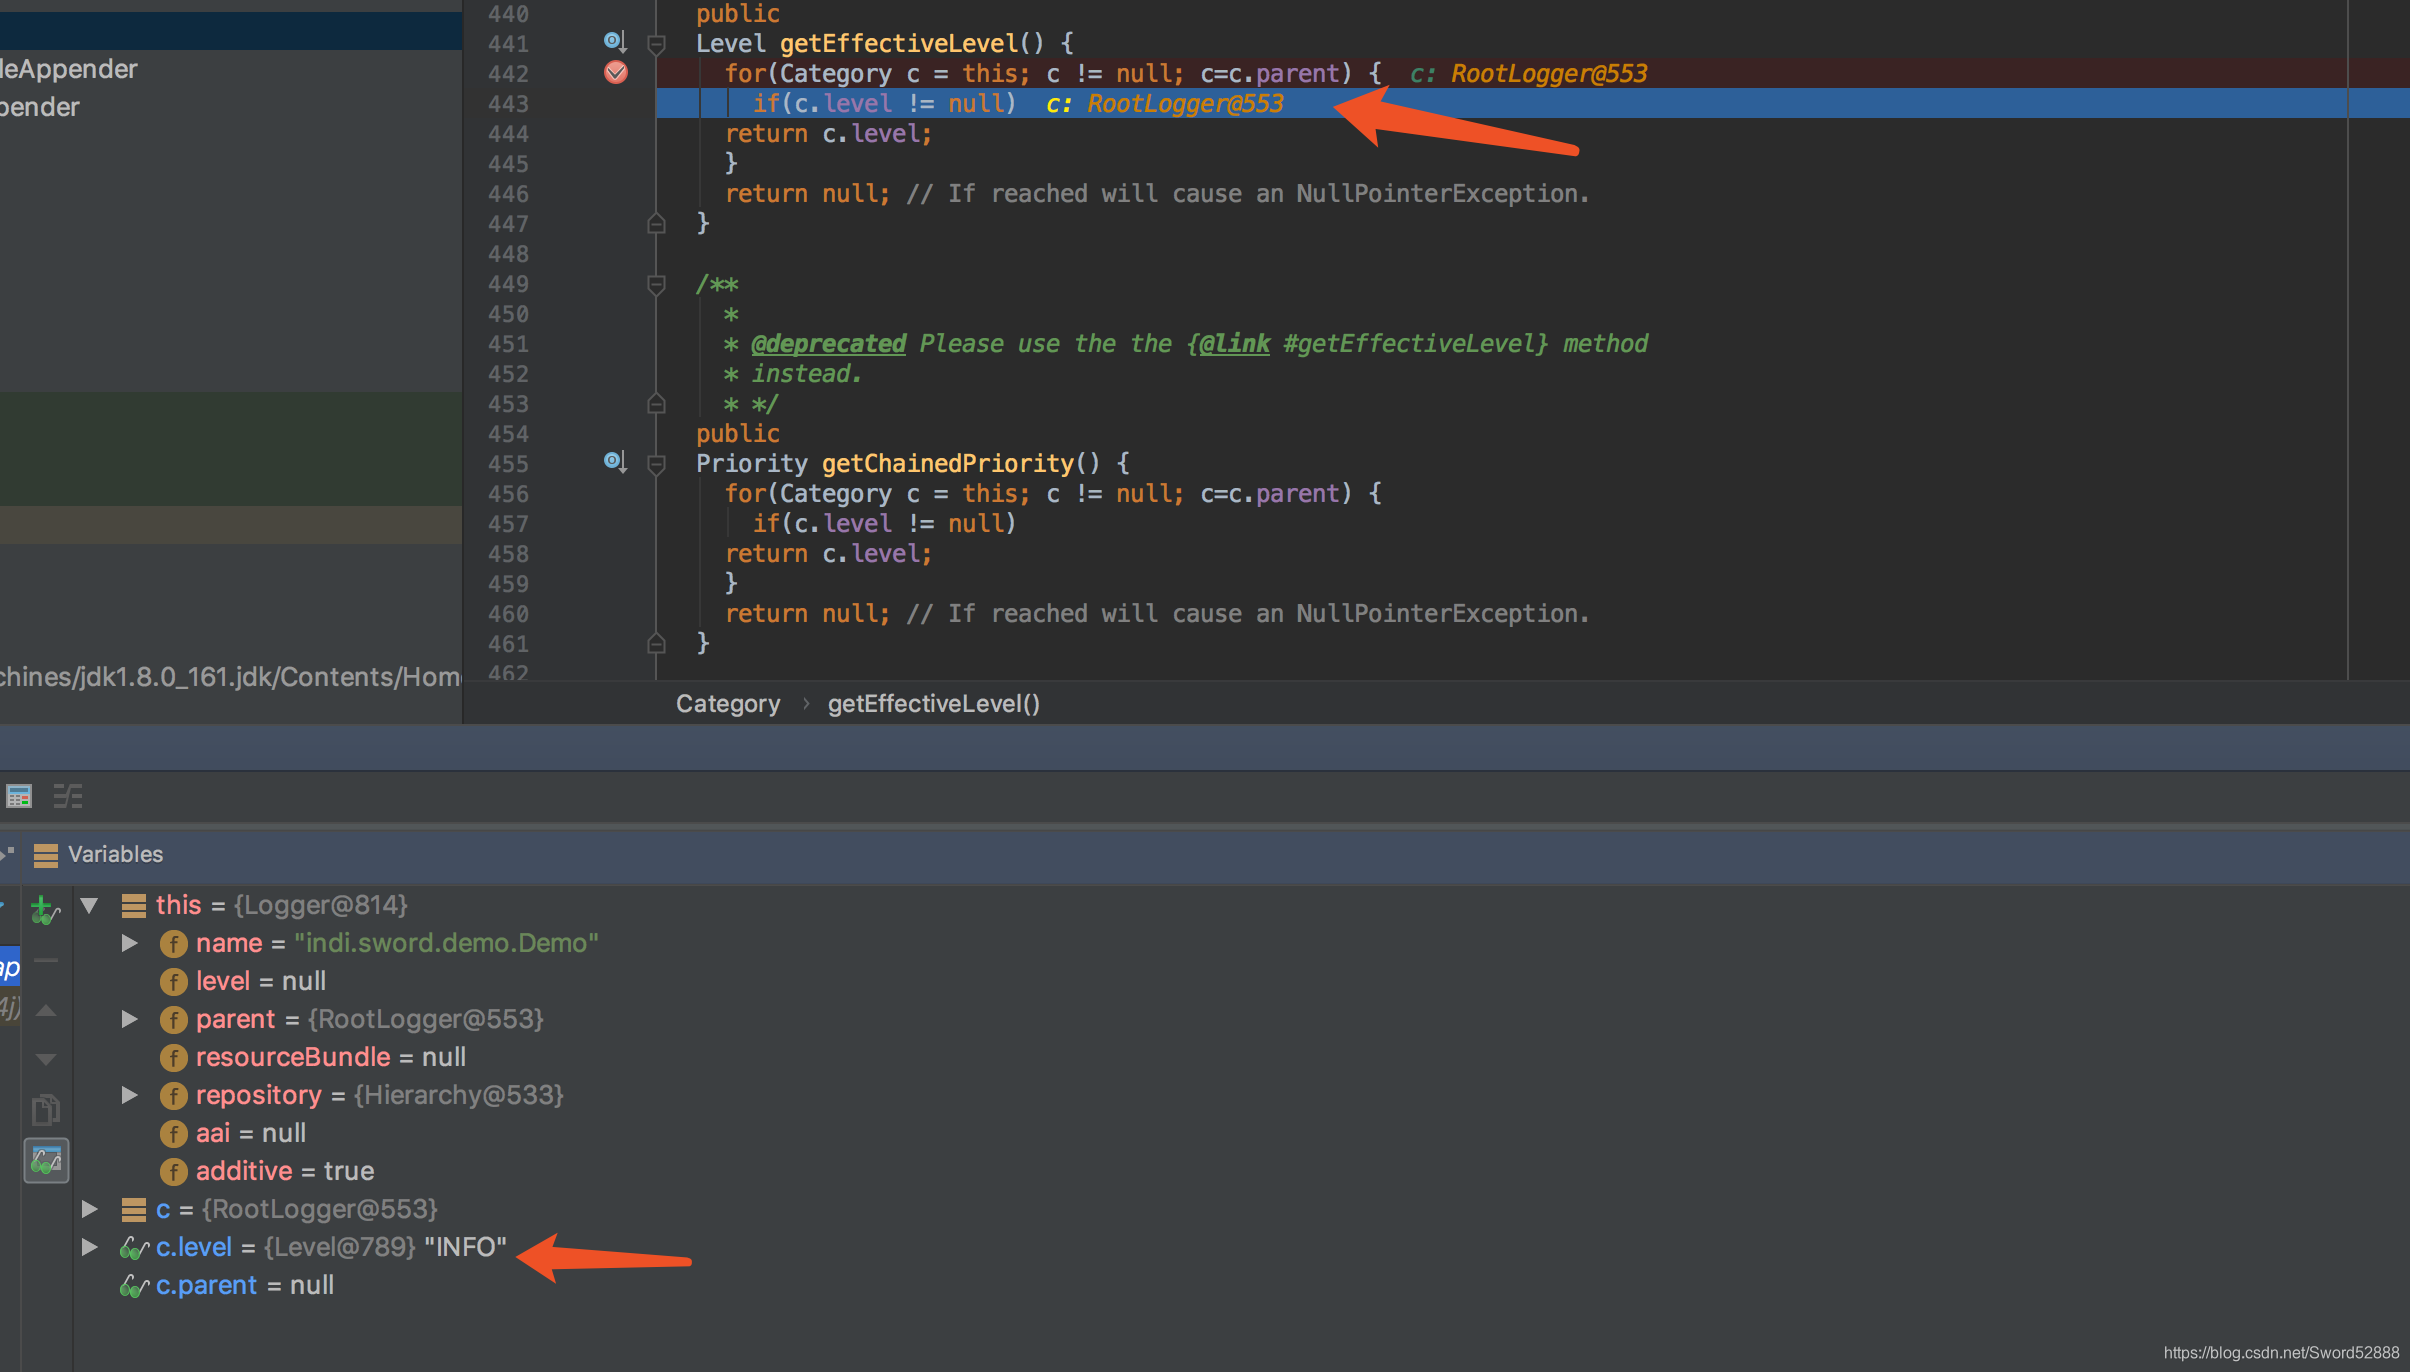
二、this.getEffectiveLevel() 哪来的?
1、 剖析 this.getEffectiveLevel() ,探索下这个Level 是怎么设置进去的,有get自然有set,那么自然可以找到当前类内部的 setLevel 方法
public class Category implements AppenderAttachable {

 volatile protected Level level;

...
  public void debug(Object message) {
    if(repository.isDisabled(Level.DEBUG_INT))
      return;
    if(Level.DEBUG.isGreaterOrEqual(this.getEffectiveLevel())) {
      forcedLog(FQCN, Level.DEBUG, message, null);
    }
  }
...

public Level getEffectiveLevel() {
    for(Category c = this; c != null; c=c.parent) {
      if(c.level != null)
	return c.level;
    }
    return null; // If reached will cause an NullPointerException.
}
...
public void setLevel(Level level) {
    this.level = level;
}
2、 接下来就是 要看 setLevel 在哪个地方被使用到,通过idea的工具,往上层找引用,你会发现不止一个引用处,这样不利于我们排查问题。
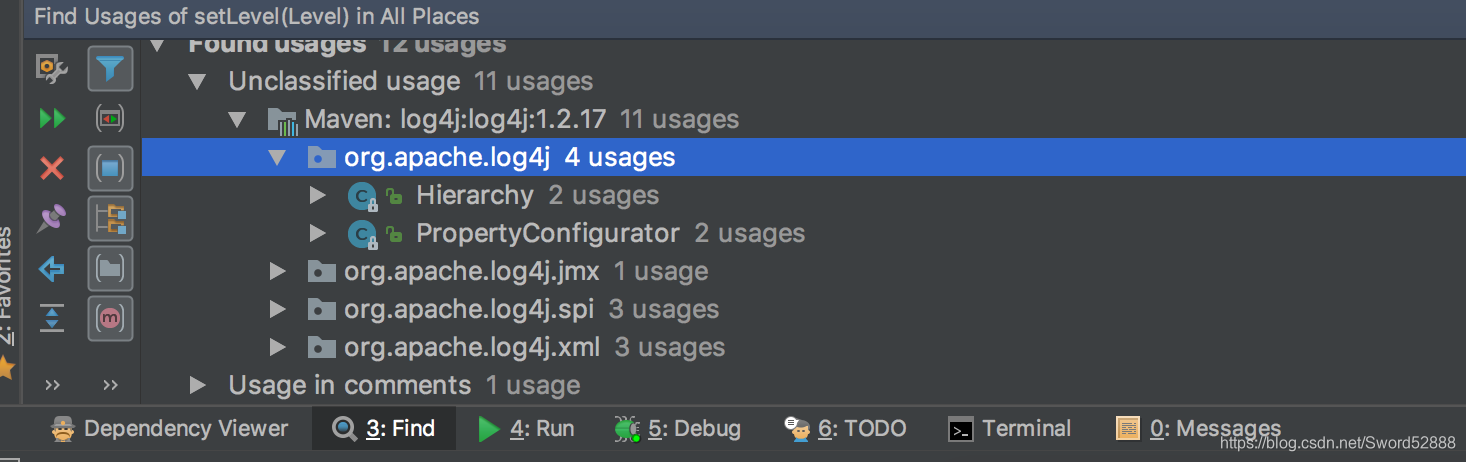
三、setLevel 到底是在那里被引用的?
一般来说,就刚刚我那两段主代码,自然可以想到是 Logger 初始化的时候 setLevel 进去的,看我的上一篇文章=点我=,可以知道 LogManager 有个static 代码块,用于初始化log4j的配置信息。
1、调试技巧 :在 static 的第一段代码打一个断点,不断追踪下去。

2、跟上一篇文章一样,看到关键代码:selectAndConfigure

3、继续点进去,看到关键代码 doConfigure
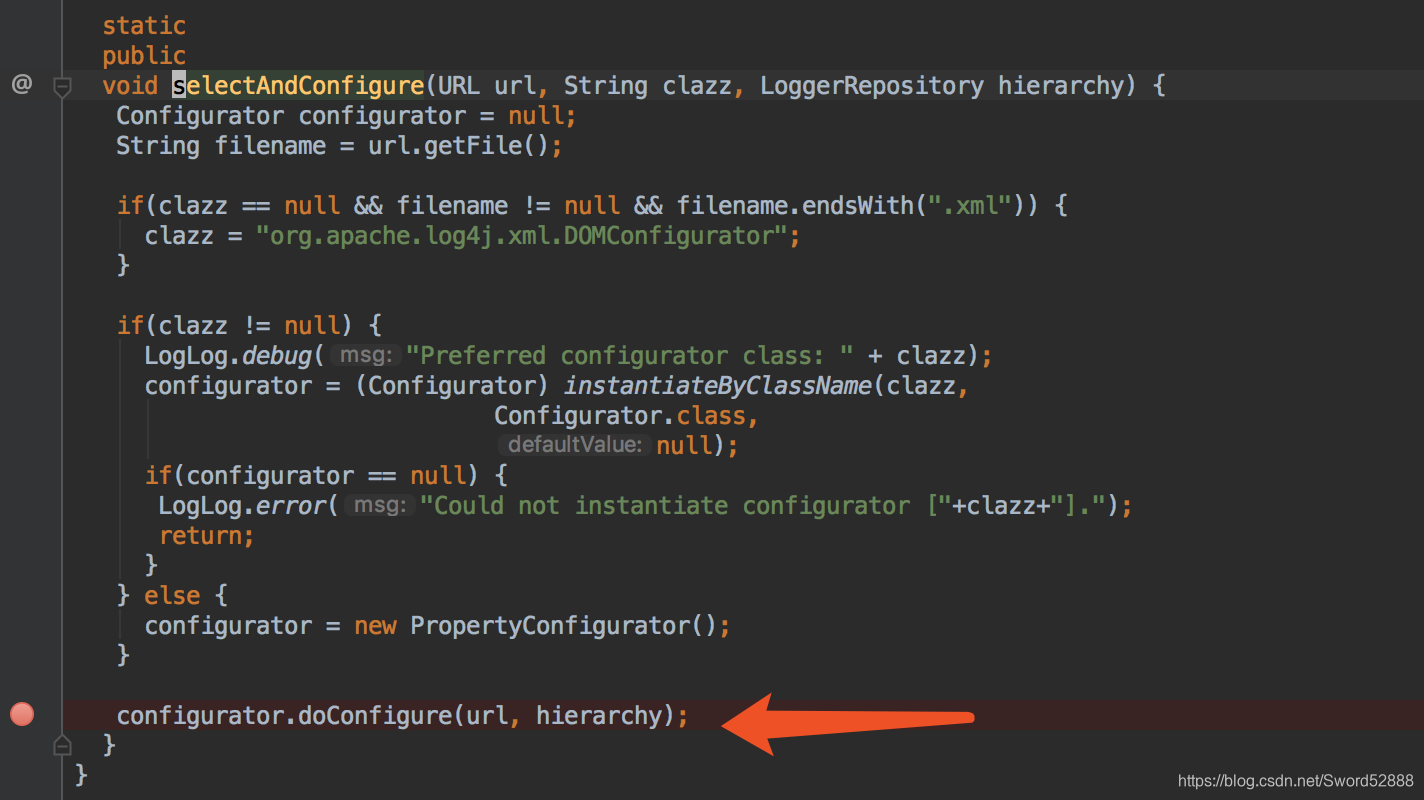
4、就继续点进去会来到 PropertyConfigurator类 的 doConfigure方法。为什么是PropertyConfigurator 看我上一篇文章=点我=
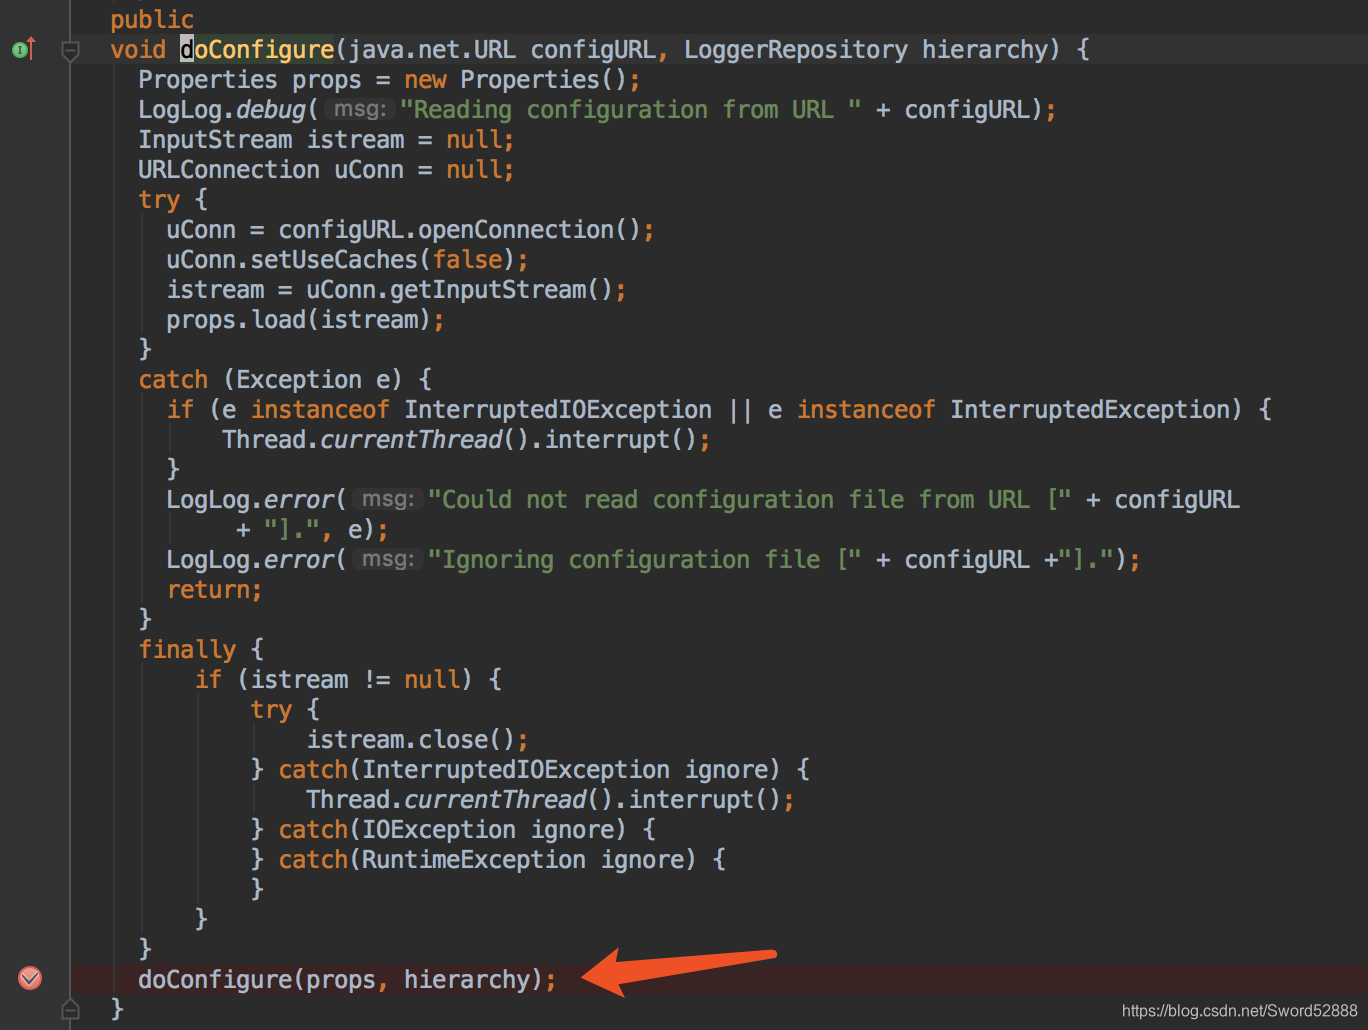
5、继续点进去 doConfigure 方法(重点观察红色箭头的两方法,第一个方法是以log4j.threshold 方式设置全局日志Level,第二种是我要讲的log4j.rootLogger=info,stdout,rollingLog 这个info的引用)

6、 直接看configureRootCategory(properties, hierarchy);为什么是 configureRootCategory 看我上一篇文章=点我=
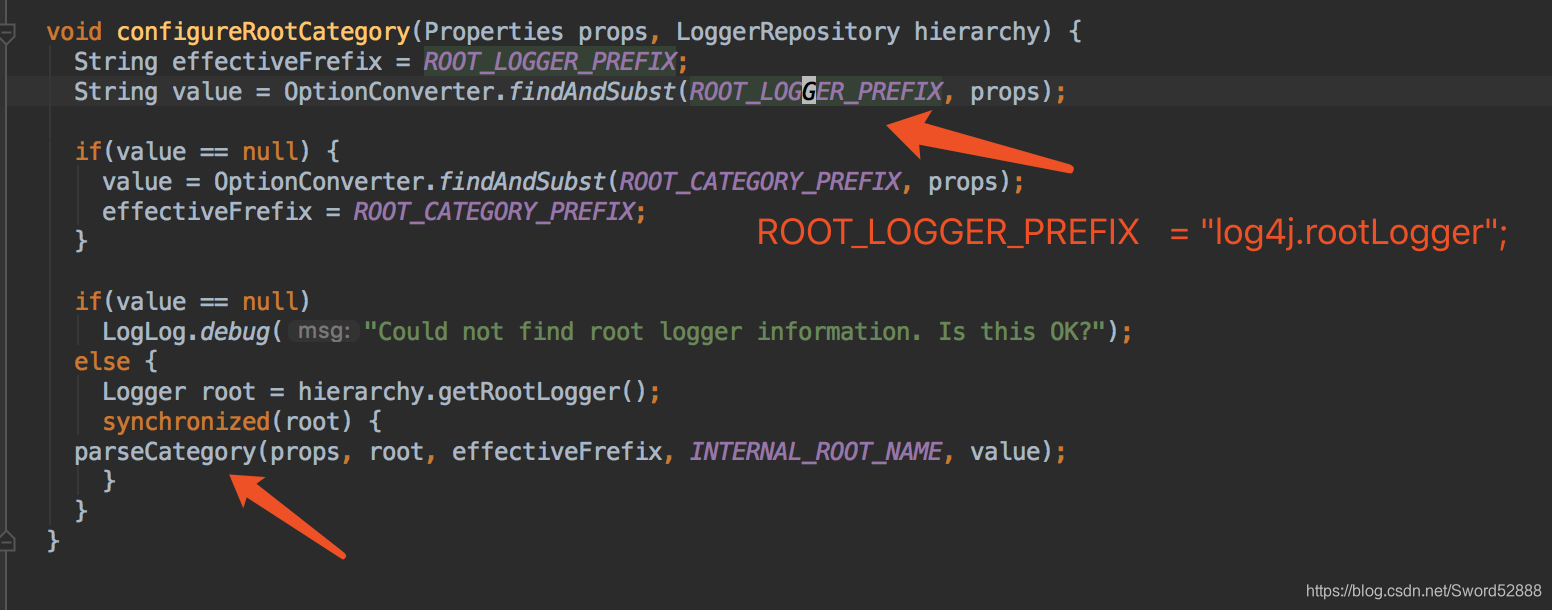
7、debug便于理解,直接盯住value这个值

8、点开 parseCategory 这个方法,看到调试结果没,这就是我们一路找的 setLevel的方法所在地,所以圆满对接上了。
四、log4j.properties 的其他属性呢?在哪设置进去的?
我们知道 :
log4j.rootLogger = [ level ] , appenderName1, appenderName2, …(默认输出目的地,当前端传入类名)
下面的代码刚好解释了一点 appenderName1日志输出地
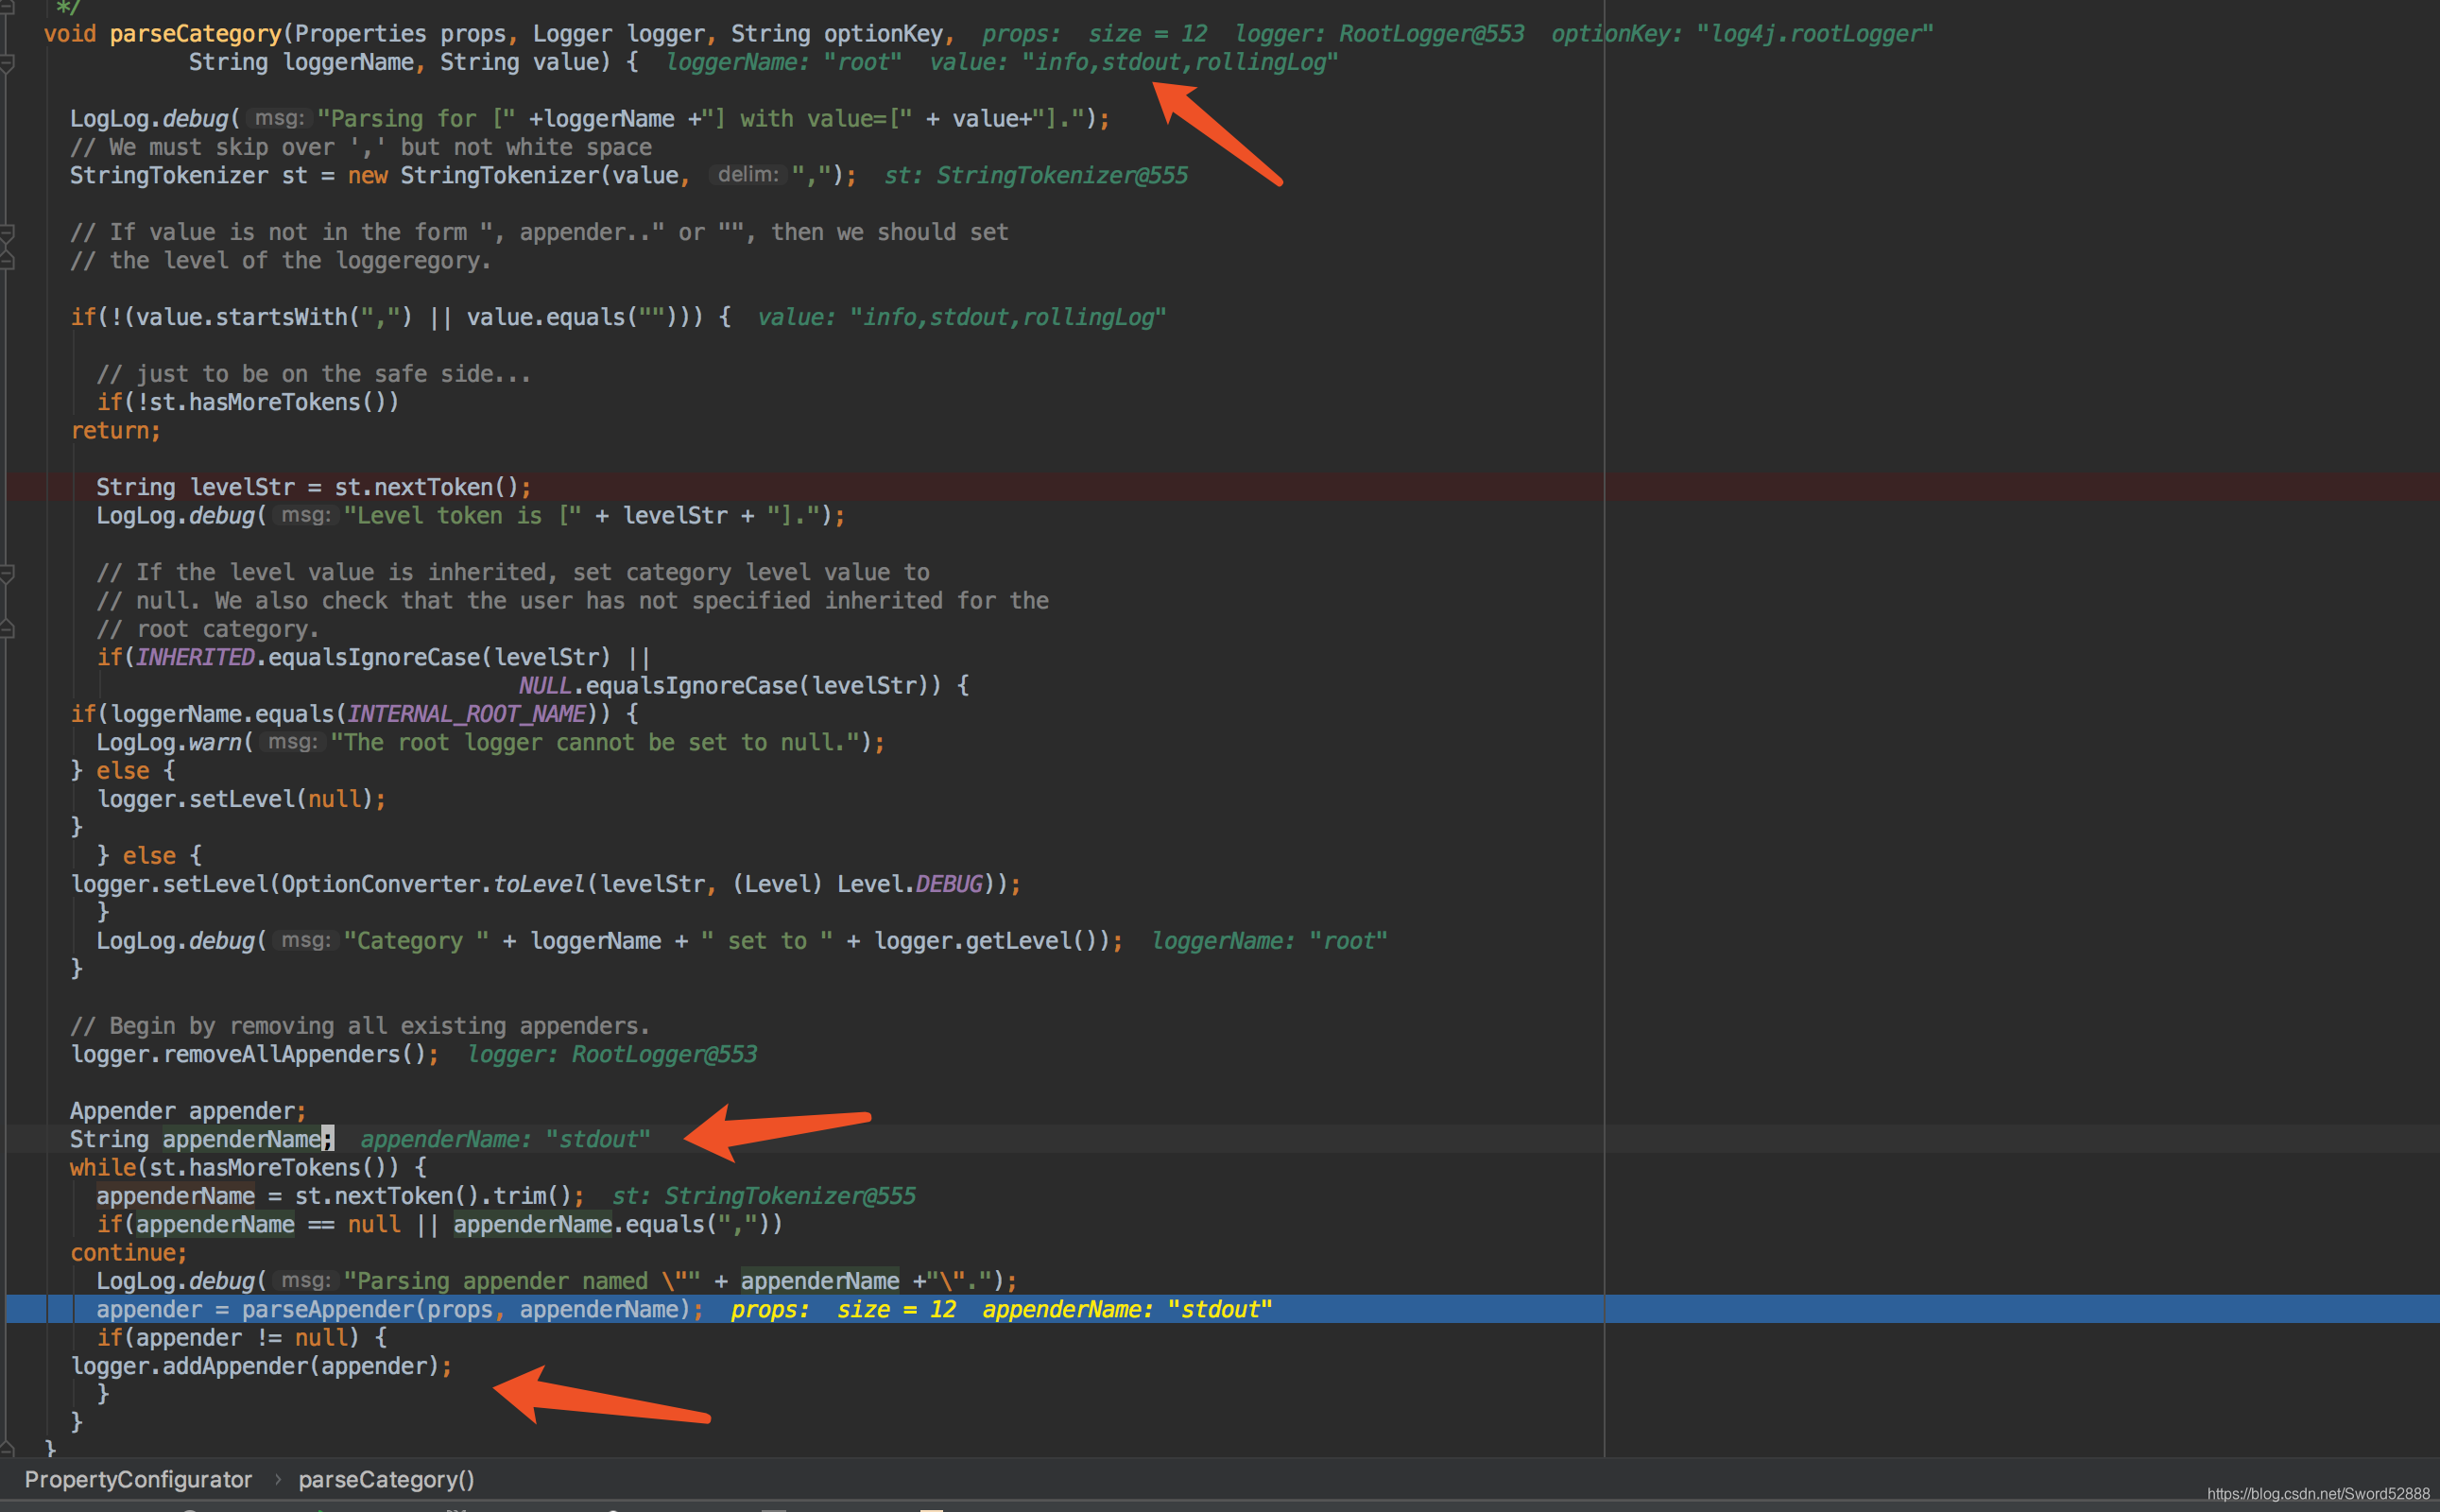
根据log4j.properties 配置文件,配置 stout 与 rollingLog 的 appender,然后logger.addAppender(appender); 完成配置。
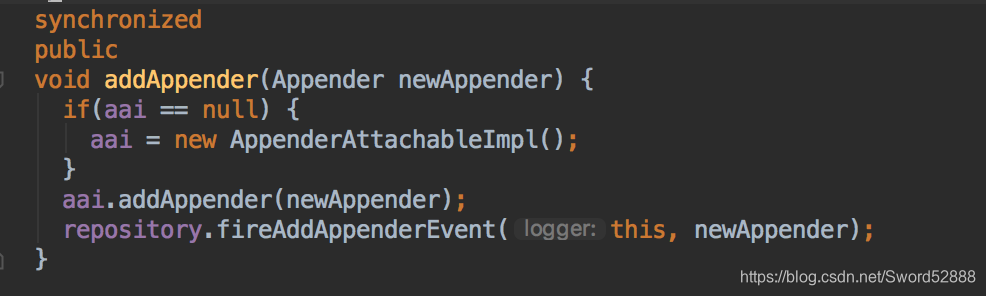
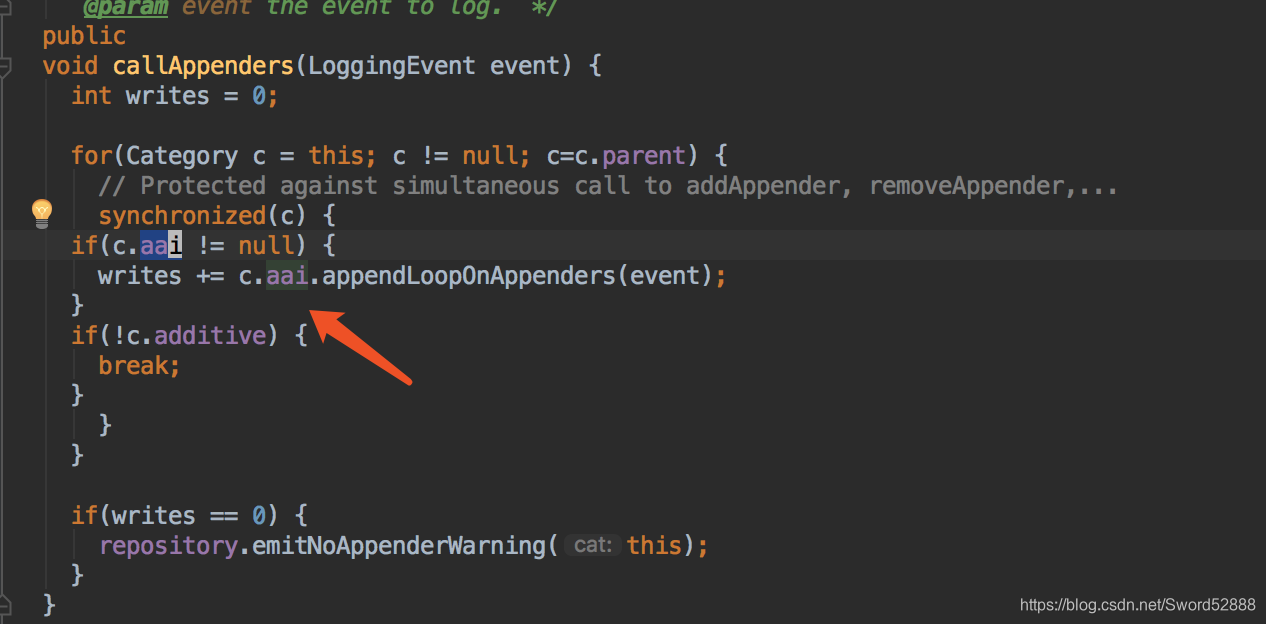
=注意这里的 aai,待会下面有用到=

于是:
info的值>debug,自然不会 ForceLog了。
五、正常如何打印?
1、修改下面的info为debug。
log4j.rootLogger=info,stdout,rollingLog
改为:
log4j.rootLogger=debug,stdout,rollingLog
这下子就进来了
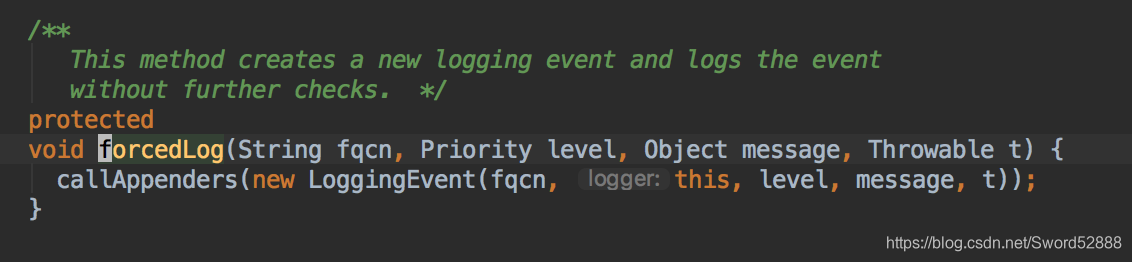
2、点开 forceLog 方法
3、 点开callAppenders 方法(注意aai,是不是很熟悉)
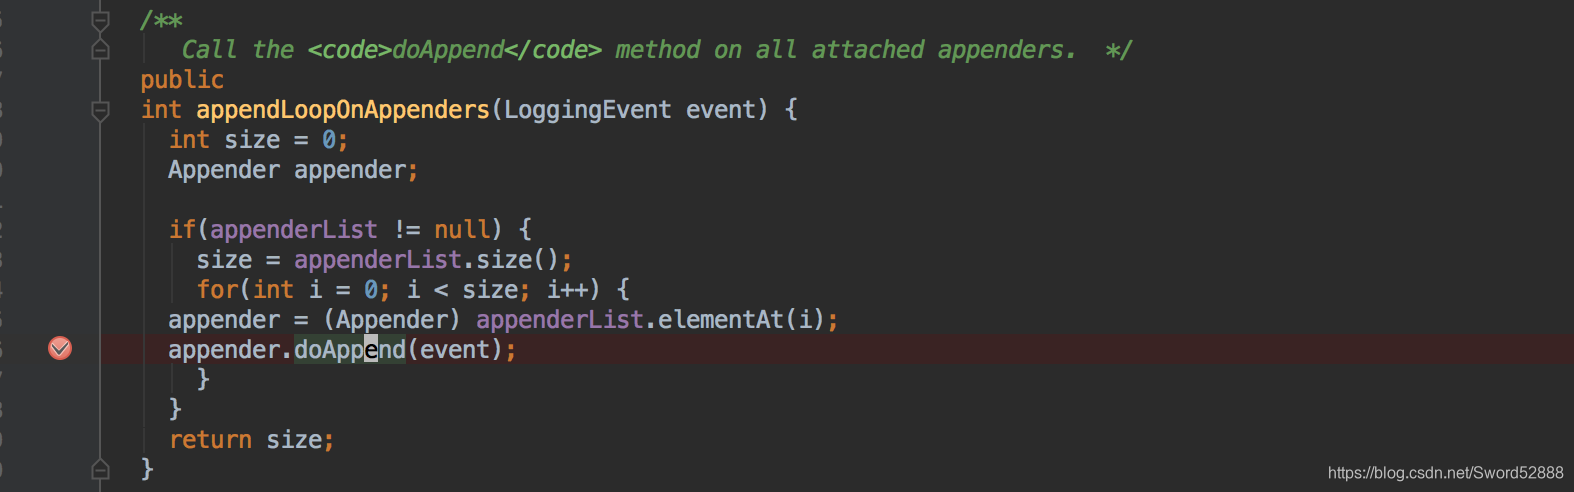
4、进入方法 appendLoopOnAppenders
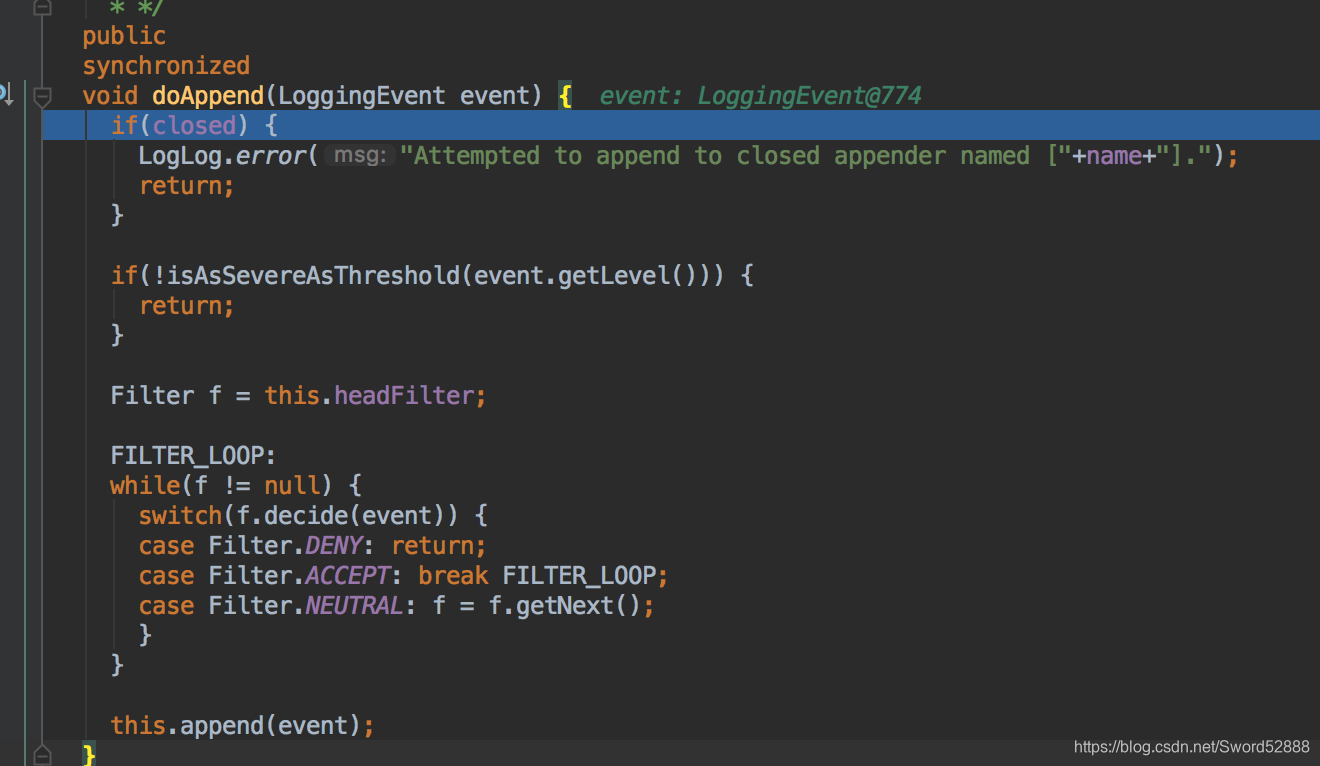
5、 debug进入 doAppend 方法,进入到
public abstract class AppenderSkeleton implements Appender, OptionHandler {
  public
  synchronized
  void doAppend(LoggingEvent event) {
    if(closed) {
      LogLog.error("Attempted to append to closed appender named ["+name+"].");
      return;
    }

    if(!isAsSevereAsThreshold(event.getLevel())) {
      return;
    }

    Filter f = this.headFilter;

    FILTER_LOOP:
    while(f != null) {
      switch(f.decide(event)) {
      case Filter.DENY: return;
      case Filter.ACCEPT: break FILTER_LOOP;
      case Filter.NEUTRAL: f = f.getNext();
      }
    }

    this.append(event);
  }
}
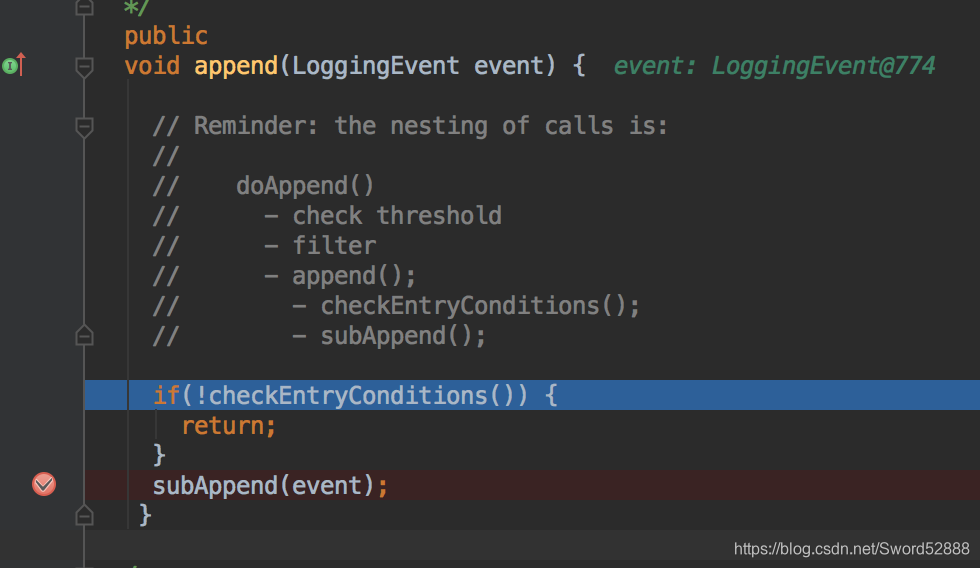
6、debug 进入 append方法
public class WriterAppender extends AppenderSkeleton {
  public
  void append(LoggingEvent event) {

    // Reminder: the nesting of calls is:
    //
    //    doAppend()
    //      - check threshold
    //      - filter
    //      - append();
    //        - checkEntryConditions();
    //        - subAppend();

    if(!checkEntryConditions()) {
      return;
    }
    subAppend(event);
   }
}
7、进入 subAppend方法,看到真正的写操作了
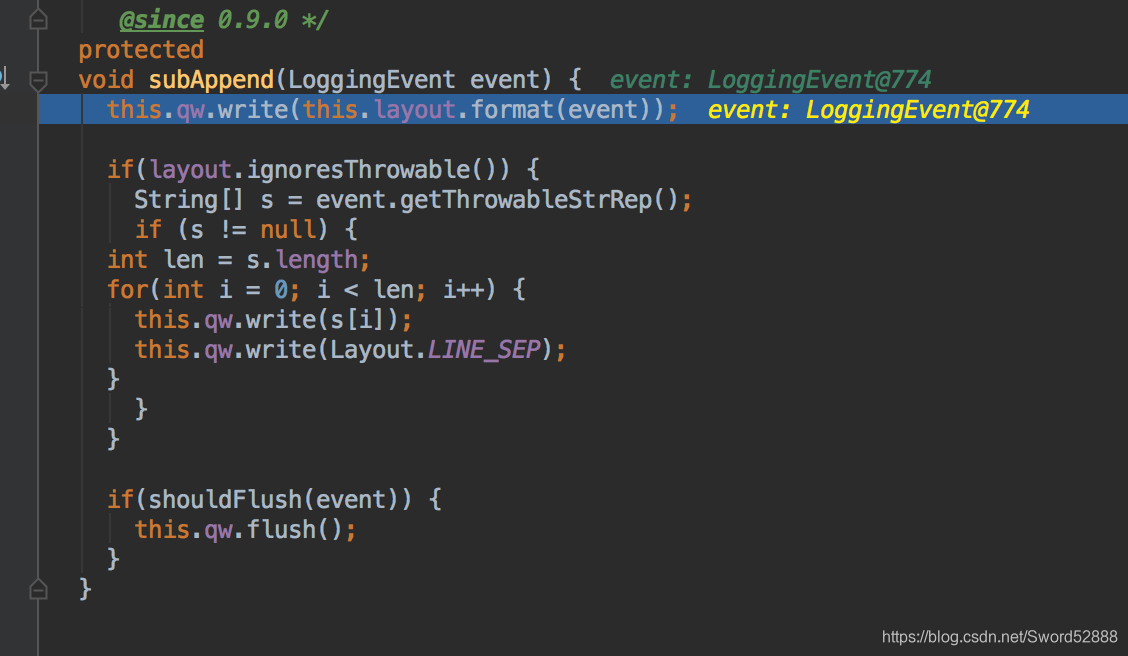
8、一个是写文件FileAppender、一个是写控制台 stout
OVER...


 1940
1940

 被折叠的 条评论
为什么被折叠?
被折叠的 条评论
为什么被折叠?
 到【灌水乐园】发言


