注:适用版本(HarmonyOS NEXT/5.0/API12+)
在上一篇文章中我们已经学会了如何使用AvRecorder进行录音功能的实现,那么有没有办法让我们的生意具象化,可视化呢,当然有的,我们鸿蒙当中也是同样可以实现这个操作的,接下来就让我们一起去实现吧~
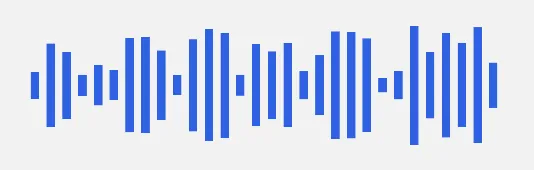
根据声音的大小实现声音振动特效就像这样,随着我们声音的大小振幅会随着变高变短。
实现步骤:
- 通过 getAudioCapturerMaxAmplitude 观察音频区间
-
- 定义状态变量 maxAmplitude
- 通过定时器, 每100ms获取一下声音振幅 (打印测试)
- 停止录音后, 要清除定时器
- 封装振动组件(AudioBoComp),通过声音振幅数据实现振动效果
-
- 定义属性接收最大振幅 maxAmplitude
- 定义状态(per)变量获取振幅比例
- 监听振幅变化 onChange
- 动画100毫秒过渡, 修改振幅比例
-
-
- <500 静音
- > 30000 达到峰值
- 其余正常
-
-
- 行(宽100%高100)>列(30条)<占满剩余空间 / 高度随机, 蓝色背景>
步骤已经明确,接下来就让我们按照以上的步骤进行一 一 实现
async startRecord(){
// 1. 创建一个音频接收对象
// 2. 开始准备
// 4. 记录声音的振幅
@State maxAmplitude: number = 0
timerId: number = 0
...
//3.监听声音的振幅
this.timerId = setInterval(async ()=>{
const res = await avRecorder.getAudioCapturerMaxAmplitude()
this.maxAmplitude = res
logger.info('maxAmplitude',this.maxAmplitude.toString())
},100)
}
// 清除录音
clearInterval(this.timerId)
this.maxAmplitude = 0
路径的储存和振幅的设置
// 5. 录制音频的文件路径
filePath:string = ''
avPlayer?: media.AVPlayer
@State total: number = 0
@State done: number = 0
@Component
export struct AudioBoComp {
// 属性: 振幅
@Prop @Watch('onChange') maxAmplitude: number = 0
// 波动比例
@State per: number = 0
/**
* 当振幅发生变化
*/
onChange(){
animateTo({duration: 100 }, ()=>{
// 1. >= 30000 1 顶峰
// 2. <= 500 0 静音
// 3. 其它情况
if(this.maxAmplitude >= 30000){
this.per = 1
} else if(this.maxAmplitude <= 500){
this.per = 0
} else {
this.per = this.maxAmplitude / 30000
}
})
}
build() {
Row({space: 3}){
ForEach(Array.from({length: 30}), ()=>{
Column()
//用随机数展示高度 显示参差不齐
.height(this.per * 100 * Math.random())
.layoutWeight(1)
.backgroundColor($r('app.color.common_blue'))
})
}
.width(200)
.height(100)
}
}
以上的代码提示就是我们按照步骤进行操作之后就可以实现的,但是总觉得还差点什么
一般我们录制都是有进度条的呢,所以接下来我们顺手也就一起实现了。接下来认识一个新的API:AvPlayer(具体我们在开发者文档中就可以查询的到哦)
实现步骤:
- 开始播放 startPlay
- 根据文件路径同步打开文件
- 创建avPlayer播放器
- stateChange事件监听
- initialized -> prepare()
- prepared -> 循环, 开始播放
- 设置avPlayer的url地址 (协议: fd://)
- 结束播放 stopPlay
-
进度条 监听时间更新 timeUpdate
开始操作
// 5. 录制音频的文件路径
filePath: string = ''
avPlayer?: media.AVPlayer
@State total: number = 0
@State done: number = 0
this.filePath = filePath
/**
* 开始播放
*/
async startPlay(){
// 1. 获取文件
const file = fileIo.openSync(this.filePath, fileIo.OpenMode.READ_ONLY)
// 2. 创建一个播放器
const avPlayer = await media.createAVPlayer()
// 3. 监听播放器的状态
avPlayer.on('stateChange', (state) => {
if (state === 'initialized') {
avPlayer.prepare()
} else if ( state === 'prepared') {
avPlayer.loop = true
avPlayer.play()
// 获取音频的总长度
this.total = avPlayer.duration
}
})
// 4. 设置播放器的url地址 本地 fd:// 网络 https:// http://
avPlayer.url = `fd://${file.fd}`
this.avPlayer = avPlayer
// 5. 监听播放时间的变化
avPlayer.on('timeUpdate', time => {
this.done = time
})
}
/**
* 结束播放
*/
stopPlay(){
if(this.avPlayer){
this.avPlayer.stop()
this.avPlayer.release()
}
}
准备完毕 build调用
Text('==============================')
// 进度条
Progress({total: this.total, value: this.done})
Button('开始播放')
.onClick(()=>{
this.startPlay()
})
Button('结束播放')
.onClick(()=>{
this.stopPlay()
})
以上我步骤走完我们的效果就已经实现了,接下来可以在评论区晒出你们的效果图哦~
下期再见~See you