


 本文详细介绍了如何安装和配置Elasticsearch及其与PHP的集成过程,包括JDK安装、Elasticsearch启动、Head插件及php客户端的使用,为开发者提供了全面的指导。
1.安装JDK
ElasticSearch是用JAVA语言开发的,其运行需要安装JDK。
JDK (Java Development Kit) ,是整个Java的核心,包括了Java运行环境(Java Runtime Envirnment),一堆Java工具和Java基础的类库(rt.jar)。
2.安装Elasticsearch
安装好后,配置环境变量。
然后打开命令行窗口 执行命令 elasticsearch -d 启动elasticsearch
注:该命令行窗口 不要关闭。
浏览器打开 http://localhost:9200
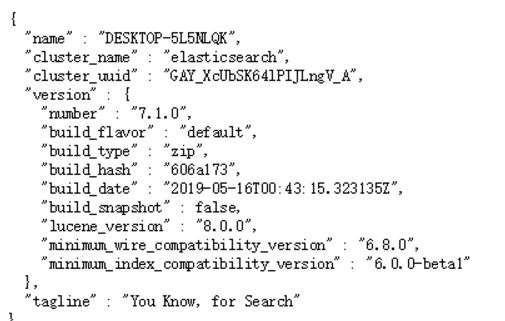
出现以上界面,则启动成功
2.1(选装)安装Elasticsearch-Head
elasticsearch-head是一个用于浏览ElasticSearch集群并与其进行交互的Web项目
GitHub托管地址:https://github.com/mobz/elasticsearch-head
安装:打开命令行,切换到Elasticsearch-Head目录,执行以下命令
npm install
启动:打开命令行,切换到Elasticsearch-Head目录,执行以下命令
npm run start
由于跨域(Elasticsearch位于9200端口),需要添加配置: E:\elasticsearch-7.1.0\config\elasticsearch.yml中
#新添加的配置行
http.cors.enabled: true
http.cors.allow-origin: "*"
2.2安装Elasticsearch-php
使用composer安装:在项目目录下,执行以下命令
composer require elasticsearch/elasticsearch
配置php.ini的sys_temp_dir

3.ElasticSearch基本使用
3.1 基本概念
3.1.1 节点与集群
Elastic 本质上是一个分布式数据库,允许多台服务器协同工作,每台服务器可以运行多个 Elastic 实例。
单个 Elastic 实例称为一个节点(node)。一组节点构成一个集群(cluster)。
3.1.2 索引
在Elasticsearch中存储数据的行为就叫做索引(indexing)
在Elasticsearch中,文档归属于一种类型(type),而这些类型存在于索引(index)中类比传统关系型数据库:
Relational DB -> Databases -> Tables -> Rows -> Columns
Elasticsearch -> Indices   -> Types  -> Documents -> Fields
Elasticsearch集群可以包含多个索引(indices)(数据库)
每一个索引可以包含多个类型(types)(表)
每一个类型包含多个文档(documents)(行)
然后每个文档包含多个字段(Fields)(列)。
3.2 基本使用
3.2.1 创建索引
$es = \Elasticsearch\ClientBuilder::create()->setHosts(['127.0.0.1:9200'])->build();
$params = [
    'index' => 'test_index'
];
$r = $es->indices()->create($params);
dump($r);die;
预期结果:
array(3) {
  ["acknowledged"] => bool(true)
  ["shards_acknowledged"] => bool(true)
  ["index"] => string(10) "test_index"
}
3.2.2 添加文档(索引文档)

$es = \Elasticsearch\ClientBuilder::create()->setHosts(['127.0.0.1:9200'])->build();
$params = [
    'index' => 'test_index',
    'type' => 'test_type',
    'id' => 100,
    'body' => ['id'=>100, 'title'=>'PHP从入门到精通', 'author' => '张三']
];

$r = $es->index($params);
dump($r);die;
预期结果:
array(8) {
  ["_index"] => string(10) "test_index"
  ["_type"] => string(9) "test_type"
  ["_id"] => string(3) "100"
  ["_version"] => int(1)
  ["result"] => string(7) "created"
  ["_shards"] => array(3) {
    ["total"] => int(2)
    ["successful"] => int(1)
    ["failed"] => int(0)
  }
  ["_seq_no"] => int(0)
  ["_primary_term"] => int(1)
}
3.2.3 修改文档
$es = \Elasticsearch\ClientBuilder::create()->setHosts(['127.0.0.1:9200'])->build();
$params = [
    'index' => 'test_index',
    'type' => 'test_type',
    'id' => 100,
    'body' => [
        'doc' => ['id'=>100, 'title'=>'ES从入门到精通', 'author' => '张三']
    ]
];

$r = $es->update($params);
dump($r);die;
预期结果:
array(8) {
  ["_index"] => string(10) "test_index"
  ["_type"] => string(9) "test_type"
  ["_id"] => string(3) "100"
  ["_version"] => int(2)
  ["result"] => string(7) "updated"
  ["_shards"] => array(3) {
    ["total"] => int(2)
    ["successful"] => int(1)
    ["failed"] => int(0)
  }
  ["_seq_no"] => int(1)
  ["_primary_term"] => int(1)
}
3.2.4 删除文档
$es = \Elasticsearch\ClientBuilder::create()->setHosts(['127.0.0.1:9200'])->build();
$params = [
    'index' => 'test_index',
    'type' => 'test_type',
    'id' => 100,
];

$r = $es->delete($params);
dump($r);die;
预期结果:
array(8) {
  ["_index"] => string(10) "test_index"
  ["_type"] => string(9) "test_type"
  ["_id"] => string(3) "100"
  ["_version"] => int(3)
  ["result"] => string(7) "deleted"
  ["_shards"] => array(3) {
    ["total"] => int(2)
    ["successful"] => int(1)
    ["failed"] => int(0)
  }
  ["_seq_no"] => int(2)
  ["_primary_term"] => int(1)
}


 2907
2907

 被折叠的 条评论
为什么被折叠?
被折叠的 条评论
为什么被折叠?
 到【灌水乐园】发言


