


 本文是Vue App项目的第三部分总结,涵盖分类页面的构建,包括页面结构、网络请求和组件使用;用户登录功能的实现,涉及路由、登录页面布局及前端验证;以及商品详情页的图片点击放大功能预告。项目源码可在GitHub找到。
本项目GitHub地址:https://github.com/Yue-Shang/shop-app
vue-app项目知识点总结(一)
vue-app项目知识点总结(二)
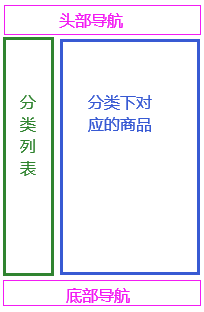
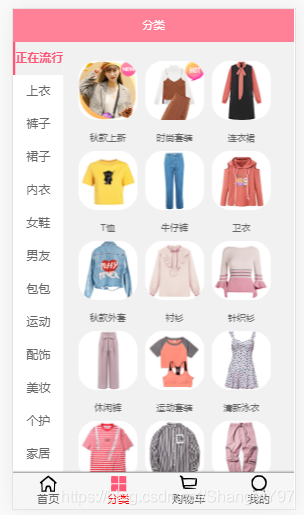
一.分类页面
1.页面结构
2.新建文件夹
主页面:Category.vue
分类列表:CategoryList.vue
对应商品:CategoryGoods.vue
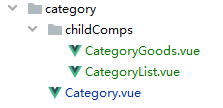
网络请求都写到Category.js中

3.我们先写分页主页面大框
这里我们先把左侧列表引到里面来了
Category.vue
<template>
  <div id="category">
    <nav-bar class="category-nav"><div slot="center">分类</div></nav-bar>
    <div class="content">
        <category-list :category="category" @selectUtem="selectUtem"/>
    </div>
  </div>
</template>

<script>
    import CategoryList from "./childComps/CategoryList";

    import Scroll from "components/common/scroll/Scroll";
    import NavBar from "components/common/navbar/NavBar";

    import {getCategoryList} from "network/Category";

    export default {
        name: "Category.vue",
        components:{Scroll,CategoryList,NavBar},
        data (){
            return{
               scroll:null,
                category:[],
            }
        },
        created() {
            this.getCategoryList()
        },
        methods:{
            getCategoryList(){
                getCategoryList().then(res =>{
                    this.category = res.data.category.list
                })
            }
        }
    }
</script>
css样式代码里看
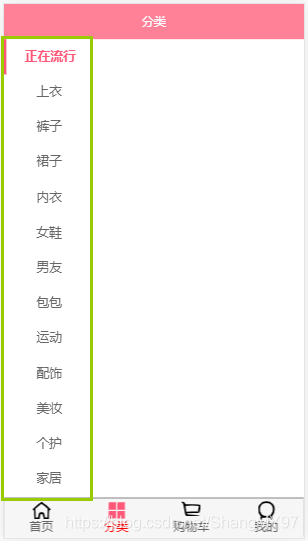
4.左侧分类列表
1)请求网络数据
Category.js
import {request} from "./request";

export function getCategoryList() {
  return request({
    url:'/category'
  })
}
2)分类列表
<template>
   <scroll>
     <div id="category-list">
       <div class="category-title"
            :class="{active: index === isAction}"
            v-for="(item,index) in category"
            :key="index"
            @click="itemClick(index)"
       >
         {{item.title}}
       </div>
     </div>
   </scroll>
</template>

<script>
    import Scroll from "components/common/scroll/Scroll";
    export default {
        name: "CategoryList",
        components: {Scroll},
        data(){
            return {
                isAction:0
            }
        },
        props:{
            category:Array
        },
        methods:{
            itemClick(index){
                this.isAction = index
                this.$emit('selectUtem',index)
            }
        }
    }
</script>

<style scoped>
  #category-list{
    width: 30%;
    height: 100%;
    box-sizing: border-box;
  }
  .category-title{
    height: 44px;
    width: 100%;
    text-align: center;
    line-height: 44px;
  }
  .category-title.active {
    font-weight: 700;
    color: var(--color-high-text);
    background-color: #fff;
    border-left: 3px solid var(--color-high-text);
  }
</style>
box-sizing: border-box;https://www.w3school.com.cn/cssref/pr_box-sizing.asp
效果:
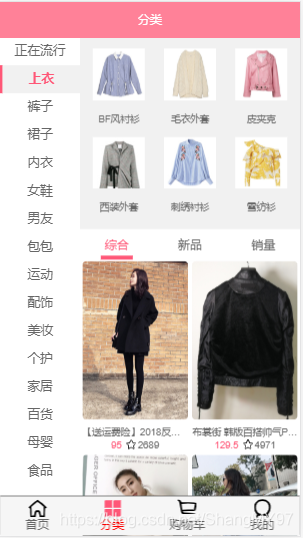
5.左侧对应商品展示
1)请求网络数据
Category.js
export function getSubcategory(maitKey) {
  return request({
    url:'http://152.136.185.210:8000/api/n3/subcategory',
    params: {
      maitKey
    }
  })
}
2)导入到父组件中
但是右侧可不是老老实实的显示maitKey对应的数据就完了,商品下还有个便签页,对商品进行分类展示,这个标签页我们之前在首页写过直接拿过来用就可以
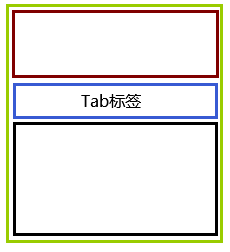
所以我们需要在Category.vue中引用三个组件
i)CategoryGoods
我们根据屏幕显示大小排列不同个数的商品图片
<template>
  <div class="category-goods">
        <div class="item" v-for="(item,index) in subcategories.list" :key="index">
          <a :href="item.link">
            <img class="item-img" :src="item.image" alt="">
            <div class="item-text">{{item.title}}</div>
          </a>
        </div>
  </div>
</template>
...
props:{
            subcategories: {
                type: Object,
                default() {
                    return []
                }
            }
        }
 css样式参考代码,这里我们要注意保证每行是3个商品图片,我们把宽度设置成百分比
放到Category.vue中
<scroll class="tab-content"
        ref="scroll"
        :probe-type="3"
        :pull-up-load="true"
>
<div>
    <category-goods :subcategories="showSubcategory"></category-goods>
</div>
</scroll>

import CategoryGoods from "./childComps/CategoryGoods";"components/common/tabControl/TabControl";

import {...getSubcategory} from "network/Category";
export default {
        name: "Category",
        components:{...,CategoryGoods},
        data (){
            return{
               scroll:null,
                category:[],
                currentIndex:-1,
                categoryData: {},
            }
        },
        created() {
            this.getCategoryList()
        },
        computed:{
            showSubcategory() {
                if (this.currentIndex === -1) return {}
                return this.categoryData[this.currentIndex].subcategories
            },
        },
        methods:{
            getCategoryList(){
                getCategoryList().then(res =>{
                    // 1.获取分类数据
                    this.category = res.data.category.list
                    // // 2.初始化每个类别的子数据
                    for (let i = 0; i < this.category.length; i++) {
                        this.categoryData[i] = {
                            subcategories: {},
                        }
                    }
                     // 3.请求第一个分类的数据,不调用的话刚进来currentIndex值为-1,什么都不显示
                    this.getSubcategory(0)
                })
            },
            getSubcategory(index){
                this.currentIndex = index;
                const maitKey = this.category[index].maitKey;
                getSubcategory(maitKey).then(res =>{
                    this.categoryData[index].subcategories = res.data
                    //ES6中的json展开功能
                    this.categoryData = {...this.categoryData}
                })
            },
            //侧边栏的点击事件,点击显示对应的商品信息
            selectUtem(index){
                this.getSubcategory(index)
            }
        }

    }
效果如下
滑动有点不好使
ii)标签页部分


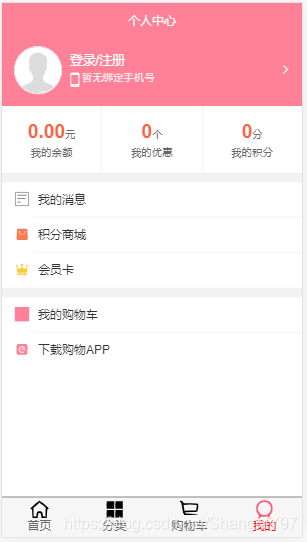
二.用户登录功能
我们点击登录要弹出一个登录页面
1.首先我们就要去建一个登录的路由
router/index.js
路由懒加载
const Login = () => import('../views/login/Login')
...
  {
    path: '/login',
    component: Login
  },
想点击这里

实现跳转
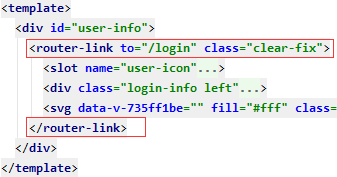
src\views\profile\childComps\UserInfo.vue
把a标签替换为
<router-link to="/login" class="clear-fix"></router-link>
2.新建Login文件
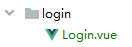
但是我们发现问题,这个底部导航我们不需要呀,怎么处理呢?
在配置映射的时候有这样一个映射meta,我们给需要导航的路由下加上这个
router/index.js
{
    path:'',
    redirect: '/home',
    meta:{
      showFooter:true
    }
  },
在App.vue
$route代表当前路由
<main-tab-bar v-show="$route.meta.showFooter"/>
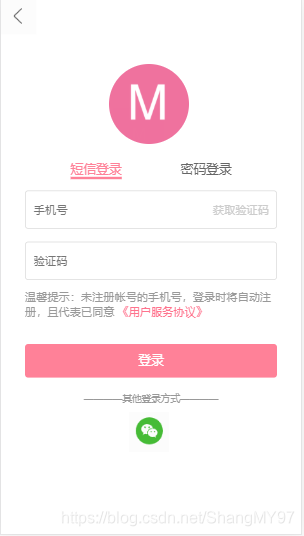
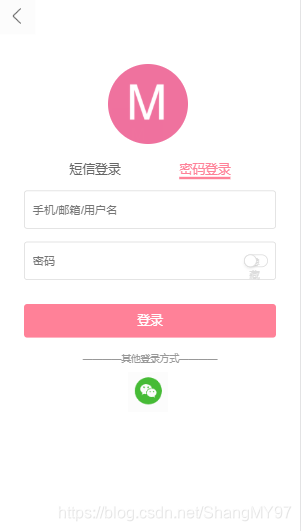
3.对登录页面进行布局
<template>
    <div class="login">
      <nav-bar>
        <div slot="left" @click="backClick" class="login-back"></div>
      </nav-bar>
      <div><span class="login-logo"></span></div>
      <div class="login-header">
        <a href="javascript:;" :class="{active: isActive}" @click="isActive=true"><span>短信登录</span></a>
        <a href="javascript:;" :class="{active: !isActive}" @click="isActive=false"><span>密码登录</span></a>
      </div>
      <div class="login_content">
        <form>
          <!-- 短信登陆 -->
          <div :class="{active2: !isActive}">
            <section class="login_message">
              <input type="tel" maxlength="11" placeholder="手机号">
              <button disabled="disabled" class="get_verification">获取验证码</button>
            </section>
            <section class="login_verification">
              <input type="tel" maxlength="8" placeholder="验证码">
            </section>
            <section class="login_hint">
              温馨提示:未注册帐号的手机号,登录时将自动注册,且代表已同意
              <a href="javascript:;">《用户服务协议》</a>
            </section>
          </div>
          <!-- 密码登陆 -->
          <div :class="{active2: isActive}">
            <section>
              <section class="login_message">
                <input type="text" maxlength="11" placeholder="手机/邮箱/用户名" v-model="name">
              </section>
              <section class="login_verification">
                <!-- 是否显示密码 -->
                <input type="text" maxlength="8" placeholder="密码">
                <input type="password" maxlength="8" placeholder="密码" >
                <div class="switch_button off" >
                  <div class="switch_circle" ></div>
                  <span class="switch_text">{{showPwd ? '显示' : '隐藏'}}</span>
                </div>
              </section>
            </section>
          </div>
          <button class="login_submit" @click.prevent="login">登录</button>
        </form>
        <a href="javascript:;" class="other-login">————其他登录方式————</a>
        <div class="weixin"></div>
      </div>
      </div>
</template>

<script>
    import NavBar from "components/common/navbar/NavBar";
    export default {
        name: "Login",
        components: {NavBar},
        data(){
            return{
              isActive:true,
            }
        },
        methods:{
            //返回按钮
            backClick(){
                this.$router.back()
            }
        },
    }
</script>
css查看源代码
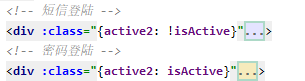
(1)实现标签切换显示不同内容
<a href="javascript:;" :class="{active: isActive}" @click="isActive=true"><span>短信登录</span></a>
<a href="javascript:;" :class="{active: !isActive}" @click="isActive=false"><span>密码登录</span></a>
     .active span{
       border-bottom:3px solid #FF8198;
       color: #FF8198;
     }
     .active2 {
       display: none;
     }
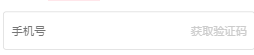
(2)手机登录格式规定
双向绑定一个phone
<input type="tel" maxlength="11" placeholder="手机号" v-model="phone">
data(){
    return{
         phone:'',//手机号
    }
},
computed:{
   rightPhone(){
        return /^1\d{10}$/.test(this.phone)
   }
}
符合这个正则的才能点击‘获取验证码’按钮,prevent禁止默认行为
right_phone样式在手机号符合条件后按钮变色
<button :disabled="!rightPhone"
		class="get_verification"
        :class="{right_phone: rightPhone}"
        @click.prevent="getCode">
    {{codeTime>0 ? `已发送(${codeTime}s)` : '获取验证码'}}
</button>
如图输入手机号前后按钮变色

        data(){
            return{
              isActive:true,
              phone:'',//手机号
              codeTime: 0, // 验证码倒计时
            }
        },
        methods:{
            //启动倒计时
            getCode(){
                //如果当前没有计时
                if(!this.codeTime){
                    //发送ajax请求(向指定手机号发送验证短信)
                    this.codeTime = 30
                    const intercalId = setInterval(()=>{
                        this.codeTime--
                        if (this.codeTime<=0){
                            //停止计时
                            clearInterval(intercalId)
                        }
                    },1000)
                }
            },
        }
点击获取验证码后效果

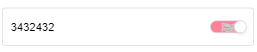
(3)用户名密码登陆显示、*隐藏问题
添加样式,让输入框获取焦点后变色
     .login_content input:focus{
       border: 1px solid #FF8198;
     }

密码显示有两个状态text和password,我们要定义一个标识状态showPwd来区分这两种状态。注意这个v-model的内容要都是一样的input框内内容才一样
<input type="text" maxlength="8" placeholder="密码" v-if="showPwd" v-model="pwd">
<input type="password" maxlength="8" placeholder="密码" v-else v-model="pwd">
...
data(){
    return{
      ...
      code:'',//验证码
      name:'',//用户名
      pwd:'',//用户密码
      showPwd:false//是否显示密码
     }
},
接下来点击监听切换showPwd的值
<div class="switch_button" :class="showPwd?'on':'off'" @click="showPwd=!showPwd">
     <div class="switch_circle" :class="{right: showPwd}"></div>
     <span class="switch_text">{{showPwd ? '显示' : '隐藏'}}</span>
</div>
...
.on{
       background: #FF8198;;
   }
.off{
       background: white;
   }
   //小圆圈点完移动位置
.right{
       transform:translateX(30px);
}
效果如下

(4)前台表达验证,弹出提示框

新建一个弹窗组件
<!--登录页面提示弹框-->
<template>
  <div class="alert_container">
    <section class="tip_text_container">
      <div class="tip_icon"></div>
      <p class="tip_text">{{alertText}}</p>
      <div class="confrim" @click="closeTip">确认</div>
    </section>
  </div>
</template>

<script>
    export default {
    	//拿到父组件传过来的提示信息
        props: {
            alertText: String
        },

        methods: {
            closeTip () {
                // 分发自定义事件(事件名: closeTip)
                this.$emit('closeTip')
            }
        }
    }
</script>
css查看源代码
Login.vue中导入
 <alert-tip :alertText="alertText" v-show="showAlert" @closeTip="closeTip"/>

import AlertTip from "components/common/alertTip/AlertTip";

components: {AlertTip},

data(){
    return{
       ...
       showAlert:false,//是否显示校验弹框
       alertText:'',//提示文本
     }
},
methods:{
        ...
     //异步登录按钮
     alertMessage(alertText){
       this.showAlert = true
       this.alertText = alertText
      },
      login(){
        //前台表单验证
        if(this.isActive){//短信登录
           const {rightPhone,authCode,phone,code} = this
           if (!this.rightPhone){
              //手机号不正确
              this.alertMessage('手机号不正确');
           }else if (!this.authCode) {
              //验证必须是6位数字
               this.alertMessage('验证必须是6位数字');
           }
         }else{//密码登录
            const {name,pwd} = this
            if (!this.name) {
               //用户名必须指定
               this.alertMessage('用户名必须指定');
            }else if(!this.pwd) {
                //密码必须指定
                this.alertMessage('密码必须指定');
            }
         }
      },
      //弹框的“确定”按钮
      closeTip(){
          this.showAlert = false
          this.alertText = ''
      },
},
computed:{
     rightPhone(){
          return /^1\d{10}$/.test(this.phone)
     },
     authCode(){
          return /^\d{6}$/.test(this.code)
     }
}
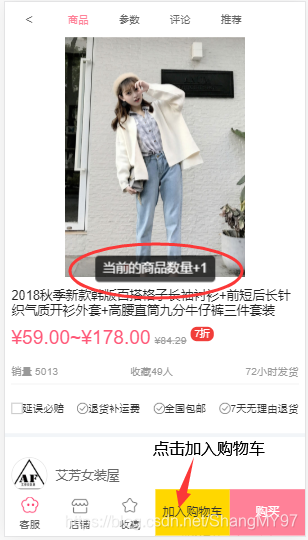
三.商品详情用户评论图片点击放大

过几天补充,代码在src\components\content\commentPhoto\CommentPhoto.vue
四.购物车选择功能
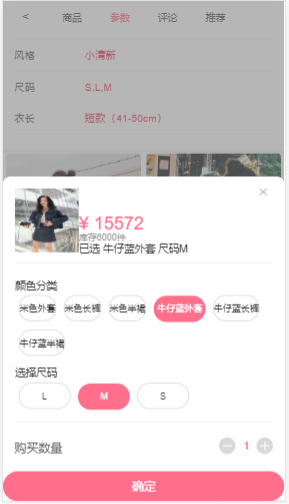
过几天补充,代码在src\views\detail\childComps\selectRules.vue
五.购物车商品左滑删除 ̄□ ̄||还没做出来,购物车登陆有点问题,改完再写这个


 1078
1078

 被折叠的 条评论
为什么被折叠?
被折叠的 条评论
为什么被折叠?
 到【灌水乐园】发言


