


1、C for Windows配置
-
打开【允许局域网】和 【系统代理】
-
点击允许局域网旁的分支按钮
-
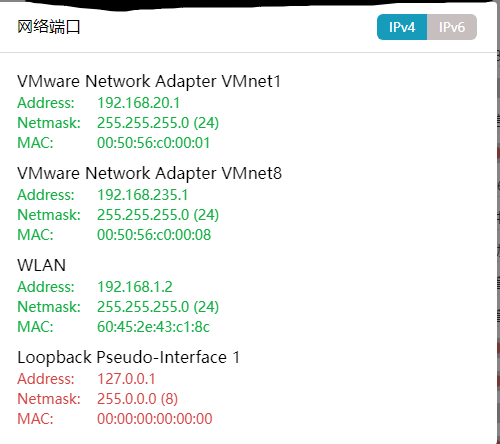
记录VMnet8的Address地址和C for Windows的端口:7890
VMnet1:通常用于创建仅主机模式的虚拟网络。在这种模式下,虚拟机可以与主机进行通信,但与外部网络隔离。
VMnet8:主要用于创建 NAT(网络地址转换)模式的虚拟网络。通过 NAT 模式,虚拟机可以借助主机的网络连接访问外部网络,同时外部网络也可以访问虚拟机上的某些服务。
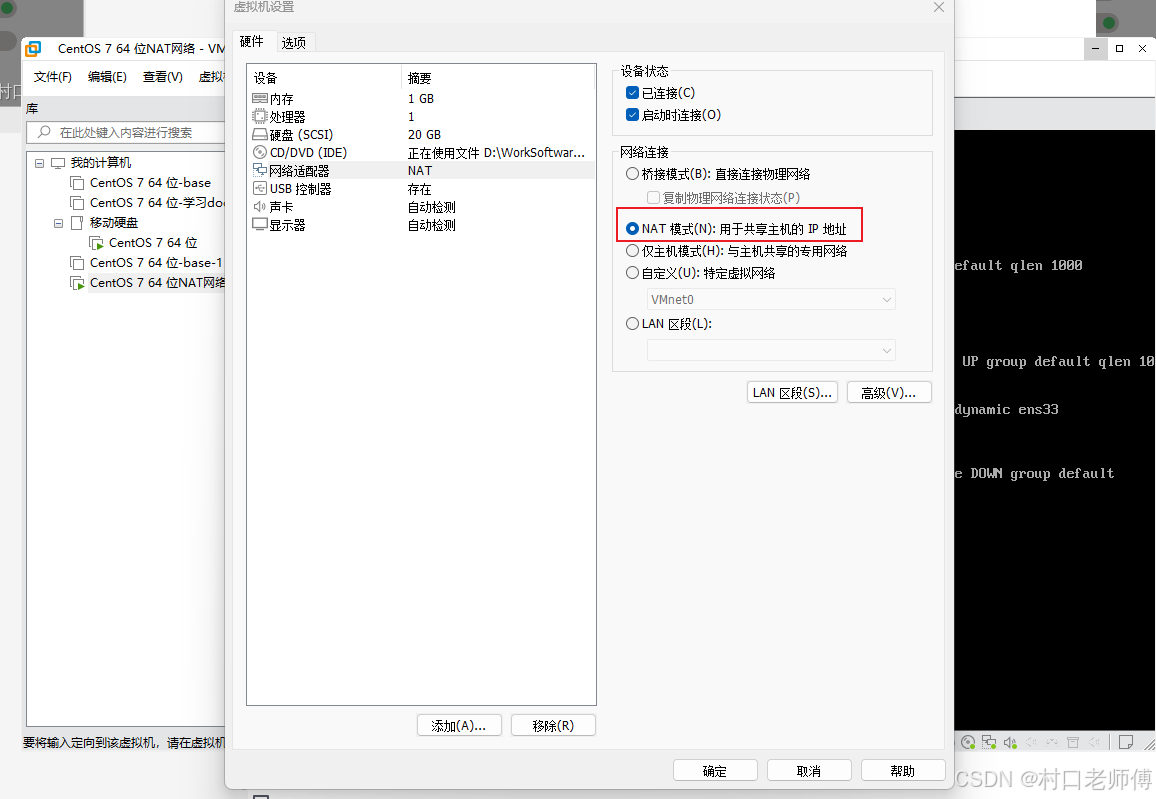
2、修改虚拟机的网络连接方式为NAT
3、在Linux控制台配置代理
ip和端口使用第一步中记录的ip、端口
永久生效:
vim /etc/profile

# 将以下内容追加到文件结尾
export https_proxy=http://192.168.235.1:7890
export http_proxy=http://192.168.235.1:7890
export all_proxy=socks5://192.168.235.1:7890

# 重新加载
source /etc/profile
临时生效,直接执行:
export https_proxy=http://192.168.235.1:7890
export http_proxy=http://192.168.235.1:7890
export all_proxy=socks5://192.168.235.1:7890
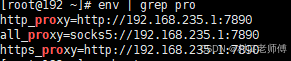
使用env | grep proxy 查看是否成功
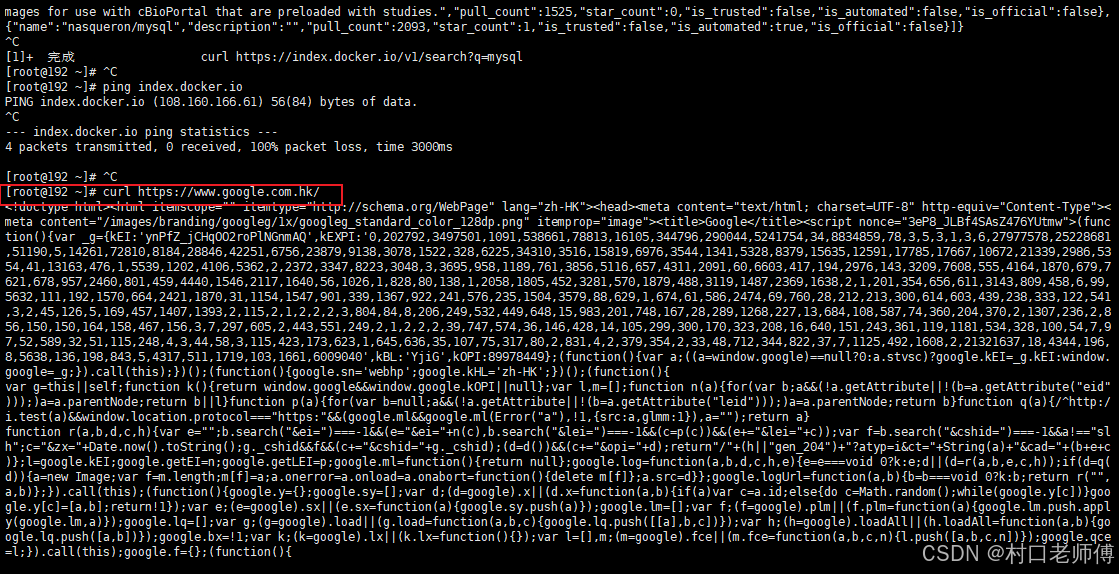
4、测试
使用curl https://www.google.com.hk/访问网址
5、为Docker配置代理
- 在/etc/docker/daemon.json中增加代理配置:
{
  "registry-mirrors": [
        "http://hub-mirror.c.163.com",
        "https://mirrors.tuna.tsinghua.edu.cn",
        "http://mirrors.sohu.com",
        "https://ustc-edu-cn.mirror.aliyuncs.com",
        "https://ccr.ccs.tencentyun.com",
        "https://docker.m.daocloud.io",
        "https://docker.awsl9527.cn"
  ],
"proxies": {
    "http-proxy":"http://192.168.235.1:7890",
    "https-proxy":"http://192.168.235.1:7890",
    "no-proxy":"localhost,127.0.0.1,hub-mirror.c.163.com,mirrors.tuna.tsinghua.edu.cn,mirrors.sohu.com,ustc-edu-cn.mirror.aliyuncs.com,ccr.ccs.tencentyun.com,docker.m.daocloud.io,docker.awsl9527.cn"
  }
}
- 重启Docker服务:
systemctl restart docker
- 检查配置是否生效:
docker info| grep Proxy
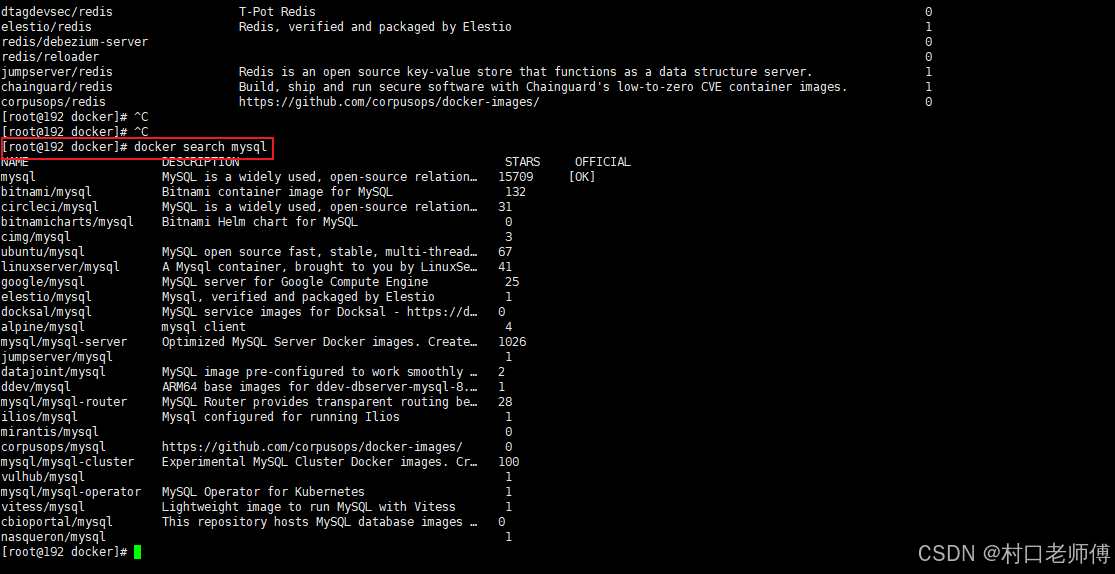
- 测试
只有配置了代理,使用docker search才能搜索


 6574
6574

 被折叠的 条评论
为什么被折叠?
被折叠的 条评论
为什么被折叠?
 到【灌水乐园】发言


