


 本文介绍如何在SpringBoot项目中通过自定义注解和AOP技术实现控制器层接口参数的日志打印功能。
文章目录
前言
通过自定义注解和aop实现,打印所有controller层接口的出入参数
一、用到的基础架构和思路
框架:
- spring boot 2.3.1版本
- jdk 8
思路:
通过继承@RequestMapping的功能,重写一个注解。然后使用aop对使用这个注解的所有方法进行拦截。然后通过环绕通知@Around来获取方法的请求入参和出参,并进行日志打印;
二、使用步骤
先创建一个maven项目
第一步、添加maven依赖
这里我就直接贴上整个项目的依赖,你们再重复实现是就不会遇到因为依赖或者版本而遇到各种奇怪的问题
<parent>
	<groupId>org.springframework.boot</groupId>
	<artifactId>spring-boot-starter-parent</artifactId>
	<version>2.3.1.RELEASE</version>
	<relativePath /> <!-- lookup parent from repository -->
</parent>

<properties>
	<java.version>1.8</java.version>
</properties>


<dependencies>
	<dependency>
		<groupId>org.springframework.boot</groupId>
		<artifactId>spring-boot-starter-web</artifactId>
	</dependency>

	<!-- <dependency> <groupId>org.springframework.boot</groupId> <artifactId>spring-boot-starter-freemarker</artifactId>
		</dependency> -->
	<dependency>
		<groupId>org.springframework.boot</groupId>
		<artifactId>spring-boot-starter-thymeleaf</artifactId>
	</dependency>

	<!-- 热部署 -->
	<dependency>
		<groupId>org.springframework.boot</groupId>
		<artifactId>spring-boot-devtools</artifactId>
		<optional>true</optional>
	</dependency>

	<!-- springboot aop -->
	<dependency>
		<groupId>org.springframework.boot</groupId>
		<artifactId>spring-boot-starter-aop</artifactId>
	</dependency>


	<dependency>
		<groupId>org.projectlombok</groupId>
		<artifactId>lombok</artifactId>
		<version>1.18.12</version>
	</dependency>

	<dependency>
		<groupId>com.alibaba</groupId>
		<artifactId>fastjson</artifactId>
		<version>1.2.47</version>
	</dependency>

	<dependency>
		<groupId>org.springframework.boot</groupId>
		<artifactId>spring-boot-starter-tomcat</artifactId>
		<!-- provided:代表在编译和测试的时候用,运行,打包的时候不会打包进去 -->
		<scope>provided</scope>
	</dependency>

	<dependency>
		<groupId>org.springframework.boot</groupId>
		<artifactId>spring-boot-starter-test</artifactId>
		<!-- test:表示当前依赖包只参与测试时的工作:比如Junit -->
		<scope>test</scope>
		<exclusions>
			<exclusion>
				<groupId>org.junit.vintage</groupId>
				<artifactId>junit-vintage-engine</artifactId>
			</exclusion>
		</exclusions>
	</dependency>
</dependencies>
第二步、创建自定义注解@RequestMappingLog
元注解:
@Target限定注解的修饰目标
@Retention生效时机
@Documented标记注解。可以被例如javadoc此类的工具文档化
@Inherited标记注解。使用了@Inherited修饰的annotation类型被用于一个class,则这个annotation将被用于该class的子类,也就是注解的功能被子类继承
package com.study.annotation;

import java.lang.annotation.Documented;
import java.lang.annotation.ElementType;
import java.lang.annotation.Retention;
import java.lang.annotation.RetentionPolicy;
import java.lang.annotation.Target;

import org.springframework.core.annotation.AliasFor;
import org.springframework.web.bind.annotation.RequestMapping;
import org.springframework.web.bind.annotation.RequestMethod;

@Retention(RetentionPolicy.RUNTIME)
@Target({ ElementType.METHOD })
@RequestMapping
@Documented
public @interface RequestMappingLog {
	String name() default "";

	@AliasFor("path")
	String[] value() default {};

	@AliasFor("value")
	String[] path() default {};

	RequestMethod[] method() default {};

	String[] params() default {};

	String[] headers() default {};

	String[] consumes() default {};

	String[] produces() default {};
}
第三步、创建切面类MyAspect
package com.study.aspect;

import java.util.Enumeration;
import java.util.HashMap;
import java.util.Map;

import javax.servlet.http.HttpServletRequest;

import com.study.annotation.RequestMappingLog;
import org.aspectj.lang.JoinPoint;
import org.aspectj.lang.ProceedingJoinPoint;
import org.aspectj.lang.annotation.After;
import org.aspectj.lang.annotation.AfterReturning;
import org.aspectj.lang.annotation.AfterThrowing;
import org.aspectj.lang.annotation.Around;
import org.aspectj.lang.annotation.Aspect;
import org.aspectj.lang.annotation.Before;
import org.aspectj.lang.annotation.Pointcut;
import org.aspectj.lang.reflect.MethodSignature;
import org.slf4j.Logger;
import org.slf4j.LoggerFactory;
import org.springframework.stereotype.Component;
import org.springframework.web.context.request.RequestContextHolder;
import org.springframework.web.context.request.ServletRequestAttributes;

/**
 * 切面类,含有多个通知
 */
@Component
@Aspect
public class MyAspect {
	private static final Logger logger = LoggerFactory.getLogger(MyAspect.class);

	private String method = "";

	// 声明公共切入点
	@Pointcut("@annotation(com.study.annotation.RequestMappingLog)")
	private void myPointCut() {
	}

	// 切入点当前有效
	@Before("myPointCut()")
	public void myBefore(JoinPoint joinPoint) {
		// 2方法执行前调用 日志打印顺序-3
	}

	@AfterReturning(value = "myPointCut()", returning = "result")
	public void myAfterReturning(JoinPoint joinPoint, Object result) {
		// 3方法执行return前调用 日志打印顺序-4-出现异常不打印
	}

	@After("myPointCut()")
	public void myAfter(JoinPoint joinPoint) {
		// 4方法执行后调用 日志打印顺序-5
	}

	@Around(value = "myPointCut()")
	public Object myAround(ProceedingJoinPoint joinPoint) throws Throwable {
		getMethodName(joinPoint);
		// 获取注解的参数
		MethodSignature signature = (MethodSignature) joinPoint.getSignature();
		RequestMappingLog annotation = signature.getMethod().getAnnotation(RequestMappingLog.class);
		logger.info("调用方法【{}】,注解参数:{}", method, annotation.name());// 日志打印顺序-1

		Map<String, Object> requestParam = getRequestParam(joinPoint);
		logger.info("调用方法【{}】,入参:{}", method, requestParam);// 日志打印顺序-2

		// 手动执行目标方法
		Object obj = joinPoint.proceed();

		logger.info("调用方法【{}】,出参:{}", method, obj);// 日志打印顺序-6-出现异常不打印
		return obj;
	}

	@AfterThrowing(value = "myPointCut()", throwing = "e")
	public void myAfterThrowing(JoinPoint joinPoint, Throwable e) {
		logger.error("调用方法【{}】出现异常:", method, e);// 日志打印顺序-出现异常时打印
	}

	/**
     * 获取方法名称
	 * @作者:严磊
	 * @时间:2020年11月26日 下午11:20:21
	 * @param joinPoint
     * @return
     */
    private String getMethodName(JoinPoint joinPoint){
        if(method == null){
            method = joinPoint.getTarget().getClass().getName() + "." + joinPoint.getSignature().getName();
        }
        return this.method;
    }

	/**
	 *
	 * @描述:获取请求参数
	 * @作者:严磊
	 * @时间:2020年11月26日 下午11:20:21
	 * @param joinPoint
	 * @return
	 */
	private Map<String, Object> getRequestParam(JoinPoint joinPoint) {

		ServletRequestAttributes attributes = (ServletRequestAttributes) RequestContextHolder.getRequestAttributes();
		HttpServletRequest request = attributes.getRequest();
		// 记录下请求内容
		logger.info("URL : " + request.getRequestURL().toString());
		logger.info("HTTP_METHOD : " + request.getMethod());
		logger.info("IP : " + request.getRemoteAddr());
		Enumeration<String> enu = request.getParameterNames();
		Map<String, Object> param = new HashMap<String, Object>();
		while (enu.hasMoreElements()) {
			String name = (String) enu.nextElement();
			param.put(name, request.getParameter(name));
		}
		return param;
	}

}
第四步、在Controller中使用@RequestMappingLog代替@RequestMapping
package com.study.controller;

import org.springframework.web.bind.annotation.RequestMapping;
import org.springframework.web.bind.annotation.RestController;

import com.study.annotation.RequestMappingLog;

@RestController
@RequestMapping("/TestController")
public class TestController {


	//http://127.0.0.1:8888/study/TestController/getUserName?userId=111111
	@RequestMappingLog(path="/getUserName",name="getUserName")
	public String getUserName(String userId){
		//int d = 1/0;
		return "success";
	}


	@RequestMapping(path="/getUserName2")
	public String getUserName2(String userId){
		return "success";
	}
}
测试结果:
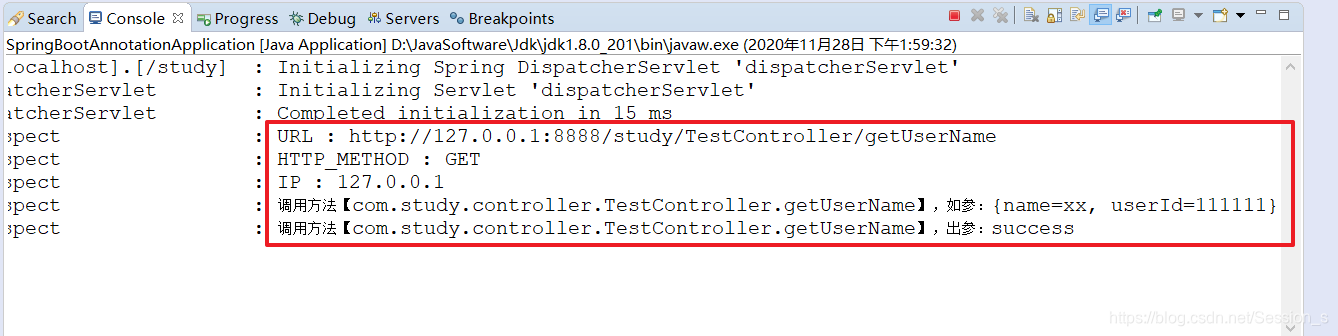
访问使用@RequestMappingLog标识的接口
当使用http://127.0.0.1:8888/study/TestController/getUserName?userId=111111&name=xx访问被自定义注解@RequestMappingLog标识的getUserName方法时,看到打印了如下日志:
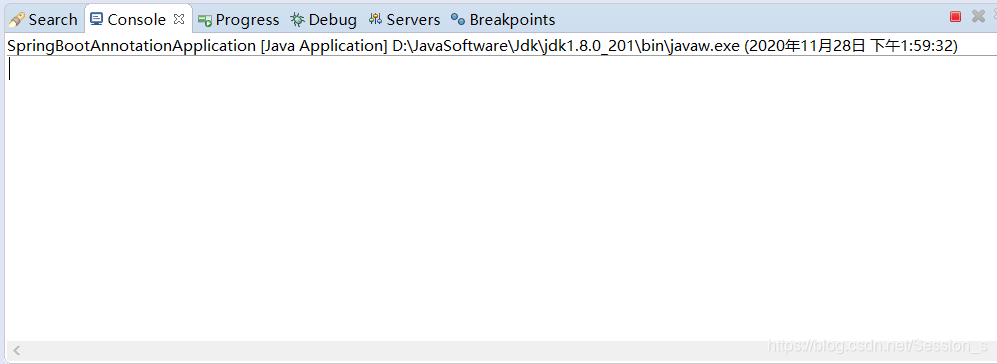
访问使用@RequestMapping标识的接口
当使用http://127.0.0.1:8888/study/TestController/getUserName2?userId=111111&name=xx访问被注解@RequestMapping标识的getUserName2方法时,则没有日志打印。
项目地址
my-annotation


 5112
5112

 被折叠的 条评论
为什么被折叠?
被折叠的 条评论
为什么被折叠?
 到【灌水乐园】发言


