


 本文介绍了在误删除数据后如何利用MySQL的binlog日志进行恢复。首先讲解如何开启binlog,然后通过mysqlbinlog命令解析binlog文件,并生成SQL脚本。最后,提供了处理解析后的文件,包括DML和DDL的操作,以恢复数据。
前言
今天一不小心在正式环境执行了一条delete语句,这尼玛如果不恢复回来是要跑路的进奏了啊,赶紧去看MySQL的binlog日志。当然前提是你的MySQL开启了binlog,如果没有开启的话那下面就不用看了(拜拜了您呢)。
一.开启binlog方法
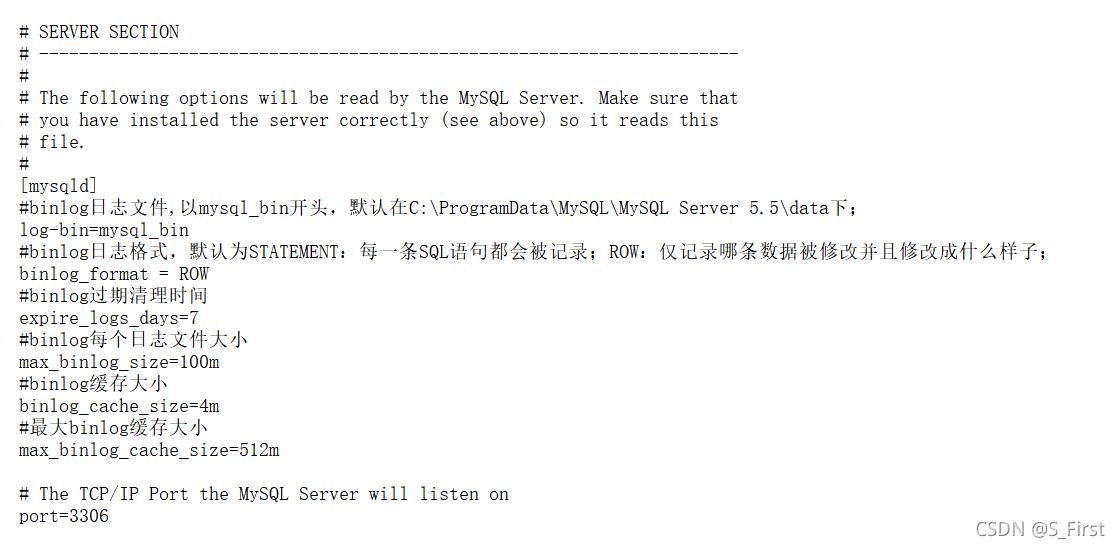
找到mysql的安装路径下的my.ini,一打开就能看到,不用多说。然后在 [mysqld] 下面添加一段话:
#binlog日志文件,以mysql-bin开头,默认在C:\ProgramData\MySQL\MySQL Server 5.5\data下;
log-bin=mysql-bin
#binlog日志格式,默认为STATEMENT:每一条SQL语句都会被记录;ROW:仅记录哪条数据被修改并且修改成什么样子;
binlog_format = ROW
#binlog过期清理时间
expire_logs_days=7
#binlog每个日志文件大小
max_binlog_size=100m
#binlog缓存大小
binlog_cache_size=4m
#最大binlog缓存大小
max_binlog_cache_size=512m
如截图所示:
二.解析mysql的binlog日志文件
命令:mysqlbinlog --base64-output=decode-rows -v --database=test "C:\ProgramData\MySQL\MySQL Server 5.5\data\mysql_bin.000009" > D:\\1.sql
三.处理解析后的文件
解析生成DML方法:
public static List<String> binlogToDML(String path) {
        BufferedReader bufferedReader = null;
        List<String> sqlList = new ArrayList<>();
        try {
            bufferedReader = new BufferedReader(new InputStreamReader(new FileInputStream(new File(path))));
            String line;
            StringBuilder sb = new StringBuilder();
            List<String> list = new ArrayList<>();
            while ((line = bufferedReader.readLine()) != null) {
                if (line.contains("###")) {
                    if (line.contains("@")) {
                        sb.append(line).append(",");
                    } else {
                        sb.append(line);
                    }
                } else {
                    String s = sb.toString();
                    if (!"".equals(s)) {
                        s = s.replace("###", "");
                        list.add(s);
                    }
                    sb.setLength(0);
                }
            }
            Map<String, List<String>> tableColumn = getAllTableColumn();
            Set<String> tables = tableColumn.keySet();

            for (String str : list) {
                for (String table : tables) {
                    if (str.contains(table)) {
                        List<String> columns = tableColumn.get(table);
                        if (str.contains("INSERT")) {
                            str = str.replace("SET", "(SELECT ");
                            for (int i = 0; i < columns.size(); i++) {
                                int index = i + 1;
                                str = str.replace("@" + index + "=", "");
                            }
                            str = str.substring(0, str.length() - 1);
                            str += ");";
                        } else if (str.contains("DELETE")) {
                            for (int i = 0; i < columns.size(); i++) {
                                int index = i + 1;
                                str = str.replace("@" + index, columns.get(i));
                            }
                            str = str.substring(0, str.length() - 1);
                            str = str.replace(",", " AND");
                            str += ";";
                        } else if (str.contains("UPDATE")) {
                            str = str.substring(0, str.indexOf("SET") - 1);
                            for (int i = 0; i < columns.size(); i++) {
                                int index = i + 1;
                                str = str.replace("@" + index, columns.get(i));
                            }
                            str = str.substring(0, str.length() - 1);
                            str = str.replace("WHERE", "SET");
                            str += ";";
                        } else {
                            continue;
                        }
                        sqlList.add(str);
                    }
                }
            }
        } catch (IOException | ClassNotFoundException | SQLException e) {
            e.printStackTrace();
        } finally {
            try {
                if (bufferedReader != null) bufferedReader.close();
            } catch (IOException e) {
                e.printStackTrace();
            }
        }
        return sqlList;
    }
解析生成DDL方法:
public static List<String> binlogToDDL(String path) {
        BufferedReader bufferedReader = null;
        List<String> ddlList = new ArrayList<>();
        try {
            bufferedReader = new BufferedReader(new InputStreamReader(new FileInputStream(new File(path))));
            String line;
            StringBuilder sb = new StringBuilder();
            String dataSourceName = "";
            List<String> list = new ArrayList<>();
            while ((line = bufferedReader.readLine()) != null) {
                if (!line.contains("#")) {
                    if (line.contains("use ")) {
                        dataSourceName = line.substring(4, line.indexOf("/"));
                    } else if ((!line.contains("DELIMITER") && !line.contains("BEGIN") && !line.contains("/*"))) {
                        sb.append(line);
                    } else if (line.contains("DROP TABLE")) {
                        line = line.substring(0, line.indexOf("/*"));
                        sb.append(line);
                    }
                } else {
                    String s = sb.toString();
                    if (!"".equals(s)) {
                        if (!s.contains(dataSourceName)) {
                            s = s.replace("CREATE TABLE", "CREATE TABLE " + dataSourceName + ".");
                        }
                        list.add(s);
                    }
                    sb.setLength(0);
                }
            }
            for (String str : list) {
                ddlList.add(str + ";");
            }
        } catch (IOException e) {
            e.printStackTrace();
        } finally {
            try {
                if (bufferedReader != null) bufferedReader.close();
            } catch (IOException e) {
                e.printStackTrace();
            }
        }
        return ddlList;
    }
连接MySQL获取表字段方法:
public static Map<String, List<String>> getAllTableColumn() throws SQLException, ClassNotFoundException {

        String driver = "com.mysql.jdbc.Driver";
        String url = "jdbc:mysql://localhost:3306/test?useUnicode=true&characterEncoding=utf8&serverTimezone=UTC";
        String username = "root";
        String password = "123456";
        Map<String, List<String>> tableMap = new HashMap<>();

        //加载驱动
        Class.forName(driver);

        //获得数据库连接
        Connection connection = DriverManager.getConnection(url, username, password);
        //获得元数据
        DatabaseMetaData metaData = connection.getMetaData();
        //获得表信息
        ResultSet tables = metaData.getTables(null, null, null, new String[]{"TABLE"});

        while (tables.next()) {
            List<String> columnNameList = new ArrayList<>();

            //获得表名
            String tableName = tables.getString("TABLE_NAME");
            //通过表名获得所有字段名
            ResultSet columns = metaData.getColumns(null, null, table_name, "%");
            //获得所有字段名
            while (columns.next()) {
                //获得字段名
                String columnName = columns.getString("COLUMN_NAME");
                columnNameList.add(columnName );
            }

            tableMap.put(tableName , columnNameList);

        }

        return tableMap;
    }
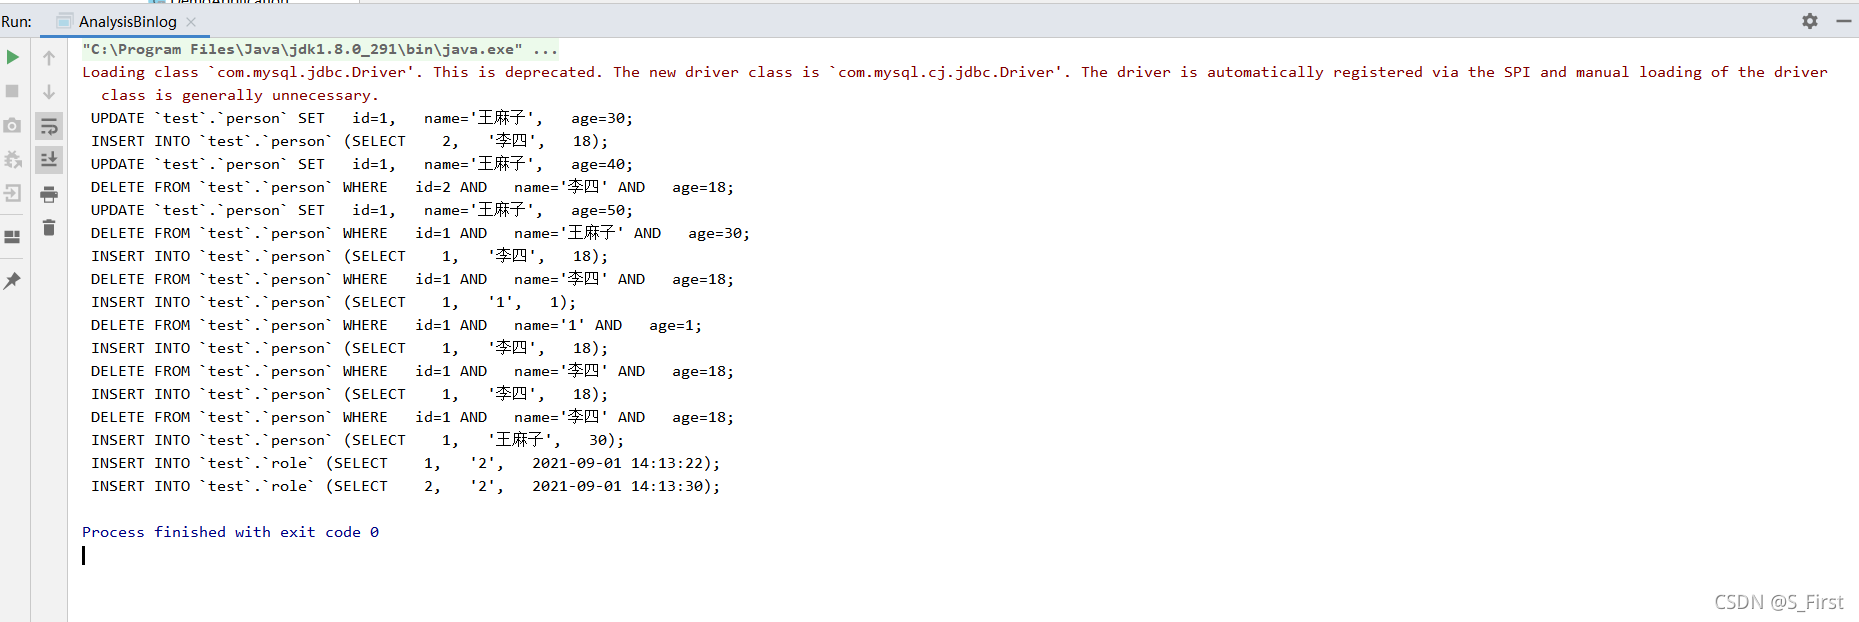
生成的DML运行效果:
生成的DDL运行效果:
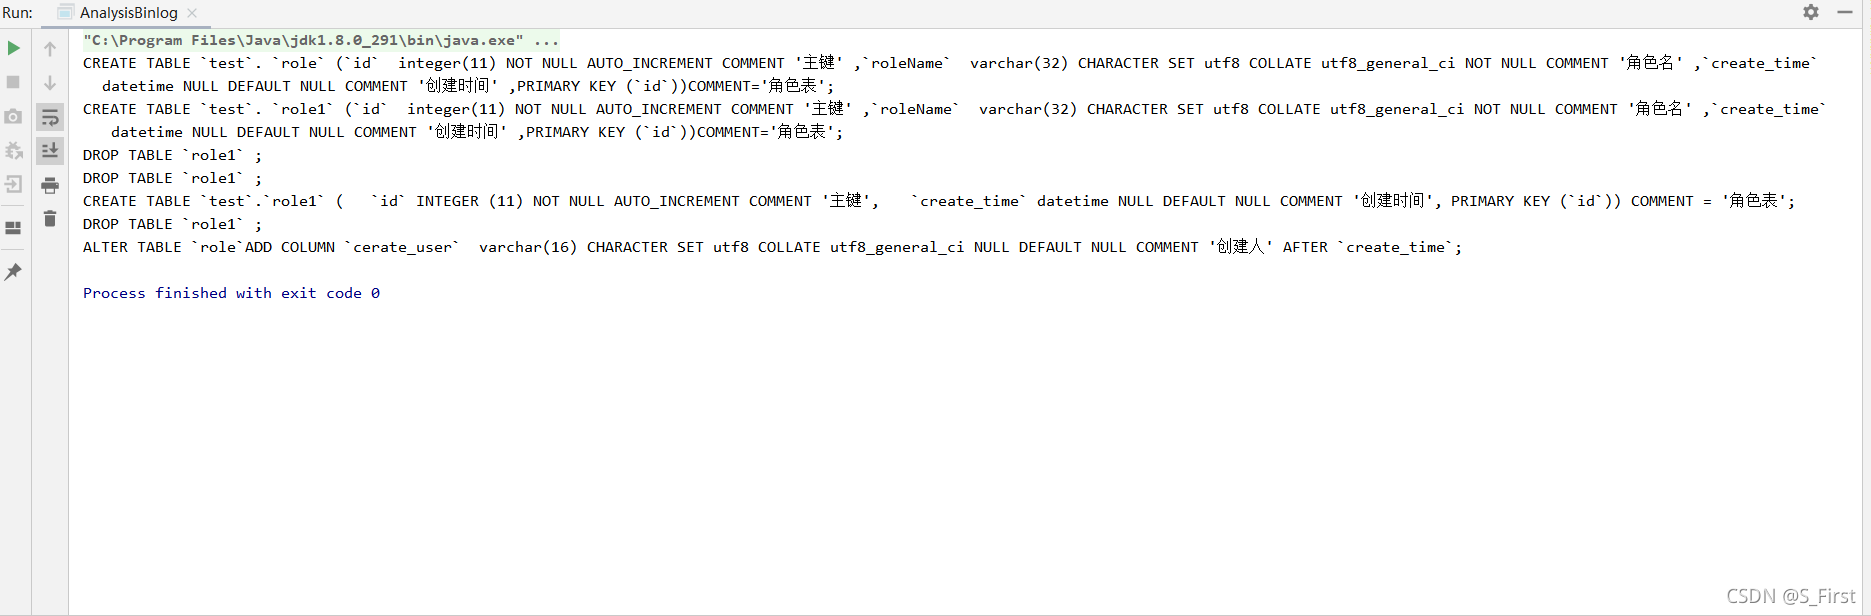
最后只需运行一下生成的脚本,我的数据又回来啦,我抬起的脚又放了下来。


 7637
7637

 被折叠的 条评论
为什么被折叠?
被折叠的 条评论
为什么被折叠?
 到【灌水乐园】发言


