


 本文通过Ansible的roles方式详细介绍了如何实现Keepalived、HAProxy和HTTPD的自动化部署,创建并初始化了对应的角色,包括haproxy、apache和keepalived。通过分配不同角色的任务,实现了高可用和负载均衡的集群服务,最终通过一个yml文件完成一键部署。
一、基础
创建角色,初始化
vim /home/ansible/ansible/ansible.cfg
roles_path = /etc/ansible/roles 指定角色目录
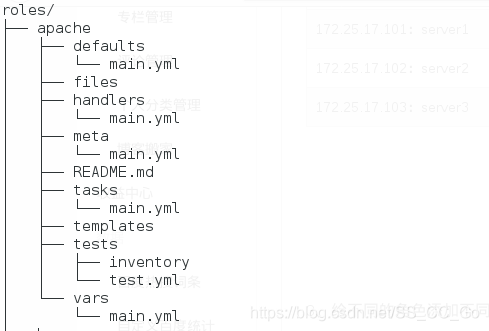
创建目录结构:
mkdir /home/ansible/ansible/roles/httpd/{files,templates,tasks,handlers,vars,defaults,meta} -p
roles目录结构:
role_name:名字
    files    存放copy或scripts等模块调用的函数
    tasks    定义各种tasks,要有main.yml文件,其他include包含调用
    handlers 定义各种handlers,要main.yml文件
    vars     定义variables,要main.yml文件
    templates存储由template模块调用的模版
    meta     定义当前角色的特殊设定及其依赖关系,要main.yml
    defaults 要有main.yml的文件,用于设定默认变量
ansible-galaxy工具访问
ansible-galaxy
        delete|import|info|init|install|list|login|remove|search|setup] 角色名称
    Options:
      -h, --help            show this help message and exit
      -c, --ignore-certs    Ignore SSL certificate validation errors.
      -s API_SERVER, --server=API_SERVER
                        The API server destination
      -v, --verbose         verbose mode (-vvv for more, -vvvv to enable
                        connection debugging)
      --version             show program's version number, config file location,
                        configured module search path, module location,
                        executable location and exit
二、示例
1、环境
| 172.25.17.100:server | keepalived:master; haproxy |
| 172.25.17.101:server1 | keepalived:backup; haproxy |
| 172.25.17.102:server2 | webserver: httpd |
| 172.25.17.103:server3 | webserver: httpd |
2、.ansible-galaxy创建角色
角色分类:haproxy,apache,keepalived
初始化三个角色
cd /home/ansible/ansible

分组:
    vim hosts
        [manage]          server1,server2上主要负责调度
        server
        server1

       [webserver]        server3,server4上部署服务
        server2
        server3

mkdir roles           创建角色目录
cd roles
初始化三个角色:
    ansible-galaxy init haproxy        初始化haproxy角色
    ansible-galaxy init apache         初始化apache角色
    ansible-galaxy init keepalived     初始化keepalived角色
3、给不同的角色添加不同的任务...
角色结构:
1)、添加apache角色任务
##部署apache任务
vim roles/apache/tasks/main.yml
- name: install httpd
  yum:
    name: httpd
    state: present
- name: copy index.html
  copy:
    content: "www.{{ ansible_facts['hostname'] }}.com"
    dest: /var/www/html/index.html

- name: configure httpd
  copy:
    src: templates/httpd.conf.j2        模版在roles/templates下边,就是http的配置文件
    dest: /etc/httpd/conf/httpd.conf
    owner: root
    group: root
    mode: 644
  notify: restart httpd

- name: start httpd firewalld
  service:
    name: "{{ item }}"
    state: started
  loop:
    - httpd
    - firewalld

- name: configure firewalld
  firewalld:
    service: http
    permanent: yes
    immediate: yes
    state: enabled
##部署触发器
vim roles/apache/handlers/main.yml
- name: restart httpd
  service:
    name: httpd
    start: restarted
2)、添加haproxy角色任务
vim roles/haproxy/tasks/main.yml
- name: install haproxy
  yum:
    name: haproxy
    state: present

- name: coufigure haproxy
  template:
    src: templates/haproxy.cfg.j2        模版时haproxy的配置文件
    dest: /etc/haproxy/haproxy.cfg

- name: start haproxy
  service:
    name: haproxy
    state: started

##部署触发器
vim roles/haproxy/handlers/main.yml
- name: restart haproxy
  service:
    name: haproxy
    start: restarted

##修改haproxy的配置模版
vim roles/haproxy/templates/haproxy.cfg.j2
    frontend  main
        bind    *:80
        default_backend       webserver
    #---------------------------------------------------------------------
    backend webserver
        balance     roundrobin
    {% for host in groups['webserver'] %}        自动获取要调度的主机信息
        server {{ hostvars[host]['ansible_facts']['hostname']}} {{ hostvars[host]        ['ansible_facts']['eth0']['ipv4']['address']}}:80 check
    {% endfor %}
3)、添加keepalived角色任务
vim roles/keepalived/tasks/main.yml
- name: install keepalived
  yum:
    name: keepalived
    state: present

- name: coufigure keepalived
  template:
    src: templates/keepalived.conf.j2        模版时keepalived的配置文件
    dest: /etc/keepalived/keepalived.conf

- name: start keepalived
  service:
    name: keepalived
    state: started

##部署触发器
vim roles/keepalived/handlers/main.yml
- name: restart keepalived
  service:
    name: keepalived
    start: restarted

##修改keepalived的配置模版
vim roles/keepalived/templates/keepalived.conf.j2

! Configuration File for keepalived
global_defs {
   notification_email {
     root@localhost
   }
   notification_email_from keepalived@localhost
   smtp_server 127.0.0.1
   smtp_connect_timeout 30
   router_id LVS_DEVEL
}

vrrp_instance VI_1 {
    state {{ STATE }}         变量需要在角色的vars里边定义,或者直接在推送的yml文件中定义
    interface eth0
    virtual_router_id 200
    priority {{ PRIORITY }}    需要定义
    advert_int 1
    authentication {
        auth_type PASS
        auth_pass 1111
    }
    virtual_ipaddress {
	172.25.27.200         vip会漂移哦
    }
}
4、编写yml推送文件
vim ansible/playbook.yml
- hosts:all
  tasks:
  - import_role:
      name: apache
    when: ansible_hostname in groups['webserver']
  - import_fole:
      name: haproxy
    when: ansible_hostname in groups['manage']
  - import_role:
      name: keepalived
    vars:
      STATE: MASTER
      PRIORITY: 100
    when: ansible_hostname == 'server'
  - import_role:
      name: keepalived
    vars:
      STATE: BACKUP
      PRIORITY: 50
    when: ansible_hostname == 'server1'
5、推送
ansible-playbook playbook.yml 部署服务,写好所有的文件,一条命令就可以部署高可用的集群服务,非常nice


 419
419

 被折叠的 条评论
为什么被折叠?
被折叠的 条评论
为什么被折叠?
 到【灌水乐园】发言


