 Linux系统网络配置:IP、网关与DNS设置详解


 本文详细介绍了Linux系统中如何设置IP、网关和DNS。内容涵盖IP的基础知识,包括IPv4、子网掩码、通信判定及网络设定工具如ifconfig和nmcli。此外,还讲解了如何设置网关,包括将虚拟机变成路由器以及设定网关的方法。最后,文章阐述了DNS的设定,包括域名解析和优先级设置,以及如何在系统中进行配置。
一.ip的基础知识
1.ipv4
二进制32位
全称:Internet protocol version 4
ip由32个01组合而成:11111110.11111110.11111110.11111110=254.254.254.254
2.子网掩码(netmask)
子网掩码用来划分网络区域,子网掩码非0位对应ip上的数字表示此ip的网络位(网络区域),0位对应ip上的数字表示此ip的主机位(网络区域的某台主机)。
例如:255.255.255.0子网掩码中255对应的ip位为网络位,0对应的ip为主机位。
3.ip的通信判定
网络位一致,主机位不一致的两个ip可以直接通信。
例如:172.25.254.1与172.25.254.2在同一网络区域内,且主机位不同,可以直接通信。
4.ip的网络设定工具
ping ip 检测网络是否通畅
ifconfig 查看ip或设定网络接口
ifconfig device ip/24 设定网络接口
ifconfig device down 关闭网络接口
ifconfig device up 开启网络接口

ip addr 检测或设定网络接口
ip addr show 检测网络接口

ip addr add ip/24 dev eth0 新增ip地址(新增之后须重启)

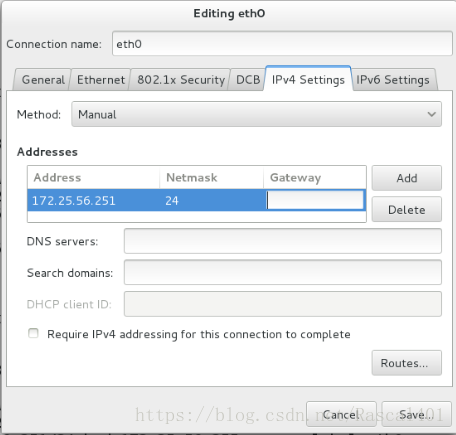
5.图形方式设定ip
命令为:nm-connection-editor

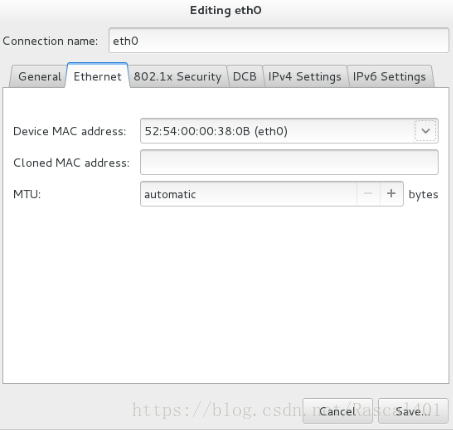
或输入命令: nmtui
6.命令方式设定网络
ifconfig 网卡 ip netmask 临时设定ip
nmcli命令 ( NetworkManager服务必须开启)
nmcli device status eth0 显示设备状态
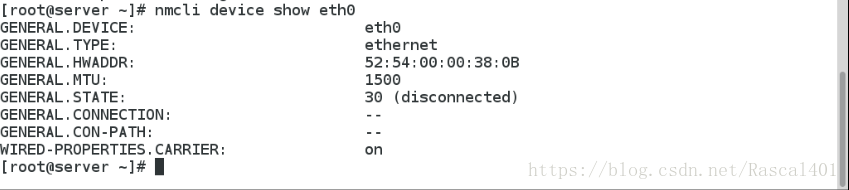
nmcli device show eth0 显示eth0网卡信息
nmcli device connect eth0 启用eth0网卡
nmcli device disconnect eth0 关闭eth0网卡

nmcli connection show 显示所有网络链接

nmcli connection down eth0 关闭指定链接
nmcli connection up eth0 开启指定链接
nmcli connection delete eth0 删除指定链接
nmcli connection add type ethernet con-name westos ifname eth0 ip4 172.25.254.100/24 添加ip为172.25.254.100/24的网络

nmcli connection modify westos ipv4.addresses newip/24 改变westos的ip
nmcli connection modify westos ipv4.method auto 改变westos的工作方式为动态获取ip
nmcli connection modify westos ipv4.method manual ipv4.addresses 172.25.254.200/24 改变westos的工作方式为静态ip且手动设置

7.管理网络配置文件
网络配置的目录: /etc/sysconfig/network-scripts/
vim /etc/sysconfig/network-scripts/后有如下显示:
DEVICE=XXX 设备名称
BOOTPROTO=dhcp|static|none 设备工作方式动态|静态|静态
ONBOOT=yes 网络服务开启时是否自动激活网卡
IPADDR=XXX ip地址
PREFIX=24 子网掩码(亦可用NETMASK=255.255.255.0来表示)
NAME=xxx 接口名称(可有可无)
设置静态网络:
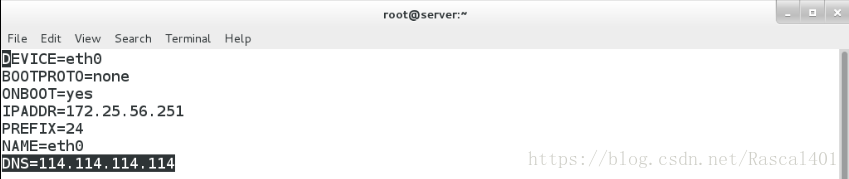
vim /etc/sysconfig/network-scripts/ifcfg-eth0
DEVICE=eth0
BOOTPROTO=none
ONBOOT=yes
IPADDR=172.25.254.251
PREFIX=24
NAME=eth0

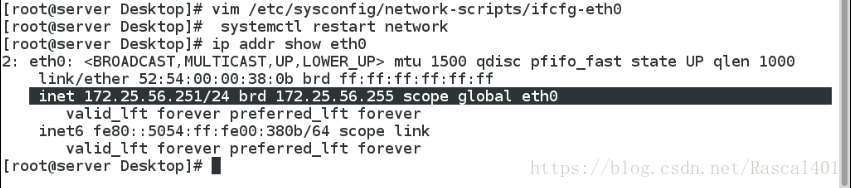
设置完成之后必须重启网络方可生效(systemctl restart network)
一块网卡上配置多个ip步骤:
vim /etc/sysconfig/network-scripts/ifcfg-eth0
DEVICE=eth0
BOOTPROTO=none
ONBOOT=yes
IPADDR0=172.25.254.100
PREFIX0=24
IPADDR1=172.25.0.100
PREFIX1=24
systemctl restart network
ip addr show eth0 查看所设置ip
二.网关
路由器上和自己处在同一个网段的那个ip.
路由器的主要功能是用来作ip地址转换的,即源地址转换(snat)和目标地址转换(dnat).
1.将虚拟机变成路由器
systemctl stop libvirtd
systemctl restart firewalld
systemctl start libvirtd
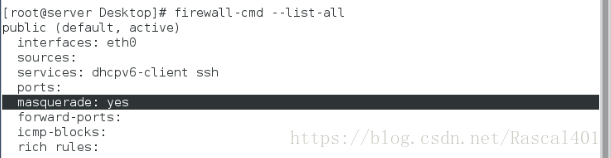
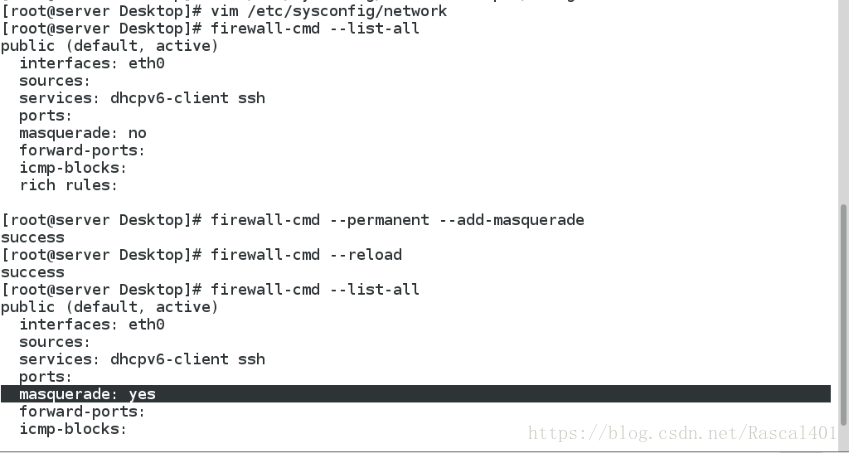
firewall-cmd –list-all
firewall-cmd –permanent –add-masquerade(添加地址伪装功能)
firewall-cmd –reload
firewall-cmd –list-all
2.设定网关
设定全局网关:针对所有没有设定网关的网卡生效.
systemctl stop NetworkManager
vim /etc/sysconfig/network
GATEWAY=172.25.56.250
systemctl restart network
route -n 查看网关


当一个网卡中设定了多个ip时,指定ip的网关:
vim /etc/sysconfig/network-scripts/ifcfg-eth0
GATEWAY0=xxx
GATEWAY1=xxx
systemctl restart network
route -n 查看网关
三.DNS(域名解析系统)
DNS=Domain Name System,dns为一台服务器,提供了回答客户主机名和ip对应关系的功能。
功能:把域名(网址)变成ip。
1.设定dns
vim /etc/hosts 本地解析文件
ip 主机名称

全局设定:
vim /etc/resolv.conf dns的指向文件
nameserver 114.114.114.114 当需要某个域名的ip时去询问114.114.114.114

vim /etc/sysconfig/network-scripts/ifcfg-eth0
DNS1=114.114.114.114
systemctl restart network
注意:
当网卡工作模式为dhcp时,系统会自动获得ip,网关,dns,那么 /etc/resolv.conf会被自动获取到的信息修改。
如果不需要获得dns信息,在网卡配置文件中加入PEERDNS=no即可。
2.设定解析的优先级
系统默认解析的优先级: /etc/hosts > /etc/resolv.conf
即本地解析优先级高于全局解析优先级。
vim /etc/nsswitch.conf

图中为 /etc/hosts即本地解析文件优先级高。
若改为dns在前,files在后,则全局解析优先级高于本地解析优先级,即/etc/resolv.conf > /etc/hosts.


 1656
1656

 被折叠的 条评论
为什么被折叠?
被折叠的 条评论
为什么被折叠?
 到【灌水乐园】发言


