


 本文指导如何在IDEA中通过Spring Initializr创建一个Spring Boot项目,并配置数据库连接、解决跨域问题,创建实体类、Repository接口及Controller,实现基本的数据操作功能。
- 点击创建新的project,选择Spring Initializr

- 两次next后,勾选出四个需要的配置

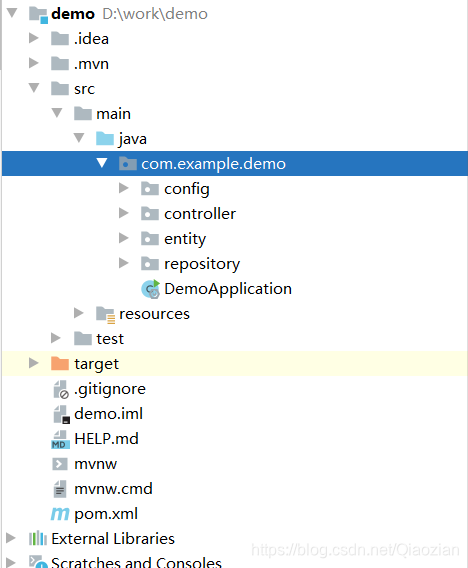
- finish后有了一个初始模板,将如下图目录下原本的application.property文件删掉,新建一个application.yml文件

application.yml中的内容如下:
spring:
  datasource:
    url: jdbc:mysql://localhost:3306/DW?serverTimezone=GMT%2B8&useUnicode=true&characterEncoding=UTF-8&useSSL=false
    username: root
    password: root
    driver-class-name: com.mysql.cj.jdbc.Driver
  jpa:
    show-sql: true
    properties:
      hibernate:
        format_sql: true
server:
  port: 8181
datasource中的url改成自己的数据库地址,username和password也改成自己的数据库账号、密码。
server下的port是此后端提供给前端的接口端口,默认8080,建议改成别的,防止和前端网页端口冲突
- 在如图所示目录下新建 config、controller、entity、repository四个文件夹
- 在config文件夹下新建类Crosconfig,这个用于解决前端调用接口时的跨域问题
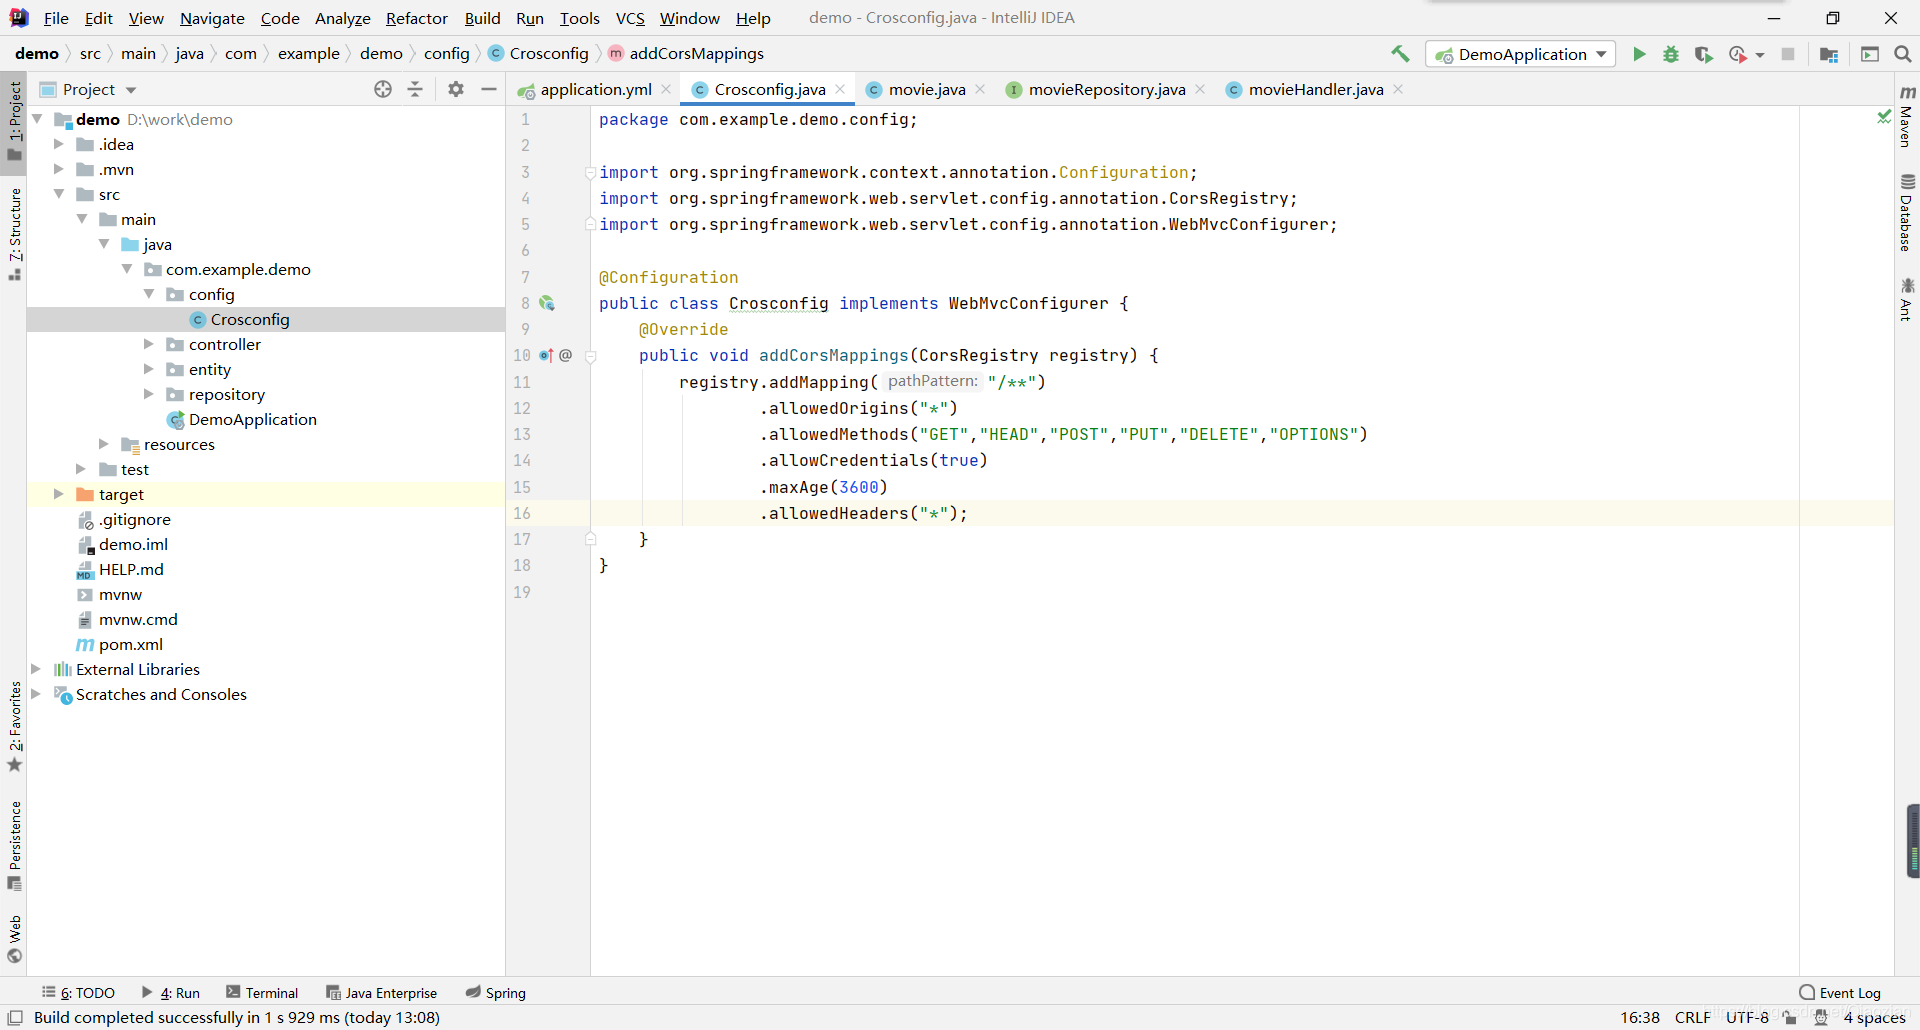
详细代码如下:
package com.example.demo.config;

import org.springframework.context.annotation.Configuration;
import org.springframework.web.servlet.config.annotation.CorsRegistry;
import org.springframework.web.servlet.config.annotation.WebMvcConfigurer;

@Configuration
public class Crosconfig implements WebMvcConfigurer {
    @Override
    public void addCorsMappings(CorsRegistry registry) {
        registry.addMapping("/**")
                .allowedOrigins("*")
                .allowedMethods("GET","HEAD","POST","PUT","DELETE","OPTIONS")
                .allowCredentials(true)
                .maxAge(3600)
                .allowedHeaders("*");
    }
}
- 在entiy文件夹下新建类,对应数据库中的表,也就是实体
在类的定义前面加上@Entity和@Data
类中的属性声明即为数据库表中的列名,在主键声明前加上@Id表明其为主键
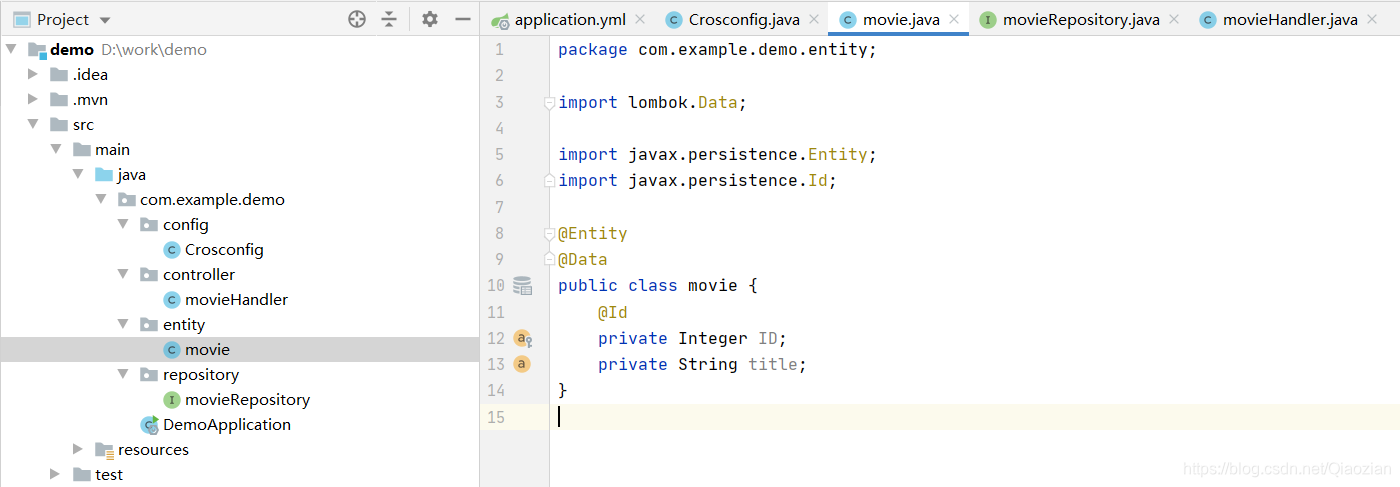
示例代码如下:
package com.example.demo.entity;

import lombok.Data;

import javax.persistence.Entity;
import javax.persistence.Id;

@Entity
@Data
public class movie {
    @Id
    private Integer ID;
    private String title;
}
- 在repository文件夹下新建接口,继承JpaRepository,实现对数据库内容的增删查改,供controller文件夹下的控制类调用
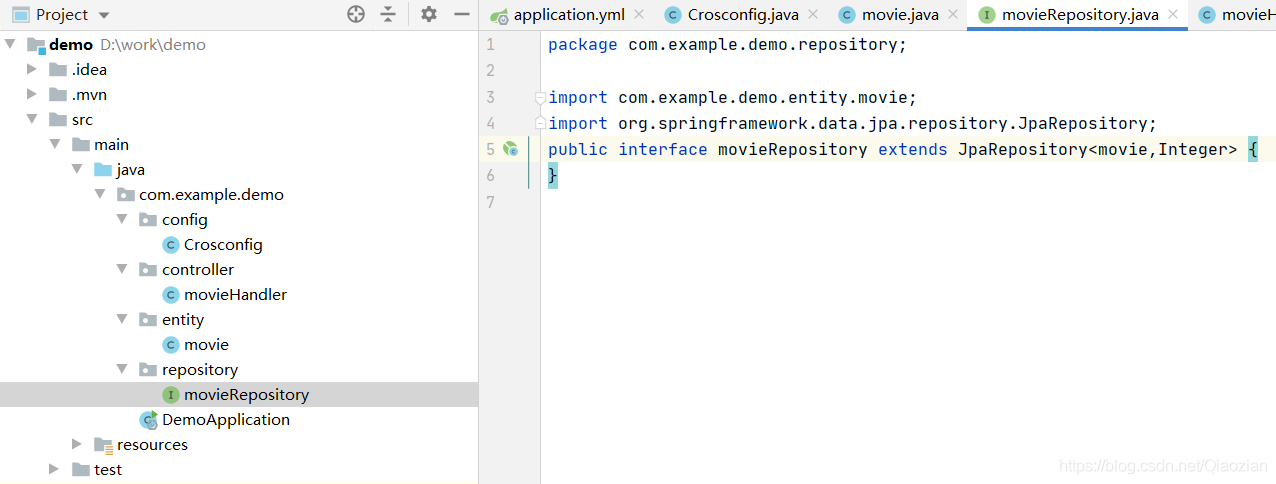
示例代码如下:
package com.example.demo.repository;

import com.example.demo.entity.movie;
import org.springframework.data.jpa.repository.JpaRepository;
public interface movieRepository extends JpaRepository<movie,Integer> {
}
- 在controller文件夹下新建要实现的功能,以及设置前端调用方式
类前添加@RestController和@RequestMapping(),括号中是前端访问的路径
在Respository接口前添加@Autowired自动注入,在处理数据库数据的函数前添加@GetMapping(),括号中为前端访问路径
比如,在运行DemoApplication后,后端开启,打开浏览器,输入localhost:8181/movie/findAll就会显示返回数据库movie表中的数据且为json格式
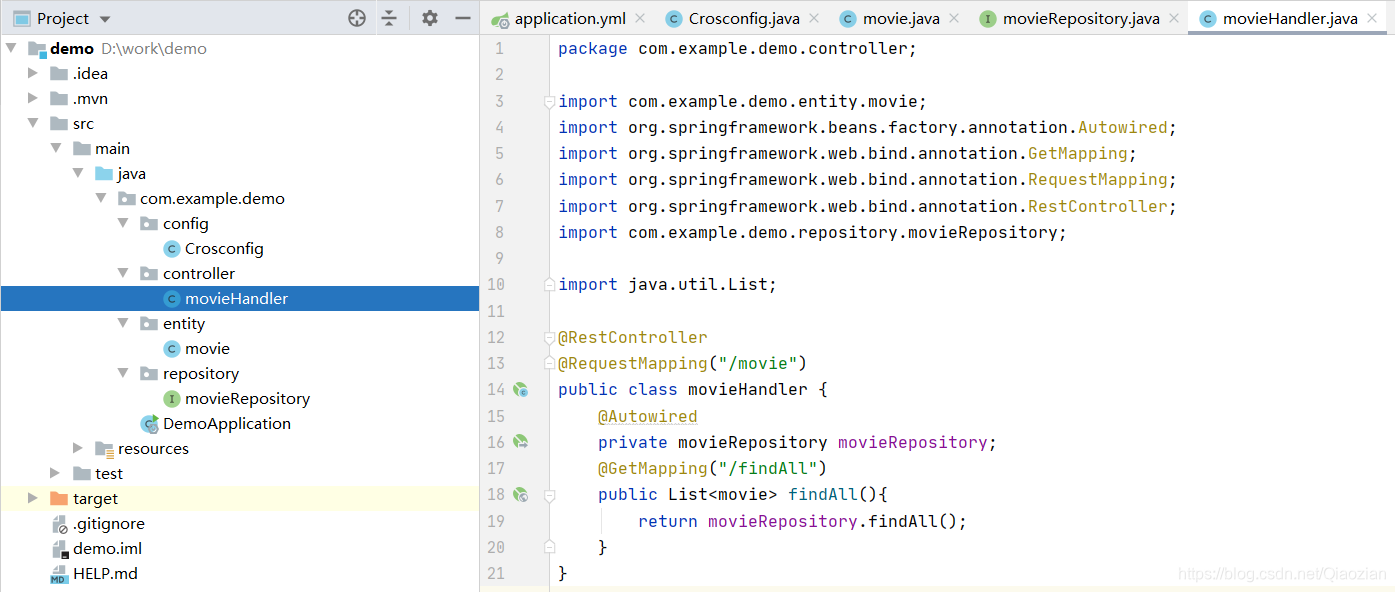
示例代码如下:
package com.example.demo.controller;

import com.example.demo.entity.movie;
import org.springframework.beans.factory.annotation.Autowired;
import org.springframework.web.bind.annotation.GetMapping;
import org.springframework.web.bind.annotation.RequestMapping;
import org.springframework.web.bind.annotation.RestController;
import com.example.demo.repository.movieRepository;

import java.util.List;

@RestController
@RequestMapping("/movie")
public class movieHandler {
    @Autowired
    private movieRepository movieRepository;
    @GetMapping("/findAll")
    public List<movie> findAll(){
        return movieRepository.findAll();
    }
}


 被折叠的 条评论
为什么被折叠?
被折叠的 条评论
为什么被折叠?
 到【灌水乐园】发言


