


 本文详细介绍如何使用Nexus 3.25.0搭建Maven私服,包括配置环境变量、启动服务、设置访问权限、创建仓库等步骤,并提供Maven和Gradle项目的配置示例。
nexus搭建maven私服
1.下载nexus-3.25.0-03-win64.zip
2.解压缩得到两个文件夹

3.配置环境变量D:\softwareinstall\nexus-3.25.0-03-win64\nexus-3.25.0-03\bin到path
4.进入D:\softwareinstall\nexus-3.25.0-03-win64\nexus-3.25.0-03\bin,用管理员权限打开cmd,运行nexus.exe /run启动服务,浏览器输入localhost:8081即可进入后台页面
5.登录密码这个版本不是admin/admin123了,去D:\softwareinstall\nexus-3.25.0-03-win64\sonatype-work\nexus3里面的admin.password文件里面找密码
6.登录之后会弹出修改密码,修改
7.设置访问权限

如果允许所有人访问就设置第一个,如果访问需要账号密码就选第二个
8.设置完后默认会有如下几个库

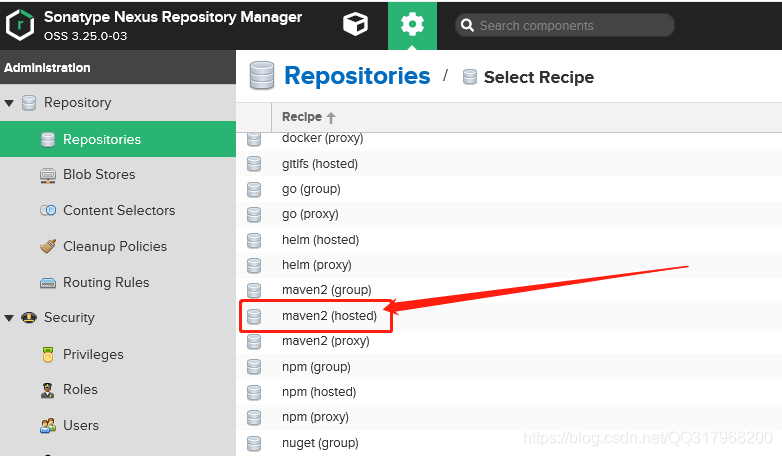
我们关注maven开头的几个仓库,简单介绍下仓库类型Type
hosted:宿主仓库,我们自行开发项目可打包发布到上面,hosted又分releases和snapshots,releases即稳定版发布的仓库,snapshots是测试版发布的仓库
proxy:代理仓库,请求过来会先查找代理仓库有则返回无则请求远程仓库缓存到代理仓库再返回
group:组仓库可自由组合宿主仓库和代理仓库
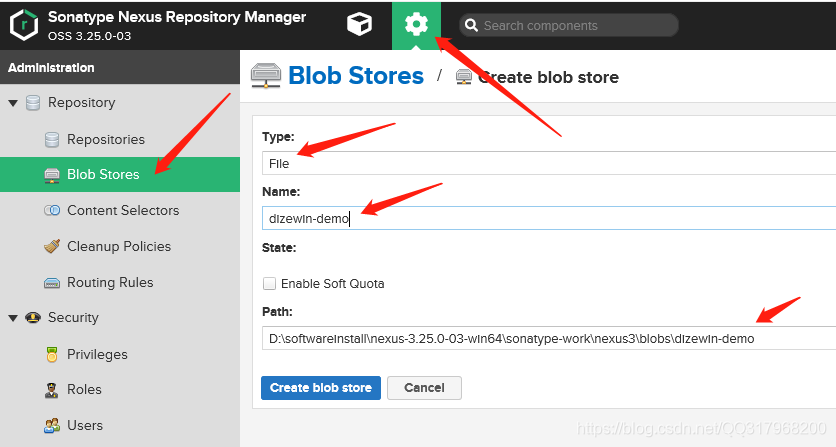
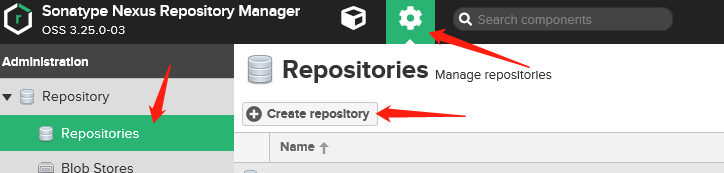
9.我们不使用默认仓库,来自己创建新的仓库
先来创建一个存储blob,用来存储文件,后面仓库的存储位置都要用到这个
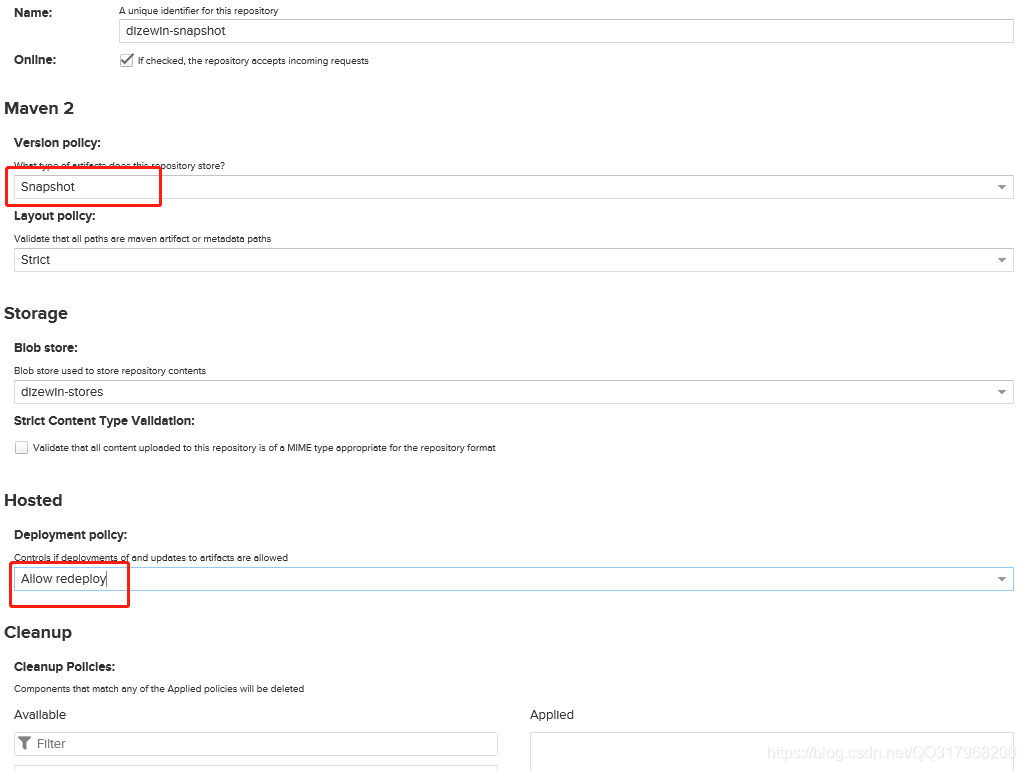
创建releases仓库
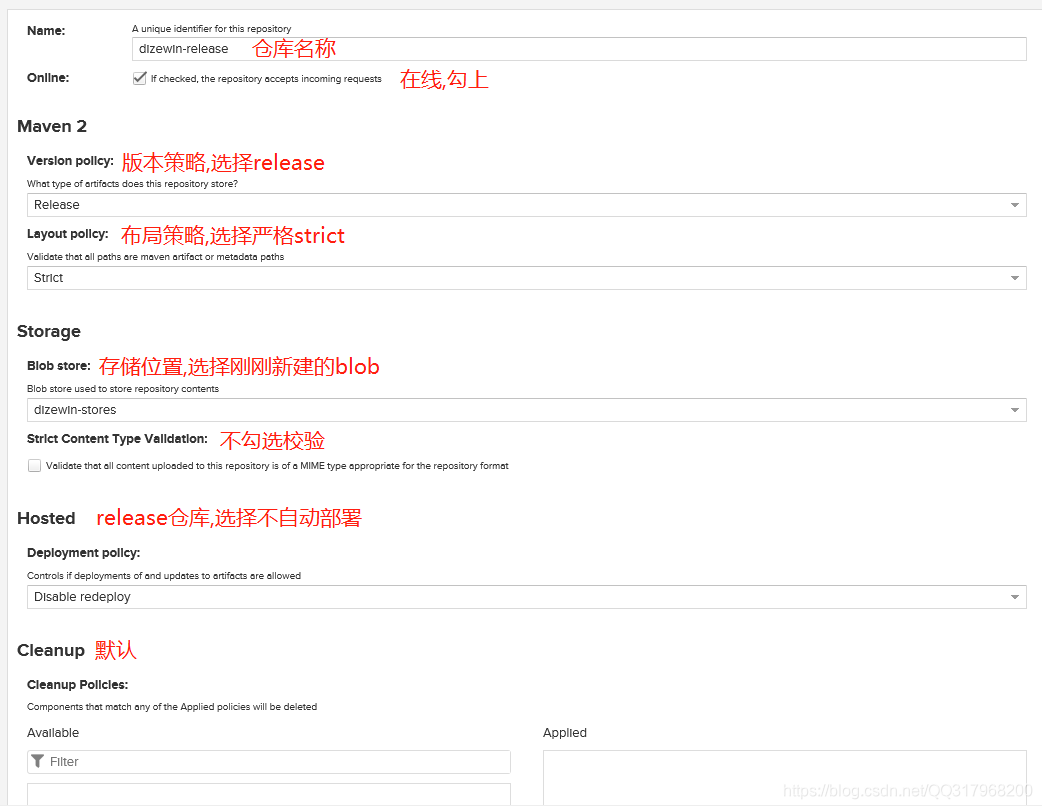
这样release仓库就创建好了,接下来创建snapshot仓库,同release仓库,改一下版本策略和允许自动部署即可
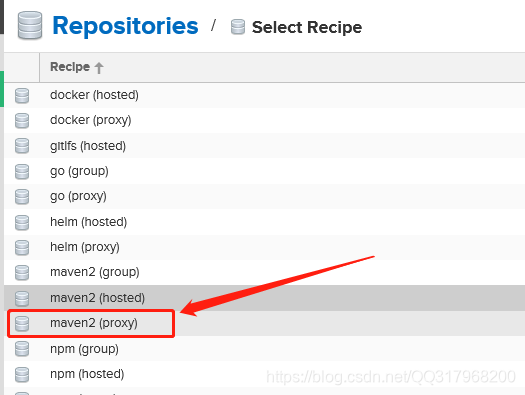
接下来创建代理仓库
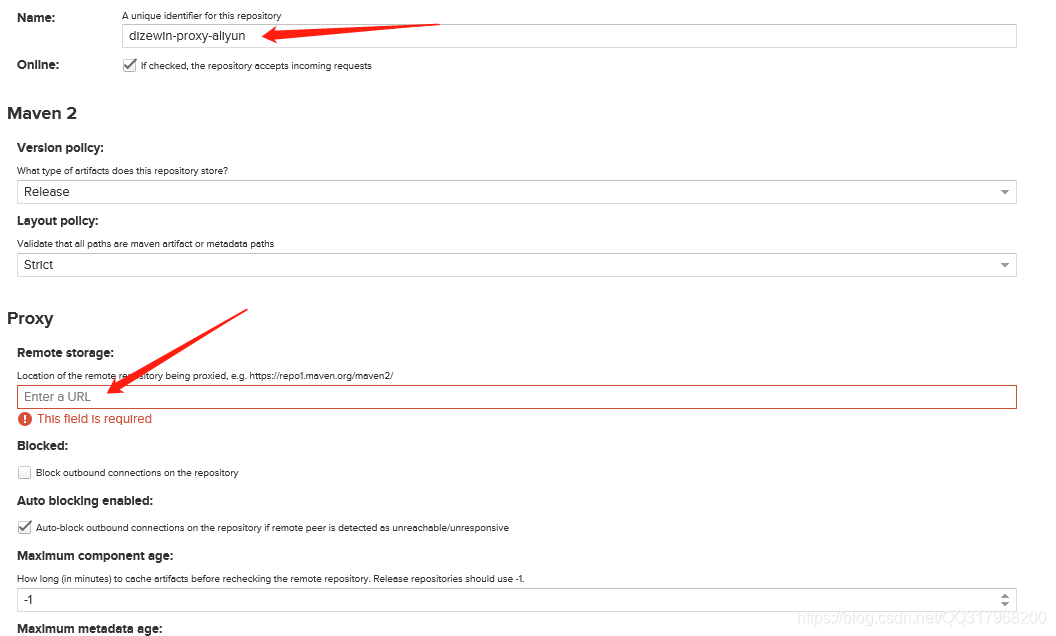
填写名称,其他都默认,远程仓库地址我罗列如下几个
阿里:http://maven.aliyun.com/nexus/content/groups/public
google:https://maven.google.com(20220307更新,https://maven.google.com已经弃用了,现在替换为https://dl.google.com/dl/android/maven2/)
jcenter:http://jcenter.bintray.com/
jitpack:JitPack | Publish JVM and Android libraries(在需要依赖git上面的项目的时候可以使用这个打包)
-----------------------------------------------------------------------------------
20231226更新
新增腾讯云远程地址
http://mirrors.cloud.tencent.com/nexus/repository/maven-public/
-----------------------------------------------------------------------------------
ok,接下来创建组仓库
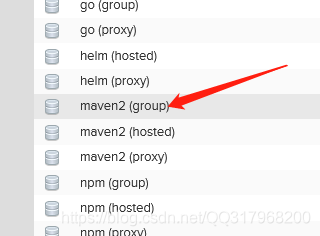
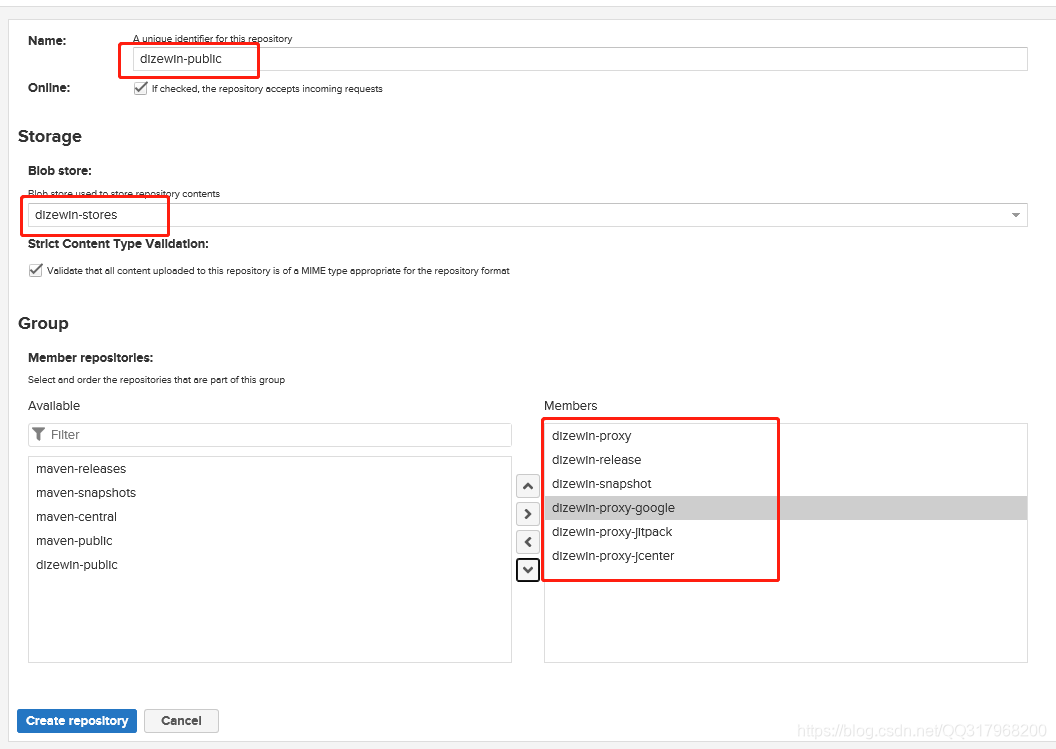
组仓库里面将前面新建的仓库都加进来,排在最前面最先请求
配好之后,来看看项目里面怎么使用
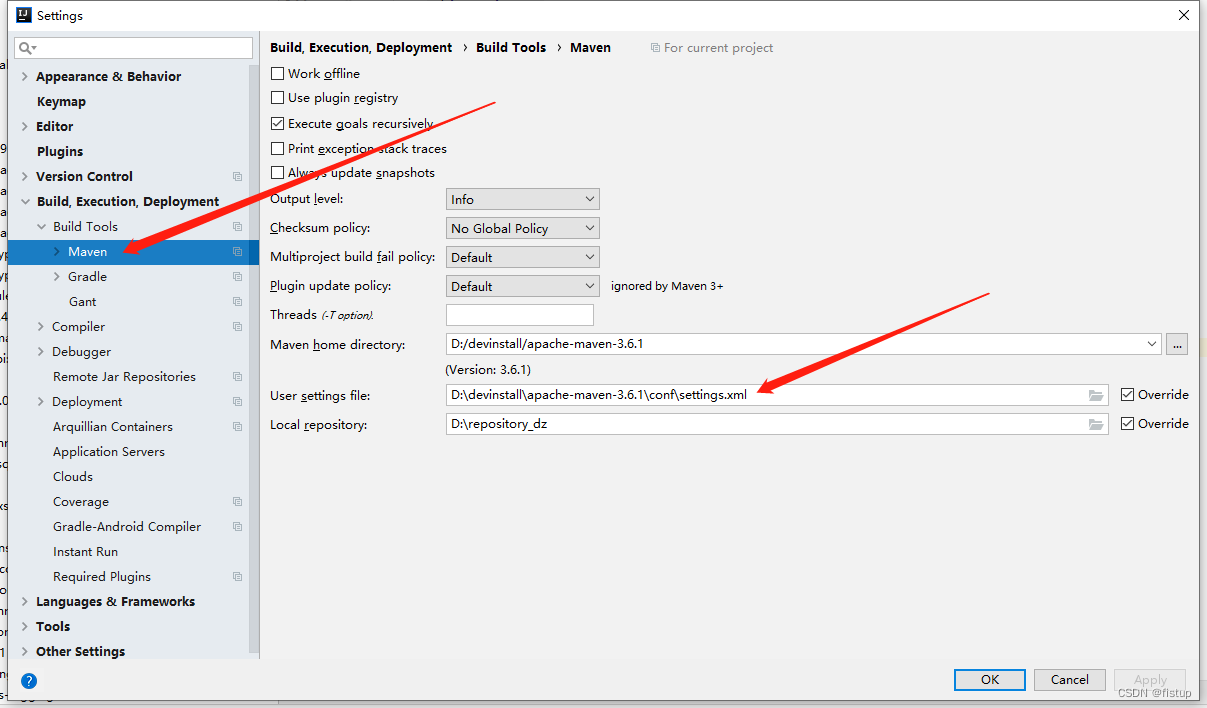
maven项目里面,修改settings.xml文件,做个备份以防万一
<?xml version="1.0" encoding="UTF-8"?>

<settings xmlns="http://maven.apache.org/SETTINGS/1.0.0"
          xmlns:xsi="http://www.w3.org/2001/XMLSchema-instance"
          xsi:schemaLocation="http://maven.apache.org/SETTINGS/1.0.0 http://maven.apache.org/xsd/settings-1.0.0.xsd">

  <localRepository>D:\repository_dz</localRepository>

  <pluginGroups>
  </pluginGroups>

  <proxies>
  </proxies>

  <servers>
    <!--第一个nexus-yang要和下面的mirror中的id一致,代表拉取是也需要进行身份校验-->
    <server>
      <id>nexus-yang</id>
      <username>admin</username>
      <password>dizewin2020</password>
    </server>
     <server>
      <!--这两个前面讲过,是jar上传时候进行的验证,id对应的是pom中id属性的值-->
      <id>releases</id>
      <username>admin</username>
      <password>xxx</password>
    </server>
     <server>
      <id>snapshots</id>
      <username>admin</username>
      <password>xxx</password>
    </server>
  </servers>

  <mirrors>
	<mirror>
        <id>nexus-yang</id>
        <name>internal nexus repository</name>
        <!--镜像采用配置好的组的地址-->
        <url>http://xx.xx.xx.xx:8081/repository/dizewin-public/</url>
        <mirrorOf>!internal.repo,*</mirrorOf>
    </mirror>
  </mirrors>

  <profiles>
    <profile>
		<!--ID用来确定该profile的唯一标识-->
           <id>jdk-1.8</id>
           <activation>
               <activeByDefault>true</activeByDefault>
               <jdk>1.8</jdk>
           </activation>
           <properties>
               <maven.compiler.source>1.8</maven.compiler.source>
               <maven.compiler.target>1.8</maven.compiler.target>
               <maven.compiler.compilerVersion>1.8</maven.compiler.compilerVersion>
           </properties>
   </profile>
	<profile>
	  <id>nexus-pr</id>
	   <!-- 远程仓库列表 -->
	  <repositories>
		<repository>
		  <id>nexus</id>
		  <name>Nexus Central</name>
		 <!-- 虚拟的URL形式,指向镜像的URL-->
		  <url>http://xx.xx.xx.xx:8081/repository/dizewin-public/</url>
		  <layout>default</layout>
		 <!-- 表示可以从这个仓库下载releases版本的构件-->
		  <releases>
			<enabled>true</enabled>
		  </releases>
		 <!-- 表示可以从这个仓库下载snapshot版本的构件 -->
		  <snapshots>
			<enabled>true</enabled>
		  </snapshots>
		</repository>
	  </repositories>
		<!-- 插件仓库列表 -->
		<pluginRepositories>
			<pluginRepository>
			  <id>nexus</id>
			  <name>Nexus Central</name>
			  <url>http://xx.xx.xx.xx:8081/repository/dizewin-public/</url>
			  <layout>default</layout>
			  <snapshots>
				<enabled>true</enabled>
			  </snapshots>
			  <releases>
				 <enabled>true</enabled>
			  </releases>
			</pluginRepository>
		</pluginRepositories>
	</profile>

  </profiles>

	<activeProfiles>
		<!--需要激活 <profile>中的ID才生效-->
		<activeProfile>nexus-pr</activeProfile>
		<activeProfile>jdk-1.8</activeProfile>
	</activeProfiles>
</settings>
在来看看Gradle项目怎么配置
allprojects {
    repositories {
        maven {
            url "http://xx.xx.xx.xx:8081/repository/dizewin-public/" // 具体仓库
            credentials {
                username = 'admin'
                password = 'xxx'
            }
        }

}
-----------------------------------------------------------------------------------
20220622更新
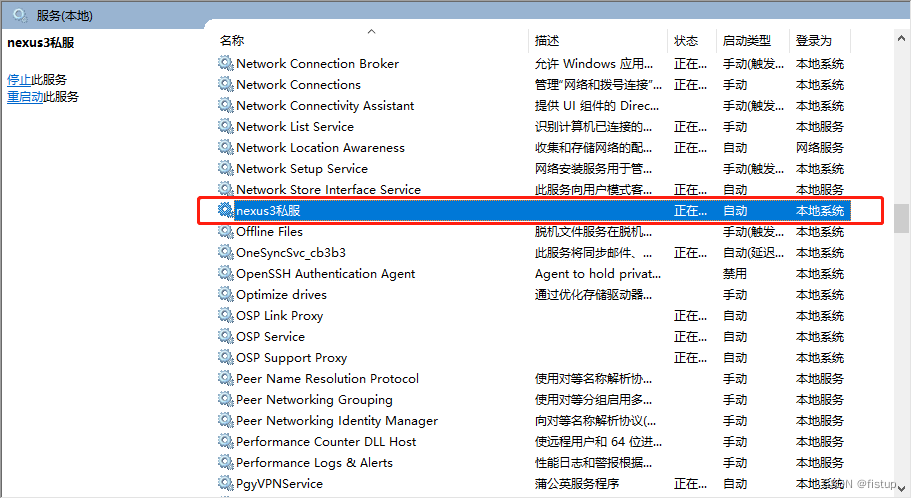
将nexus注册成windows开机自启服务,首先以管理员身份打开cmd cd到nexus.exe目录
执行nexus.exe /install nexus3私服
即可注册成服务
--------------------------------------------------------------------------------------------------------
默认nexus启动Xms Xmx比较占内存,我给改成512了
在nexus.exe同级目录下修改nexus.vmoptions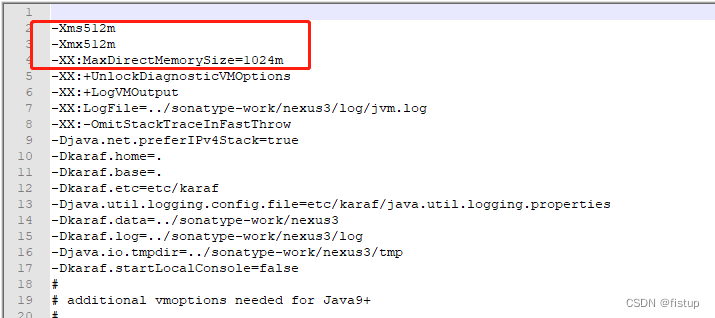
-----------------------------------------------------------------------------------
20230419更新
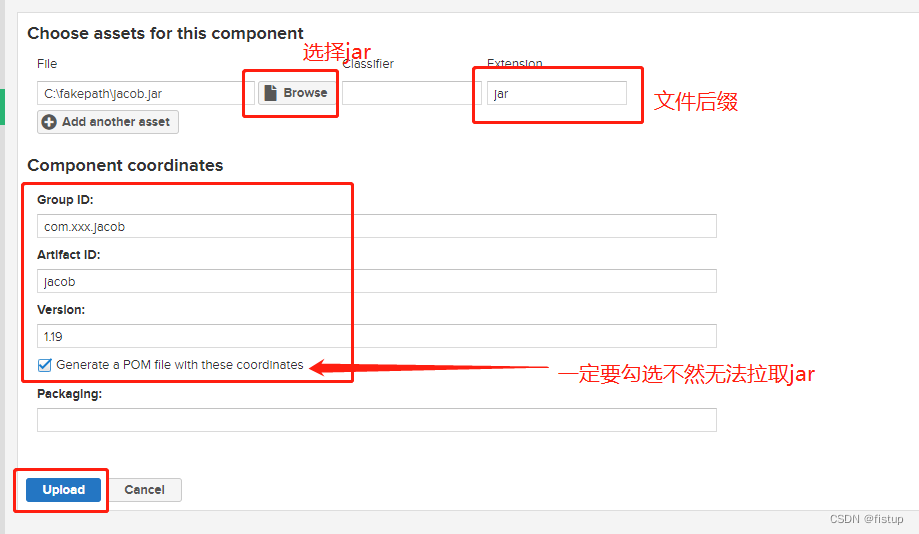
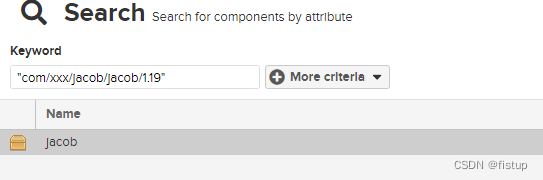
nexus上传自定义jar并使用
1.首先进入nexus后台进入upload,选择我们前面自己创建的release

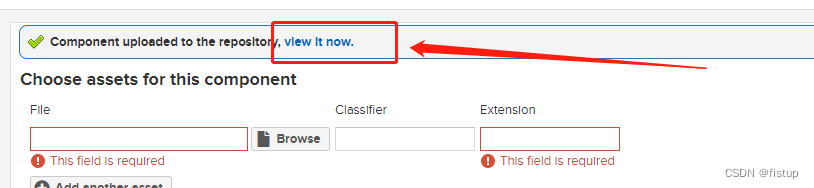
2.填写相关信息在上传
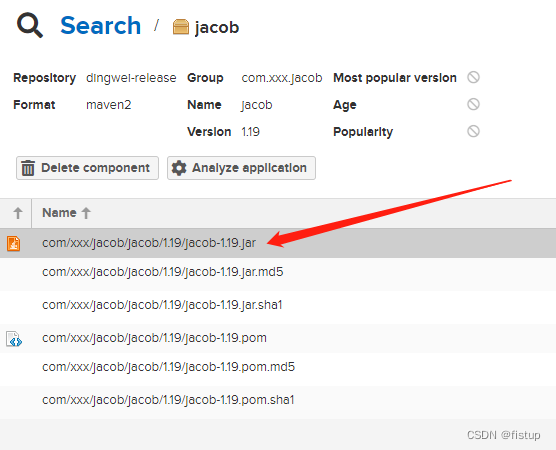
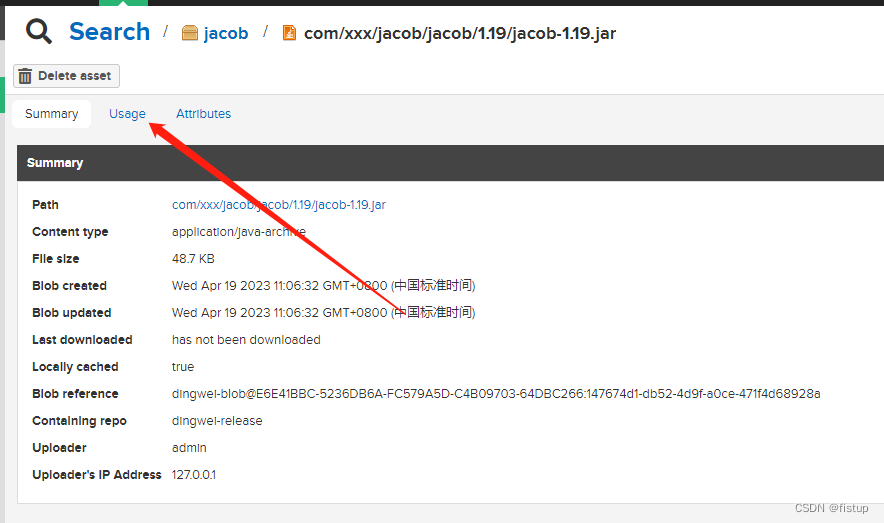
3.上传成功之后
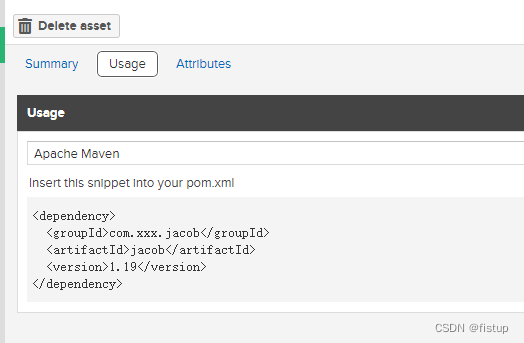
4.maven setting.xml简单配置即可使用
  <!--nexus服务器,id自定义,用户名和密码为nexus服务器的账号密码-->
  <servers>
    <server>
        <id>nexus_dingwei</id>
        <username>admin</username>
        <password>xxx</password>
    </server>
  </servers>
  <!--组资源库的url地址  id和name自定义,mirrorOf的值设置为central,写死的-->
  <mirrors>
    <mirror>
        <id>nexus_dingwei</id>
        <name>nexus repository</name>
        <url>http://192.168.3.24:8081/repository/dingwei-group/</url>
        <mirrorOf>central</mirrorOf>
    </mirror>
  </mirrors>


 6253
6253

 被折叠的 条评论
为什么被折叠?
被折叠的 条评论
为什么被折叠?
 到【灌水乐园】发言


