


 本文详细介绍了SpringBoot框架的基础使用方法,包括自动配置原理、环境切换、热部署等功能,并深入探讨了如何通过SpringBoot整合MyBatis,实现数据库操作的自动化配置。
1. SpringBoot源码分析
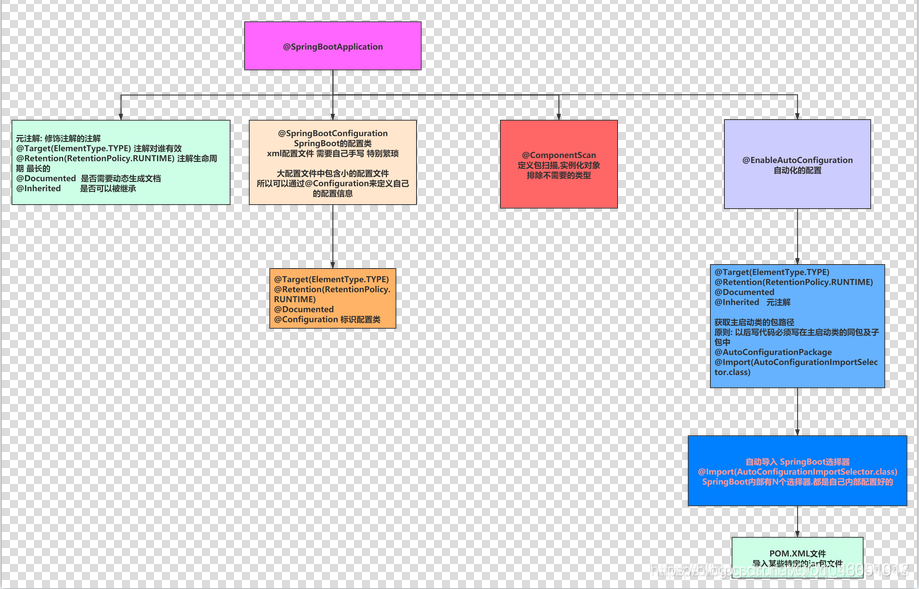
1.1 "开箱即用"说明
说明: 如果用户需要使用某些框架/功能 只需要经过少量的配置 即可以实现该功能。
说明2: SpringBoot程序启动会依次执行多个启动项,当pom.xml文件中添加某个特定的jar包文件时, 启动项就会加载该文件,实例化对象.完成自动化的装配.从而实现了开箱即用的效果。
SpringBoot官网提供了主流的装配的配置项,无需过多的配置即可实现功能。
但是如果官网没有提供配置项,则需要手动通过Configuration自定义配置类的方式进行手动的装配。
总结:官网有配置则直接导包 ,官网没有配置则手动配置即可
1.2 自动选择器种类
展现方式: 配置文件中添加如下代码即可 利用debug展现启动过程项
============================
CONDITIONS EVALUATION REPORT
============================


Positive matches:
-----------------

   AopAutoConfiguration matched:
      - @ConditionalOnProperty (spring.aop.auto=true) matched (OnPropertyCondition)

   AopAutoConfiguration.ClassProxyingConfiguration matched:
      - @ConditionalOnMissingClass did not find unwanted class 'org.aspectj.weaver.Advice' (OnClassCondition)
      - @ConditionalOnProperty (spring.aop.proxy-target-class=true) matched (OnPropertyCondition)

   DispatcherServletAutoConfiguration matched:
      - @ConditionalOnClass found required class 'org.springframework.web.servlet.DispatcherServlet' (OnClassCondition)
      - found 'session' scope (OnWebApplicationCondition)

   DispatcherServletAutoConfiguration.DispatcherServletConfiguration matched:
      - @ConditionalOnClass found required class 'javax.servlet.ServletRegistration' (OnClassCondition)
      - Default DispatcherServlet did not find dispatcher servlet beans (DispatcherServletAutoConfiguration.DefaultDispatcherServletCondition)

   DispatcherServletAutoConfiguration.DispatcherServletRegistrationConfiguration matched:
      - @ConditionalOnClass found required class 'javax.servlet.ServletRegistration' (OnClassCondition)
      - DispatcherServlet Registration did not find servlet registration bean (DispatcherServletAutoConfiguration.DispatcherServletRegistrationCondition)

.....
2. SpringBoot高级属性用法
2.1 关于SpringBoot配置文件说明
- 基本配置: KEY-VALUE结构
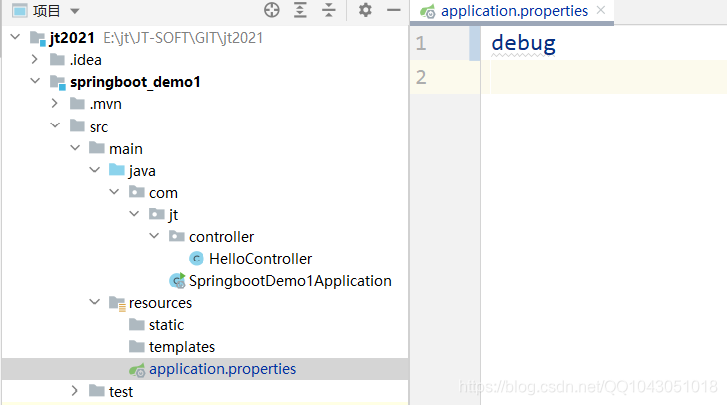
2.1.1 properties文件
特点:
- 1.properties编辑的数据 本质都是
String类型的字符串 - 2.properties中的key value结构使用
=号方法动态链接 - 3.properties中无需添加多余的
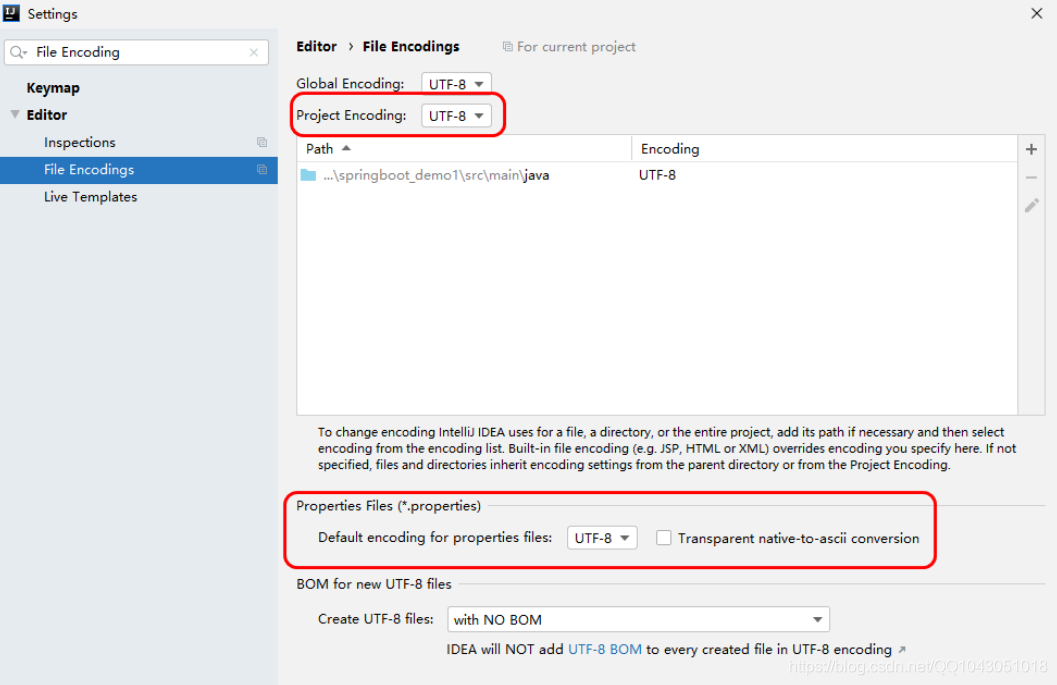
"号 - 4.properties中加载时默认的字符集的编码格式是
ISO-8859-1如果写中文需要指定字符集
修改字符集配置:
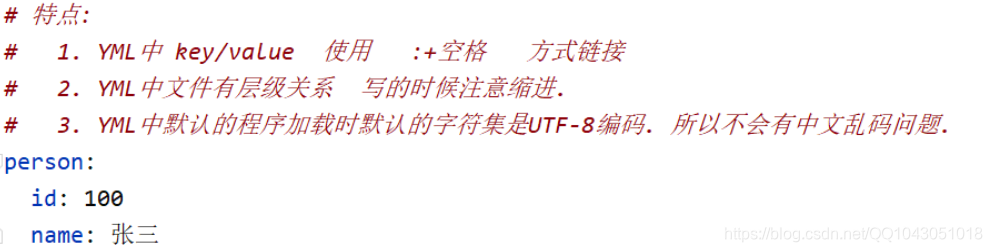
2.1.2 yml文件
2.2 为属性赋值操作
2.2.1 业务需求
当利用SpringBoot程序整合第三方框架时,如果都将属性信息写死在代码中,则程序的扩展性不好
问题: 能否动态的获取属性信息呢?
2.2.2 利用@Value属性赋值
1).编辑YML配置文件
# 特点:
#   1. YML中 key/value  使用   :+空格   方式链接
#   2. YML中文件有层级关系  写的时候注意缩进.
#   3. YML中默认的程序加载时默认的字符集是UTF-8编码. 所以不会有中文乱码问题.
server:
  port: 8080

# 测试案例1:属性赋值  注意事项 编辑key时最好添加业务名称
redis:
  host: 10.0.0.4
  port: 6379
2).利用@Value属性赋值
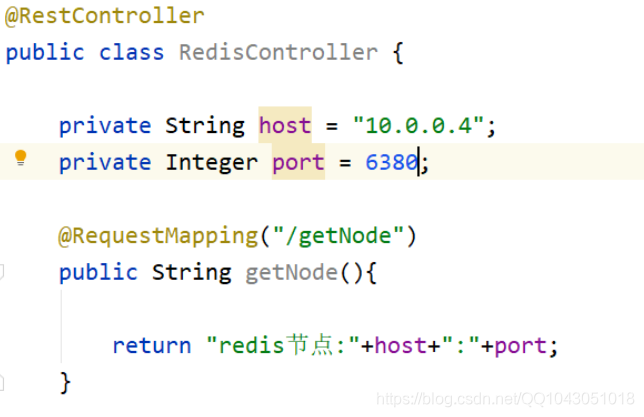
RedisController
@RestController
public class RedisController {

    //需求:从spring容器中动态获取属性值 表达式:springel表达式 简称spel表达式
    @Value("${redis.host}")
    private String host;  // = "10.0.0.4"
    @Value("${redis.port}")
    private Integer port; //  = 6380

    @RequestMapping("/getNode")
    public String getNode(){

        return "redis节点:"+host+":"+port;
    }
}

2.2.3 利用properties为属性赋值
1).编辑properties配置文件

redis.properties
#业务类型的配置文件  注意事项: key不能重复
redisPro.host=192.168.1.1的IP地址
redisPro.port=7000
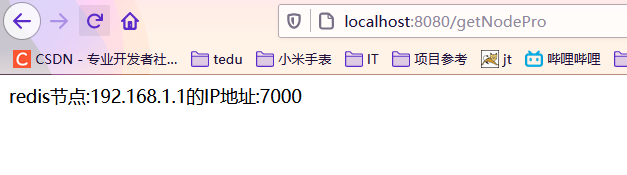
2).编辑Controller
RedisProController
@RestController
//动态加载配置文件
@PropertySource(value = "classpath:/properties/redis.properties",encoding = "UTF-8")
public class RedisProController {

    @Value("${redisPro.host}")
    private String host;
    @Value("${redisPro.port}")
    private Integer port;

    @RequestMapping("/getNodePro")
    public String getNode(){

        return "redis节点:"+host+":"+port;
    }
}
2.3 环境切换测试
2.3.1 业务说明
开发时可能会遇到 办公地点的变化. 开发可能在公司完成,但是线上部署时需要在甲方完成.
开发环境和测试环境可能不同.如果频繁修改 效率太低.
2.3.2 实现环境切换
# 选择默认环境  SpringCloud 配置中心机制  统一管理YML配置文件
spring:
  profiles:
    active: test
---
# 特点:
#   1. YML中 key/value  使用   :+空格   方式链接
#   2. YML中文件有层级关系  写的时候注意缩进.
#   3. YML中默认的程序加载时默认的字符集是UTF-8编码. 所以不会有中文乱码问题.
server:
  port: 8080

#定义环境名称
spring:
  config:
    activate:
      on-profile: prod


# 测试案例1:属性赋值  注意事项 编辑key时最好添加业务名称
redis:
  host: 10.0.0.4
  port: 6379

#环境分隔符 原来的一个YML 拆分为2个YML
---
server:
  port: 9000

#定义环境名称
spring:
  config:
    activate:
      on-profile: test
redis:
  host: 192.168.1.1
  port: 7000
2.4 热部署测试
2.4.1 添加jar包
<!--支持热部署开发阶段使用 -->
<dependency>
	<groupId>org.springframework.boot</groupId>
	<artifactId>spring-boot-devtools</artifactId>
</dependency>
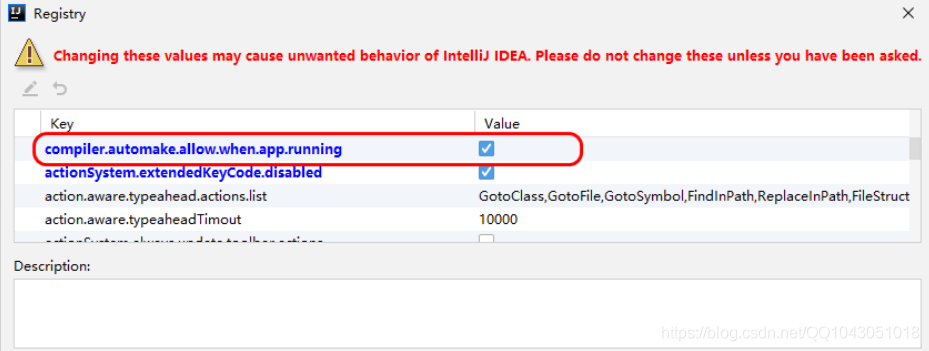
2.4.2 IDEA配置
组合键: ctrl + shift + alt + / 或者ctrl + alt + a
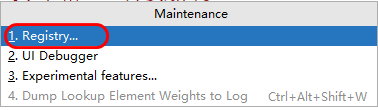
勾选热部署工具
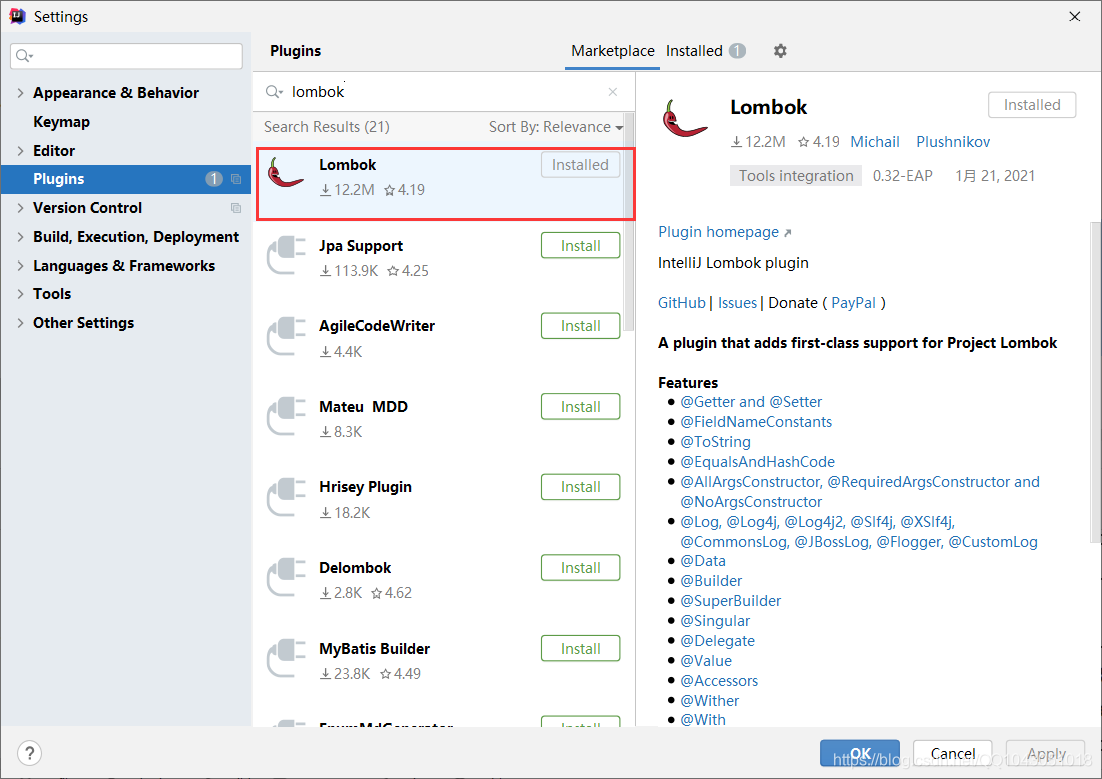
2.5 引入lombok
2.5.1 导入jar包
        <dependency>
            <groupId>repository.org.projectlombok</groupId>
            <artifactId>lombok</artifactId>
            <version>1.18.16</version>
        </dependency>
2.5.2 校验插件是否安装
2.5.3 注解使用
@Data    //动态添加get/set/toString/equals等方法
@AllArgsConstructor //添加构造方法
@NoArgsConstructor//添加无参构造
@Accessors(chain = true)//引入链式加载方式,重写set方法
public class User {
    private Integer id;
    private String name;
    private Integer age;
    private String sex;
}
引入链式加载方式,重写set方法
@RestController
public class HelloController {

    @GetMapping("/hello")
    public String Hello(){
        User user = new User();
        user.setName("清风").setAge(18).setSex("男");

        return "Hello SpringBoot";
    }
2.5.4 关于lombok面试题
说明: 在开发阶段需要在IDEA中添加lombok插件,程序才能正常的运行. 问题: 如果项目需要在Linux系统中运行 是否需要在Linux中提前安装Lombok插件?
答案: 不需要
lombok插件编译期有效. xxx.java 通过IDE 编译为xxx.class文件 动态添加get/set等方法
所以将项目打成 xx.jar/xxx.war的时候 已经包含了get/set方法.所以无需添加
2.6 SpringBoot整合Mybatis
2.6.1 新建项目
1).选择项目名称
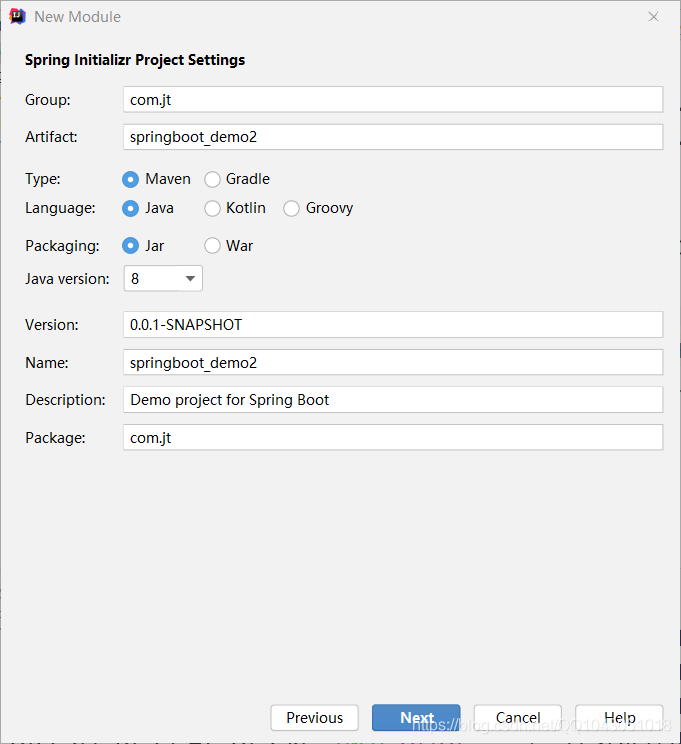
选择jar包
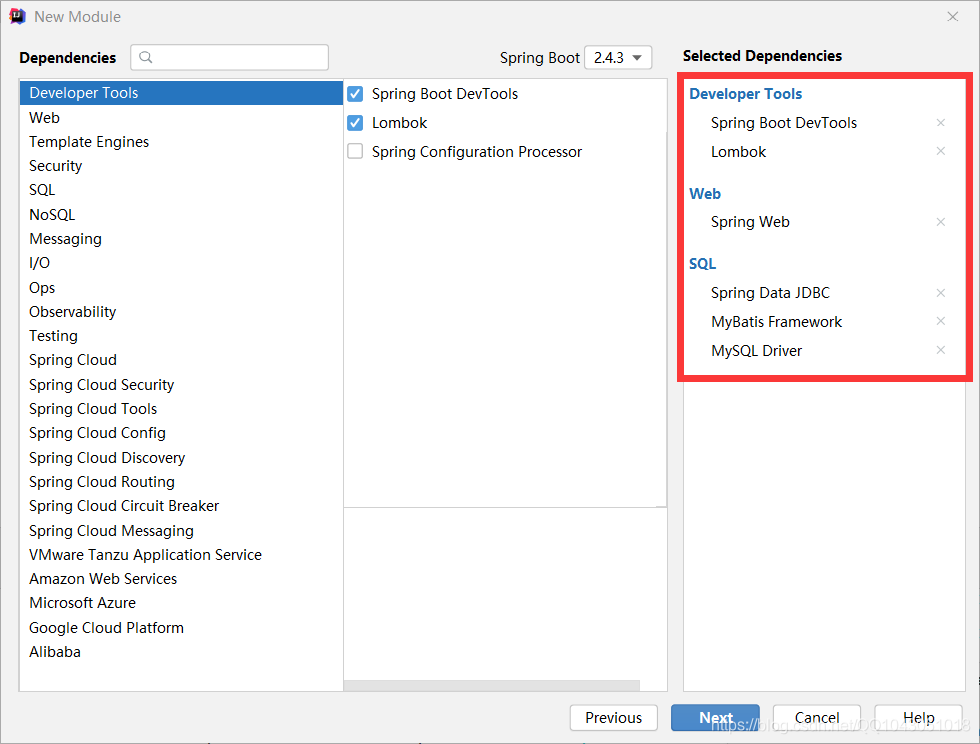
2).编辑pom.xml文件
<?xml version="1.0" encoding="UTF-8"?>
<project xmlns="http://maven.apache.org/POM/4.0.0" xmlns:xsi="http://www.w3.org/2001/XMLSchema-instance"
         xsi:schemaLocation="http://maven.apache.org/POM/4.0.0 https://maven.apache.org/xsd/maven-4.0.0.xsd">
    <modelVersion>4.0.0</modelVersion>
    <parent>
        <groupId>org.springframework.boot</groupId>
        <artifactId>spring-boot-starter-parent</artifactId>
        <version>2.4.3</version>
        <relativePath/> <!-- lookup parent from repository -->
    </parent>
    <groupId>com.jt</groupId>
    <artifactId>springboot_demo2</artifactId>
    <version>0.0.1-SNAPSHOT</version>
    <name>springboot_demo2</name>
    <description>Demo project for Spring Boot</description>
    <properties>
        <java.version>1.8</java.version>
    </properties>
    <dependencies>
        <dependency>
            <groupId>org.springframework.boot</groupId>
            <artifactId>spring-boot-starter-data-jdbc</artifactId>
        </dependency>
        <dependency>
            <groupId>org.springframework.boot</groupId>
            <artifactId>spring-boot-starter-web</artifactId>
        </dependency>
        <dependency>
            <groupId>org.mybatis.spring.boot</groupId>
            <artifactId>mybatis-spring-boot-starter</artifactId>
            <version>2.1.4</version>
        </dependency>

        <dependency>
            <groupId>org.springframework.boot</groupId>
            <artifactId>spring-boot-devtools</artifactId>
            <scope>runtime</scope>
            <optional>true</optional>
        </dependency>
        <dependency>
            <groupId>mysql</groupId>
            <artifactId>mysql-connector-java</artifactId>
            <scope>runtime</scope>
        </dependency>
        <dependency>
            <groupId>org.projectlombok</groupId>
            <artifactId>lombok</artifactId>
            <optional>true</optional>
        </dependency>
        <dependency>
            <groupId>org.springframework.boot</groupId>
            <artifactId>spring-boot-starter-test</artifactId>
            <scope>test</scope>
        </dependency>
    </dependencies>

    <build>
        <plugins>
            <plugin>
                <groupId>org.springframework.boot</groupId>
                <artifactId>spring-boot-maven-plugin</artifactId>
                <configuration>
                    <excludes>
                        <exclude>
                            <groupId>org.projectlombok</groupId>
                            <artifactId>lombok</artifactId>
                        </exclude>
                    </excludes>
                </configuration>
            </plugin>
        </plugins>
    </build>

</project>
2.6.2 编辑数据源配置
application.yml
#SpringBoot数据源配置
spring:
  datasource:
    url: jdbc:mysql://127.0.0.1:3306/jtdb?serverTimezone=GMT%2B8&useUnicode=true&characterEncoding=utf8&autoReconnect=true&allowMultiQueries=true
    username: root
    password: root
- serverTimezone=GMT%2B(+)8 代表时区东八区
- &useUnicode=true&characterEncoding=utf8 是否使用Unicode编码 使用UTF-8字符集
- &autoReconnect=true 链接断开之后是否重连.
- &allowMultiQueries=true 是否允许批量操作
   <insert id="xxxx">
		<!--可能需要同时入库三张表allowMultiQueries=true,就需要使用-->
		insert into xxx1 values (xxx,xx,xx);
		insert into xxx2 values (xxx,xx,xx);
		insert into xxx3 values (xxx,xx,xx);
	</insert>
2.6.3 编辑Mybatis相关配置
application.yml
#SpringBoot整合Mybatis
mybatis:
  #定义别名包 作用: 以后封装POJO对象时自动进行拼接
  type-aliases-package: com.jt.pojo
  #引入mapper配置文件
  mapper-locations: classpath:/mybatis/mappers/*.xml
  #开启驼峰映射
  configuration:
    map-underscore-to-camel-case: true
完整配置:
application.yml
#配置端口号
server:
  port: 8090
  servlet:
    context-path: /

#SpringBoot数据源配置
spring:
  datasource:
    driver-class-name: com.mysql.cj.jdbc.Driver
    url: jdbc:mysql://127.0.0.1:3306/jtdb?serverTimezone=GMT%2B8&useUnicode=true&characterEncoding=utf8&autoReconnect=true&allowMultiQueries=true
    username: root
    password: root

#SpringBoot整合Mybatis
mybatis:
  #定义别名包 作用: 以后封装POJO对象时自动进行拼接
  type-aliases-package: com.jt.pojo
  #引入mapper配置文件
  mapper-locations: classpath:/mybatis/mappers/*.xml
  #开启驼峰映射
  configuration:
    map-underscore-to-camel-case: true
2.6.4 编辑Mapper接口
- 拷贝之前的pojo类
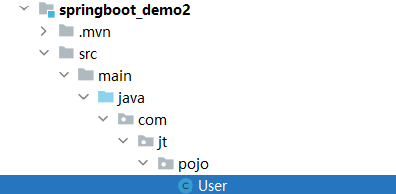
User
@Data    //动态添加get/set/toString/equals等方法
@AllArgsConstructor //添加构造方法
@NoArgsConstructor//添加无参构造
@Accessors(chain = true)//引入链式加载方式重写set方法
public class User {
    private Integer id;
    private String name;
    private Integer age;
    private String sex;
}
- 创建UserMapper类
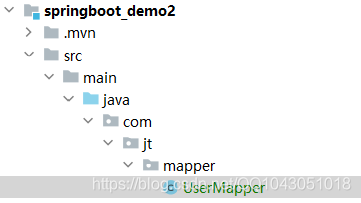
UserMapper
@Mapper
public interface UserMapper {
    //查询全部用户的数据 注解方式  /  xml映射文件方式
    List<User> findAll();
}
编辑映射文件:
<?xml version="1.0" encoding="UTF-8" ?>
<!DOCTYPE mapper
  PUBLIC "-//mybatis.org//DTD Mapper 3.0//EN"
  "http://mybatis.org/dtd/mybatis-3-mapper.dtd">
  <!-- namespace 需要与接口路径保持一致 -->
<mapper namespace="com.jt.mapper.UserMapper">
		<!--
		id="属性需要与接口方法保持一致"
	 	resultType="包名.类名" 简写resultType="类名"
	 	Mybatis 会将结果集进行数据封装 resultSET 封装为对象
	 -->
	<select id="findAll" resultType="User">
		select * from user
	</select>

	<!--
		驼峰规则说明
		业务需求:
			表中的字段:	 user_id,user_age,user_sex
			对象中的属性: userId,userAge,userSex
		驼峰规则方法:
			字段user_id~~~~映射时,会自动的去处_线~~~之后首字母大写~~userId~~~
			动态赋值给属性!!!

		考题: 如果开启驼峰规则映射
		字段: user_id,user_age
		属性: user_id,user_age
		问:  能否自动映射呢?    不能映射
		注意事项:  如果开启了驼峰规则映射,则必须按照要求实现.
		-->

</mapper>
2.6.5 编辑主启动类
@SpringBootApplication
//引入mybatis接口包路径
@MapperScan("com.jt.mapper")
public class SpringbootDemo2Application {

    public static void main(String[] args) {
        SpringApplication.run(SpringbootDemo2Application.class, args);
    }

}
2.6.6 编辑测试方法
@SpringBootTest  //当程序执行@Test方法时,会先启动springBoot的容器实例化对象,.之后程序调用
class SpringbootDemo2ApplicationTests {
    //动态注入mapper接口的实例对象 代理对象  cgblib  jdk
    @Autowired    //依赖注入 1.按照类型注入   2.按照名称注入
    //@Qualifier("注入属性的名称")
    private UserMapper userMapper;


    @Test
    public void testMybatis() {
        System.out.println("输入代理对象的类型:"+userMapper.getClass()+"JDK代理");
        List<User> userList = userMapper.findAll();
        System.out.println(userList);
    }
}

2.7 MybatisPlus
2.7.1 ORM思想
对象关系映射(英语:Object Relational Mapping,简称ORM,或O/RM,或O/R mapping),是一种程序设计技术,用于实现面向对象编程语言里不同类型系统的数据之间的转换。
应用ORM思想框架: Mybatis | Hibernate(配置繁琐)
有利: 程序员操作简单
弊端: 执行开销相对较大.(慢)
总结: 以对象的方式操作数据库
2.7.2 MybatisPlus实现原理
分析问题本质:
- 1.对象-------属性
- 2.表 -------- 字段
1.对象与表如何进行关联? 利用自定义注解实现
2.如何实现CRUD方法的简化? 定义一个公共的Mapper接口,在其中添加CURD方法
3.需要将对象转化为Sql语句 按照特定的语法进行转化
转化的环节MP已经按照接口文档已经实现了
Sql: insert into user(字段名称…) values (属性值…); 形式sql拼接
之后将拼接成的SQL交给Mybatis执行
2.7.3 MybatisPlus(MP)介绍
MyBatis-Plus (opens new window)(简称 MP)是一个 MyBatis (opens new window)的增强工具,在 MyBatis 的基础上只做增强不做改变,为简化开发、提高效率而生。
特点:
- 无侵入:只做增强不做改变,引入它不会对现有工程产生影响,如丝般顺滑
- 损耗小:启动即会自动注入基本 CURD,性能基本无损耗,直接面向对象操作
- 强大的 CRUD 操作:内置通用 Mapper、通用 Service,仅仅通过少量配置即可实现单表大部分 CRUD 操作,更有强大的条件构造器,满足各类使用需求
- 支持 Lambda 形式调用:通过 Lambda 表达式,方便的编写各类查询条件,无需再担心字段写错
- 支持主键自动生成:支持多达 4 种主键策略(内含分布式唯一 ID 生成器 - Sequence),可自由配置,完美解决主键问题
- 支持 ActiveRecord 模式:支持 ActiveRecord 形式调用,实体类只需继承 Model 类即可进行强大的 CRUD 操作
- 支持自定义全局通用操作:支持全局通用方法注入( Write once, use anywhere )
- 内置代码生成器:采用代码或者 Maven 插件可快速生成 Mapper 、 Model 、 Service 、 Controller 层代码,支持模板引擎,更有超多自定义配置等您来使用
- 内置分页插件:基于 MyBatis 物理分页,开发者无需关心具体操作,配置好插件之后,写分页等同于普通 List 查询
- 分页插件支持多种数据库:支持 MySQL、MariaDB、Oracle、DB2、H2、HSQL、SQLite、Postgre、SQLServer 等多种数据库
- 内置性能分析插件:可输出 Sql 语句以及其执行时间,建议开发测试时启用该功能,能快速揪出慢查询
- 内置全局拦截插件:提供全表 delete 、 update 操作智能分析阻断,也可自定义拦截规则,预防误操作
2.8 MybatisPlus(MP)入门案例
2.8.1 导入jar包
		<!--引入MybatisPlus配置   删除原有Mybatisjar包  不然造成冲突 -->
		<dependency>
			<groupId>com.baomidou</groupId>
			<artifactId>mybatis-plus-boot-starter</artifactId>
			<version>3.4.2</version>
		</dependency>
2.8.2 编辑YML配置文件
server:
  port: 8090
  servlet:
    context-path: /

#SpringBoot数据源配置
spring:
  datasource:
    driver-class-name: com.mysql.cj.jdbc.Driver
    url: jdbc:mysql://127.0.0.1:3306/jtdb?serverTimezone=GMT%2B8&useUnicode=true&characterEncoding=utf8&autoReconnect=true&allowMultiQueries=true
    username: root
    password: root

#mybatis-plush配置
mybatis-plus:
  #定义别名包 作用: 以后封装POJO对象时自动进行拼接
  type-aliases-package: com.jt.pojo
  #引入mapper配置文件
  mapper-locations: classpath:/mybatis/mappers/*.xml
  #开启驼峰映射
  configuration:
    map-underscore-to-camel-case: true
2.8.3 编辑POJO映射关系
@Data    //动态添加get/set/toString/equals等方法
@AllArgsConstructor //添加构造方法
@NoArgsConstructor//添加无参构造
@Accessors(chain = true)//引入链式加载方式重写set方法
@TableName("user")  //引入表名
public class User {  //规则:如果标识字段名称与属性一致(包含驼峰规则) 则可以省略不写

    @TableId(type = IdType.AUTO)  //标识主键,主键自增
    private Integer id;
    //@TableField(value = "name")
    private String name;
    private Integer age;
    private String sex;
}
2.8.4 继承公共接口方法
//@Mapper()      //为接口创建代理对象 交给Spring管理
//注意事项!!!!!   继承父级接口时必须添加泛型<xxx>
public interface UserMapper extends BaseMapper<User> {
    //查询全部用户的数据 注解方式  /  xml映射文件方式
    List<User> findAll();
}
2.8.5 MP测试
	@Test
	public void testMP(){
		//几乎单表不写sql      查询所有的user表数据 不写where条件
		List<User> userList = userMapper.selectList(null);
		System.out.println(userList);
	}

2.8.6 MP动态Sql原理说明
对象: 关联的数据表|关联的表字段.
数据库执行: Sql语句.
java基础: 反射机制
必须动态拼接sql:
java代码: 实现用户入库操作 userMapper.insert(user);
Sql拼接过程: insert into user(name,age,sex) values (name值,age值,sex值)
交给Mybatis执行即可.
String value = user.getName()


 1085
1085

 被折叠的 条评论
为什么被折叠?
被折叠的 条评论
为什么被折叠?
 到【灌水乐园】发言


