Rust Web 全栈开发(十二):构建 WebAssembly 应用

深入浅出聊聊 Rust WebAssembly(一) 什么是 webassembly 在 2019 年 12 月之前,如果你要编写一个web页面,那一定离不开 html、css、js 这三个好兄弟。在 2019 年 12 月之后 W3C 宣布 webassembly 加入了他们。为什么要在三兄弟后加入 webassembly ?它和之前的有什么区别么?以 js 为对比,我们具体看一下它们的区别。 wasm 与 js 的区别 js 是一种解释型语言,它代码运行之前不会进行编译工作,而是在执行的过程中实时编译。为了让边编译边执行能够顺利进行,我们拥有了 js 引擎 阅读详情

Rust Web 全栈开发(十二):构建 WebAssembly 应用

参考视频:https://www.bilibili.com/video/BV1RP4y1G7KF

继续之前的 Actix 项目。

我们已经实现了一个 Web App,在网页端查看并操作数据库中教师的数据。现在我们想创建一个 WebAssembly App,查看并操作数据库中课程的数据。
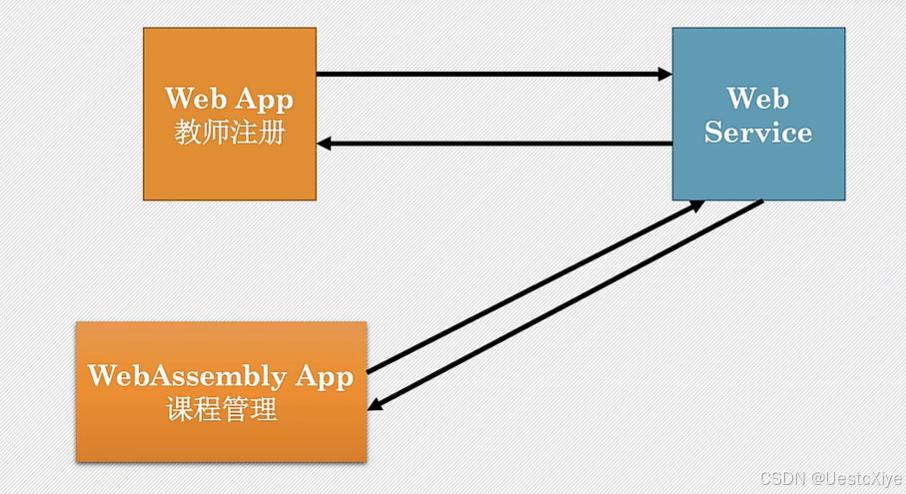
在这里插入图片描述

项目配置

打开 webservice 的 Cargo.toml,添加配置:

actix-cors = "0.6.0-beta.10"

因为客户端和服务器在不同的端口,需要跨域。

修改 webservice/src/bin/teacher_service.rs:

use actix_cors::Cors;

...

#[actix_rt::main]
async fn main() -> io::Result<()> {
    // 检测并读取 .env 文件中的内容,若不存在也会跳过异常
    dotenv().ok();

    let db_url = env::var("DATABASE_URL")
        .expect("DATABASE_URL 没有在 .env 文件里设置");

    // 创建数据库连接池
    let db_pool = MySqlPoolOptions::new()
        .connect(&db_url)
        .await
        .unwrap();

    let shared_data = web::Data::new(AppState {
        health_check_response: "I'm OK.".to_string(),
        visit_count: Mutex::new(0),
        // courses: Mutex::new(vec![]),
        db: db_pool,
    });

    let app = move || {
        let cors = Cors::default()
            .allowed_origin("http://localhost:8082/")
            .allowed_origin_fn(|origin, _req_head| {
                origin.as_bytes().starts_with(b"http://localhost")
            })
            .allowed_methods(vec!["GET", "POST", "PUT", "DELETE", "PATCH", "OPTIONS"])
            .allowed_headers(vec![
                http::header::AUTHORIZATION,
                http::header::ACCEPT,
                http::header::CONTENT_TYPE,
            ])
            .allowed_header(http::header::CONTENT_TYPE)
            .max_age(3600);
        
        App::new()
            .app_data(shared_data.clone())
            .app_data(web::JsonConfig::default().error_handler(|_err, _req| {
                MyError::InvalidInput("Please provide valid json input".to_string()).into()
            }))
            .configure(general_routes)
            .configure(course_routes)
            .wrap(cors)
            .configure(teacher_routes)
    };

    HttpServer::new(app).bind("127.0.0.1:3000")?.run().await
}

构建 wasm-client

回到 Actix 项目的最顶层,在终端中用下面的命令克隆项目模板:

cargo generate --git https://github.com/rustwasm/wasm-pack-template

wasm 模块名称为:wasm-client。

Actix 项目的 members 会自动添加:
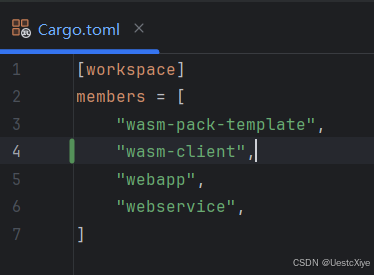
在这里插入图片描述

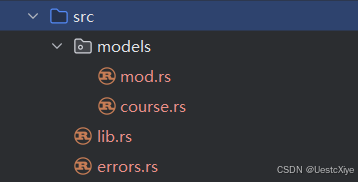
在 wasm-client/src 目录下新建文件,编写代码。

在这里插入图片描述

wasm-client/src/models/mod.rs:

pub mod course;

wasm-client/src/models/course.rs:

use super::super::errors::MyError;
use serde::{Deserialize, Serialize};
use chrono::NaiveDateTime;
use wasm_bindgen::JsCast;
use wasm_bindgen_futures::JsFuture;
use web_sys::{Request, RequestInit, RequestMode, Response};

#[derive(Debug, Serialize, Deserialize)]
pub struct Course {
    pub teacher_id: i32,
    pub id: i32,
    pub name: String,
    pub time: NaiveDateTime,

    pub description: Option<String>,
    pub format: Option<String>,
    pub structure: Option<String>,
    pub duration: Option<String>,
    pub price: Option<i32>,
    pub language: Option<String>,
    pub level: Option<String>,
}

pub async fn get_courses_by_teacher(teacher_id: i32) -> Result<Vec<Course>, MyError> {
    let mut opts = RequestInit::new();
    opts.method("GET");
    opts.mode(RequestMode::Cors);

    let url = &format!("http://localhost:3000/courses/{}", teacher_id);

    let request = Request::new_with_str_and_init(&url, &opts)?;
    request.headers().set("Accept", "application/json")?;

    let window = web_sys::window().ok_or("no windows exists".to_string())?;
    let resp_value = JsFuture::from(window.fetch_with_request(&request)).await?;

    assert!(resp_value.is_instance_of::<Response>());

    let resp: Response = resp_value.dyn_into().unwrap();
    let json = JsFuture::from(resp.json()?).await?;

    let courses: Vec<Course> = json.into_serde().unwrap();

    Ok(courses)
}

pub async fn delete_course(teacher_id: i32, course_id: i32) -> () {
    let mut opts = RequestInit::new();
    opts.method("DELETE");
    opts.mode(RequestMode::Cors);

    let url = format!("http://localhost:3000/courses/{}/{}", teacher_id, course_id);

    let request = Request::new_with_str_and_init(&url, &opts).unwrap();
    request.headers().set("Accept", "application/json").unwrap();

    let window = web_sys::window().unwrap();
    let resp_value = JsFuture::from(window.fetch_with_request(&request)).await.unwrap();

    assert!(resp_value.is_instance_of::<Response>());

    let resp: Response = resp_value.dyn_into().unwrap();
    let json = JsFuture::from(resp.json().unwrap()).await.unwrap();

    let _courses: Course = json.into_serde().unwrap();
}

use js_sys::Promise;
use wasm_bindgen::prelude::*;

#[wasm_bindgen]
pub async fn add_course(name: String, description: String) -> Result<Promise, JsValue> {
    let mut opts = RequestInit::new();
    opts.method("POST");
    opts.mode(RequestMode::Cors);

    let str_json = format!(
        r#"
        {{
            "teacher_id":1,
            "name": "{}",
            "description": "{}"
        }}
        "#,
        name, description
    );
    opts.body(Some(&JsValue::from_str(str_json.as_str())));

    let url = "http://localhost:3000/courses/";
    let request = Request::new_with_str_and_init(&url, &opts)?;
    request.headers().set("Content-Type", "application/json")?;
    request.headers().set("Accept", "application/json")?;

    let window = web_sys::window().ok_or("no windows exists".to_string())?;
    let resp_value = JsFuture::from(window.fetch_with_request(&request)).await?;

    assert!(resp_value.is_instance_of::<Response>());

    let resp: Response = resp_value.dyn_into().unwrap();
    Ok(resp.json()?)
}

wasm-client/src/lib.rs:

mod utils;

use wasm_bindgen::prelude::*;
use wasm_bindgen_futures::spawn_local;
use web_sys::{HtmlButtonElement};

// When the `wee_alloc` feature is enabled, use `wee_alloc` as the global
// allocator.
#[cfg(feature = "wee_alloc")]
#[global_allocator]
static ALLOC: wee_alloc::WeeAlloc = wee_alloc::WeeAlloc::INIT;

// "C" is the ABI the wasm target uses
#[wasm_bindgen]
extern "C" {
    fn alert(s: &str);

    fn confirm(s: &str) -> bool;

    #[wasm_bindgen(js_namespace = console)]
    fn log(s: &str);
}

#[wasm_bindgen]
pub fn greet() {
    alert("Hello, wasm-client!");
}

pub mod errors;
pub mod models;

use models::course::Course;
use crate::models::course::delete_course;

#[wasm_bindgen(start)]
pub async fn main() -> Result<(), JsValue> {
    let window = web_sys::window().expect("no global window exists");
    let document = window.document().expect("should have a document exists");

    let left_body = document
        .get_element_by_id("left-tbody")
        .expect("left div not exists");

    let courses: Vec<Course> = models::course::get_courses_by_teacher(1).await.unwrap();
    for c in courses.iter() {
        let tr = document.create_element("tr")?;
        tr.set_attribute("id", format!("tr-{}", c.id).as_str())?;
        // course id
        let td = document.create_element("td")?;
        td.set_text_content(Some(format!("{}", c.id).as_str()));
        tr.append_child(&td)?;
        // course name
        let td = document.create_element("td")?;
        td.set_text_content(Some(c.name.as_str()));
        tr.append_child(&td)?;
        // course time
        let td = document.create_element("td")?;
        td.set_text_content(Some(c.time.format("%Y-%m-%d").to_string().as_str()));
        tr.append_child(&td)?;
        // course description
        let td = document.create_element("td")?;
        if let Some(desc) = &c.description.clone() {
            td.set_text_content(Some(desc.as_str()));
        }
        tr.append_child(&td)?;
        // append button
        let td = document.create_element("td")?;
        let btn: HtmlButtonElement = document
            .create_element("button")
            .unwrap()
            .dyn_into::<HtmlButtonElement>()
            .unwrap();

        let cid = c.id;
        let click_closure = Closure::wrap(Box::new(
            move |_event: web_sys::MouseEvent| {
                let r = confirm(format!("Are you sure to delete course {}?", cid).as_str());
                match r {
                    true => {
                        spawn_local(delete_course(1, cid));
                        alert("deleted!");

                        // reload
                        web_sys::window().unwrap().location().reload().unwrap();
                    }
                    _ => {}
                }
            }) as Box<dyn Fn(_)>);

        // convert to `Function` and pass to `addEventListener`
        btn.add_event_listener_with_callback("click", click_closure.as_ref().unchecked_ref())?;
        // prevent memory leak
        click_closure.forget();

        btn.set_attribute("class", "btn btn-danger btn-sm")?;
        btn.set_text_content(Some("Delete"));
        td.append_child(&btn)?;
        tr.append_child(&td)?;

        left_body.append_child(&tr)?;
    }

    Ok(())
}

wasm-client/src/errors.rs:

use serde::Serialize;

#[derive(Debug, Serialize)]
pub enum MyError {
    SomeError(String),
}

impl From<String> for MyError {
    fn from(error: String) -> Self {
        MyError::SomeError(error)
    }
}

impl From<wasm_bindgen::JsValue> for MyError {
    fn from(js_value: wasm_bindgen::JsValue) -> Self {
        MyError::SomeError(js_value.as_string().unwrap())
    }
}

构建项目

cd 到 wasm-pack-template 目录下,执行命令:

wasm-pack build

构建成功:

在这里插入图片描述

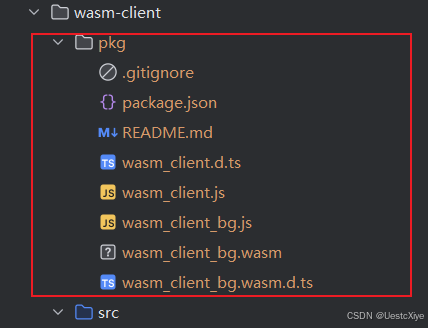
当构建完成后,我们可以在 pkg 目录中找到它的工件:

在这里插入图片描述

生成网页

在 wasm-client 目录下运行这个命令:

npm init wasm-app www

等待构建成功。

构建网页

修改 wasm-client/www/index.html:

<!DOCTYPE html>
<html lang="en">
<head>
    <meta charset="utf-8">
    <title>Hello wasm-pack!</title>
    <!--引入bootstrap 5-->
    <link href="https://cdn.jsdelivr.net/npm/bootstrap@5.1.3/dist/css/bootstrap.min.css" rel="stylesheet">
</head>
<body>
<noscript>This page contains webassembly and javascript content, please enable javascript in your browser.</noscript>
<nav class="navbar navbar-dark bg-primary">
    <div class="container-fluid">
        <a class="navbar-brand" href="#">Wasm-client</a>
    </div>
</nav>
<div class="m-3" style="height: 600px">
    <div class="row">
        <div class="col">
            <div class="card border-info mb-3">
                <div class="card-header">Course</div>
                <div class="card-body">
                    <button type="button" class="btn btn-primary">Add</button>
                </div>
                <table class="table table-hover table-bordered table-sm">
                    <thead>
                    <tr>
                        <th scope="col">ID</th>
                        <th scope="col">Name</th>
                        <th scope="col">Time</th>
                        <th scope="col">Description</th>
                        <th scope="col">Option</th>
                    </tr>
                    </thead>
                    <tbody id="left-tbody"></tbody>
                </table>
            </div>
        </div>
        <div class="col">
            <div class="card border-info mb-3">
                <div class="card-header">Add Course</div>
                <div class="card-body">
                    <form class="row g-3 needs-validation" id="form">
                        <div class="mb-3">
                            <label for="name" class="form-label">Course Name</label>
                            <input type="text" class="form-control" id="name" required placeholder="Please fill in Course name">
                            <div class="invalid-feedback">Please fill in course name</div>
                        </div>
                        <div class="mb-3">
                            <label for="description" class="form-label">Description</label>
                            <textarea class="form-control" id="description" rows="3" placeholder="Please fill in description"></textarea>
                        </div>
                        <div class="col-12">
                            <button type="submit" class="btn btn-primary">Submit</button>
                        </div>
                    </form>
                </div>
            </div>
        </div>
    </div>
</div>
<script src="./bootstrap.js"></script>
</body>
</html>

修改 wasm-client/www/index.js:

import * as wasm from "wasm-client";

const myForm = document.getElementById("form");

myForm.addEventListener("submit", (e) => {
    e.preventDefault();
    const name = document.getElementById("name").value;
    const desc = document.querySelector("#description").value;

    wasm.add_course(name, desc).then((json) => {
        alert('添加成功!')
        window.location.reload();
    });
});

添加并下载依赖

向 wasm-client/www/package.json 中添加依赖:

  "dependencies": {
    "wasm-client": "file:../pkg"
  },

通过在 wasm-client/www 子目录下运行 npm install,确保本地开发服务器及其依赖已经安装:
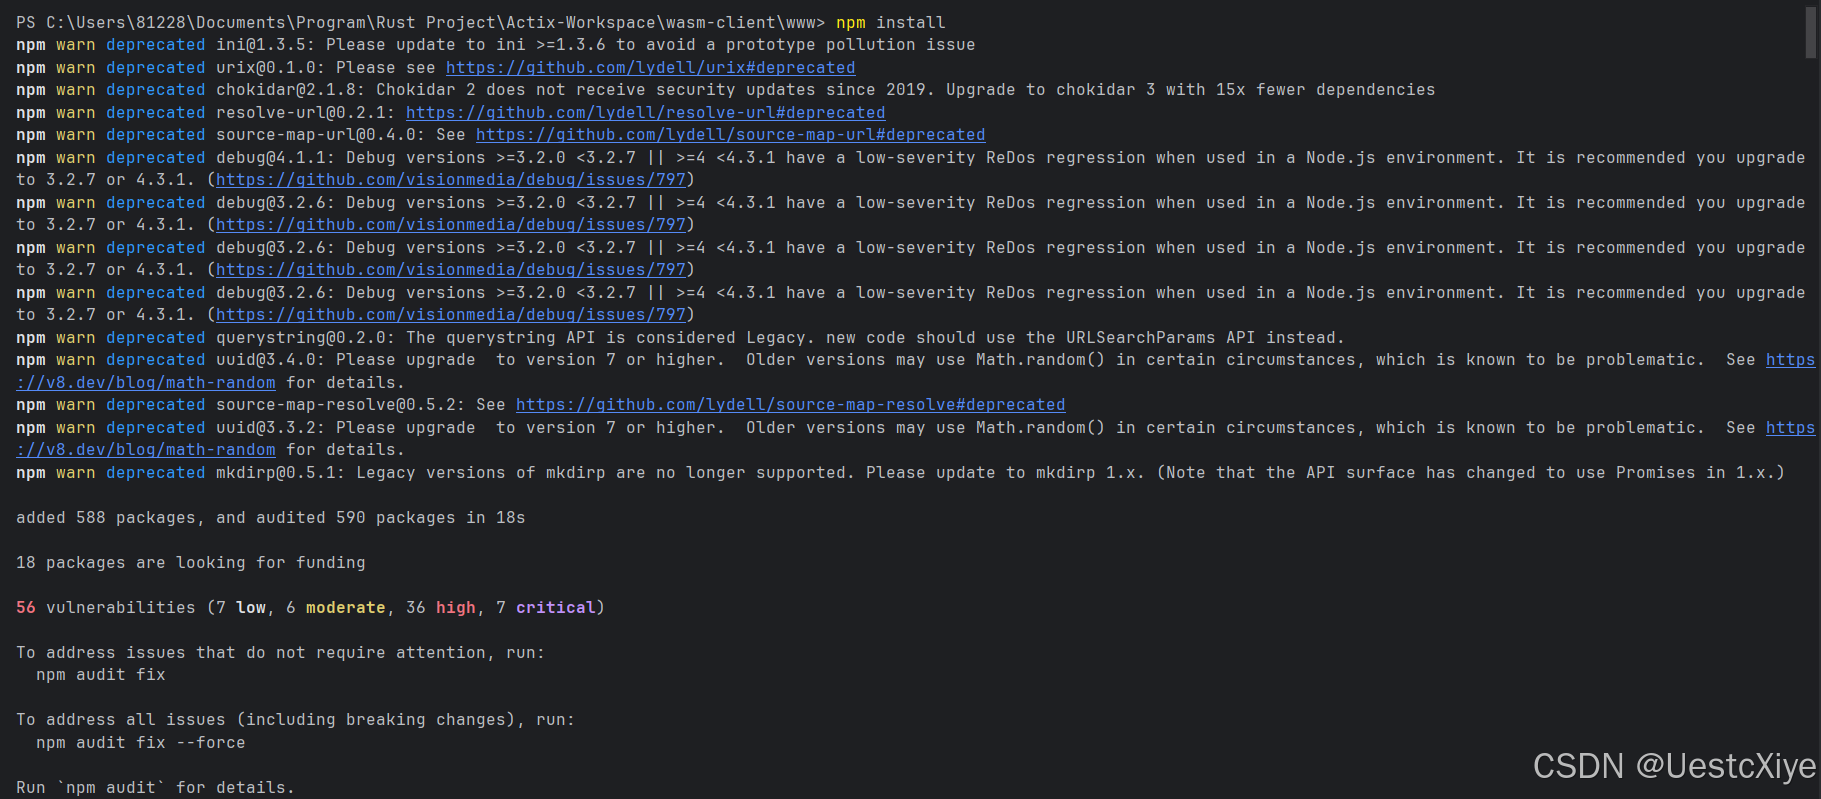
在这里插入图片描述

测试

先 cd 到 webservice,执行 cargo run 命令,把服务器运行起来

新建一个终端,在新终端中 cd 到 wasm-client/www 目录中,运行以下命令:

npm run start

构建成功:
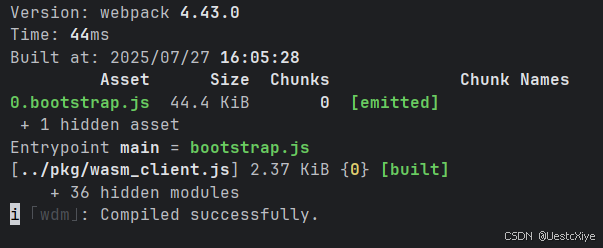
在这里插入图片描述

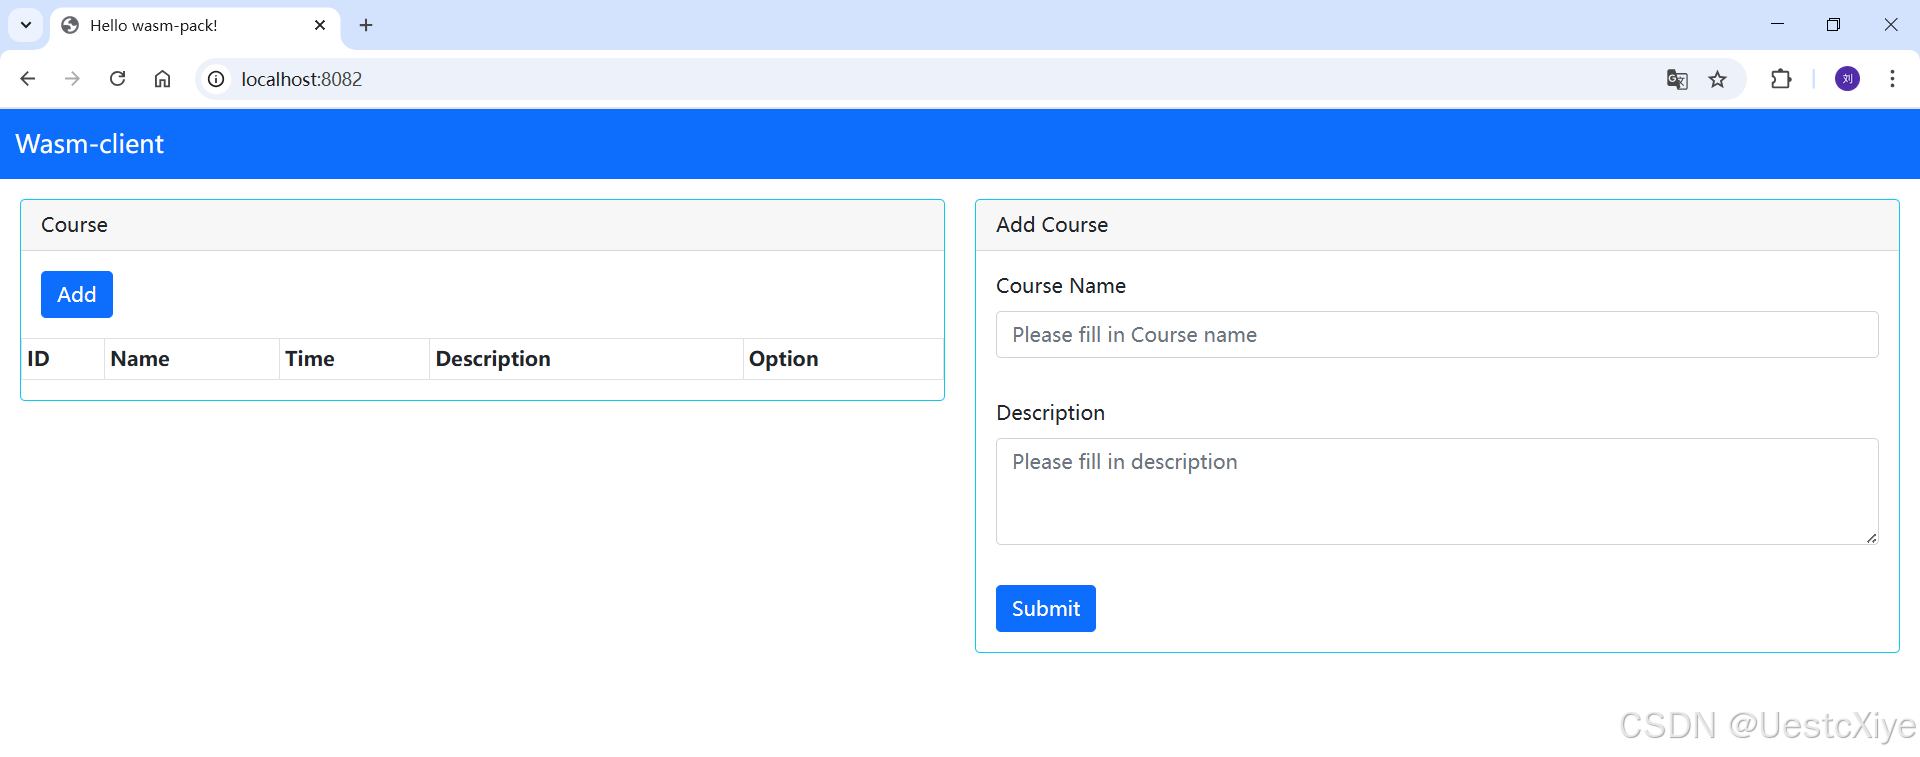
将 Web 浏览器导航到 localhost:8082/:

在这里插入图片描述

Rust 与 WebAssembly 构建前端应用 本文章探讨了如何使用 Yew 框架构建多线程前端Web应用,并且提供了丰富的代码示例来展示一个基本的 Yew 应用架构。我们了解了如何创建组件,处理组件间的交互,以及如何管理状态和获取外部数据。希望这些信息能帮你在 Rust 和 WebAssembly 的世界中,构建出高性能、高交互的前端应用。 阅读详情

相关推荐

使用 Rust 和 wasm-pack 开发 WebAssembly 应用

是一种运行在现代 Web 浏览器中的新型二进制指令格式。它是一种低级别的字节码,可以被多种语言编译,并在浏览器中高效运行。要将 Rust 代码编译为 WebAssembly 并与 JavaScript 集成,wasm-pack是不可或缺的工具。环境配置:安装了 Rust、wasm-pack,以及 Node.js 和 npm,为开发奠定了基础。创建 Rust 项目:使用cargo创建了一个新的库项目,并编写了简单的 Rust 函数。编译为 WebAssembly:通过。

m0_74823983的博客 1392

Rust Web 全栈开发(十一):WebAssembly 尝鲜

Rust Web 全栈开发(十一):WebAssembly 尝鲜

ProgramNovice的博客 1484

给 Web 前端工程师看的用 Rust 开发 wasm 组件实战 | 京东云技术团队

本文先介绍了 wasm-pack 官方的教程,还有其他组件测试、发布等的流程先不在这里介绍了。以下用一个实际开发中的模块来说一下开发 wasm 组件过程中遇到的问题和解决方法。

JDDTechTalk的博客 1886

Rust Web入门(七):WebAssembly

本教程笔记来自 杨旭老师的 rust web 全栈教程,项目的源代码可以查看 git:(注意作者使用的是 mysql 数据库而不是原教程的数据库) https://github.com/aiai0603/rust_web_mysql 在之前的项目中,我们使用 rust 的模板引擎 Tera 编写一个项目,这节课我们来介绍一种 Rust 提供的更加高级的功能来编写前端应用—— WebAssembly,这是官方文档 https://rustwasm.github.io/docs/book/

weixin_46463785的博客 1848

告别调参玄学:用 DINOv2 (ViT-S/ViT-G) 和 PCA 可视化,直观理解自监督特征

本文深入解析了DINOv2(ViT-S/ViT-G)模型在自监督学习中的特征提取机制,通过PCA降维技术实现特征空间的可视化。文章对比了不同规模模型的特征表达差异,并提供了PCA阈值调优和深度分析的实用技巧,帮助读者直观理解自监督学习的视觉密码。

weixin_42565865的博客 410

网格自适应实战 | 攻克超弹性体大变形不收敛难题

本文针对超弹性体(如橡胶)在大变形仿真中因网格严重扭曲导致计算不收敛的难题,提供了基于ANSYS网格自适应技术的实战解决方案。文章详细阐述了从问题诊断、模型准备到核心参数设置的完整流程,并介绍了结合混合U-P单元技术的进阶组合策略,有效攻克了材料压缩等场景下的仿真收敛问题。

week9的博客 523

Rust 全栈开发最好的框架是哪一个?深度对比 Leptos、Yew、Axum 与 Tauri

过去十年,Rust 从系统语言一步步成长为现代开发生态的重要力量。而现在,Rust 已不再局限于“写系统底层”或“高性能后端”。它正在成为一种全栈语言——既能写后端服务、命令行工具,也能编译成运行在前端,甚至能构建跨平台桌面应用。于是一个问题越来越多地被问到:“Rust 做全栈,哪个框架最好?出发,对比它们在性能、生态、易用性、全栈整合能力等方面的表现,帮你找出最值得投入学习的框架。Rust 正在成为“系统安全 + 全栈性能”的代名词。

未来已来,AI时代,学AI编程,做AI量化,就来大鹏AI教育。 3382

Computers & Security 投稿实战:从零到一详解避坑指南

本文详细解析了向《Computers & Security》投稿的全流程避坑指南,包括ORCID账号注册、文件格式统一、Editorial Manager®系统操作技巧等关键步骤。特别强调了cover letter撰写、Declaration of Interest Statement准备以及PDF生成后的检查要点,帮助研究者高效完成投稿流程。

weixin_29228203的博客 676

Rust WebAssembly开发实战:构建高性能前端应用

Rust WebAssembly开发实战指南摘要:本文详细介绍如何使用Rust构建高性能WebAssembly前端应用。首先阐述WebAssembly的概念、优势及与JavaScript的互补关系,然后讲解开发环境搭建,包括安装wasm-pack和cargo-generate工具。通过创建"hello-wasm"项目示例,展示Rust代码编译为WebAssembly模块的完整流程,包括数据类型转换、字符串处理等交互方式。文章还提供了测试方法和HTTP服务器启动指南,帮助开发者快速上手Ru

编程世界如山海,探索不止。 1万+

机器视觉最全面试题总结

空洞卷积(Atrous Convolution)也叫做膨胀卷积、扩张卷积,最初的提出是为了解决图像分割在用下采样(池化、卷积)增加感受野时带来的特征图缩小,后再上采样回去时造成的精度上的损失。空洞卷积通过引入了一个扩张率的超参数,该参数定义了卷积核处理数据时各值的间距。可以在增加感受野的同时保持特征图的尺寸不变,从而代替下采样和上采样a. 是普通的卷积过程(dilation rate = 1),卷积后的感受野为3b. 是dilation rate = 2的空洞卷积,卷积后的感受野为5。

@bangbang的博客 9213

uniapp:解决微信小程序包体积超过2M的优化方案+详解分包问题,编译小程序体积大于2M不能上传和预览提示体积太大的处理教程,uniApp微信小程序主包过大问题如何解决(排查可疑点+分包+最小改动)

uniapp微信小程序开发,如何解决打包太大无法预览发布的问题,uniApp微信小程序包体积超过2M的优化方法,uni-app打包微信小程序主包超2M终极解决方案,使用uniapp开发微信小程序使用uni_modules导致主包文件过大,无法发布的解决方法,UniApp开发的微信小程序主包过大问题及解决方案 编译小程序时Node-modules被打入主包,小程序体积大于2M不能上传和预览,怎么处理,解决微信小程序主包太大问题,微信小程序中主包和分包过大,详解分包问题,uni-app 微信小程序发布时,主包超

✅ 精选推荐文章 5067

终极Rust WebAssembly开发入门:使用wasm-pack-template构建高性能Web应用

**wasm-pack-template**是一个专为Rust和WebAssembly项目设计的快速启动模板,通过**wasm-pack**工具链将Rust代码编译为WebAssembly并发布到NPM。本指南将帮助你从零开始创建高性能Web应用,无需深入复杂的底层细节。 ## 🚀 为什么选择Rust+WebAssembly? WebAssembly(Wasm)作为高性能的二进制指令格式,让

gitblog_00553的博客 876

从零开始用 C# 打造工业级上位机系统:完整项目实战

本文介绍了一个基于C#开发的工业级上位机系统项目。该系统采用分层架构设计,包含通信、数据采集、UI展示、告警日志等模块,支持Modbus协议和串口通信。文章详细阐述了系统架构设计、关键模块实现(如Modbus通信封装、实时数据采集、告警系统等)以及性能优化策略。该项目已在实际工控场景中稳定运行超过1年,具备良好的可扩展性和稳定性,适合有一定C#基础的开发者参考学习工业软件开发实践。

这里只有干货:从 Modbus 通信到 MES 对接,从 YOLO 训练到工控机部署,带你搞定工业软件开发全流程。 1370

《WebAssembly指南》第四章:从 Rust 编译到 WebAssembly

本文介绍了如何将Rust代码编译为WebAssembly并在Web应用中使用。主要内容包括: 环境搭建:安装Rust工具链和wasm-pack工具 创建Rust项目并编写与JavaScript交互的代码,使用wasm-bindgen实现双向调用 配置Cargo.toml文件,构建WebAssembly包 两种使用方式演示: 原生ES模块方式:通过HTML直接加载 npm包方式:结合webpack打包工具使用 可选地将包发布到npm仓库的步骤 教程重点展示了在现有JavaScript应用中嵌入Rust/Web

北京锋通科技有限公司的技术blog 2428

LeetCode 面试经典 150 题回顾

最经典 150 题,掌握面试所有知识点 面试经典 150 题 : 题目分析、解题思路、复杂度分析、代码展示

曾经“等你生日那天”都遥远得像未来,如今却可欢愉的挥手说“下个十年见” 8万+

Python 爬虫实战:Twitter 数据定向抓取(特定话题 + 用户推文爬取与分析)

在社交媒体研究、舆情监测和市场分析等领域,Twitter 数据具有极高的价值。本文将详细介绍如何使用 Python 构建一个完整的 Twitter 数据爬取系统,包括特定话题和用户推文的爬取与分析。我们将涵盖从认证到数据存储、清洗、分析和可视化的全流程。

u014481728的博客 1038

如何用Rust和WebAssembly构建高性能Web应用:从入门到实战

Rust和WebAssembly(Wasm)的组合正在彻底改变Web应用开发,让开发者能够用系统级语言编写高性能前端代码。本指南将带你从基础概念到实战开发,掌握这一强大技术栈的核心工具与最佳实践,轻松构建闪电般快速的Web应用。 ## 为什么选择Rust+WebAssembly? WebAssembly作为一种低级二进制格式,为Web平台带来了接近原生的执行性能。而Rust凭借其内存安全、零成

gitblog_00951的博客 998

深度学习工具包 DeepLearningToolbox

深度学习工具包Deprecation notice.-----This toolbox is outdated and no longer maintained.There are much better tools available for deep learning than this toolbox, e.g. [Theano](http://deeplearning.net/software/theano/), [torch](http://torch.ch/) or [tensorflow](http://www.tensorflow.org/)I would suggest you use one of the tools mentioned above rather than use this toolbox.Best, Rasmus.DeepLearnToolbox================A Matlab toolbox for Deep Learning.Deep Learning is a new subfield of machine learning that focuses on learning deep hierarchical models of data.It is inspired by the human brain's apparent deep (layered, hierarchical) architecture.A good overview of the theory of Deep Learning theory is[Learning Deep Architectures for AI](http://www.iro.umontreal.ca/~bengioy/papers/ftml_book.pdf)For a more informal introduction, see the following videos by Geoffrey Hinton and Andrew Ng.* [The Next Generation of Neural Networks](http://www.youtube.com/watch?v=AyzOUbkUf3M) (Hinton, 2007)* [Recent Developments in Deep Learning](http://www.youtube.com/watch?v=VdIURAu1-aU) (Hinton, 2010)* [Unsupervised Feature Learning and Deep Learning](http://www.youtube.com/watch?v=ZmNOAtZIgIk) (Ng, 2011)If you use this toolbox in your research please cite [Prediction as a candidate for learning deep hierarchical models of data](http://www2.imm.dtu.dk/pubdb/views/publication_details.php?id=6284)```@MASTERSTHESIS\{IMM2012-06284, author = "R. B. Palm", title = "Prediction as a candidate for learning deep hierarchical models of data", year = "2012",}```Contact: rasmusbergpalm at gmail dot comDirectories included in the toolbox-----------------------------------`NN/` - A library for Feedforward Backpropagation Neural Networks`CNN/` - A library for Convolutional Neural Networks`DBN/` - A library for Deep Belief Networks`SAE/` - A library for Stacked Auto-Encoders`CAE/` - A library for Convolutional Auto-Encoders`util/` - Utility functions used by the libraries`data/` - Data used by the examples`tests/` - unit tests to verify toolbox is workingFor references on each library check REFS.mdSetup-----1. Download.2. addpath(genpath('DeepLearnToolbox'));Example: Deep Belief Network---------------------```matlabfunction test_example_DBNload mnist_uint8;train_x = double(train_x) / 255;test_x = double(test_x) / 255;train_y = double(train_y);test_y = double(test_y);%% ex1 train a 100 hidden unit RBM and visualize its weightsrand('state',0)dbn.sizes = [100];opts.numepochs = 1;opts.batchsize = 100;opts.momentum = 0;opts.alpha = 1;dbn = dbnsetup(dbn, train_x, opts);dbn = dbntrain(dbn, train_x, opts);figure; visualize(dbn.rbm{1}.W'); % Visualize the RBM weights%% ex2 train a 100-100 hidden unit DBN and use its weights to initialize a NNrand('state',0)%train dbndbn.sizes = [100 100];opts.numepochs = 1;opts.batchsize = 100;opts.momentum = 0;opts.alpha = 1;dbn = dbnsetup(dbn, train_x, opts);dbn = dbntrain(dbn, train_x, opts);%unfold dbn to nnnn = dbnunfoldtonn(dbn, 10);nn.activation_function = 'sigm';%train nnopts.numepochs = 1;opts.batchsize = 100;nn = nntrain(nn, train_x, train_y, opts);[er, bad] = nntest(nn, test_x, test_y);assert(er < 0.10, 'Too big error');```Example: Stacked Auto-Encoders---------------------```matlabfunction test_example_SAEload mnist_uint8;train_x = double(train_x)/255;test_x = double(test_x)/255;train_y = double(train_y);test_y = double(test_y);%% ex1 train a 100 hidden unit SDAE and use it to initialize a FFNN% Setup and train a stacked denoising autoencoder (SDAE)rand('state',0)sae = saesetup([784 100]);sae.ae{1}.activation_function = 'sigm';sae.ae{1}.learningRate = 1;sae.ae{1}.inputZeroMaskedFraction = 0.5;opts.numepochs = 1;opts.batchsize = 100;sae = saetrain(sae, train_x, opts);visualize(sae.ae{1}.W{1}(:,2:end)')% Use the SDAE to initialize a FFNNnn = nnsetup([784 100 10]);nn.activation_function = 'sigm';nn.learningRate = 1;nn.W{1} = sae.ae{1}.W{1};% Train the FFNNopts.numepochs = 1;opts.batchsize = 100;nn = nntrain(nn, train_x, train_y, opts);[er, bad] = nntest(nn, test_x, test_y);assert(er < 0.16, 'Too big error');```Example: Convolutional Neural Nets---------------------```matlabfunction test_example_CNNload mnist_uint8;train_x = double(reshape(train_x',28,28,60000))/255;test_x = double(reshape(test_x',28,28,10000))/255;train_y = double(train_y');test_y = double(test_y');%% ex1 Train a 6c-2s-12c-2s Convolutional neural network %will run 1 epoch in about 200 second and get around 11% error. %With 100 epochs you'll get around 1.2% errorrand('state',0)cnn.layers = { struct('type', 'i') %input layer struct('type', 'c', 'outputmaps', 6, 'kernelsize', 5) %convolution layer struct('type', 's', 'scale', 2) %sub sampling layer struct('type', 'c', 'outputmaps', 12, 'kernelsize', 5) %convolution layer struct('type', 's', 'scale', 2) %subsampling layer};cnn = cnnsetup(cnn, train_x, train_y);opts.alpha = 1;opts.batchsize = 50;opts.numepochs = 1;cnn = cnntrain(cnn, train_x, train_y, opts);[er, bad] = cnntest(cnn, test_x, test_y);%plot mean squared errorfigure; plot(cnn.rL);assert(er<0.12, 'Too big error');```Example: Neural Networks---------------------```matlabfunction test_example_NNload mnist_uint8;train_x = double(train_x) / 255;test_x = double(test_x) / 255;train_y = double(train_y);test_y = double(test_y);% normalize[train_x, mu, sigma] = zscore(train_x);test_x = normalize(test_x, mu, sigma);%% ex1 vanilla neural netrand('state',0)nn = nnsetup([784 100 10]);opts.numepochs = 1; % Number of full sweeps through dataopts.batchsize = 100; % Take a mean gradient step over this many samples[nn, L] = nntrain(nn, train_x, train_y, opts);[er, bad] = nntest(nn, test_x, test_y);assert(er < 0.08, 'Too big error');%% ex2 neural net with L2 weight decayrand('state',0)nn = nnsetup([784 100 10]);nn.weightPenaltyL2 = 1e-4; % L2 weight decayopts.numepochs = 1; % Number of full sweeps through dataopts.batchsize = 100; % Take a mean gradient step over this many samplesnn = nntrain(nn, train_x, train_y, opts);[er, bad] = nntest(nn, test_x, test_y);assert(er < 0.1, 'Too big error');%% ex3 neural net with dropoutrand('state',0)nn = nnsetup([784 100 10]);nn.dropoutFraction = 0.5; % Dropout fraction opts.numepochs = 1; % Number of full sweeps through dataopts.batchsize = 100; % Take a mean gradient step over this many samplesnn = nntrain(nn, train_x, train_y, opts);[er, bad] = nntest(nn, test_x, test_y);assert(er < 0.1, 'Too big error');%% ex4 neural net with sigmoid activation functionrand('state',0)nn = nnsetup([784 100 10]);nn.activation_function = 'sigm'; % Sigmoid activation functionnn.learningRate = 1; % Sigm require a lower learning rateopts.numepochs = 1; % Number of full sweeps through dataopts.batchsize = 100; % Take a mean gradient step over this many samplesnn = nntrain(nn, train_x, train_y, opts);[er, bad] = nntest(nn, test_x, test_y);assert(er < 0.1, 'Too big error');%% ex5 plotting functionalityrand('state',0)nn = nnsetup([784 20 10]);opts.numepochs = 5; % Number of full sweeps through datann.output = 'softmax'; % use softmax outputopts.batchsize = 1000; % Take a mean gradient step over this many samplesopts.plot = 1; % enable plottingnn = nntrain(nn, train_x, train_y, opts);[er, bad] = nntest(nn, test_x, test_y);assert(er < 0.1, 'Too big error');%% ex6 neural net with sigmoid activation and plotting of validation and training error% split training data into training and validation datavx = train_x(1:10000,:);tx = train_x(10001:end,:);vy = train_y(1:10000,:);ty = train_y(10001:end,:);rand('state',0)nn = nnsetup([784 20 10]); nn.output = 'softmax'; % use softmax outputopts.numepochs = 5; % Number of full sweeps through dataopts.batchsize = 1000; % Take a mean gradient step over this many samplesopts.plot = 1; % enable plottingnn = nntrain(nn, tx, ty, opts, vx, vy); % nntrain takes validation set as last two arguments (optionally)[er, bad] = nntest(nn, test_x, test_y);assert(er < 0.1, 'Too big error');```[![Bitdeli Badge](https://d2weczhvl823v0.cloudfront.net/rasmusbergpalm/deeplearntoolbox/trend.png)](https://bitdeli.com/free "Bitdeli Badge")

Rust全栈开发革命:Actix Web与WebAssembly的前后端同构新范式

Actix Web是一个功能强大、务实且速度极快的Rust Web框架,它正在引领Rust全栈开发的新革命。结合WebAssembly技术,Actix Web为开发者提供了一种前后端同构的新范式,让Rust语言能够贯穿整个Web应用开发流程。 ## 🚀 Actix Web:Rust Web开发的强力引擎 Actix Web作为Rust生态中最受欢迎的Web框架之一,以其卓越的性能和丰富的功能

gitblog_00027的博客 1156

win10 跳过U8环境检测的IE WebControls.rar

win10 安装u8的时候 提示IE WebControls 不通过,这个工具可以欺骗u8的检查。 跳过U8环境检测的IE WebControls。提示导入失败后,重新检测通过。

霍尼韦尔SoftMaster使用说明

霍尼韦尔SoftMaster使用说明

从入门到实战:一本《Rust全栈开发》带你掌握未来Web技

在数字化的浪潮中,高性能、高可靠性的Web应用已成为技术核心。对于许多编程爱好者而言,亲手创造一个安全、高效的全栈应用,无疑是一项充满吸引力与挑战的目标。在众多后端与系统级语言中,Rust 凭借其卓越的性能、内存安全保证和现代化的工具链,正迅速成为构建下一代网络服务的热门选择。本文将为您介绍Rust在全栈开发中的应用,并重点推荐一本优秀的入门书籍——《Rust全栈开发》。

专注于 C/C++ 后端开发,涵盖基础语法、Linux系统与网络、MySQL数据库、常见算法及项目经验。 1616

IEM模型,地表粗糙度模拟

利用微波反演土壤水分时候,利用IEM模型可以实现对随机地表的模拟

Rust 在 WebAssembly (WASM) 中的应用:构建高性能前端

Rust与WebAssembly的结合为前端开发带来革命性变革,通过将高性能Rust代码编译为WASM模块,实现接近原生性能的计算能力。Rust的内存安全、强大类型系统和丰富生态,配合wasm-pack等工具链,使计算密集型任务在浏览器中高效运行成为可能。这种组合不仅提升Web应用性能,还增强了可靠性和代码复用性,为图像处理、游戏、科学计算等场景开启新可能,推动Web平台突破性能边界。

wilbur1688的博客 850

Rust WebAssembly 开发实战:从 Web 应用到边缘计算

本文将深入探讨Rust与WebAssembly(Wasm)的结合应用。文章从Rust+Wasm的优势讲起,详细介绍了环境搭建、项目创建和编译测试流程,并深度解析wasm-bindgen工具链的类型映射、数据传递和DOM操作。通过图像处理、性能测试和游戏引擎等实战案例,展示了Rust+Wasm的高性能特性。同时提供了减小二进制大小、避免克隆和使用TypedArray等优化技巧,以及浏览器、Node.js和Cloudflare Workers等多种部署方案。最后讨论了调试测试方法和Rust+Wasm的核心优势及

weixin_43862642的博客 1029

【Rust全栈开发突破】:用WASM+WebAssembly打造前后端一体化应用

掌握Rust语言Web开发新范式,通过WASM实现前后端高效协同。适用于高性能Web应用与全栈场景,结合WebAssembly提升执行效率与安全性。构建一体化架构的现代解决方案,值得收藏。

DevPath的博客 530

WASM web-sys 开发指南:从 0 到 1 玩转 WASM+web-sys:用 Rust 写高性能 Web 应用

这篇文章介绍了如何使用Rust和web-sys开发WebAssembly(WASM)应用。主要内容包括:搭建开发环境(安装Rust、wasm-pack)、配置web-sys按需选择浏览器功能、基础用法(日志打印、DOM操作、事件处理)、编译与调试技巧,以及进阶应用(网络请求、Canvas绘图、本地存储、WebWorker)。通过具体示例展示了如何将Rust代码编译为WASM,并与浏览器交互,特别适合需要高性能计算的Web应用场景。文章采用通俗易懂的语言,帮助开发者快速入门WASM开发。

北京锋通科技有限公司的技术blog 1611

使用 Rust 和 WASM 打造高性能 Web 应用

WebAssembly (WASM) 是一种跨平台、二进制格式的指令集,可在现代浏览器中高效运行。与 JavaScript 不同,WASM 的设计目标是提供接近原生的执行速度,这使其成为解决前端性能瓶颈的优秀选择。核心特点:性能高:基于编译的二进制格式,接近原生性能。跨平台:支持所有主流浏览器。语言中立:支持从 C、C++、Rust 等语言编译为 WASM。与 JS 无缝集成:可轻松与现有 JavaScript 应用程序互操作。

桂月二二博客 1564

从0到1开发WebAssembly应用:基于wasm-pack-template的实战案例

WebAssembly(Wasm)是一种高性能的二进制指令格式,让开发者能够使用Rust等系统级语言编写Web应用。**wasm-pack-template**作为GitHub加速计划中的核心模板,提供了快速构建Rust-Wasm项目的完整脚手架,帮助开发者轻松跨越语言壁垒,将高性能Rust代码无缝集成到Web环境中。 ## 📋 为什么选择wasm-pack-template? ### 🌟

gitblog_01155的博客 1026
上一篇: Rust Web 全栈开发(十一):WebAssembly 尝鲜
下一篇: Rust Web 全栈开发(十三):发布
UestcXiye
博客等级 码龄8年 9031粉丝 1306原创
评论 1
成就一亿技术人!
拼手气红包6.0元
还能输入1000个字符
 
 条评论被折叠 查看
添加红包

请填写红包祝福语或标题

个

红包个数最小为10个

元

红包金额最低5元

当前余额3.43元 前往充值 >
需支付:10.00元
成就一亿技术人!
领取后你会自动成为博主和红包主的粉丝 规则
hope_wisdom
发出的红包

打赏作者

UestcXiye

你的鼓励将是我创作的最大动力

¥1 ¥2 ¥4 ¥6 ¥10 ¥20
扫码支付:¥1
获取中
扫码支付

您的余额不足,请更换扫码支付或充值

打赏作者

实付元
使用余额支付
点击重新获取
扫码支付
钱包余额 0

抵扣说明:

1.余额是钱包充值的虚拟货币,按照1:1的比例进行支付金额的抵扣。
2.余额无法直接购买下载,可以购买VIP、付费专栏及课程。

余额充值