


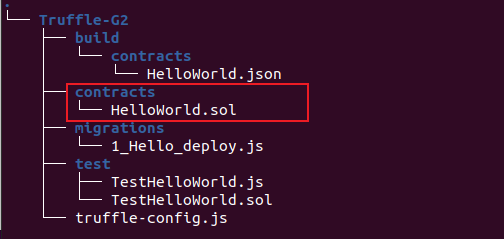
Truffle 目录结构
├── build #
├── contracts # 合约存放位置
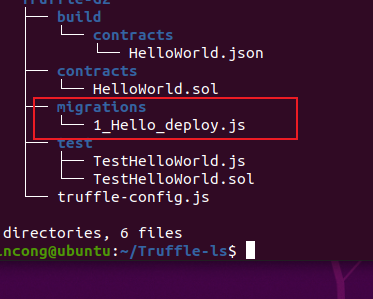
├── migrations # 迁移脚本(JavaScript文件) 即部署文件
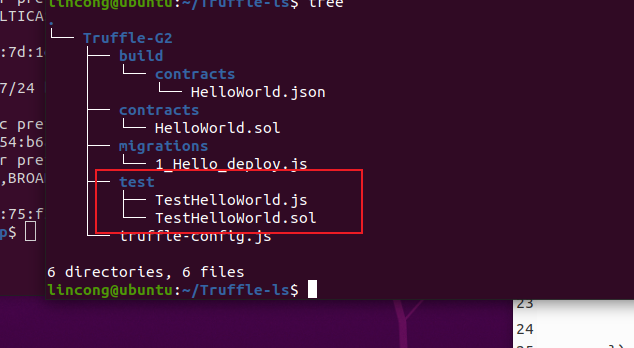
├── test # 测试用例的存放位置
│ └── .js / .ts / .es / .es6 # 测试用例常用 js/sol文件
└── truffle-config.js # truffle的配置文件
首先将需要测试的合约,移动到contracts文件夹下。
以最基础的HelloWorld合约为例子,进行合约测试:采用 Js(JavaScript) 和 Sol(solidity) 来编写测试用例。
// SPDX-License-Identifier: GPL-3.0
pragma solidity >=0.8.3;

contract HelloWorld {
  string name;
  constructor () public {
    name = "Hello World!";
  }
  function get() public view returns (string memory){
    return name;
  }
  function set(string memory _name) public {
    name = _name;
  }
}
一,采用 `JavaScript` 来编写 测试用例
const HelloWorld = artifacts.require("HelloWorld");

contract('HelloWorld 合约测试',(accounts)=>{
	it('GetSet方法测试',async()=>{
		const hello = await HelloWorld.deployed();
		const a0 = accounts[0];
		const msgold = await hello.get();
	        console.log("修改前的值为"+msgold);
		const cs = "canshu";
		await hello.set(cs);
		const msg = await hello.get();
		console.log("修改后的值为"+msg);
		assert.equal(msg,cs,"不通过");
	})
})
二,采用`solidity` 编写 测试用例
import "truffle/Assert.sol";
import "truffle/DeployedAddresses.sol";
import "../contracts/HelloWorld.sol";

contract TestHelloWorld {
  function testInitialBalanceUsingDeployedContract() public{
    HelloWorld hello = HelloWorld(DeployedAddresses.HelloWorld());
    hello.set("123");
    Assert.equal(hello.get(), "12", "Owner should have 10000 MetaCoin initially");
  }

}

编写完测试用例之后 我们来编写 部署文件 在migrations目录下,编写 Js文件,即:
var HelloWorld = artifacts.require("./HelloWorld.sol");

module.exports = function(deployer){
	deployer.deploy(HelloWorld);

}
一切准备完成之后 就来进行测试: truffle develop 或者 ganache-cli
truffle console //启动控制台 (可以不启动)
truffle compile //编译 若是在控制台里面 前面的truffle 可以省略
truffle migrate //部署 若是在控制台里面 前面的truffle 可以省略
truffle test //开始测试 若是在控制台里面 前面的truffle 可以省略
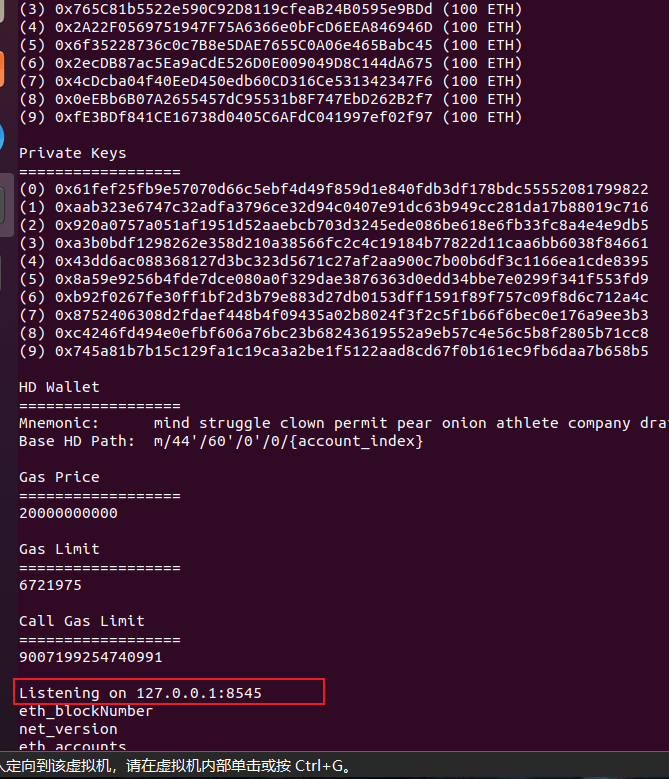
一,采用`ganache-cli`:
启动 ganache-cli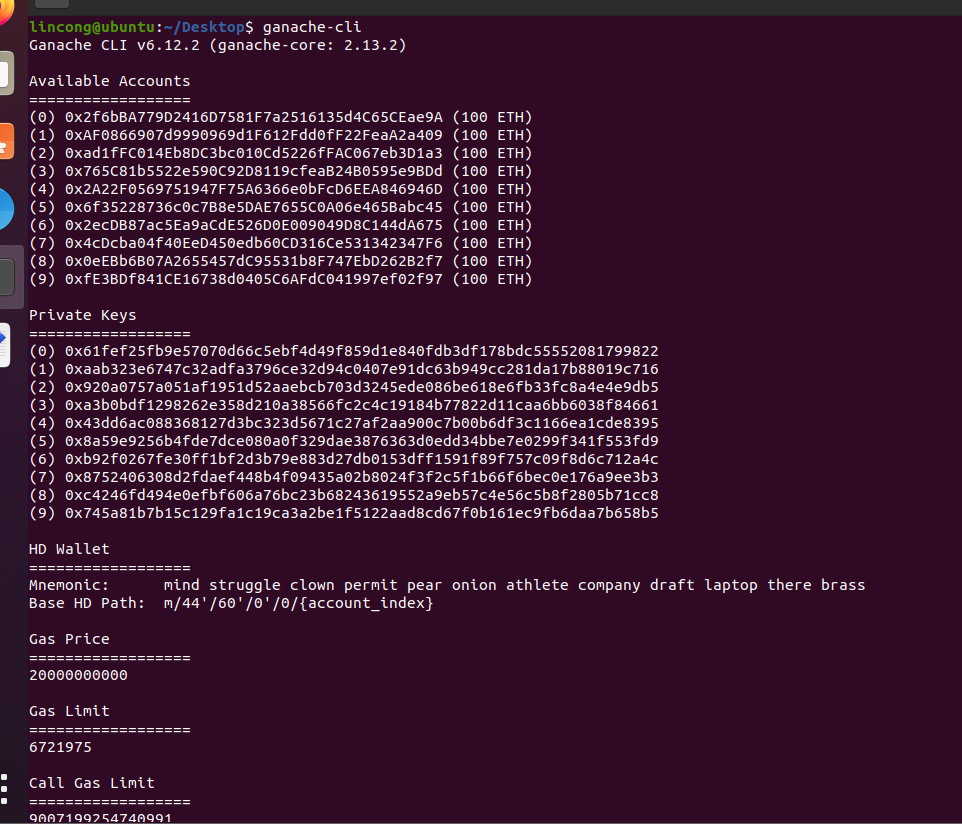
记下这个 端口
我们再修改truffle-config.js 文件 这个ip和端口要与我们 上面 ganache-cli启动时 提示的ip和端口一致
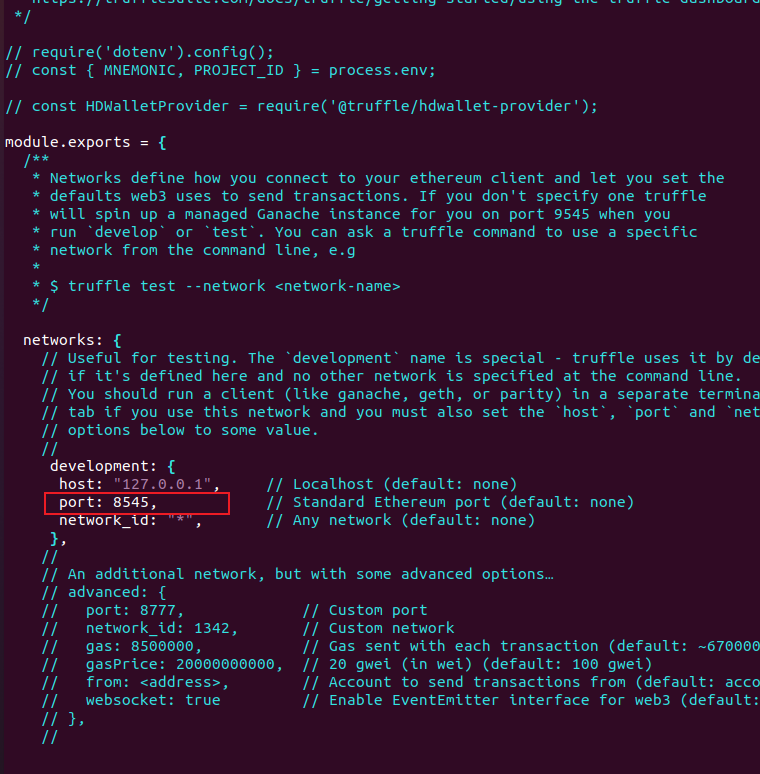
然后保存 退出
执行 truffle console
执行 compile
执行 migrate
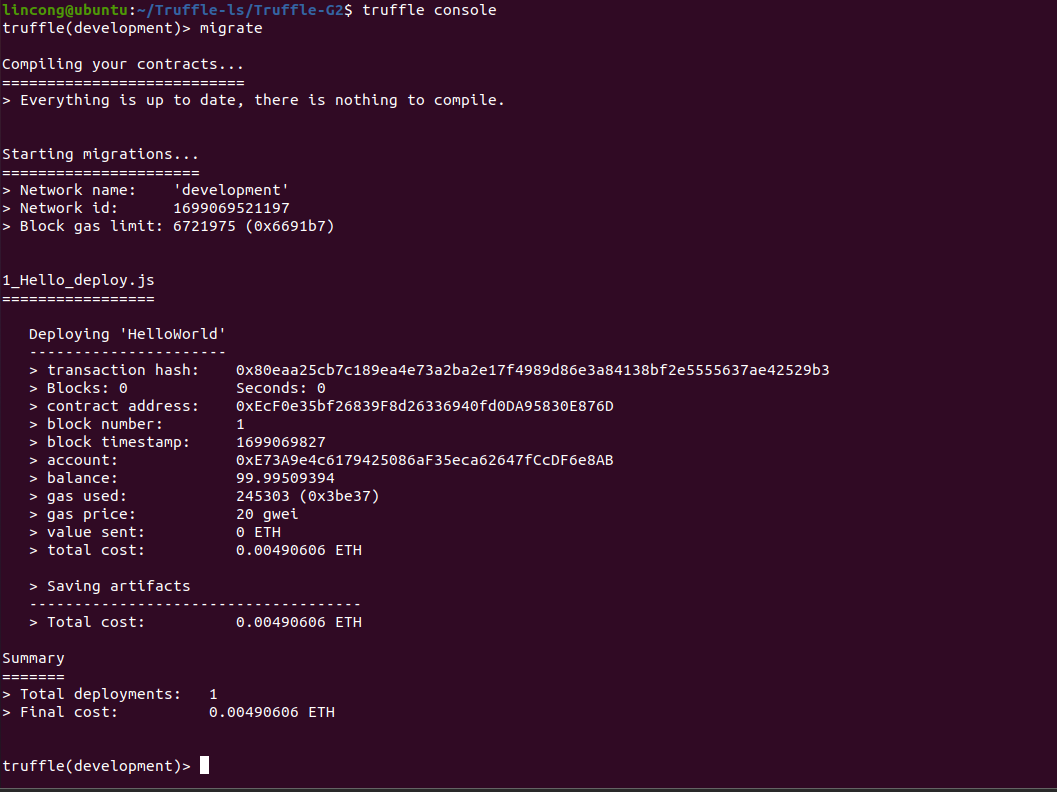
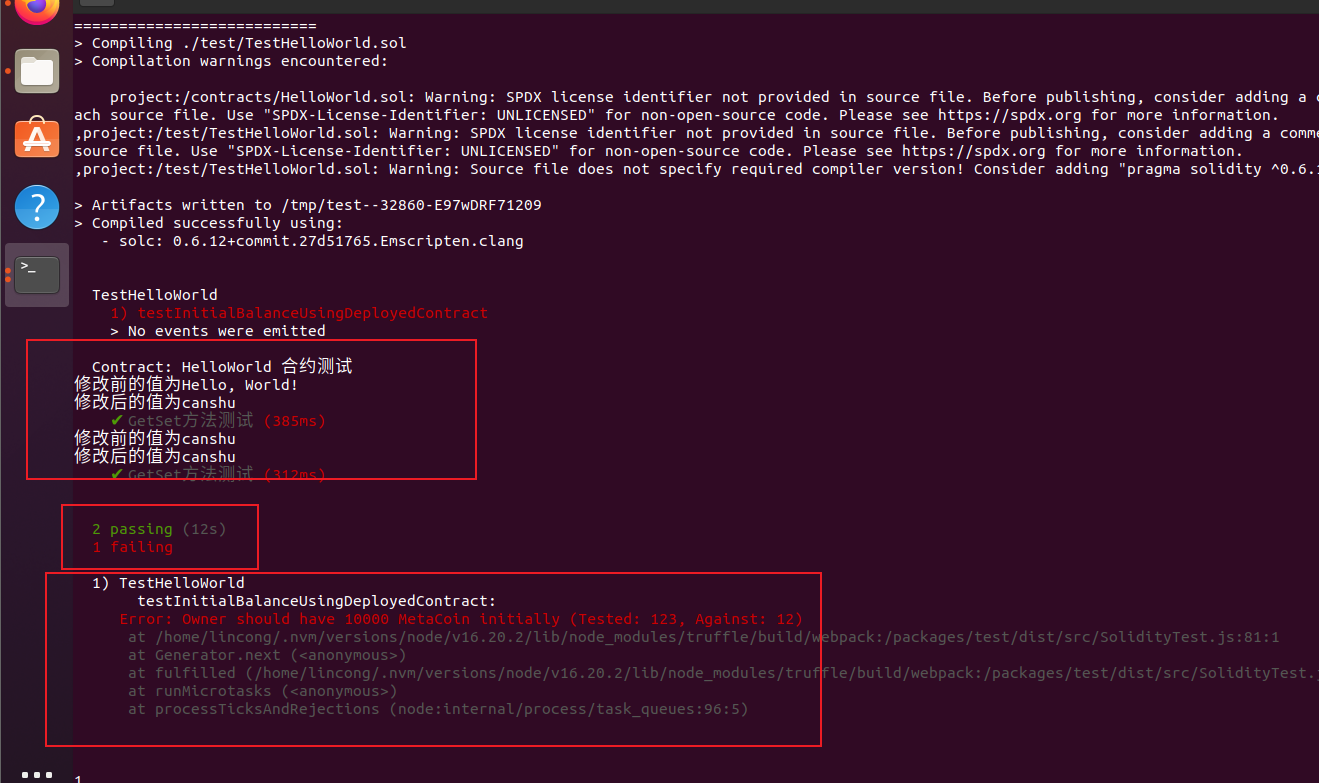
最后执行 test 开始测试
测试结果输出
二,采用 `truffle develop`:
不需要去改其他的什么配置直接 执行 truffle develop 之后 会自动生成10给account 的提供测试用
之后 按照正常的流程去 编译 部署 测试 就好了
执行 truffle compile
执行 truffle migrate
执行 truffle test
和用 ganache-cli 去测试 的结果是 一样的 ;ganache-cli只是给你提供测试用户,但是用truffle内置的truffle develop 也可以达到同样的效果 ;这两种方法 按照具体情况来选择


 1850
1850

 被折叠的 条评论
为什么被折叠?
被折叠的 条评论
为什么被折叠?
 到【灌水乐园】发言


