


 本文详细介绍如何在蚂蚁金服开放平台配置并使用支付宝沙箱支付功能,包括密钥生成、环境配置、代码实现及支付流程演示。
详解:支付宝沙箱支付功能<接口的使用>
一.蚂蚁金服开放平台的操作
首先需要进行下载密钥:这里面已经很详细了下载完生成密钥就好.https://docs.open.alipay.com/291/105971
然后开始进入蚂蚁金服
(1):地址:https://open.alipay.com/platform/home.htm
登陆后进入开发平台.
(2)进入研发服务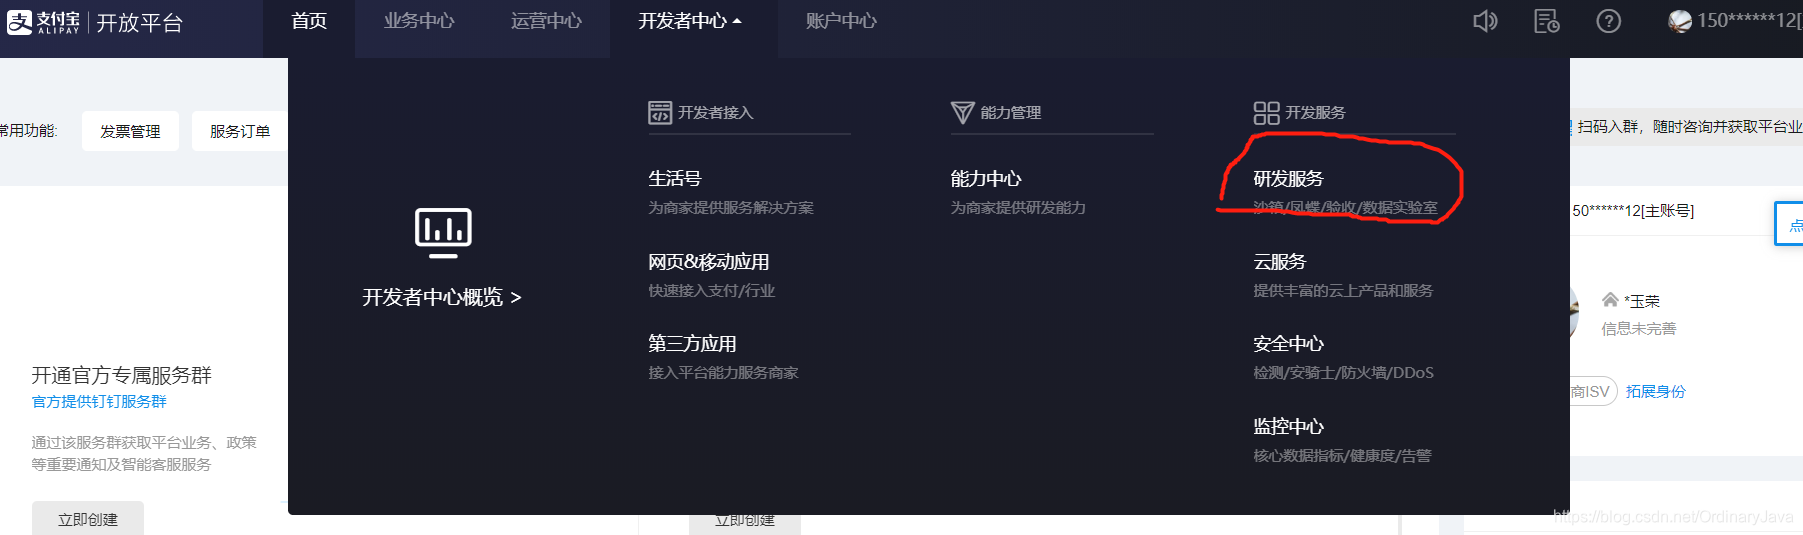
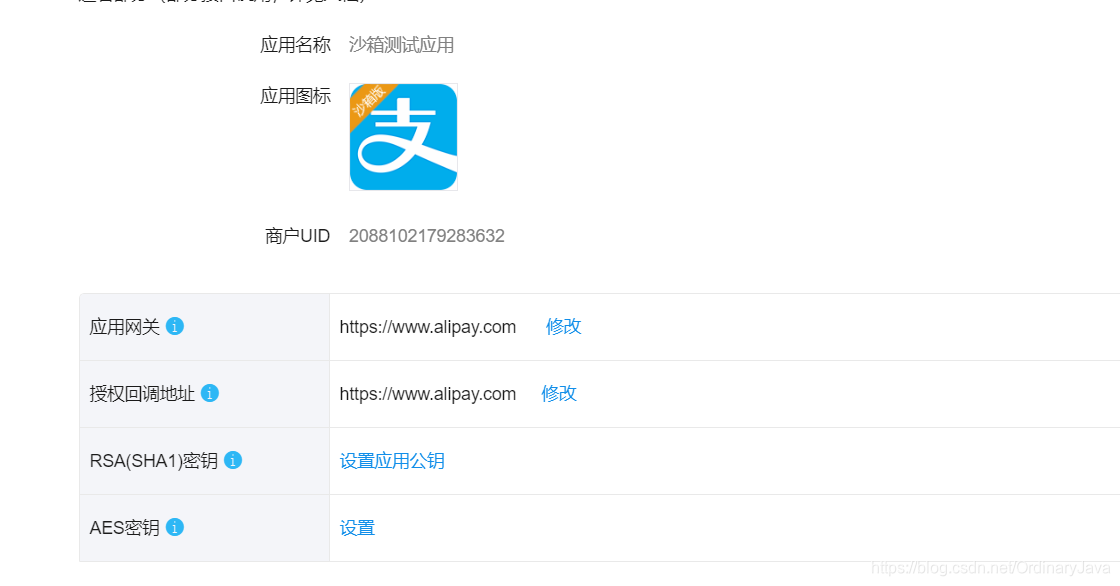
(3)进入后在沙箱应用中选择 设置/查看 支付宝网关 换成
https://openapi.alipaydev.com/gateway.do(如果本来就是的话就不用改了)
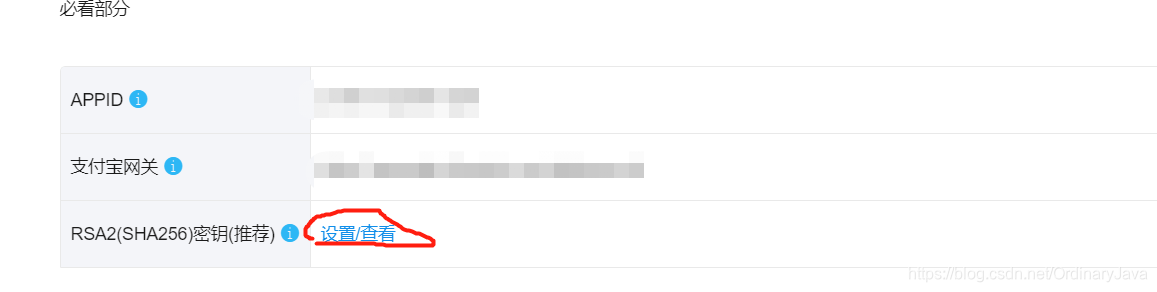
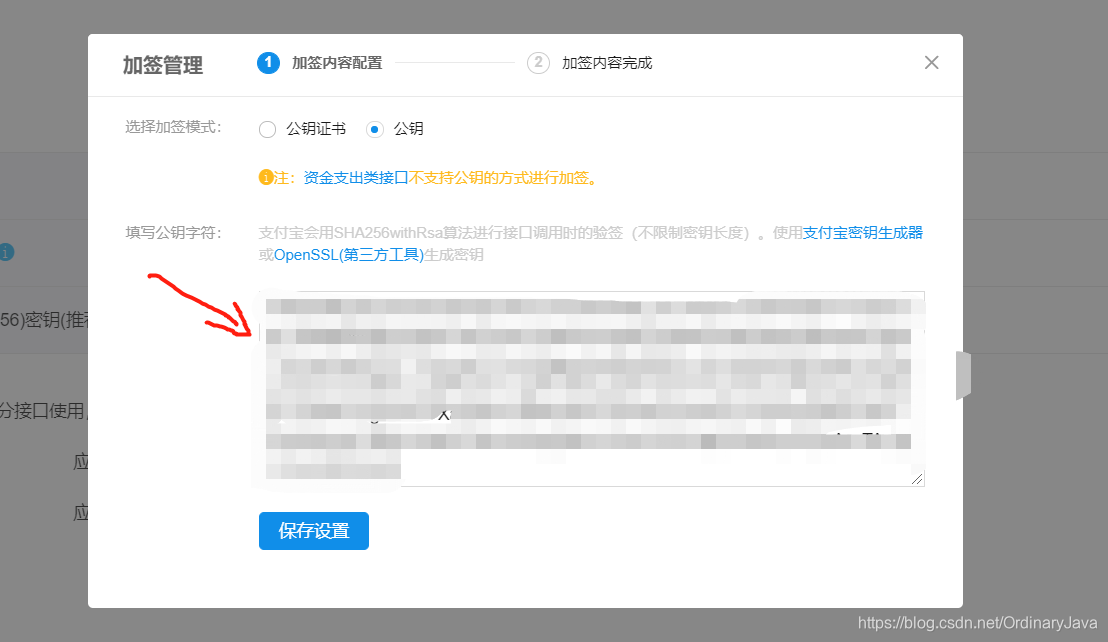
(4)点击公钥 然后 将你第一步 生成的 公钥 记住 是 公钥 保存设置 后 关掉就行
(5) 往下拉 来到这个地方 将
应用网关和回调地址更改为:https://www.alipay.com
OK!到这基本配置就完了,下面进入大家最最最最喜欢的代码时间:
二.最最最最喜欢的代码时间
(1)首先的 当然是jar包了 我这里用的为maven 所以加入maven依赖
<dependency>
      <groupId>com.alipay.sdk</groupId>
      <artifactId>alipay-sdk-java</artifactId>
      <version>3.7.4.ALL</version>
</dependency>
如果不是maven的话 点击这个 连接 下载jar包
http://central.maven.org/maven2/com/pentahohub/nexus/alipay-sdk-java/20150820220052/alipay-sdk-java-20150820220052.jar
(2)然后配置一个调用支付宝的Config
package com.alipay.config;

import java.io.FileWriter;
import java.io.IOException;

/* *
 *类名:AlipayConfig
 *作者:AAA_有梦想一起实现
 */

public class AlipayConfig{

    // ↓↓↓↓↓↓↓↓↓↓请在这里配置您的基本信息↓↓↓↓↓↓↓↓↓↓↓↓↓↓↓

    // 应用ID,您的APPID,收款账号既是您的APPID对应支付宝账号
    public static String app_id = "APPID";//例:2016082600317257

    // 商户私钥,您的PKCS8格式RSA2私钥
    public static String merchant_private_key = "商户私钥!!!!私钥!!!不是公钥!!!";
    // 支付宝公钥,查看地址:https://openhome.alipay.com/platform/keyManage.htm
    // 对应APPID下的支付宝公钥。
    public static String alipay_public_key = "支付宝公钥,记得是支付宝公钥!!!!!!!支付宝公钥";
    // 服务器异步通知页面路径 需http://格式的完整路径,不能加?id=123这类自定义参数,必须外网可以正常访问
    /**
     * 返回的时候此页面不会返回到用户页面,只会执行你写到控制器里的地址
     * 待会会有方法 共计使用
     */
    public static String notify_url = "你的服务器地址/项目名称/notify_url";
    // 页面跳转同步通知页面路径 需http://格式的完整路径,不能加?id=123这类自定义参数,必须外网可以正常访问
    /**
     * 此页面是同步返回用户页面,也就是用户支付后看到的页面,上面的notify_url是异步返回商家操作,谢谢
     * 要是看不懂就找度娘,或者多读几遍,或者去看支付宝第三方接口API,不看API直接拿去就用,遇坑不怪别人
     */
     //这个就是支付成功后 所返回的页面  或者是方法
    public static String return_url = " 你的服务器地址/项目名称/return_url";
    // 签名方式
    public static String sign_type = "RSA2";
    // 字符编码格式
    public static String charset = "gbk";
    // 支付宝网关
    public static String gatewayUrl = "https://openapi.alipaydev.com/gateway.do";
    // 日志地址
    public static String log_path = "D:/logs/";
    // ↑↑↑↑↑↑↑↑↑↑请在这里配置您的基本信息↑↑↑↑↑↑↑↑↑↑↑↑↑↑↑

    /**
     * 写日志,方便测试(看网站需求,也可以改成把记录存入数据库)
     *
     * @param sWord
     *            要写入日志里的文本内容
     */
    public static void logResult(String sWord) {
        FileWriter writer = null;
        try {
            writer = new FileWriter(log_path + "alipay_log_"
                    + System.currentTimeMillis() + ".txt");
            writer.write(sWord);
        } catch (Exception e) {
            e.printStackTrace();
        } finally {
            if (writer != null) {
                try {
                    writer.close();
                } catch (IOException e) {
                    e.printStackTrace();
                }
            }
        }
    }
}
(3)然后 来就是 业务代码了 我是直接 写在了 controller 中 建议还是写在service中
// payables 金额  body 和 subject 可有可无  传入金额 即可
 @RequestMapping("alipaySum")
    public Object alipayIumpSum(Model model, String payables, String subject, String body, HttpServletResponse response)
            throws Exception {
        // 获得初始化的AlipayClient
        AlipayClient alipayClient = new DefaultAlipayClient(AlipayConfigInfo.gatewayUrl, AlipayConfigInfo.app_id,
                AlipayConfigInfo.merchant_private_key, "json", AlipayConfigInfo.charset,
                AlipayConfigInfo.alipay_public_key, AlipayConfigInfo.sign_type);
        // 设置请求参数
        AlipayTradePagePayRequest alipayRequest = new AlipayTradePagePayRequest();
        alipayRequest.setReturnUrl(AlipayConfigInfo.return_url);
        alipayRequest.setNotifyUrl(AlipayConfigInfo.notify_url2);
        SimpleDateFormat sdf = new SimpleDateFormat("yyyyMMddHHmmssSSS");
        // 商户订单号,商户网站订单系统中唯一订单号,必填
        String out_trade_no = sdf.format(new Date());
        // 付款金额,必填
        String total_amount = payables.replace(",", "");
        alipayRequest.setBizContent("{\"out_trade_no\":\"" + out_trade_no + "\"," + "\"total_amount\":\"" + total_amount
                + "\"," + "\"subject\":\"" + subject + "\"," + "\"body\":\"" + body + "\","
                + "\"product_code\":\"FAST_INSTANT_TRADE_PAY\"}");
        // 请求
        String result = alipayClient.pageExecute(alipayRequest).getBody();
        // System.out.println(result);
        AlipayConfigInfo.logResult(result);// 记录支付日志
        response.setContentType("text/html; charset=gbk");
        PrintWriter out = response.getWriter();
        out.print(result);
        return null;
    }
(4)下面 就是 ReturnUrl NotifyUrl的 代码了
//当你点击支付时  会走此方法
 @RequestMapping("notifyUrl")
    public void Notify(HttpServletResponse response, HttpServletRequest request) throws Exception {
        System.out.println("----------------------------notify_url------------------------");
        // 商户订单号
        String out_trade_no = new String(request.getParameter("out_trade_no").getBytes("ISO-8859-1"), "GBK");
        // 付款金额
        String total_amount = new String(request.getParameter("total_amount").getBytes("ISO-8859-1"), "GBK");
        // 支付宝交易号
        String trade_no = new String(request.getParameter("trade_no").getBytes("ISO-8859-1"), "GBK");
        // 交易说明
        String cus = new String(request.getParameter("body").getBytes("ISO-8859-1"), "GBK");
        // 交易状态
        String trade_status = new String(request.getParameter("trade_status").getBytes("ISO-8859-1"), "GBK");
        if (trade_status.equals("TRADE_SUCCESS")) {
            //支付成功商家操作
            //下面是我写的一个简单的插入操作,根据你的操作自行编写
            /*Map<Object, Object> map = new HashMap<Object, Object>();
            map.put("cuId", Integer.valueOf(cus));
            RepaymentPlan repaymentPlan = new RepaymentPlan();
            Integer id = Integer.valueOf(out_trade_no);
            double payablesCheck = Double.valueOf(total_amount);
            RepaymentPlan repayCheck = serviceMain.selectByPrimaryKey(id);
            double total = repayCheck.getPayables();
            if (Double.valueOf(total_amount) < repayCheck.getPayables()) {
                map.put("ubalance", total - Double.valueOf(total_amount));
                serviceMain.updateCusMoney(map);
            }
            repaymentPlan.setId(id);
            repaymentPlan.setActualPayment(total);
            repaymentPlan.setRepaymentStatus(1);
            int i = serviceMain.updateByPrimaryKeySelective(repaymentPlan);
            System.out.println("---------------------还款影响行数----------------------------" + i);*/
        }
    }
/**
     * 同步通知的页面的Controller
     *
     * @param ,response
     * @throws InterruptedException
     * 这是 支付成功 后返回的  页面
     */
    @RequestMapping("returnUrl")
    public String Return_url() throws InterruptedException {
        return "shopping-result";
    }
好了 到这 基本上就结束了 下面 看一下 基本效果
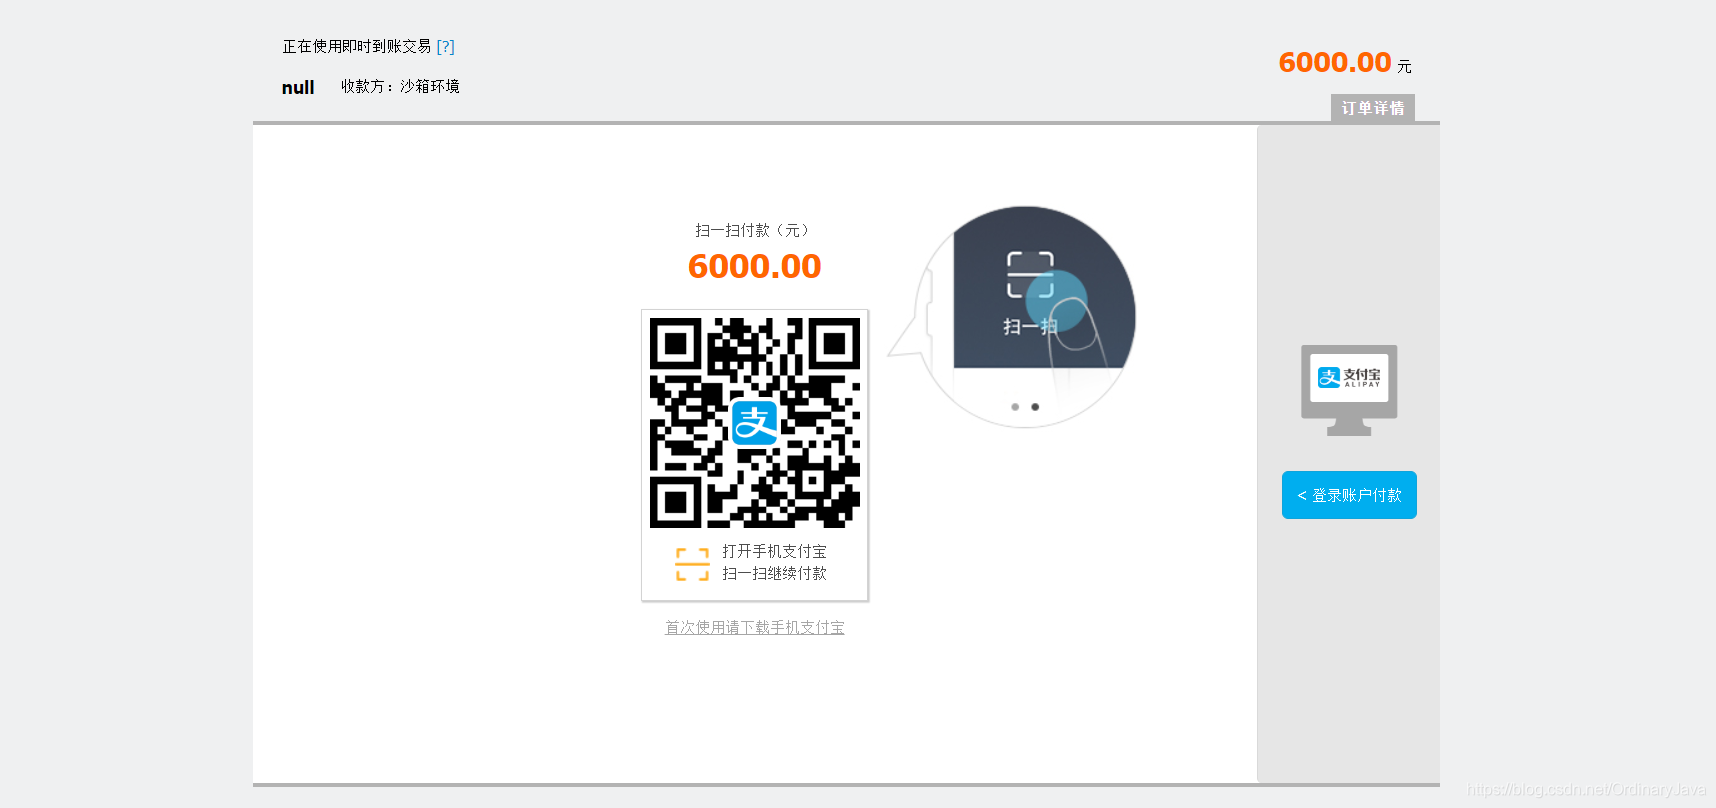
1.点击付款

2.就会进入这个页面 点击右方登陆 当然 是使用的 沙箱账号下面的 买家账号
3.登陆 后就会l来到这 当然 这金额 都是虚拟的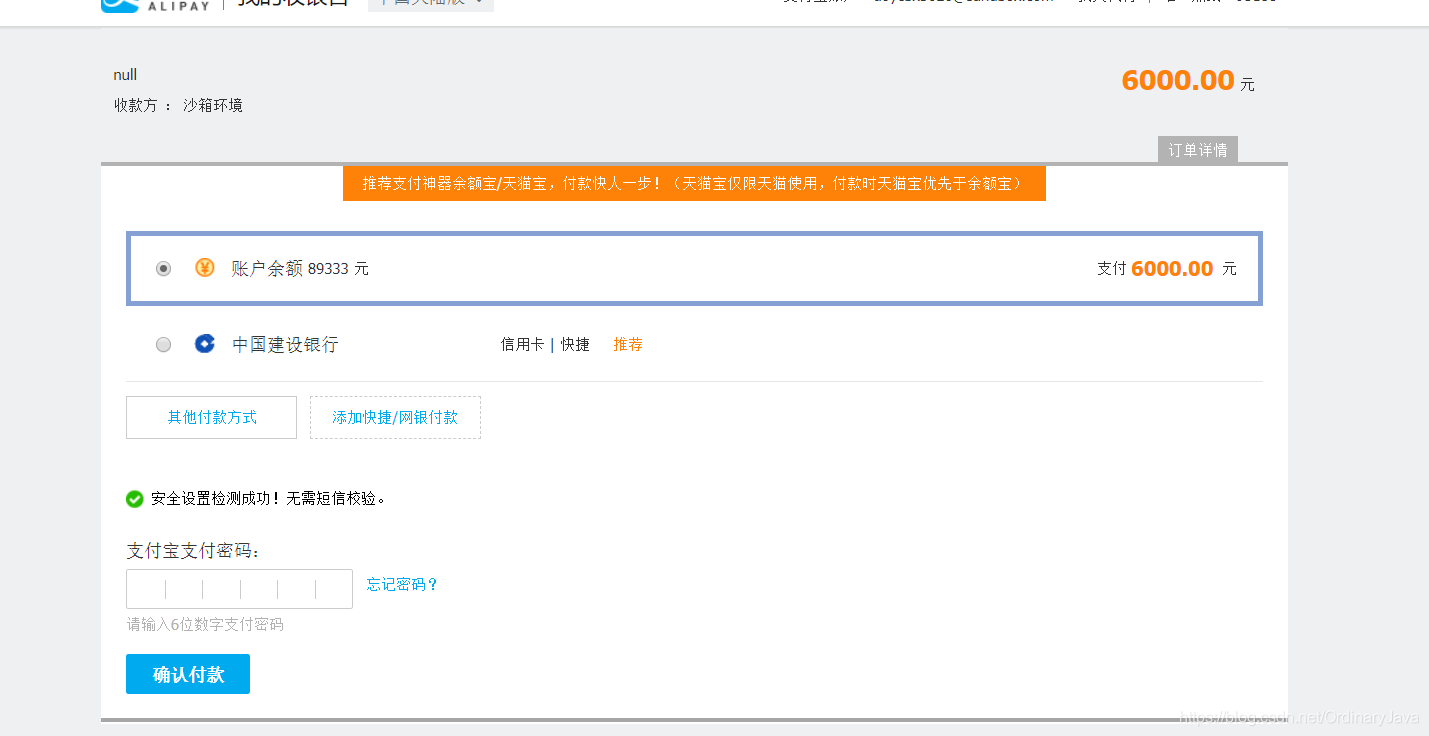
4.点击付款即可完成.
到这基本结束那就
告辞!!!


 472
472


 到【灌水乐园】发言


