


最近闲来无事,打算研究一下手上的A133芯片,为它移植一个ubuntu系统,但是可悲的发现开发板商提供的A133 Linux都是没有GPU和硬件编解码的,安卓才能使用GPU和硬件编解码
然而我在whycan论坛闲逛时,发现21年左右的sdk还是tina4,跑的基于openwrt的tina系统,可以使用GPU和硬件编解码,因此我搜寻并下载了Tina4 for A133,并开始了研究如何将其移植到ubuntu上
目录结构分析
首先在tina的package目录下能看到
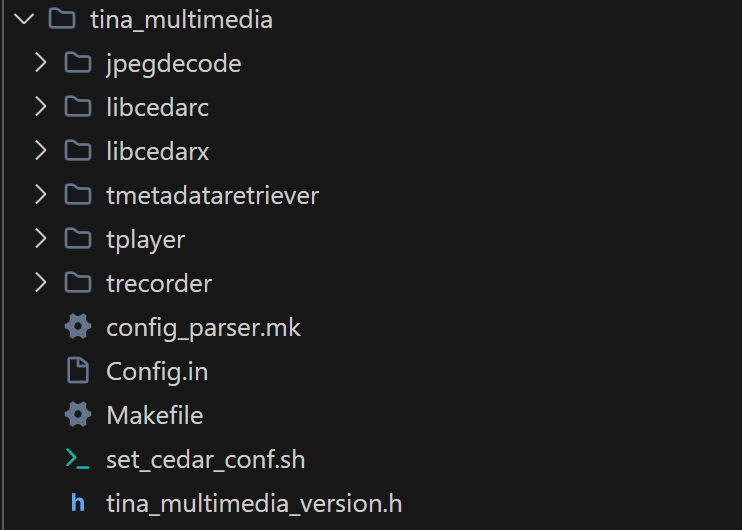
1. libcedarc/ (Cedar Codec - 编解码核心库)
2. libcedarx/ (Cedar eXtension - 多媒体中间件)
3. tplayer/ (Tina Player - 播放器应用层)
4. trecorder/ (Tina Recorder - 录制器应用层)
5. tmetadataretriever/ (Tina Metadata Retriever)
6. jpegdecode/ (JPEG Decoder)
构建流程分析
进入Tinalinux的配置界面
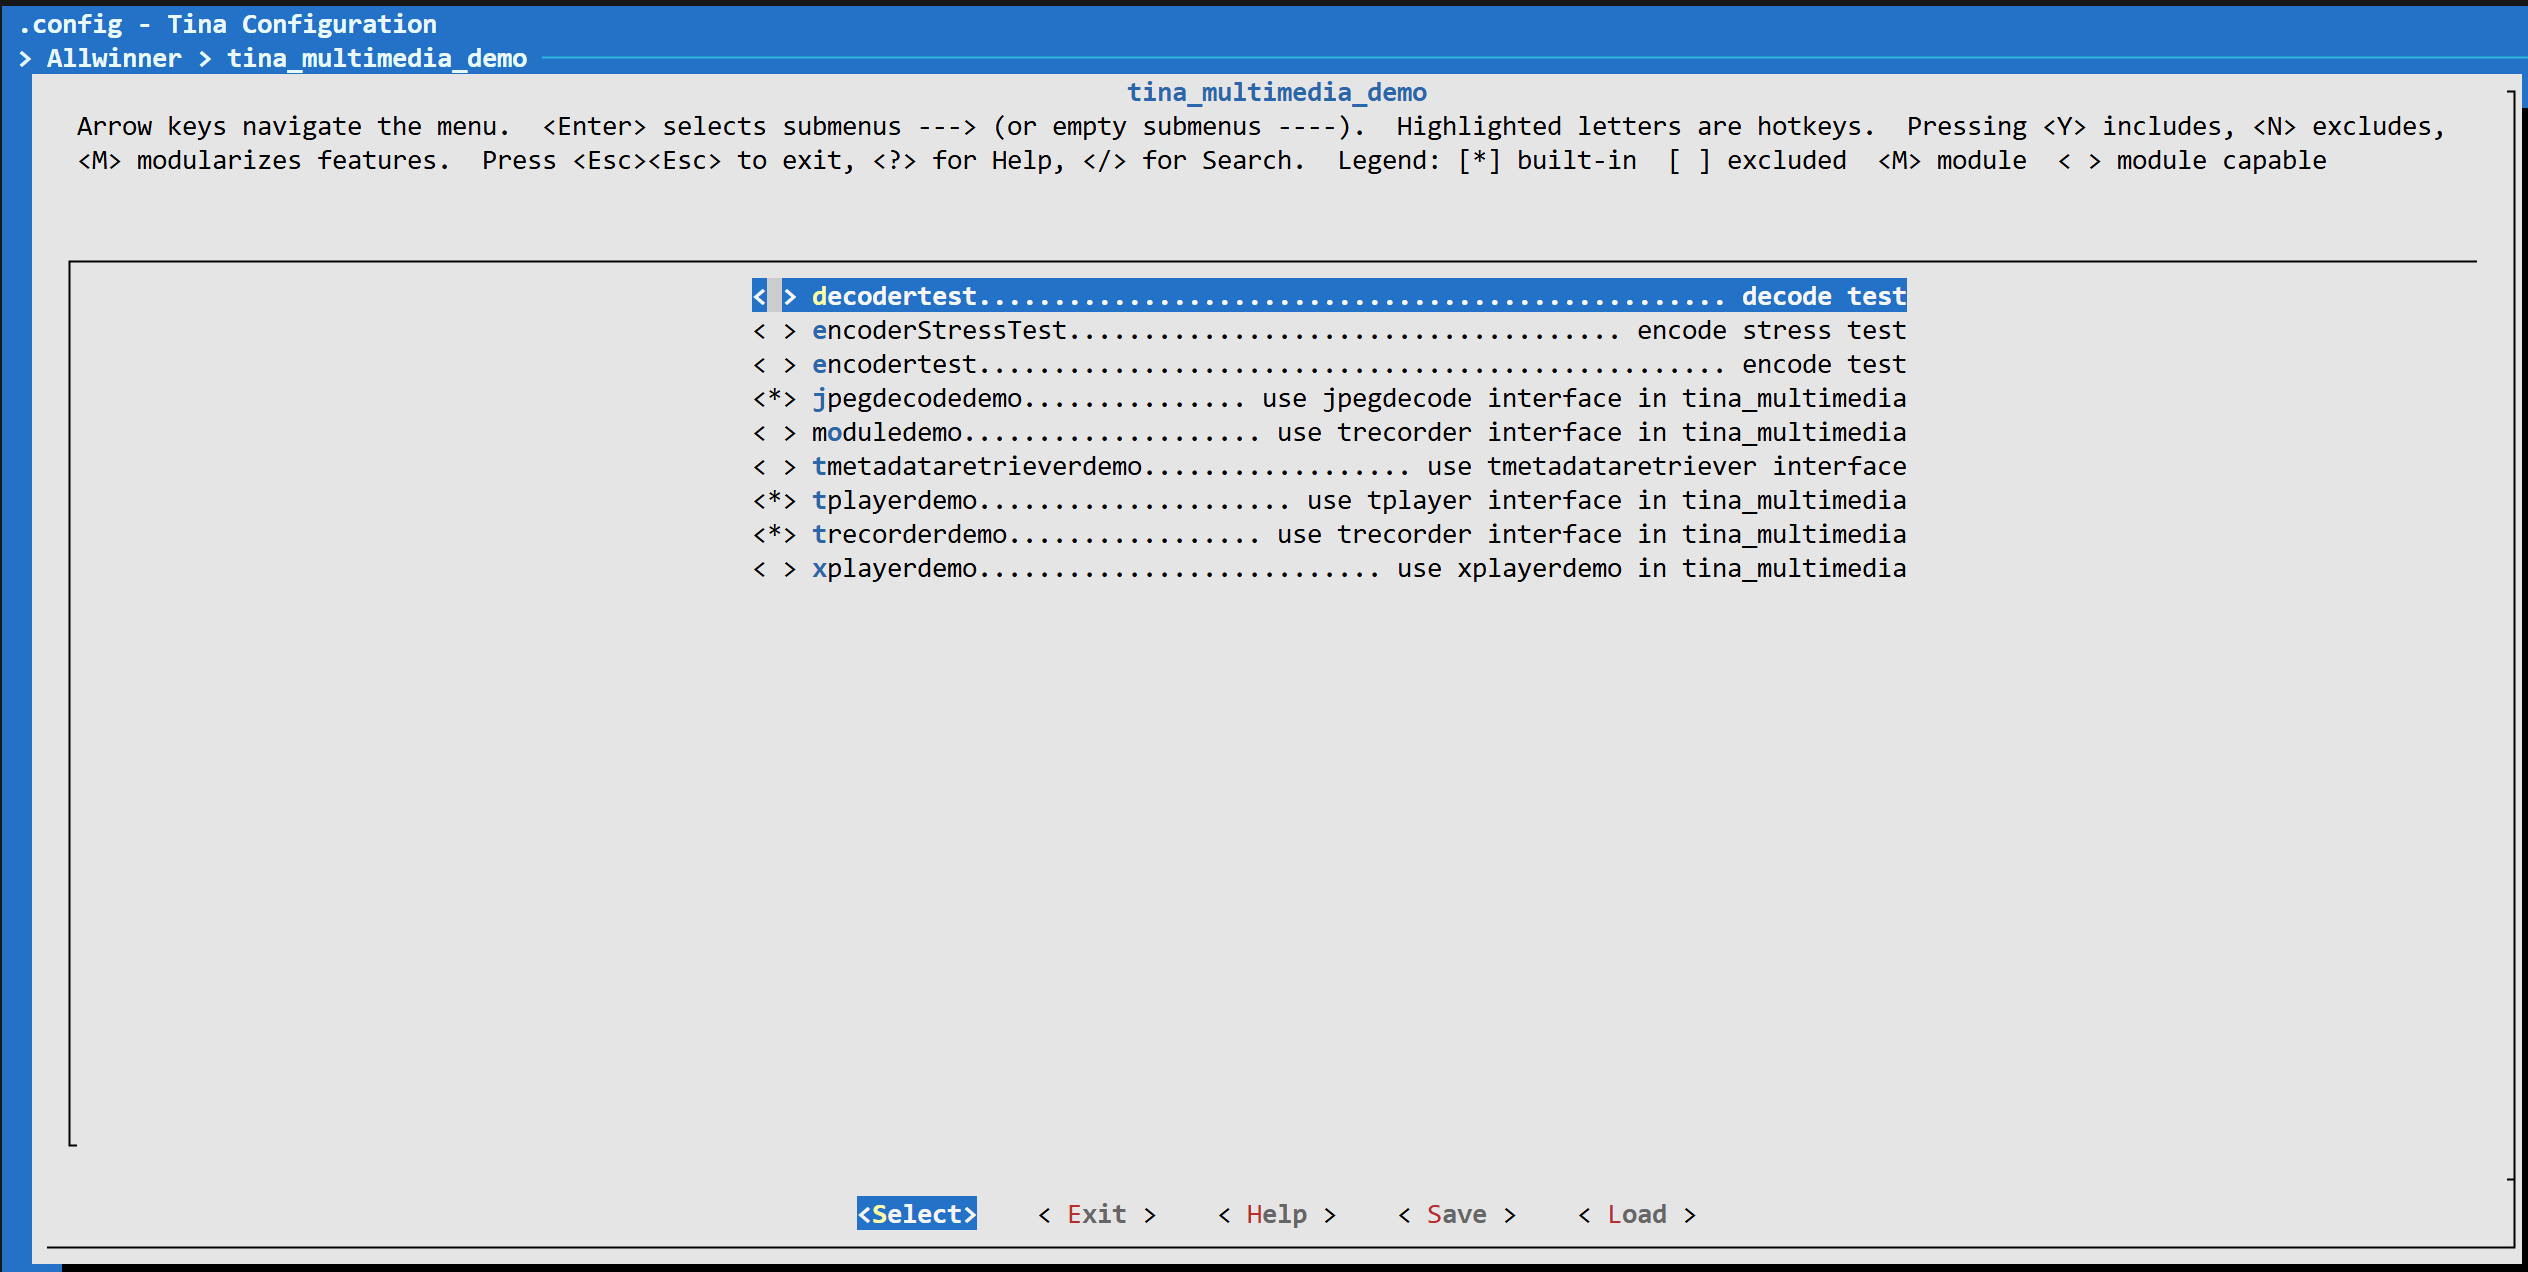
勾选上这这几个demo之后,
经分析,总共需要移植这些编解码库
简要分析流程(仅供参考):以下是目录结构
├── package/                          # 源码包定义
│   └── allwinner/
│       ├── tina_multimedia/          # 多媒体核心库
│       │   ├── Config.in            # 库配置选项
│       │   ├── Makefile             # 构建规则
│       │   ├── libcedarc/           # 编解码器库(Cedar-C)
│       │   ├── libcedarx/           # 多媒体框架库(Cedar-X)
│       │   ├── tplayer/             # 播放器中间件
│       │   ├── trecorder/           # 录制器中间件
│       │   ├── jpegdecode/          # JPEG解码器
│       │   └── tmetadataretriever/  # 元数据提取器
│       │
│       └── tina_multimedia_demo/    # Demo应用
│           ├── tplayerdemo/         # 播放器Demo
│           ├── trecorderdemo/       # 录制Demo
│           ├── jpegdecodedemo/      # JPEG解码Demo
│           ├── decodertest/         # 解码器测试
│           ├── encodertest/         # 编码器测试
│           ├── encoderStressTest/   # 编码压力测试
│           ├── moduledemo/          # 模块Demo
│           ├── tmetadataretrieverdemo/  # 元数据提取Demo
│           └── xplayerdemo/         # XPlayer Demo
│
└── out/r818-sc3917/                  # 构建输出(目标平台: r818-sc3917)
    ├── compile_dir/target/           # 编译中间文件
    │   ├── libcedarx/               # 库的编译目录
    │   ├── tplayerdemo/             # Demo的编译目录
    │   └── ...
    │
    ├── packages/base/                # 生成的IPK安装包
    │   ├── libcedarx_2.8-1_sunxi.ipk        # 多媒体核心库包
    │   ├── tplayerdemo_1-1_sunxi.ipk        # 播放器Demo包
    │   ├── trecorderdemo_1-1_sunxi.ipk      # 录制Demo包
    │   ├── jpegdecodedemo_1-1_sunxi.ipk     # JPEG解码Demo包
    │   └── ...
    │
    ├── staging_dir/target/           # 头文件和库的staging区域
    └── rootfs.img                    # 最终的根文件系统镜像
以tplayerdemo为例,基于openwrt的makefile如下
# 包信息
PKG_NAME:=tplayerdemo
PKG_VERSION:=1
PKG_BUILD_DIR := $(COMPILE_DIR)/$(PKG_NAME)

# 依赖关系
DEPENDS:= @TPLAYER libcedarx libstdcpp

# 准备阶段: 复制源码
Build/Prepare:
    $(CP) -r ./src/* $(PKG_BUILD_DIR)/

# 编译阶段
Build/Compile:
    $(MAKE) -C $(PKG_BUILD_DIR)/

# 安装阶段
Package/install:
    $(INSTALL_BIN) $(PKG_BUILD_DIR)/tplayerdemo $(1)/usr/bin/
随后会构建编译依赖库,以下都是makefile自动执行
-
libcedarc编译(如果未启用ONLY_ENABLE_AUDIO):
cd libcedarc ./configure --host=aarch64-openwrt-linux make install -
libcedarx编译:
cd libcedarx ./configure --host=aarch64-openwrt-linux \ --enable-parsers --enable-streams --enable-muxers make install -
中间件编译(tplayer, trecorder等):
cd tplayer && make
cd trecorder && make
随后绘本安装到指定目录,有耐心的人可以根据这个思路慢慢摸索总结
这里我将准备好的放入github了
Nopiskl/Allwinner-drivers-and-patches: Opencv isp for Allwinner platform
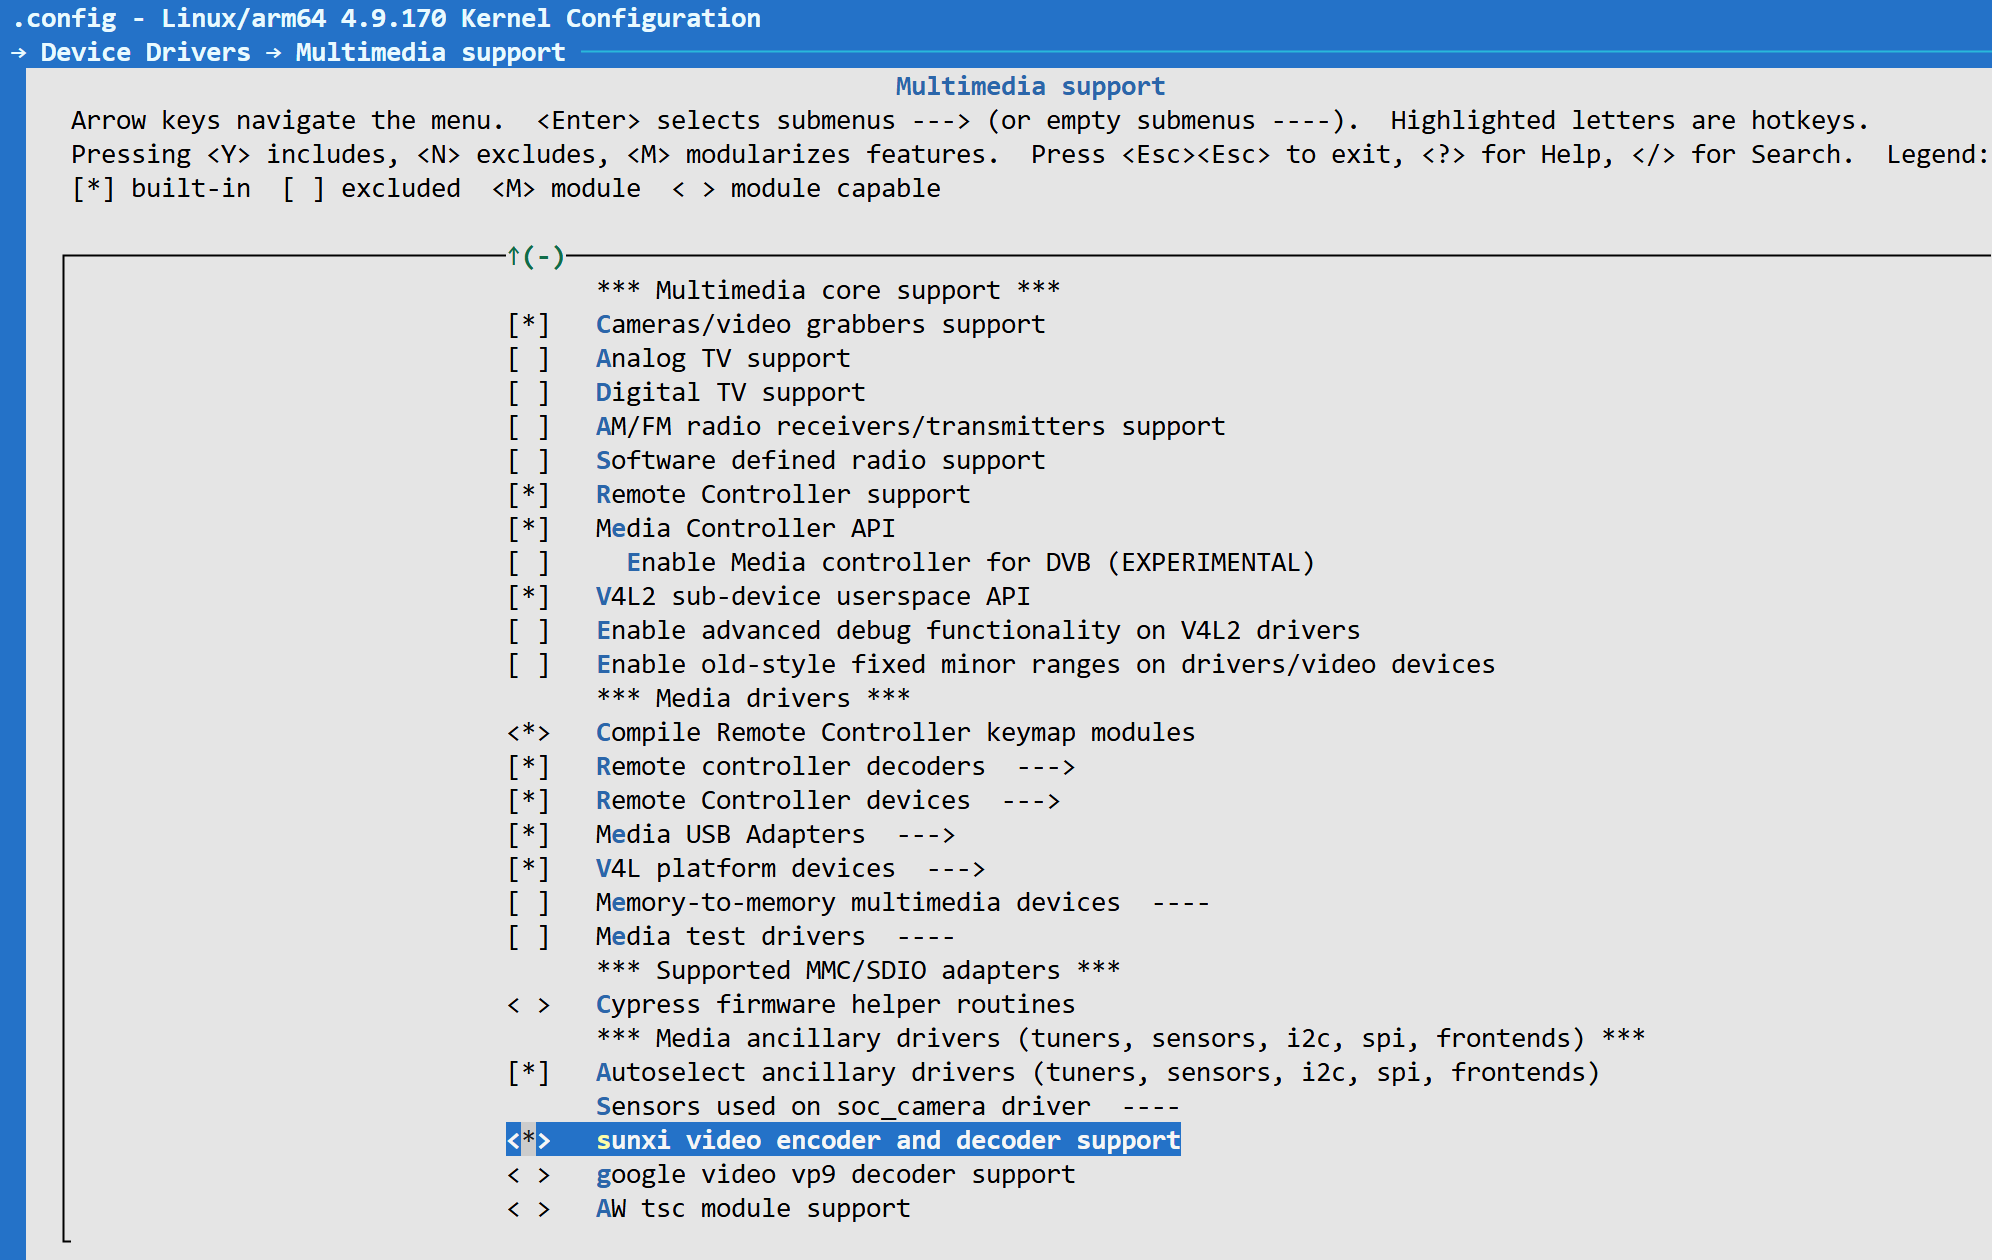
然后是内核使能ve和ion(这个一般默认都使能了)
进入文件系统后,看到
root@nopiskl:/# cd dev
root@nopiskl:/dev# ls
block            fuse       kmem          loop2             mmcblk0boot0        null   ptyp8  ram12  random       sunxi_pwm0      tty17  tty28  tty39  tty5   tty60  ttyp1  ttypd    vcsa
bus              gpiochip0  kmsg          loop3             mmcblk0boot1        ppp    ptyp9  ram13  rfkill       sunxi_soc_info  tty18  tty29  tty4   tty50  tty61  ttyp2  ttype    vcsa1
cedar_dev        gpiochip1  log           loop4             mmcblk0p1           ptmx   ptypa  ram14  rtc          tty             tty19  tty3   tty40  tty51  tty62  ttyp3  ttypf    vcsa2
char             i2c-0      loop-control  loop5             mmcblk0p2           pts    ptypb  ram15  rtc0         tty0            tty2   tty30  tty41  tty52  tty63  ttyp4  uinput   vcsa3
console          i2c-1      loop0         loop6             mmcblk0p3           ptyp0  ptypc  ram2   shm          tty1            tty20  tty31  tty42  tty53  tty7   ttyp5  urandom  vcsa4
cpu_dma_latency  i2c-2      loop1         loop7             mmcblk0p4           ptyp1  ptypd  ram3   snd          tty10           tty21  tty32  tty43  tty54  tty8   ttyp6  vcs      vcsa5
cuse             i2c-3      loop10        loop8             mmcblk0p5           ptyp2  ptype  ram4   sst_storage  tty11           tty22  tty33  tty44  tty55  tty9   ttyp7  vcs1     vcsa6
disk             i2c-6      loop11        loop9             mmcblk0p6           ptyp3  ptypf  ram5   stderr       tty12           tty23  tty34  tty45  tty56  ttyS0  ttyp8  vcs2     zero
disp             initctl    loop12        mapper            mmcblk0rpmb         ptyp4  ram0   ram6   stdin        tty13           tty24  tty35  tty46  tty57  ttyS1  ttyp9  vcs3
fb0              input      loop13        mem               net                 ptyp5  ram1   ram7   stdout       tty14           tty25  tty36  tty47  tty58  ttyS2  ttypa  vcs4
fd               ion        loop14        memory_bandwidth  network_latency     ptyp6  ram10  ram8   sunxi-reg    tty15           tty26  tty37  tty48  tty59  ttyS7  ttypb  vcs5
full             ir_tx0     loop15        mmcblk0           network_throughput  ptyp7  ram11  ram9   sunxi-wlan   tty16           tty27  tty38  tty49  tty6   ttyp0  ttypc  vcs6
看到ion和cedar_dev代表内核使能成功
为了隔离环境,我把所有的库和bin文件单独放在
然后设置链接库地址,启动程序
root@nopiskl:/dev# cd /usr/cedar_libs/bin
root@nopiskl:/usr/cedar_libs/bin# export LD_LIBRARY_PATH=/usr/cedar_libs/lib:$LD_LIBRARY_PATH
root@nopiskl:/usr/cedar_libs/bin# ./tplayerdemo
然后在程序中输入
>>>>>>>>>>>>>>>>>>>>>>>>>>>>>>> tina_multimedia <<<<<<<<<<<<<<<<<<<<<<<<<<<<<<<
tag   : tina3.5
branch: tina-dev
date  : Mon Jul 15 19:04:59 2019 +0800
Change-Id: I5f6c8a88d7b387a312b7744797a0d5f8ab07ee7a
-------------------------------------------------------------------------------
DEBUG : tplayer <TPlayerCreate:198>: TPlayerCreate
DEBUG  : awplayer <XPlayerCreate:236>: XPlayerCreate.
DEBUG  : awplayer <LogVersionInfo:34>:
>>>>>>>>>>>>>>>>>>>>>>>>>>>>>>> CedarX <<<<<<<<<<<<<<<<<<<<<<<<<<<<<<<
tag   : CedarX-2.8.0
branch: master
commit: 967535b8ff6a073cb4f38e85a4ae5fa6008014d8
date  : Mon, 15 May 2017 01:30:22 +0000 (09:30 +0800)
author:
----------------------------------------------------------------------

DEBUG : tsoundcontrol <TSoundDeviceCreate:147>: TinaSoundDeviceInit()
DEBUG : tsoundcontrol <openSoundDevice:17>: openSoundDevice() in default style
DEBUG  : awplayer <LayerCreate:969>: LayerCreate.
DEBUG  : awplayer <LayerCreate:989>: ==== callback: 0x7fa664de60, pUser: 0x12a2cbf0
DEBUG  : awplayer <LayerCreate:1000>: screen:w 720, screen:h 1280
DEBUG : tsubtitlectrl <SubtitleCreate:84>: ==== pCallback: 0x7fa664dd20, pUser: 0x12a2cbf0
DEBUG  : awplayer <XPlayerSetVideoSurfaceTexture:634>: setVideoSurfaceTexture, surface = 0x12a5acf0
DEBUG  : awplayer <XPlayerThread:1981>: process message XPLAYER_COMMAND_SET_SURFACE.
DEBUG  : awplayer <XPlayerThread:2044>: ==== process message XPLAYER_COMMAND_SET_SUBCTRL.
DEBUG  : awplayer <PlayerSetSubCtrl:750>: === PlayerSetSubCtrl
DEBUG  : awplayer <XPlayerSetDeinterlace:737>: set deinterlace
DEBUG  : awplayer <XPlayerThread:2059>: ==== process message XPLAYER_COMMAND_SET_SUBCTRL.
7372800 bytes (7.4 MB, 7.0 MiB) copied, 0.419861 s, 17.6 MB/s


tplayerdemo# play url:xxx.mp4
即可显示
可能会遇到的bug
我第一次测试时,视频通路一切正常,没有严重报错,但是就是黑屏
然后我发现我的ubuntu xfce显示似乎和播放器冲突,暂时禁用也未解决
后来发现是UI界面(主显示layer)和播放器layer设置在了同一图层导致冲突
通过以下方式获取layer信息
cat /sys/class/disp/disp/attr/sys播放时显示
root@nopiskl:~# cat /sys/class/disp/disp/attr/sys
screen 0:
de_rate 300000000 hz, ref_fps:66
mgr0: 720x1280 fmt[rgb] cs[0x204] range[full] eotf[0x4] bits[8bits] err[0] force_sync[0] unblank direct_show[false                                                                             ] iommu[1]
dmabuf: cache[0] cache max[0] umap skip[0] overflow[0]
        lcd output      backlight(255)  fps:66.4         720x1280
        err:1   skip:5  irq:13505       vsync:0 vsync_skip:0
   BUF    enable ch[0] lyr[0] z[0] prem[N] a[pixel   0] fmt[ 77] fb[ 896,1504; 448, 752; 448, 752] crop[   0,   0,                                                                              896,1492] frame[   0,   0, 720,1280] addr[fe800000,fe949000,fe99b400] flags[0x       0] trd[0,0]
depth[ 0]    BUF    enable ch[1] lyr[0] z[0] prem[N] a[globl 255] fmt[  0] fb[ 720,1280; 720,1280; 720,1280] crop[                                                                                0,   0, 720,1280] frame[   0,   0, 720,1280] addr[ff800000,       0,       0] flags[0x       0] trd[0,0]
z[0]:视频层
z[0]: UI层
z值越大,越处于上层,因此两个设置在最底层会冲突
主要流程:整个layer设置链路
drivers/video/fbdev/sunxi/disp2/disp/dev_fb.c
config.info.mode = LAYER_MODE_BUFFER;
			config.info.zorder = 16;
			config.info.alpha_mode = 0;
			config.info.alpha_value = 0xff;
			config.info.fb.crop.x = (0LL) << 32;
			config.info.fb.crop.y = ((long long)y_offset) << 32;
			config.info.fb.crop.width =
			    ((long long)src_width) << 32;
			config.info.fb.crop.height =
			    ((long long)src_height) << 32;
tina_multimedia/tplayer/awsink/tlayer_ctrl.c
lc->mDispOutPort->setRectFake(lc->mDispOutPort,&rect);
	lc->mDispOutPort->SetZorder(lc->mDispOutPort, VIDEO_ZORDER_BOTTOM);
	lc->mDispOutPort->setEnable(lc->mDispOutPort, 1);
	pthread_mutex_unlock(&configMtx);
allwinner/display/libuapi/src/videoOutPort.c
static int layer_set_zorder(int fd, unsigned int hlay, int zorder) {
disp_layer_info config;
videoZorder layer_zorder = (videoZorder) zorder;
if ((layer_zorder < VIDEO_ZORDER_TOP)
|| (layer_zorder < VIDEO_ZORDER_TOP)) {
DISP_DBG_LOG("(%s)invalid zorder\n", __FUNCTION__);
return RET_FAIL;
}
memset(&config, 0, sizeof(disp_layer_info));
LayerGetPara(fd, hlay, &config);
switch (layer_zorder) {
case VIDEO_ZORDER_TOP:
config.zorder = ZORDER_MAX;
break;
case VIDEO_ZORDER_BOTTOM:
config.zorder = ZORDER_MIN;
break;
default:
break;
}
return LayerSetPara(fd, hlay, &config);
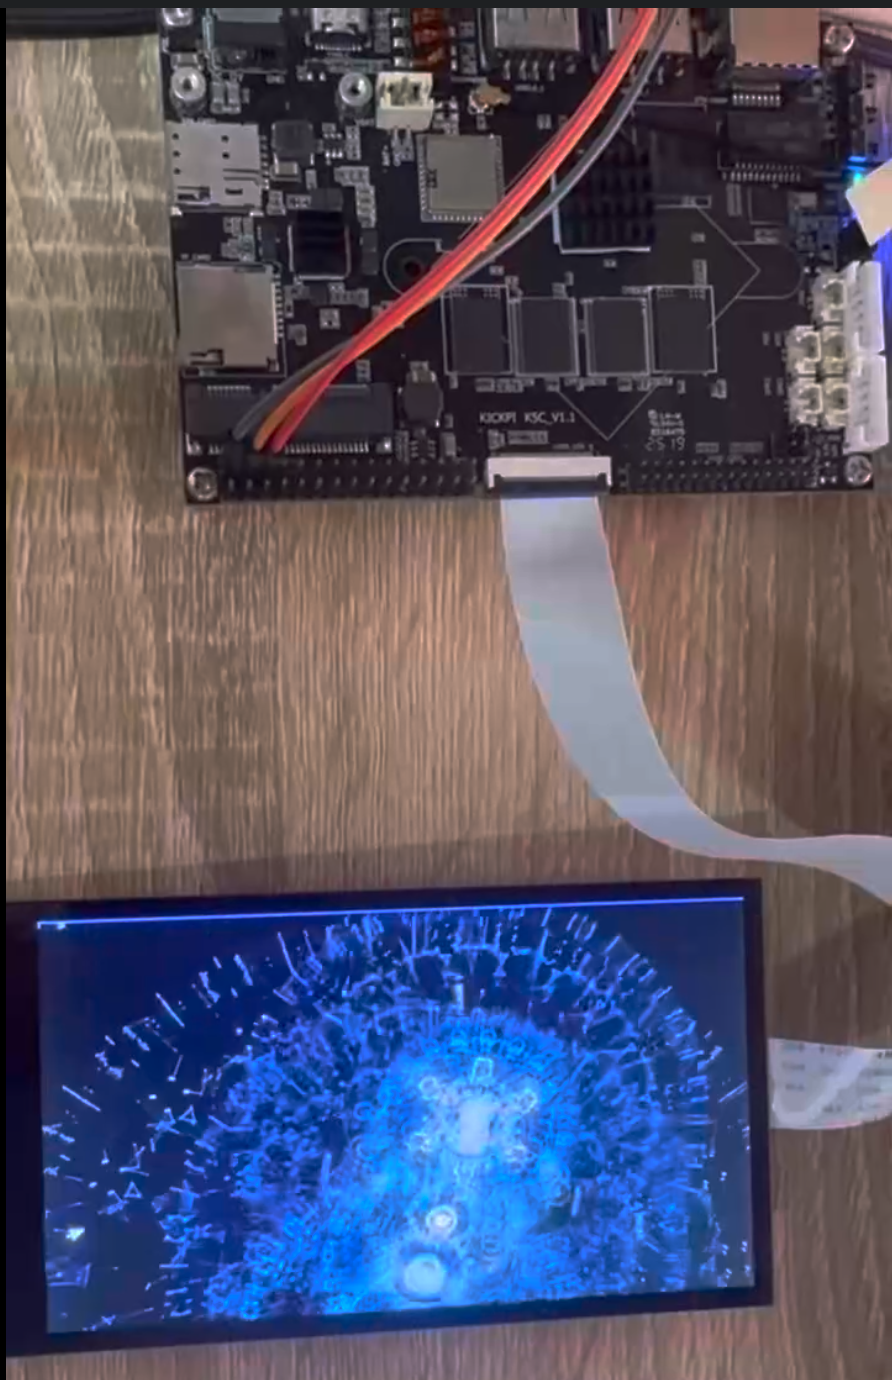
}因此修改tlayer_ctrl.c中的VIDEO_ZORDER_BOTTOM为VIDEO_ZORDER_MIDDLE或VIDEO_ZORDER_MAX即可
效果展示(播放视频画面tplayerdemo):


 1453
1453

 被折叠的 条评论
为什么被折叠?
被折叠的 条评论
为什么被折叠?
 到【灌水乐园】发言


