关于mmdeploy在window上编译example的坑

第一个坑

这边简单阐述下我的操作

  1. 在GitHub官网下载了mmdeploy-1.3.1-windows-amd64预编译包
  2. 修改build_sdk.ps1脚本里的$OPENCV_DIR的路径
  3. 在PowerShell 7-preview (x64)中执行以下命令
    .\set_env.ps1 .\build_sdk.ps1
    然后就出现下面的问题,我在网上找了好久都没找到原因。
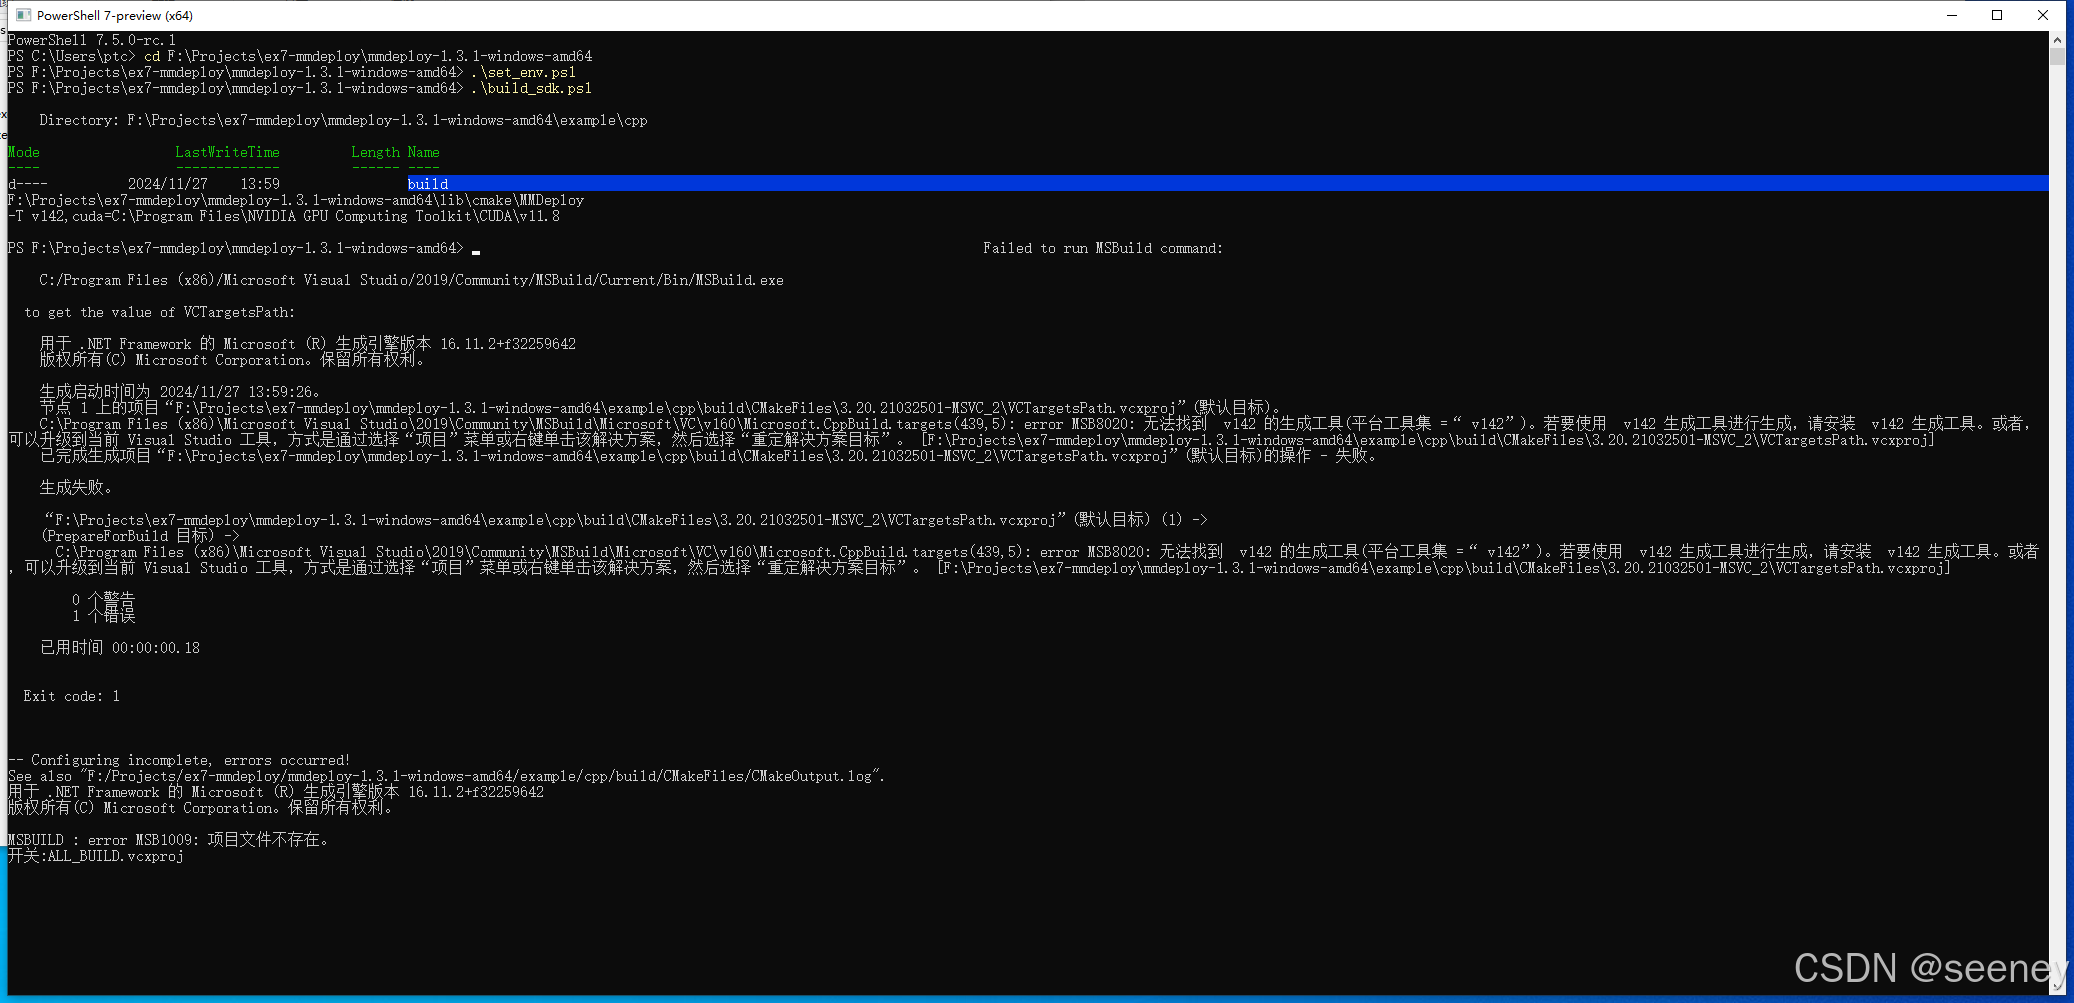
    在这里插入图片描述

原因

cmake路径在按照中文教程设置成了vs2019里自带的cmakeC:\Program Files (x86)\Microsoft Visual Studio\2019\Community\Common7\IDE\CommonExtensions\Microsoft\CMake\CMake\bin
在这里插入图片描述
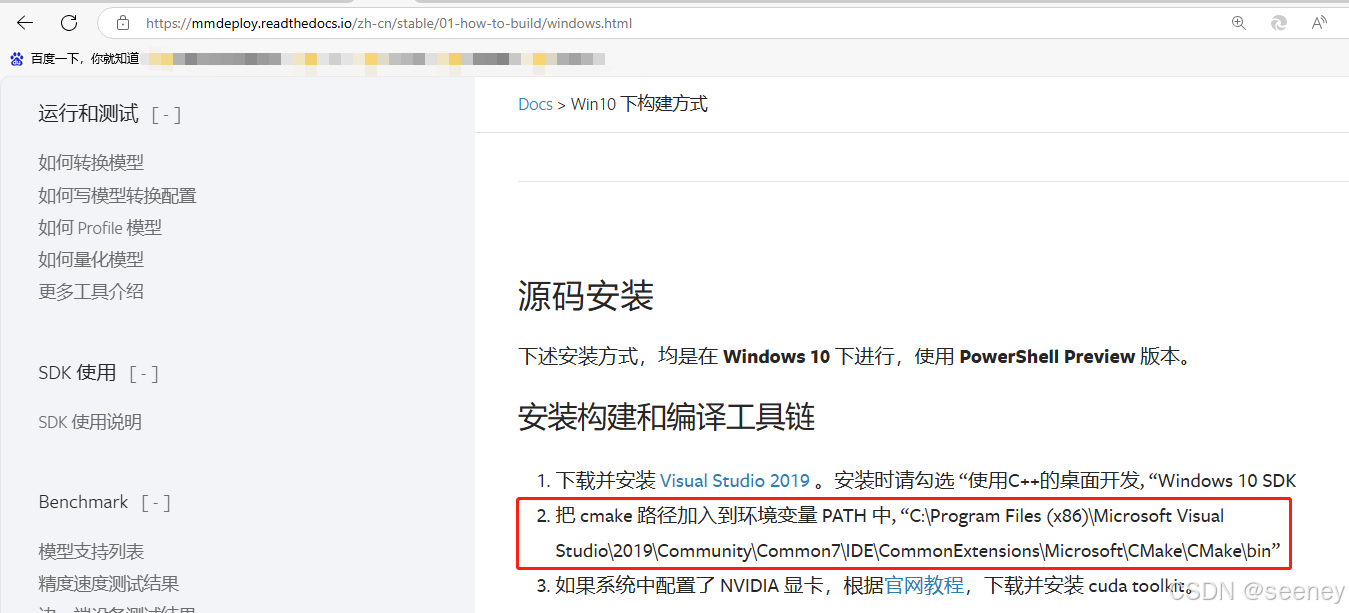
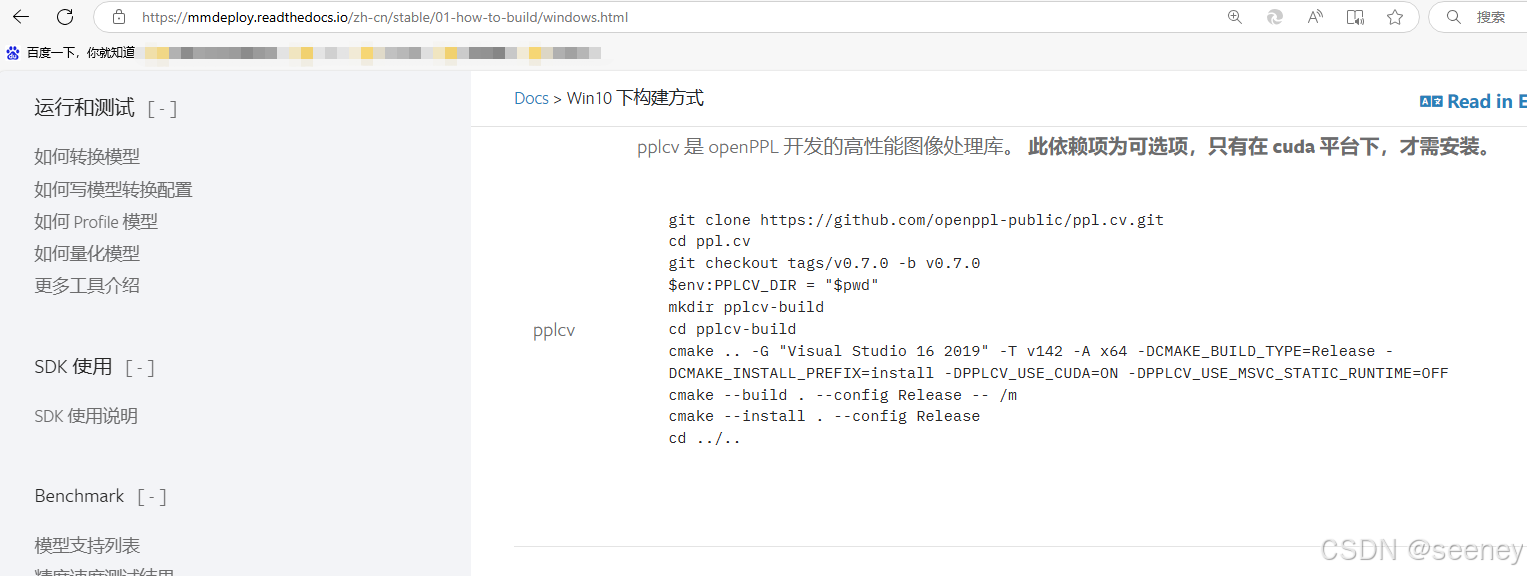
这个在我编译ppl.cv时,并没有问题,对应教程里的这部分
在这里插入图片描述

解决方法

最终,我把环境变量里的cmake路径改成了cmake安装后的路径C:\Program Files\CMake\bin,example编译完成,废了我好几个小时,生气。

第二个坑

在转换模型时,转为tensorrt时,这边的2onnx的device也要选择'cuda'
在这里插入图片描述

第三个坑

mmdeploy1.3.1在教程里,它推荐安装的onnxruntime=1.8.1,然后在转换模型时,就会报错,
在这里插入图片描述
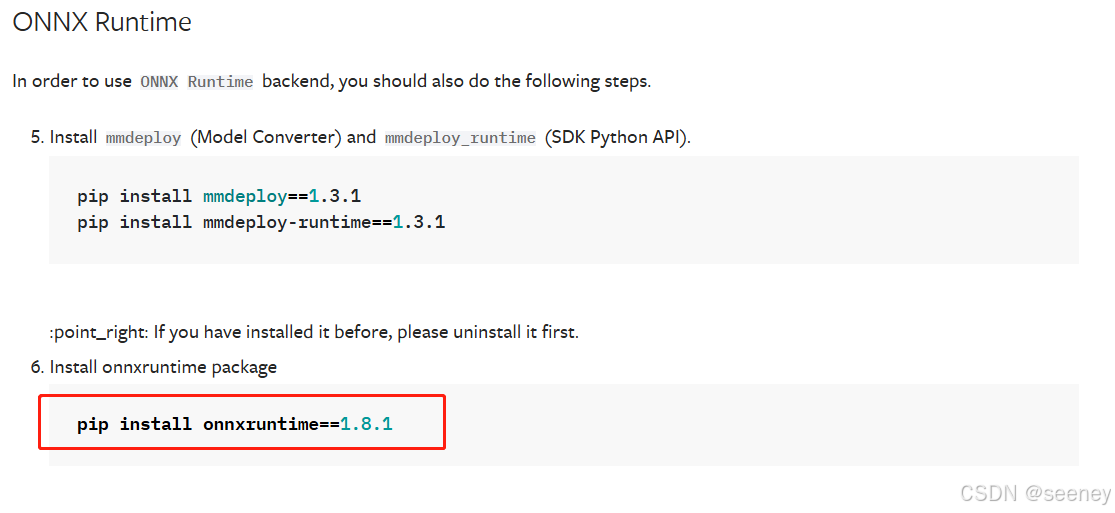
在GitHub ISSUE里是可以搜到的 https://github.com/open-mmlab/mmdeploy/issues/2491
解决方法: pip install onnxruntime --upgrade

第四个坑

见 https://github.com/open-mmlab/mmdeploy/issues/2694
python sdk验证时,
在这里插入图片描述

  1. onnxruntime,没有结果,也不报错。
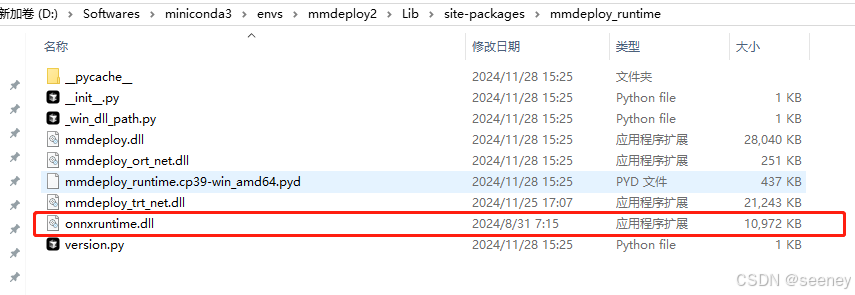
解决方法

替换调虚拟环境中对应包所在文件夹里的onnxruntime.dll
在这里插入图片描述

  1. tensorrt,就是报错,没有找到cuda,无语了。

有没有人知道是怎么解决的?评论区踢我一下。

在这里插入图片描述

第五个坑

好消息,是这个坑解决了,我在编译完example后,发现给的image_classification.exe在cmd运行没有输出结果,在vs里进行打断点也不行,每次进入调试,报的问题还不一样,添加了fprintf看看哪里有问题,发现是apply接口有问题,如image_classification.cpp里的status = mmdeploy_classifier_apply(classifier, &mat, 1, &res, &res_count);classifier.cxx里的classifier.Apply(img);
在这里插入图片描述

解决方法

其实和第三个坑差不多,就是mmdeploy-1.3.1-windows-amd64\thirdparty\onnxruntime\lib自带的onnxruntime.dll版本不对,应该换成咱们在python端能运行对应的onnxruntime版本,去这里下载https://github.com/microsoft/onnxruntime/releases

在这里插入图片描述
在这里插入图片描述

运行成功后,发现结果和python端onnxruntime有点不一样,
这是c sdk的结果
在这里插入图片描述
这是python onnx推理的结果
在这里插入图片描述
这个最终的类别是一样的和类别分数差的不多。

Tips

给个小提示,给可能不知道的伙伴,编译完不是在build/Release下有很多.exe文件嘛,你直接双击是一闪而过,那么你可以通过powershell或者cmd,cd到对应文件夹,然后命令行执行。在cmd执行,会报缺什么具体的dll,powershell不会。咱们这个就只依赖四个dll,如图。
在这里插入图片描述

经验

如果说不报什么错,但就是没结果,像坑5,就是dll版本有问题。

最佳实践

今天我在运行下图时,发现mmdetection根本装不上,害,去https://mmdetection.readthedocs.io/zh-cn/latest/notes/faq.html,发现版本不兼容,因为之前我装的torch2.3.1+cu118,这个搭配的mmcv是2.2.0,但是mmdetection不支持mmcv-2.2.0,硬编出现错误,详见https://github.com/open-mmlab/mmdetection/issues/11926

在这里插入图片描述
mmcv的兼容可见:https://mmcv.readthedocs.io/zh-cn/latest/get_started/installation.html
在这里插入图片描述

最后我还是新建一个虚拟环境

  1. https://mmdetection.readthedocs.io/en/latest/get_started.html按这个操作装完mmdetection,这边给下我的命令,
conda create --name openmmlab python=3.8 -y
conda activate openmmlab
conda install pytorch==2.1.0 torchvision==0.16.0 torchaudio==2.1.0 pytorch-cuda=11.8 -c pytorch -c nvidia
pip install -U openmim
mim install mmengine
pip install mmcv==2.1.0 -f https://download.openmmlab.com/mmcv/dist/cu118/torch2.1/index.html
  1. https://mmdeploy.readthedocs.io/zh-cn/latest/02-how-to-run/prebuilt_package_windows.html
pip install mmdeploy==1.3.1
pip install mmdeploy-runtime==1.3.1
pip install onnxruntime

pip install  TensorRT-8.6.1.6\python\tensorrt-8.6.1-cp38-none-win_amd64.whl
pip install pycuda

git clone -b main https://github.com/open-mmlab/mmdeploy.git
git clone -b main https://github.com/open-mmlab/mmpretrain.git
cd mmpretrain
pip install -e .

基本就是这样,虚拟环境openmmlab里统一一个环境,关键这样直接没有坑4的发生,这个暂时不管了。

再更新下,

虽然mmdetetection装上了,但还是无法把faster-rcnn导出,导出onnx就出错了,https://github.com/open-mmlab/mmdeploy/issues/2819,和这个人的出错一样,但是我和他的环境不一样,单按照他的方法,解决不了我的报错。
于是又新建一个环境,和他安装的包,保持一致,但是我在pip install pycuda时,装不上,pycuda编译好的包是python3.8的,他装的是python3.10,哎,在编译pycuda时,一直报找不到io.h,即使下载源码,在setup里添加对应的include路径,还是有其他找不到,我的vs2019装了win10sdk,vscode也能跳转过去,太奇怪了。
conda install -c conda-forge pycuda倒是可以,但是会装上cudatookit11.8,这个待会试试。

发现:

在装py38新环境的时候,下载比较慢,又试了试当前环境下能不能转出Faster-RCNN的模型,结果可以,哈哈哈。

  1. 不装pycuda的话,https://mmdeploy.readthedocs.io/zh-cn/latest/02-how-to-run/prebuilt_package_windows.html操作均无问题;
  2. 命令python mmdeploy/tools/deploy.py mmdeploy/configs/mmdet/detection/detection_tensorrt_dynamic-320x320-1344x1344.py mmdetection/configs/faster_rcnn/faster-rcnn_r50_fpn_1x_coco.py checkpoints/faster_rcnn_r50_fpn_1x_coco_20200130-047c8118.pth mmdetection/demo/demo.jpg --work-dir mmdeploy_model/faster-rcnn --device cuda --dump-info居然没问题。
  3. 待更新。

只能再再新建环境了,淦。

conda create -n openmmlab3 python=3.8
conda activate openmmlab3
pip install torch==1.13.1+cu117 torchvision==0.14.1+cu117 torchaudio==0.13.1 --extra-index-url https://download.pytorch.org/whl/cu117

评论 3
添加红包

请填写红包祝福语或标题

红包个数最小为10个

红包金额最低5元

当前余额3.43前往充值 >
需支付:10.00
成就一亿技术人!
领取后你会自动成为博主和红包主的粉丝 规则
hope_wisdom
发出的红包
实付
使用余额支付
点击重新获取
扫码支付
钱包余额 0

抵扣说明:

1.余额是钱包充值的虚拟货币,按照1:1的比例进行支付金额的抵扣。
2.余额无法直接购买下载,可以购买VIP、付费专栏及课程。

余额充值