 SpringBoot项目打包与部署


 本文详细介绍如何将SpringBoot项目打包成jar包并部署运行,包括pom文件配置、主启动类修改、资源文件包含及常见错误解决方法。
jar包的打包部署
spring boot可以打成war包和jar包,但是由于spring boot采用前后端分离的形式,加之其有内置汤姆猫,所以打成jar包的方式更加好。楼主是用IDEA,接下来讲讲楼主打包的过程以及过程中踩过的坑
1.pom文件的修改
先指定打包类型:
<packaging>jar</packaging>
然后在pom中需要加入下面这段代码,如果不添加这一段代码,会导致部署的时候找不到启动类
<plugin>
	 <groupId>org.springframework.boot</groupId>
	 <artifactId>spring-boot-maven-plugin</artifactId>
     <configuration>
     <mainClass>此处填入启动类的路径如:com.demo.DemoApplication</mainClass>
     </configuration>
</plugin>
如果打包的时候出现如下错误:
Failed to execute goal
org.apache.maven.plugins:maven-surefire-plugin:2.22.1:test
(default-test) on project cms: There are test failures.
[ERROR] Tests run: 1, Failures: 0, Errors: 1, Skipped: 0
[INFO]
[INFO] ------------------------------------------------------------------------
[INFO] BUILD FAILURE
[INFO] ------------------------------------------------------------------------
[INFO] Total time: 01:16 min
[INFO] Finished at: 2019-02-19T10:11:10+08:00
[INFO] ------------------------------------------------------------------------
[ERROR] Failed to execute goal org.apache.maven.plugins:maven-surefire-plugin:2.22.1:test (default-test) on project cms: There are test failures.
[ERROR]
[ERROR] Please refer to C:\**\**\target\surefire-reports for the individual test results.
[ERROR] Please refer to dump files (if any exist) [date].dump, [date]-jvmRun[N].dump and [date].dumpstream.
[ERROR] -> [Help 1]
[ERROR]
[ERROR] To see the full stack trace of the errors, re-run Maven with the -e switch.
[ERROR] Re-run Maven using the -X switch to enable full debug logging.
[ERROR]
[ERROR] For more information about the errors and possible solutions, please read the following articles:
[ERROR] [Help 1] http://cwiki.apache.org/confluence/display/MAVEN/MojoFailureException

Process finished with exit code 1
解决方案: 在pom中需要加入下面这段代码
<plugin>
	<groupId>org.apache.maven.plugins</groupId>
	<artifactId>maven-surefire-plugin</artifactId>
	<version>2.22.1</version>
	<configuration>
		<skipTests>true</skipTests>
	</configuration>
</plugin>
2.主启动类的修改
在启动类中,继承 SpringBootServletInitializer,并重写configure
public class DemoApplication extends SpringBootServletInitializer
@Override//为了打包springboot项目
    protected SpringApplicationBuilder configure(
            SpringApplicationBuilder builder) {
        return builder.sources(this.getClass());
    }
3.yml或者property的修改
在yml中配置端口以及数据库连接等信息,这些就不用多说了吧!
4.打包
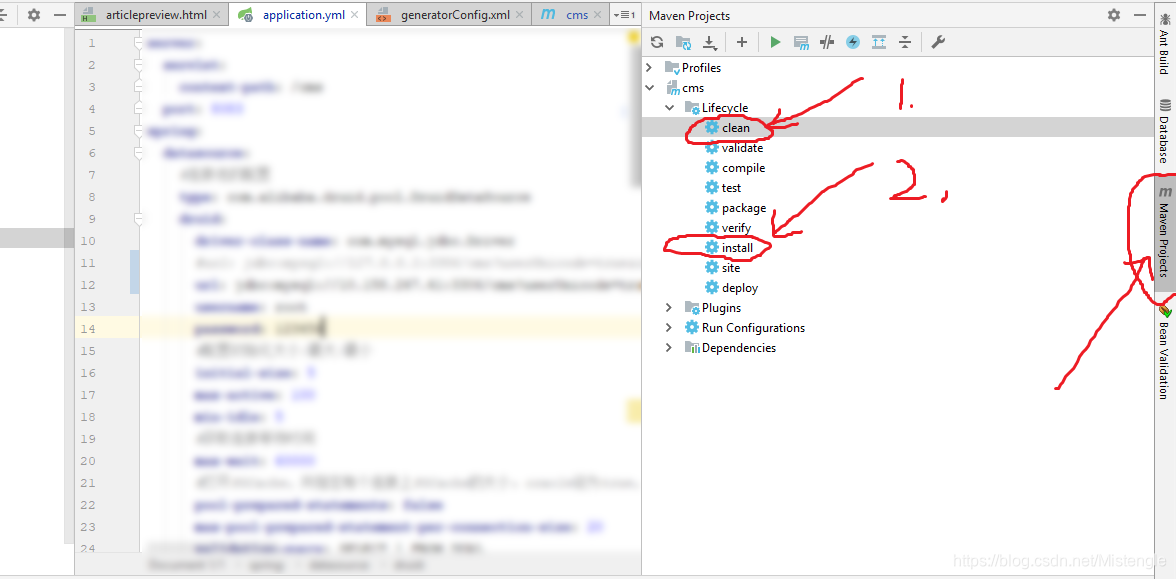
完成以上三个步骤就可以去打包了,楼主使用的是IDEA,直接用软件进行打包
点击maven后先clean再install
或者
使用命令切入到项目的路径下,执行:mvn package 就会自己打包的
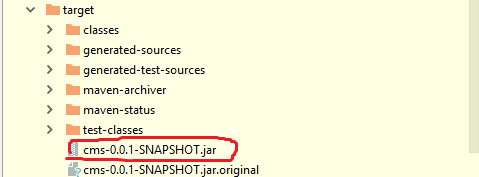
打包完成后在项目输出目录target中可用看到对应的jar包
5.部署运行
得到这个jar包之后,用命令行到jar包的目录下执行
java -jar jar包完整名字
如此,就可以运行起来了!
但是,细心的旁友就会发现我还没有说到我遇到的坑!!!!!
大家先看一下我项目的目录结构
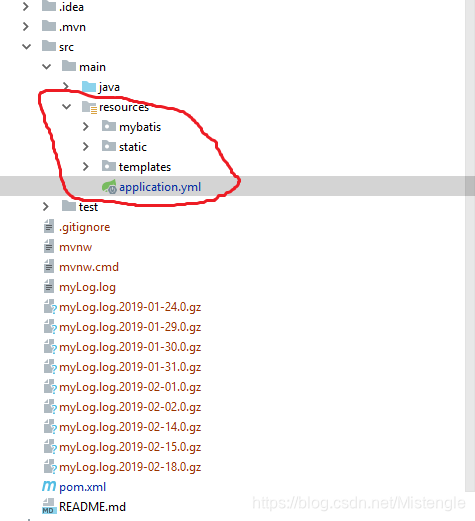
本来,按照上面的步骤确实可以成功运行,也没有报错什么的,但是楼主遇到的坑是什么呢。我的目录结构里面有一个resources文件夹,他是我用来存放静态资源的,我运行之后遇到的坑就是找不到静态资源!!!而且yml的配置也没有读进去,也就是说打包的时候直接忽略掉了这整个resources文件夹,这些根本不在jar包中!!!
解决方案:
<resource>
	<directory>src/main/resources</directory>
	<includes>
		<include>**/*</include>
	</includes>
</resource>


 529
529

 被折叠的 条评论
为什么被折叠?
被折叠的 条评论
为什么被折叠?
 到【灌水乐园】发言


