


 本文详细介绍了如何构建一个完整的前后端分离项目,包括使用Vue.js创建美观页面,设置路由实现页面跳转,以及实现文件上传和下载功能。前端通过Ant Design Vue框架美化页面,配置路由进行页面间导航。后端使用Java编写控制器和服务,处理上传和下载请求。项目完成后,通过npm run dev启动前端,后台以debug模式启动,即可测试功能。
该节主要内容:布置vue页面样式,设置路由,写一个上传下载功能
前端页面和路由
整一个好看的vue页面
1.创建好相关文件夹和文件
components下创建一个api文件夹,里面创建hw.js
components下创建一个vue文件夹,里面创建downloadFile.vue和uploadFile.vue

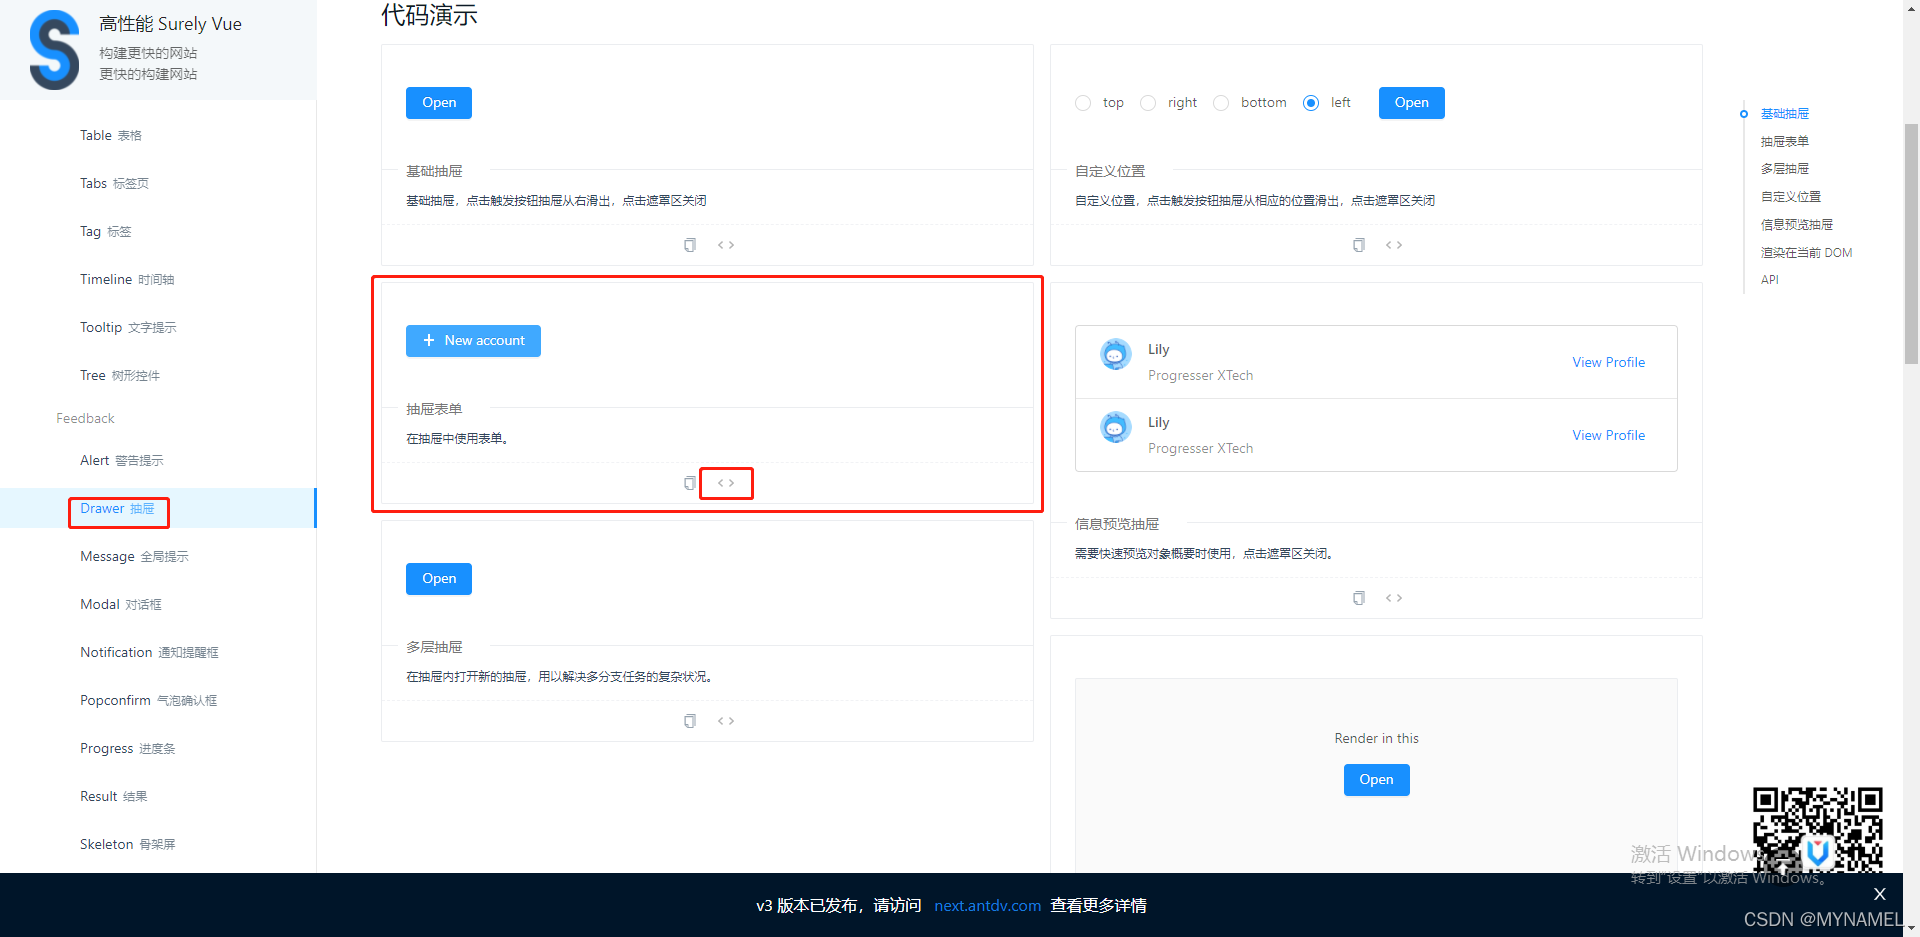
2.访问Ant Design Vue官网选取页面样式,并将样式应用到HelloWorld.vue页面
我选的最后一种基本布局


前端引用该框架代码HelloWorld.vue
给位尽量自己引用试试,不要上来就复制我的代码,自己引用成功后,想怎么布局就怎么布局
<template>
  <div>
    <div id="components-layout-demo-basic">
      <a-layout>
        <a-layout-sider>
          <div>
            <a-menu
              :default-selected-keys="['1']"
              :default-open-keys="['sub1']"
              mode="inline"
            >
              <a-menu-item key="1">
                <a-icon type="pie-chart" />
                <span>
                </span>
              </a-menu-item>
              <a-menu-item key="2">
                <a-icon type="desktop" />
                <span>
                </span>
              </a-menu-item>
              <a-menu-item key="3">
                <a-icon type="inbox" />
                <span>Option 3</span>
              </a-menu-item>
              <a-sub-menu key="sub1">
                <span slot="title"
                  ><a-icon type="mail" /><span>Navigation One</span></span
                >
                <a-menu-item key="5"> Option 5 </a-menu-item>
                <a-menu-item key="6"> Option 6 </a-menu-item>
                <a-menu-item key="7"> Option 7 </a-menu-item>
                <a-menu-item key="8"> Option 8 </a-menu-item>
              </a-sub-menu>
              <a-sub-menu key="sub2">
                <span slot="title"
                  ><a-icon type="appstore" /><span>Navigation Two</span></span
                >
                <a-menu-item key="9"> Option 9 </a-menu-item>
                <a-menu-item key="10"> Option 10 </a-menu-item>
                <a-sub-menu key="sub3" title="Submenu">
                  <a-menu-item key="11"> Option 11 </a-menu-item>
                  <a-menu-item key="12"> Option 12 </a-menu-item>
                </a-sub-menu>
              </a-sub-menu>
            </a-menu>
          </div>
        </a-layout-sider>
        <a-layout>
          <a-layout-header style="height: 150px">
            <a-page-header title="Title" sub-title="This is a subtitle">
              <!-- @back="() => $router.go(-1)" -->
              <template slot="tags">
                <a-tag color="blue"> Running </a-tag>
              </template>
              <template slot="extra">
                <a-button key="3"> 上传 </a-button>
                <a-button key="2"> 下载 </a-button>
                <a-button key="1" type="primary"> 奥里给 </a-button>
              </template>
              <a-row type="flex">
                <a-statistic title="作者" value="L" />
                <a-statistic
                  title="指导老师"
                  prefix="@"
                  value="L"
                  :style="{
                    margin: '0 32px',
                  }"
                />
                <a-statistic title="吃瓜群众" prefix="@" value="各位" />
              </a-row>
            </a-page-header>
          </a-layout-header>
          <a-layout-content style="height: 650px">
            <div>
            </div>
          </a-layout-content>
          <a-layout-footer style="height: 120px">
            <div>
              <h1>---热烈欢迎 吃瓜群众 前来参观指教---</h1>
            </div>
          </a-layout-footer>
        </a-layout>
      </a-layout>
    </div>
    <upload-file ref="uploadFile" />
    <download-file ref="downloadFile" />
  </div>
</template>
<script>
import $ from "jquery";
export default {
  name: "HelloWorld",
  components: {
  },
  data() {
    return {
      result:"123",
    };
  },
  created() {},
  mounted() {},
  watch: {},
  methods: {
  },
};
</script>
<style scoped>
#components-layout-demo-basic {
  text-align: center;
}
#components-layout-demo-basic .ant-layout-header,
#components-layout-demo-basic .ant-layout-footer {
  /* background: #7dbcea; */
  background: #ffffff;
  color: rgb(78, 68, 68);
}
#components-layout-demo-basic .ant-layout-footer {
  line-height: 1.5;
}
#components-layout-demo-basic .ant-layout-sider {
  /* background: #3ba0e9; */
  background: #ffffff;
  color: #fff;
  line-height: 120px;
}
#components-layout-demo-basic .ant-layout-content {
  /* background: rgba(16, 142, 233, 1); */
  background: #ffffff;
  color: #fff;
  min-height: 120px;
  line-height: 120px;
}
#components-layout-demo-basic > .ant-layout {
  margin-bottom: 48px;
}
#components-layout-demo-basic > .ant-layout:last-child {
  margin: 0;
}
</style>
然后在终端运行项目查看结果
npm run dev
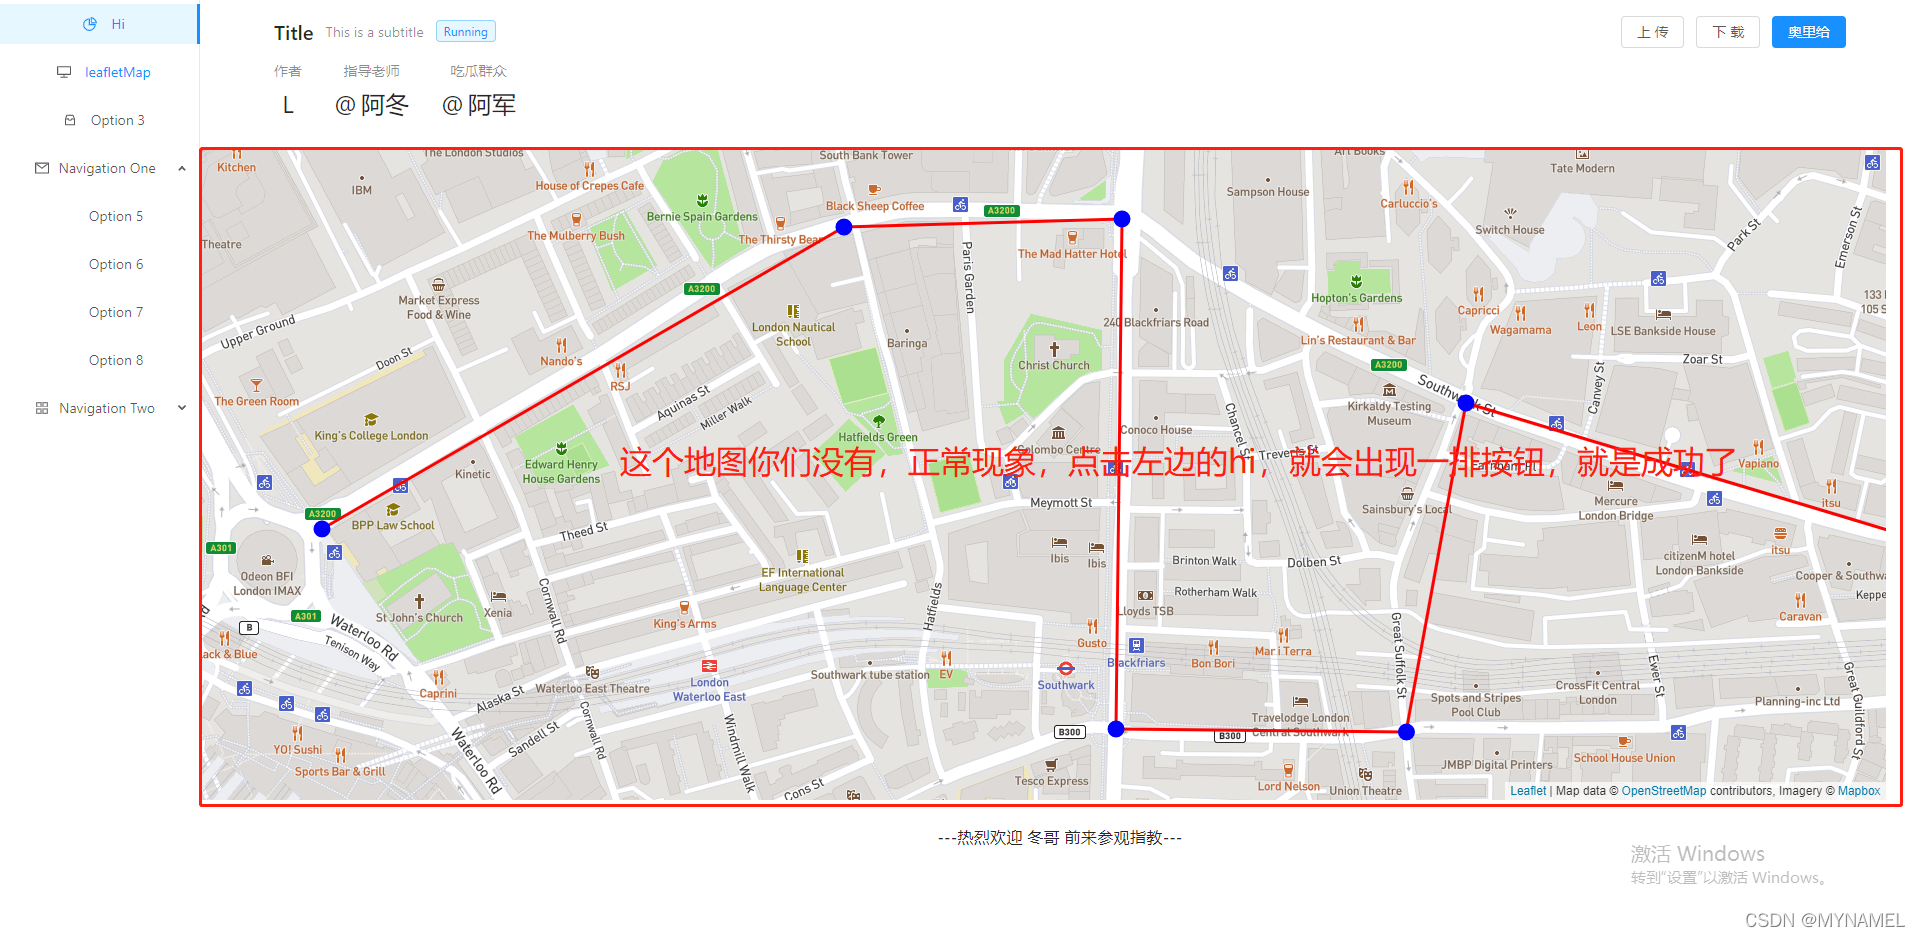
样式图(我的页面样式,我略做了调整,所以和各位的有点不一样都正常,不影响接下来的开发)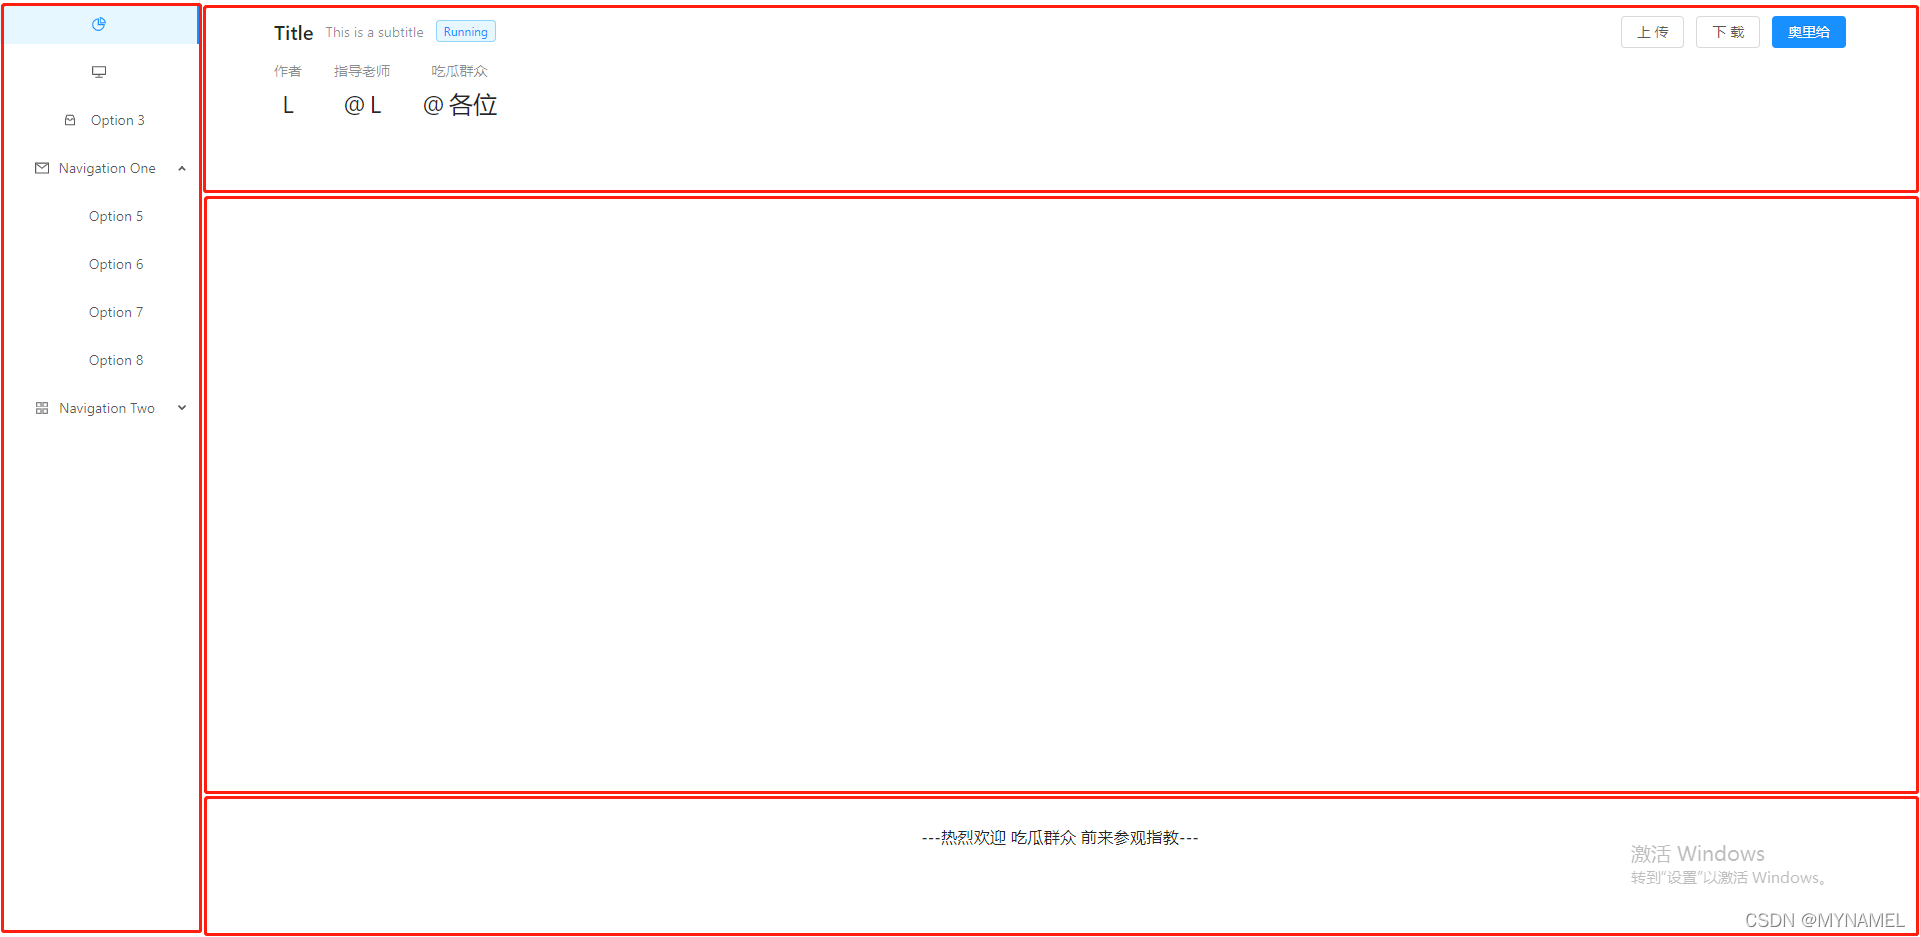
设置页面路由(就是页面跳转)
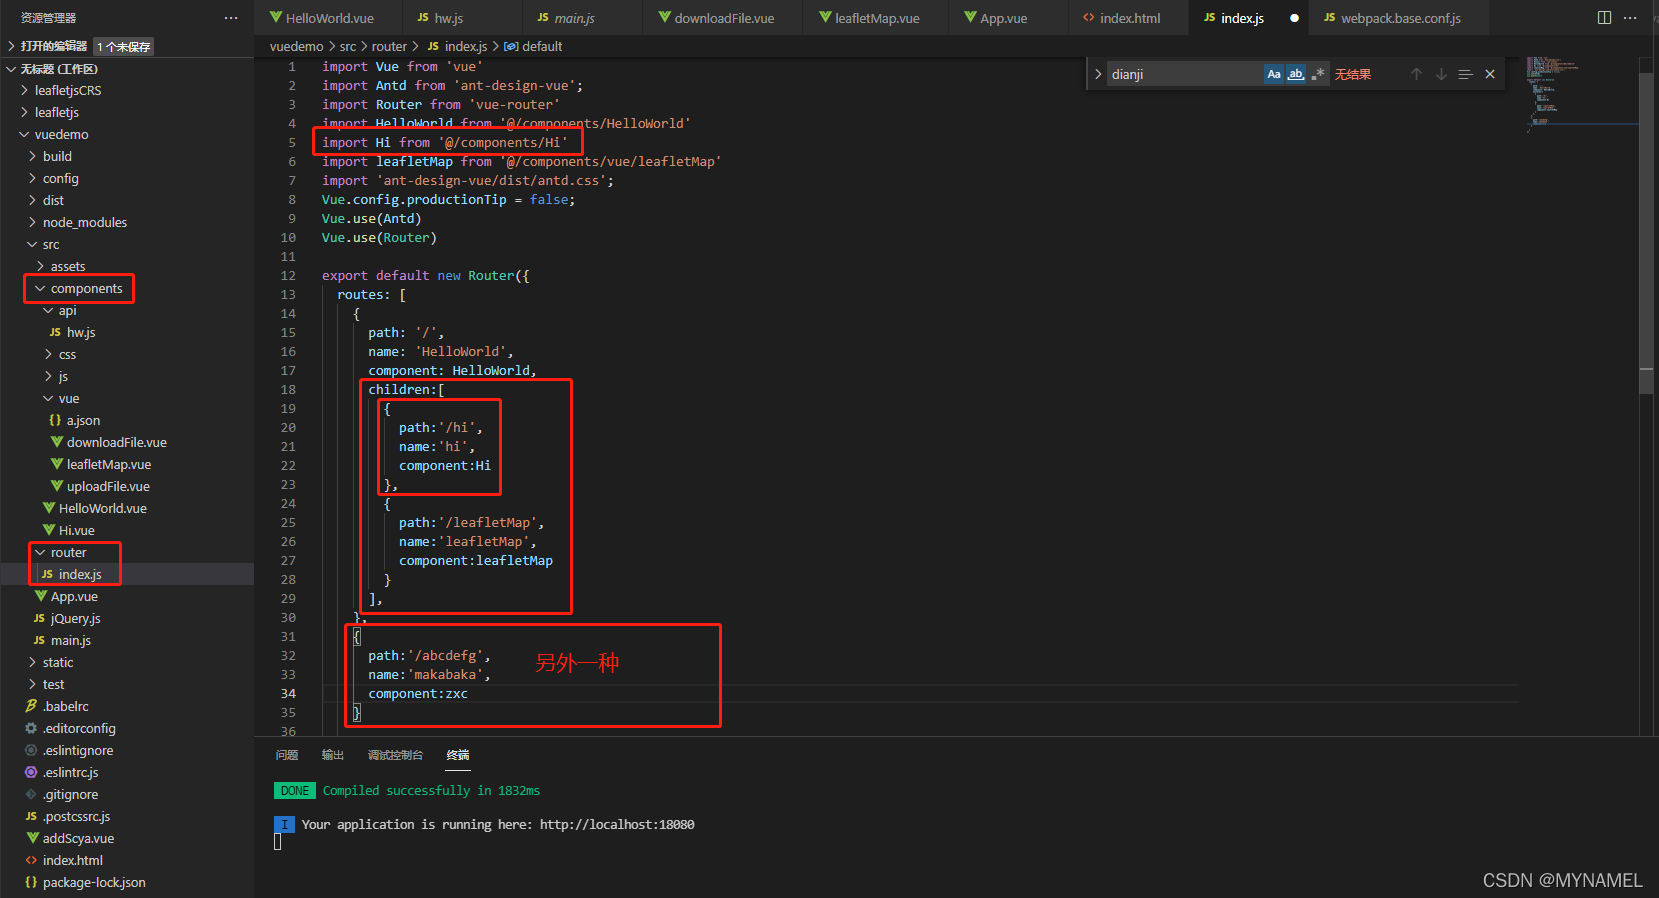
在components–>router–>index.js中配置
import abc from 'bcd'
abc:是你定义的名字(你可以定义为:鸡你太美)
bcd:是引入文件的路径(其中@代表src文件夹,这个是配置的)
{
    path:'/hi',
    name:'hi',
    component:Hi
},
path:就是访问时要填的路径,同鸡你太美,可以随意设置
name:页面名
component:填import里面的鸡你太美
在HelloWorld下面的children配置的路由和与HelloWorld并排配置的abcdefg路由是不一样的,并排配置的路由你用HelloWorld页面访问时,会整体页面都跳转了,就有点像登录页面跳到首页,整个页面都跳转了。我们下面只配置children路由,然后我们试一下。并排的路由后面会用到,有兴趣的白嫖怪可以自己先试试。
在vue文件夹下创建一个Hi.vue(我是创建在和HelloWorld同文件夹下,这样不太好,要规范)
然后按照上述路由要求在router下的index.js中配置文件路由,然后在HelloWorld.vue中引用
Hi.vue的代码
<template>
  <div>
    <div>
      <a-button type="primary"> Primary </a-button>
      <a-button>Default</a-button>
      <a-button type="dashed"> Dashed </a-button>
      <a-button type="danger"> Danger </a-button>
      <a-config-provider :auto-insert-space-in-button="false">
        <a-button type="primary"> 按钮 </a-button>
      </a-config-provider>
      <a-button type="primary"> 按钮 </a-button>
      <a-button type="link"> Link </a-button>
    </div>
  </div>
</template>
<script>
// import { aaa } from "./js/helloWorld";

import $ from "jquery";
// import "./css/leaflet.css";
export default {
  name: "Hi",
  components: {
    // aaa,
  },
  data() {
    return {
      msg: "Welcome to Your Vue.js App",
    };
  },
  created() {},
  mounted() {},
  watch: {},
  methods: {},
};
</script>
<style scoped>
</style>
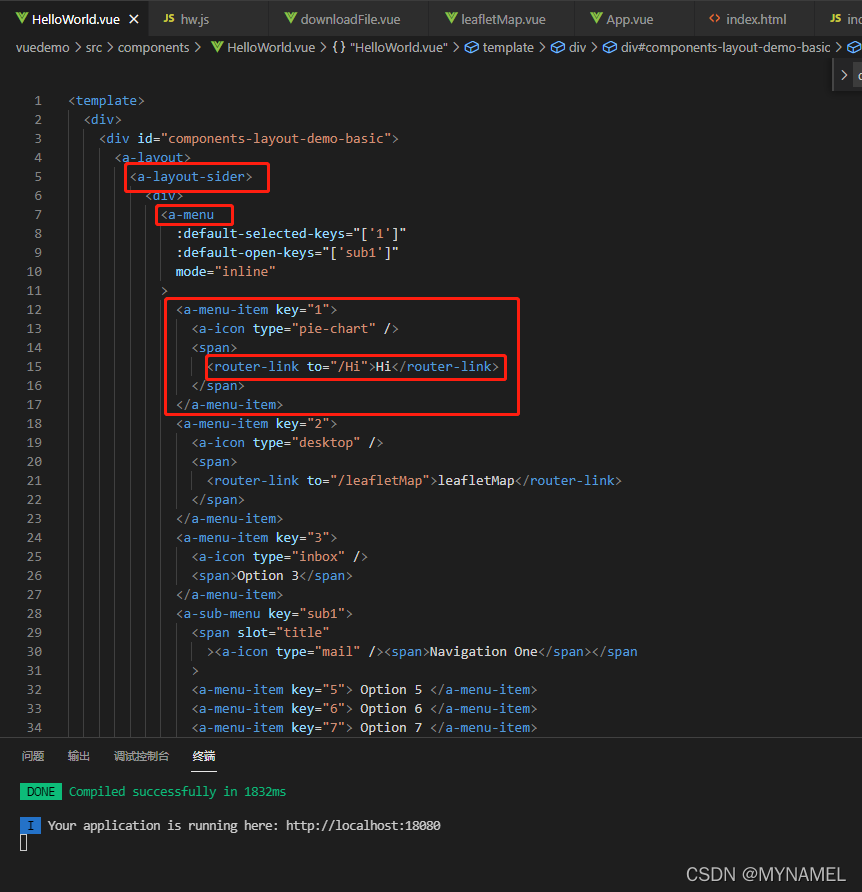
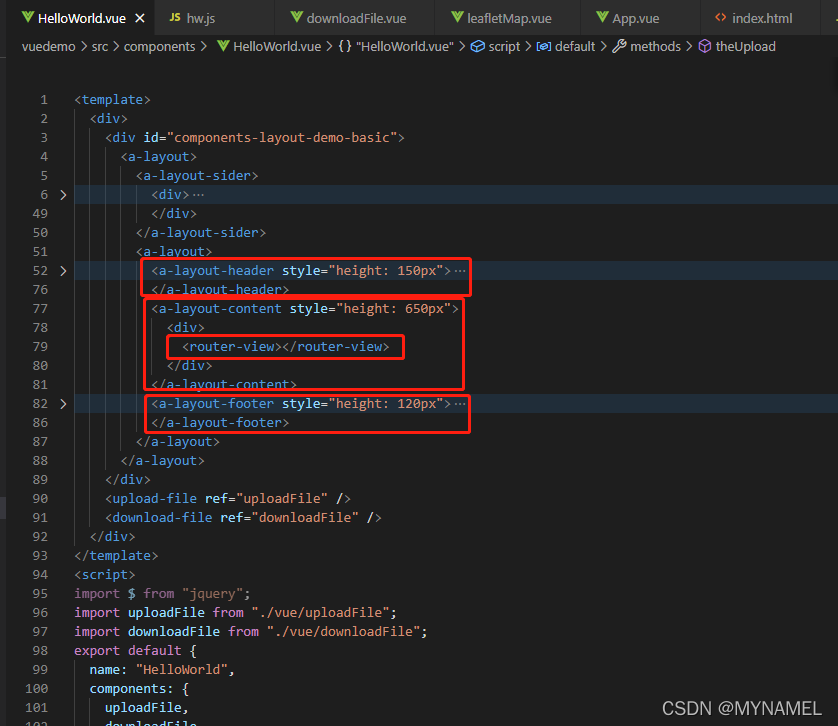
HelloWorld.vue部分代码和位置截图
在a-layout-content标签中加入
<router-view></router-view>
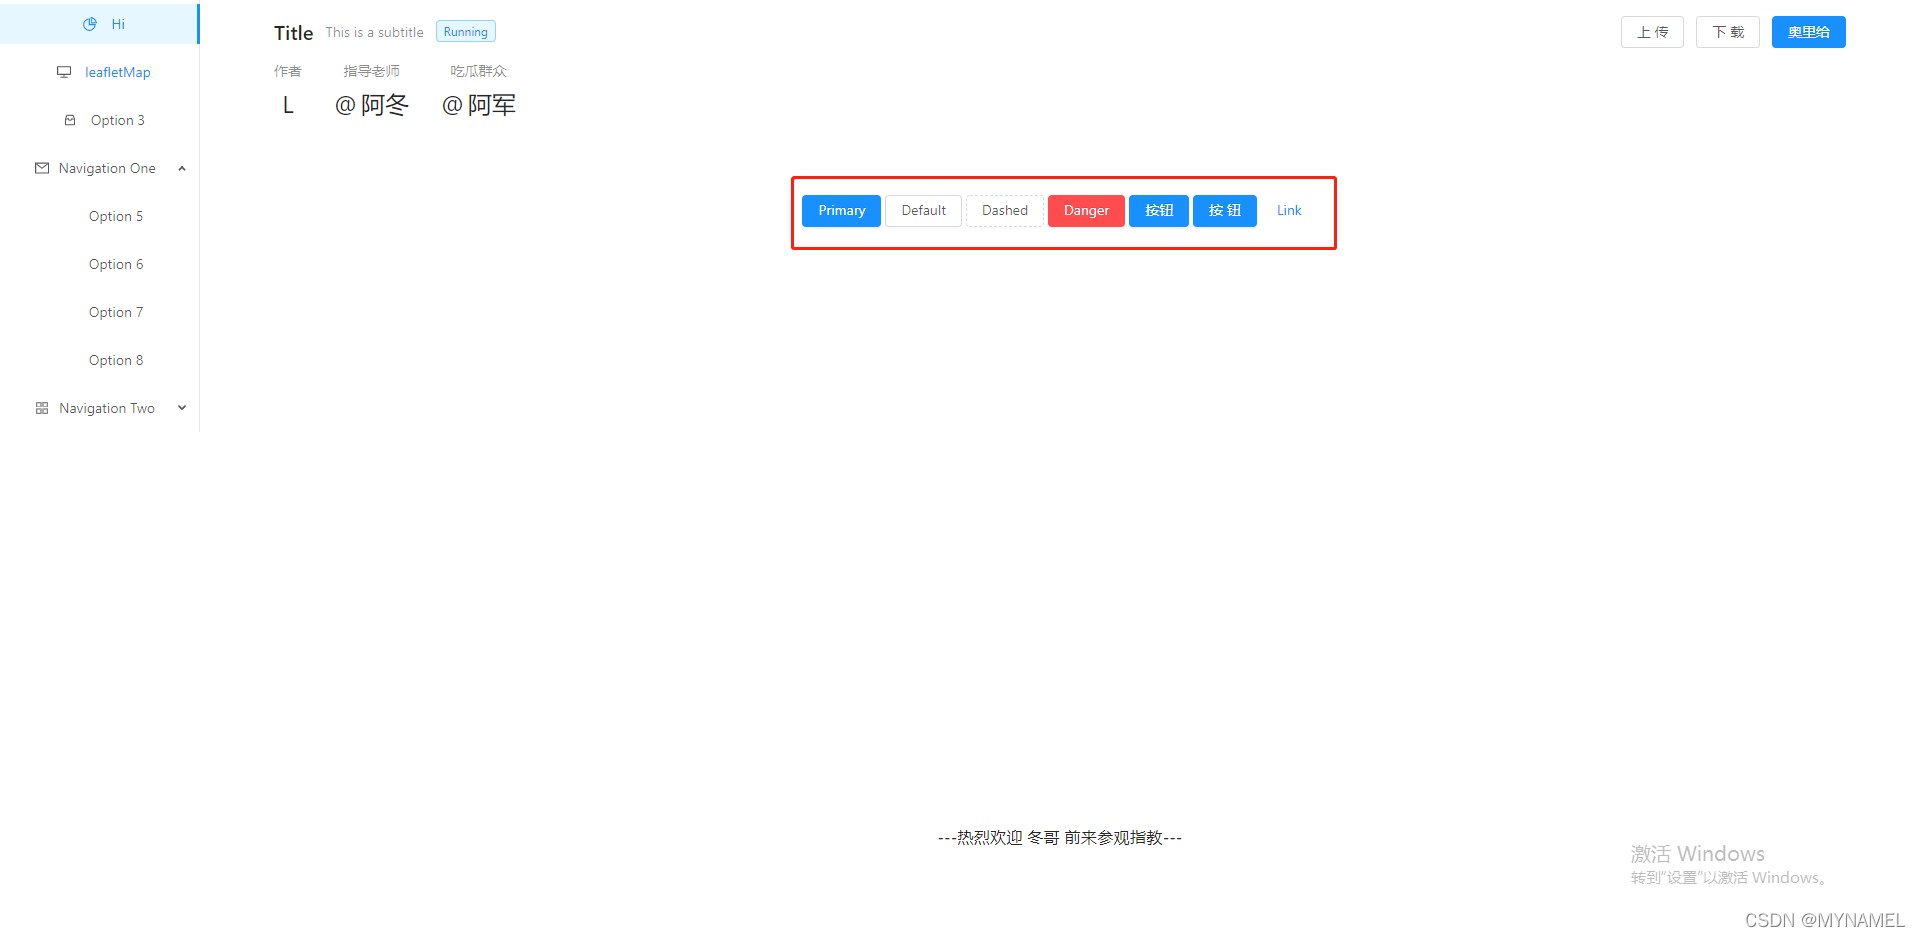
在左边导航栏中加入
<router-link to="/Hi">Hi</router-link>
效果图
想要二维地图,请到该博客我是奔波儿灞你是霸波尔奔
上传和下载前后端代码
前端页面
还记得文章开头我让你们创建的文件夹和文件吧?
在HelloWorld.vue中引入
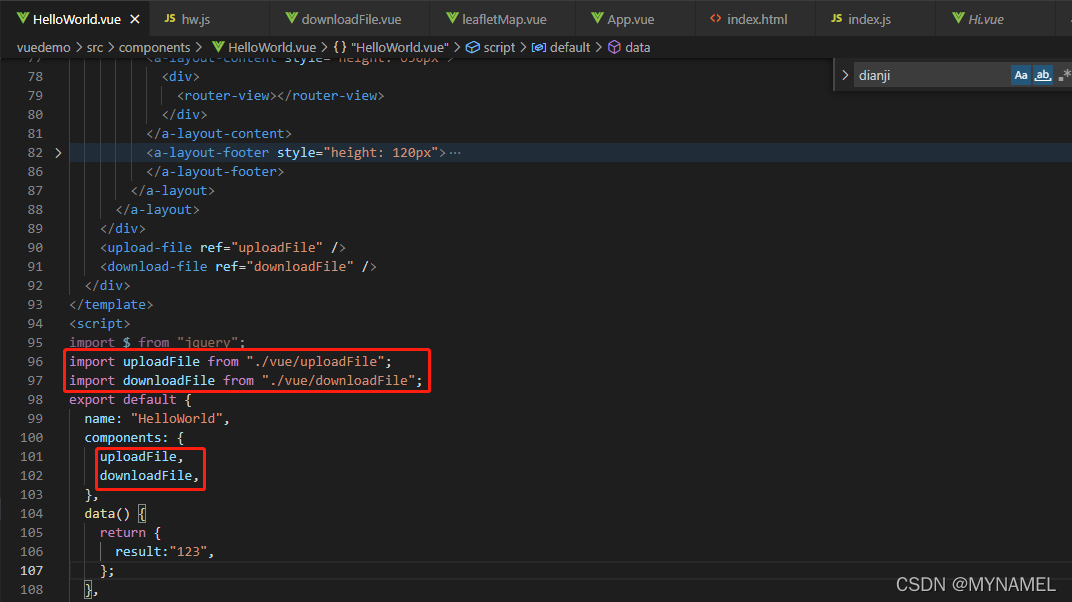
将uploadFile.vue和downloadFile.vue的代码直接复制吧,样式我用的是
downloadFile.vue代码
<template>
  <div>
    <a-drawer
      title="文件下载"
      :width="300"
      :visible="visible"
      :body-style="{ paddingBottom: '80px' }"
      @close="onClose"
    >
      <a-form :form="form" layout="vertical" hide-required-mark>
        <a-row :gutter="16">
          <a-col :span="20">
            <a-form-item label="姓名">
              <a-input
                v-decorator="[
                  'name',
                  { rules: [{ required: true, message: '请输入姓名' }] },
                ]"
                placeholder="请输入姓名"
              />
            </a-form-item>
          </a-col>
        </a-row>
        <a-row>
          <a-col :span="20">
            <a-form-item label="暗号">
              <a-input
                v-decorator="[
                  'anhao',
                  { rules: [{ required: true, message: '请输入暗号' }] },
                ]"
                placeholder="请输入暗号"
              />
            </a-form-item>
          </a-col>
        </a-row>
      </a-form>
      <div
        :style="{
          position: 'absolute',
          right: 0,
          bottom: 0,
          width: '100%',
          borderTop: '1px solid #e9e9e9',
          padding: '10px 16px',
          background: '#fff',
          textAlign: 'right',
          zIndex: 1,
        }"
      >
        <a-button @click="onClose">关闭</a-button>
        <a-button type="primary" @click="handleSave()"> 提交 </a-button>
      </div>
    </a-drawer>
  </div>
</template>
<script>
import jquery from "jquery";
import moment from "moment";
import { downloadFile } from "../api/hw";
export default {
  name: "downloadFile",
  components: {},
  data() {
    return {
      moment,
      form: this.$form.createForm(this),
      visible: false,
    };
  },
  created() {
    console.log(jquery);
  },
  methods: {
    downloadfilea() {
      debugger;
      this.form.validateFields((err, values) => {
        var val = values.name;
        window.open(
          "http://127.0.0.1:19080/allController/download?fileName=" + val,
          "_blank"
        );
      });
    },
    open() {
      this.visible = true;
    },
    showDrawer() {
      this.visible = true;
    },
    onClose() {
      this.visible = false;
    },
    handleSave() {
      this.form.validateFields((err, values) => {
        if (err) {
          return;
        }
        console.log("download values", values);
        downloadFile(values).then((res) => {
          console.log("res", res);

          window.open(res.data);
          if (res.status == 200) {
            this.$message.success("下载成功");
            this.form.resetFields(); //清除form表单数据
            // window.open(fileDownloadUrl);
          } else {
            this.$message.error(res.data);
          }
        });
      });
    },
  },
};
</script>
uploadFile.vue代码
<template>
  <div>
    <a-drawer
      title="文件上传"
      :width="300"
      :visible="visible"
      :body-style="{ paddingBottom: '80px' }"
      @close="onClose"
    >
      <a-form :form="form" layout="vertical" hide-required-mark>
        <a-row :gutter="16">
          <a-col :span="20">
            <a-form-item label="姓名">
              <a-input
                v-decorator="[
                  'name',
                  {
                    rules: [{ required: true, message: '请输入姓名' }],
                  },
                ]"
                placeholder="请输入姓名"
              />
            </a-form-item>
          </a-col>
        </a-row>
        <a-row>
          <a-col :span="20">
            <a-form-item label="暗号">
              <a-input
                v-decorator="[
                  'anhao',
                  {
                    rules: [{ required: true, message: '请输入暗号' }],
                  },
                ]"
                placeholder="请输入暗号"
              />
            </a-form-item>
          </a-col>
        </a-row>
        <a-row>
          <a-upload
            v-decorator="['file']"
            :beforeUpload="beforeUpload"
            :fileList="fileList"
            :showUploadList="true"
            :remove="handleRemove"
            @change="handleChange"
          >
            <a-button>
              <a-icon type="upload" />
              {{ text }}
            </a-button>
          </a-upload>
        </a-row>
      </a-form>
      <div
        :style="{
          position: 'absolute',
          right: 0,
          bottom: 0,
          width: '100%',
          borderTop: '1px solid #e9e9e9',
          padding: '10px 16px',
          background: '#fff',
          textAlign: 'right',
          zIndex: 1,
        }"
      >
        <a-button @click="onClose">关闭</a-button>
        <a-button type="primary" @click="handleSave"> 提交 </a-button>
      </div>
    </a-drawer>
  </div>
</template>
<script>
import jquery from "jquery";
import moment from "moment";
import { uploadFile } from "../api/hw";
export default {
  name: "uploadFile",
  components: {},
  props: {
    accept: {
      //文件接收的类型
      type: String,
      required: false,
      default: ".pdf,.doc,.docx,.txt",
    },
    uploading: {
      type: Boolean,
      required: false,
      default: false,
    },
    isDraggable: {
      type: Boolean,
      required: false,
      default: false,
    },
    handleImport: {
      type: Function,
      required: false,
      default: undefined,
    },
    fileNum: {
      type: Number,
      required: false,
      default: 1,
    },
    text: {
      type: String,
      required: false,
      default: "选择文件",
    },
    action: {
      type: Function,
      default: () => {},
      required: false,
    },
  },
  data() {
    return {
      moment,
      form: this.$form.createForm(this),
      visible: false,
      fileList: [],
      uploadFile: {},
    };
  },
  created() {
    console.log(jquery);
  },
  methods: {
    beforeUpload(file) {
      // this.fileList = [...this.fileList, file]
      return false;
    },
    //上传文件-删除
    handleRemove(file) {
      const index = this.fileList.indexOf(file);
      const newFileList = this.fileList.slice();
      newFileList.splice(index, 1);
      this.fileList = newFileList;
    },
    handleChange(info) {
      console.log(info, "文件");
      let fileList = info.fileList;
      this.uploadFile = info.fileList[0];
      fileList && (fileList = fileList.slice(-this.fileNum));
      fileList && (this.fileList = fileList);
      console.log("fileList", fileList);
    },
    open() {
      this.visible = true;
    },
    showDrawer() {
      this.visible = true;
    },
    onClose() {
      this.visible = false;
    },
    handleSave() {
      this.form.validateFields((err, values) => {
        if (err) {
          return;
        }
        const formData = new FormData();
        if (this.fileList.length > 0) {
          formData.append("file", this.fileList[0].originFileObj);
          formData.append("filePathName", this.fileList[0].name);
        } else {
          return this.$message.error("请选择上传文件");
        }
        formData.append("name", values.name);
        formData.append("anhao", values.anhao);
        formData.append(
          "reportStr",
          moment(values.reportStr).format("YYYY-MM-DD")
        );
        console.log("formData", formData);
        uploadFile(formData).then((res) => {
          // var result = JSON.stringify(res);
          // console.log("result",result);
          console.log("res", res);
          if (res.status == 200) {
            this.$message.success("保存成功");
            //       this.$router.go(-1);
            this.form.resetFields(); //清除form表单数据
          } else {
            //     this.dataLoading = false;
            this.$message.error(res.data);
          }
        });
      });
    },
  },
};
</script>
hw.js代码(请求我建议最好能用post的都用post,很多项目是要求不能用get传递信息的)
记得将网址和端口号改成自己后台的,别啥都没改,报错了还找不到错误
//let parameter ={ username:'dashuaige',password:'123456' }
//这种后台接到的是一个对象
import axios from 'axios'

const address = {
    theUrl: `http://localhost:19080/allController/`,
}

export function uploadFile(parameter) {
    return axios({
        url: address.theUrl + 'upload',
        method: 'post',
        headers: { 'Content-Type': 'application/form-data;charset=UTF-8', },
        data: parameter
    })
}

export function downloadFile(parameter) {
    return axios({
        url: address.theUrl + 'download',
        method: 'post',
        // headers: { 'Content-Type': 'application/form-data;charset=UTF-8', },
        data: parameter
    })
}

export function dianji() {
    return axios({
        url: address.theUrl + 'dianji',
        method: 'post',
        data: null
    })
}
后台代码
特别注意:文中所有的本地地址和文件还有代码中涉及的地址和文件,你要是没有,你就创建或者换成自己的,别代码复制上去就不管了。
创建一个util文件夹,然后里面创建一个类,代码如下(代码在图片的下面,别对着图片敲,哈尼)
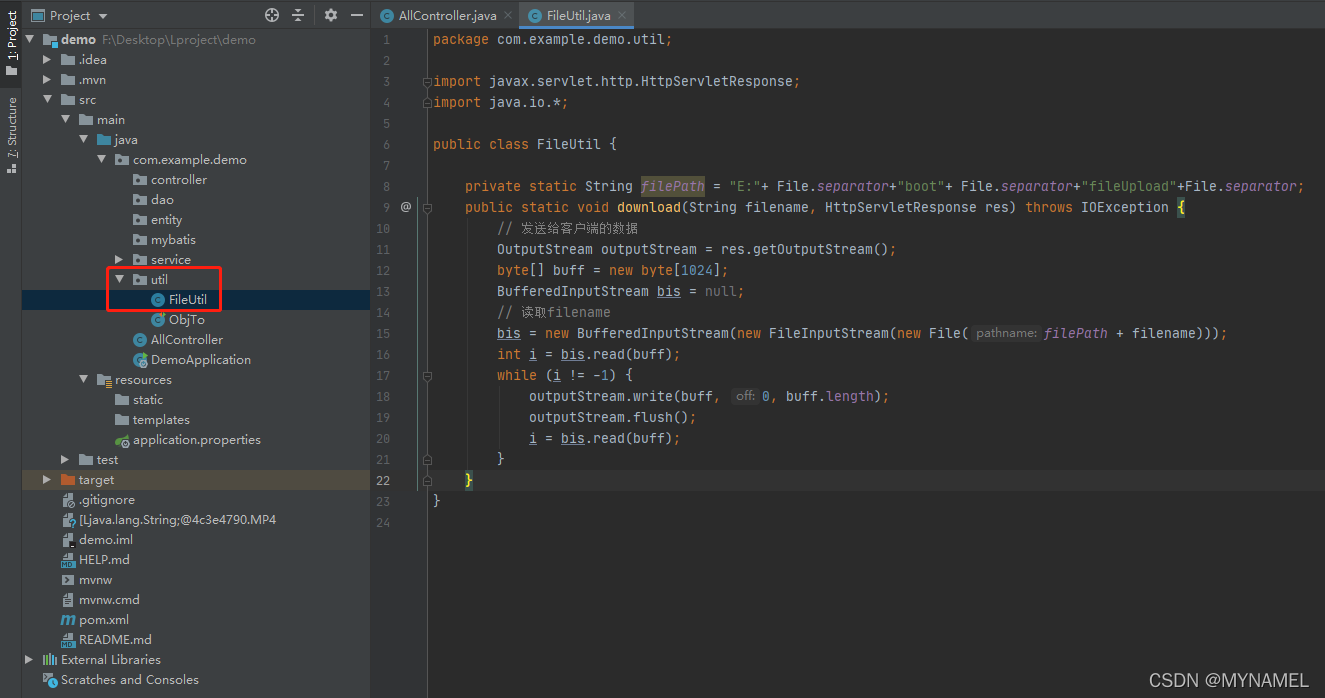
package com.example.demo.util;

import javax.servlet.http.HttpServletResponse;
import java.io.*;

public class FileUtil {

    private static String filePath = "E:"+ File.separator+"boot"+ File.separator+"fileUpload"+File.separator;
    public static void download(String filename, HttpServletResponse res) throws IOException {
        // 发送给客户端的数据
        OutputStream outputStream = res.getOutputStream();
        byte[] buff = new byte[1024];
        BufferedInputStream bis = null;
        // 读取filename
        bis = new BufferedInputStream(new FileInputStream(new File(filePath + filename)));
        int i = bis.read(buff);
        while (i != -1) {
            outputStream.write(buff, 0, buff.length);
            outputStream.flush();
            i = bis.read(buff);
        }
    }
}
创建一个AllController.java类,位置如下,我建议你创建进controller文件夹里面(没有该文件夹你就创建一个,这个不用我教你吧?)(代码在图片下面,说第二次了,giao~)
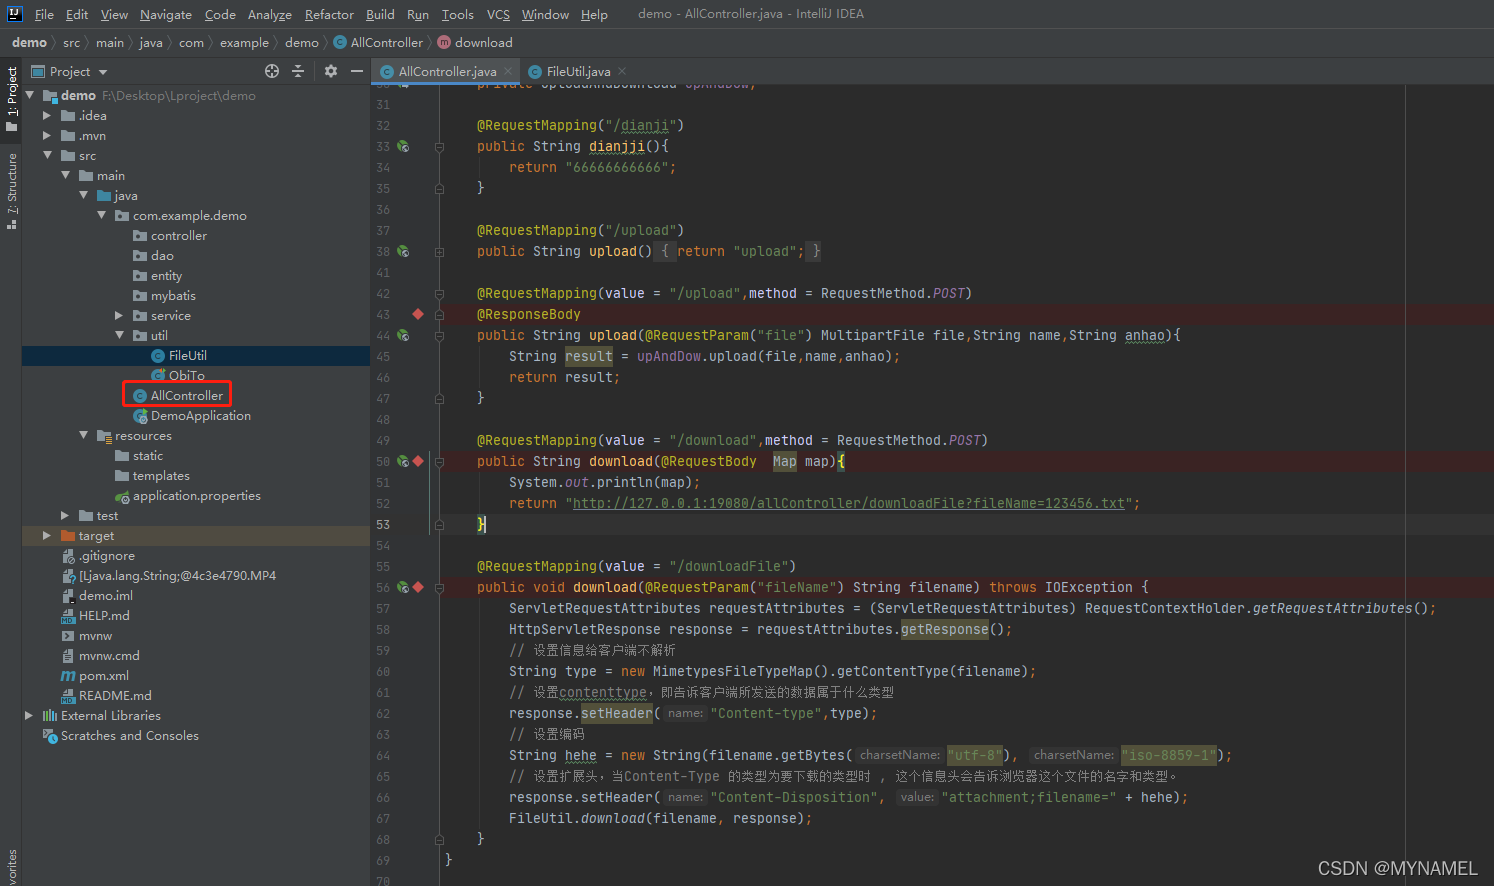
Controller层
package com.example.demo;

import com.example.demo.service.UploadAndDownload;
import com.example.demo.util.FileUtil;
import org.springframework.beans.factory.annotation.Autowired;
import org.springframework.web.bind.annotation.*;
import org.springframework.web.context.request.RequestContextHolder;
import org.springframework.web.context.request.ServletRequestAttributes;
import org.springframework.web.multipart.MultipartFile;

import javax.activation.MimetypesFileTypeMap;
import javax.servlet.http.HttpServletResponse;
import java.io.File;
import java.io.IOException;
import java.nio.file.Files;
import java.nio.file.Path;
import java.nio.file.Paths;
import java.util.Map;

@RequestMapping("allController")
@RestController
@CrossOrigin
public class AllController {


    //    定义文件存放的父文件夹路径
    private static String parentPath = "E:"+File.separator+"boot"+ File.separator+"fileUpload";

    @Autowired
    private UploadAndDownload upAndDow;

    @RequestMapping("/dianji")
    public String dianjji(){
        return "66666666666";
    }

    @RequestMapping("/upload")
    public String upload(){
        return "upload";
    }

    @RequestMapping(value = "/upload",method = RequestMethod.POST)
    @ResponseBody
    public String upload(@RequestParam("file") MultipartFile file,String name,String anhao){
        String result = upAndDow.upload(file,name,anhao);
        return result;
    }

    @RequestMapping(value = "/download",method = RequestMethod.POST)
    public String download(@RequestBody  Map map){
        System.out.println(map);
        return "http://127.0.0.1:19080/allController/downloadFile?fileName=123456.txt";
    }

    @RequestMapping(value = "/downloadFile")
    public void download(@RequestParam("fileName") String filename) throws IOException {
        ServletRequestAttributes requestAttributes = (ServletRequestAttributes) RequestContextHolder.getRequestAttributes();
        HttpServletResponse response = requestAttributes.getResponse();
        // 设置信息给客户端不解析
        String type = new MimetypesFileTypeMap().getContentType(filename);
        // 设置contenttype,即告诉客户端所发送的数据属于什么类型
        response.setHeader("Content-type",type);
        // 设置编码
        String hehe = new String(filename.getBytes("utf-8"), "iso-8859-1");
        // 设置扩展头,当Content-Type 的类型为要下载的类型时 , 这个信息头会告诉浏览器这个文件的名字和类型。
        response.setHeader("Content-Disposition", "attachment;filename=" + hehe);
        FileUtil.download(filename, response);
    }
}
Service层
package com.example.demo.service;

import com.example.demo.dao.AllMapper;
import com.example.demo.entity.FileEntity;
import org.springframework.beans.factory.annotation.Autowired;
import org.springframework.stereotype.Service;
import org.springframework.web.multipart.MultipartFile;

import java.io.File;
import java.io.IOException;
import java.util.Date;
import java.util.List;

@Service
public class AllService {
    @Autowired
    private AllMapper allMapper;

    //    定义文件存放的父文件夹路径
    private static String parentPath = "E:"+File.separator+"boot"+ File.separator+"fileUpload";


    //上传
    public String upload(MultipartFile file,String name,String anhao){
        boolean isEmpty = file.isEmpty();
        long fileSize = file.getSize();
        System.out.println("isEmpty:"+isEmpty+"  fileSize:"+fileSize);
        if (file.isEmpty()){
            return "不可传输空文件";
        }
//        else if(file.getSize()>1000){return "文件太大";}
        else{
//          获取文件原名
            String originalFilename = file.getOriginalFilename();

//          获取源文件前缀
            String fileNamePrefix = originalFilename.substring(0,originalFilename.lastIndexOf("."));

//          获取源文件后缀
            String fileNameSuffix = originalFilename.substring(originalFilename.lastIndexOf("."));

//          将源文件前缀之后加上时间戳避免重名
            String newFileNamePrefix = fileNamePrefix.concat(String.valueOf(new Date().getTime()));

//          得到上传后新文件的文件名
            String newFileName = newFileNamePrefix+fileNameSuffix;

//          创建一个新的File对象用于存放上传的文件
            File fileNew = new File(parentPath+File.separator+newFileName);
            try {
                file.transferTo(fileNew);
            } catch (IOException e) {
                e.printStackTrace();
            }

//          存数据库
            FileEntity fileEntity = new FileEntity();
            fileEntity.setFileName(newFileName);
            fileEntity.setFileSize(String.valueOf(file.getSize()));
            System.out.println("file.getSize()"+file.getSize());
            fileEntity.setUploadTime(new Date());
            fileEntity.setFilePath(parentPath+File.separator+newFileName);
            allMapper.addFile(fileEntity);
        }
        return "上传成功";
    }

    public List selectFiles(FileEntity fileEntity) {
        List fileList = allMapper.selectFiles(fileEntity);
        return fileList;
    }
}
好了,全部整完了,现在启动前后台,然后访问
前台启动,终端里面输入npm run dev

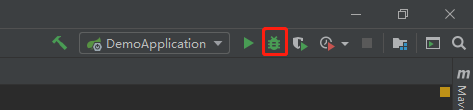
后台启动,点debug启动,别用第一个,用debug是一个好习惯。
效果图


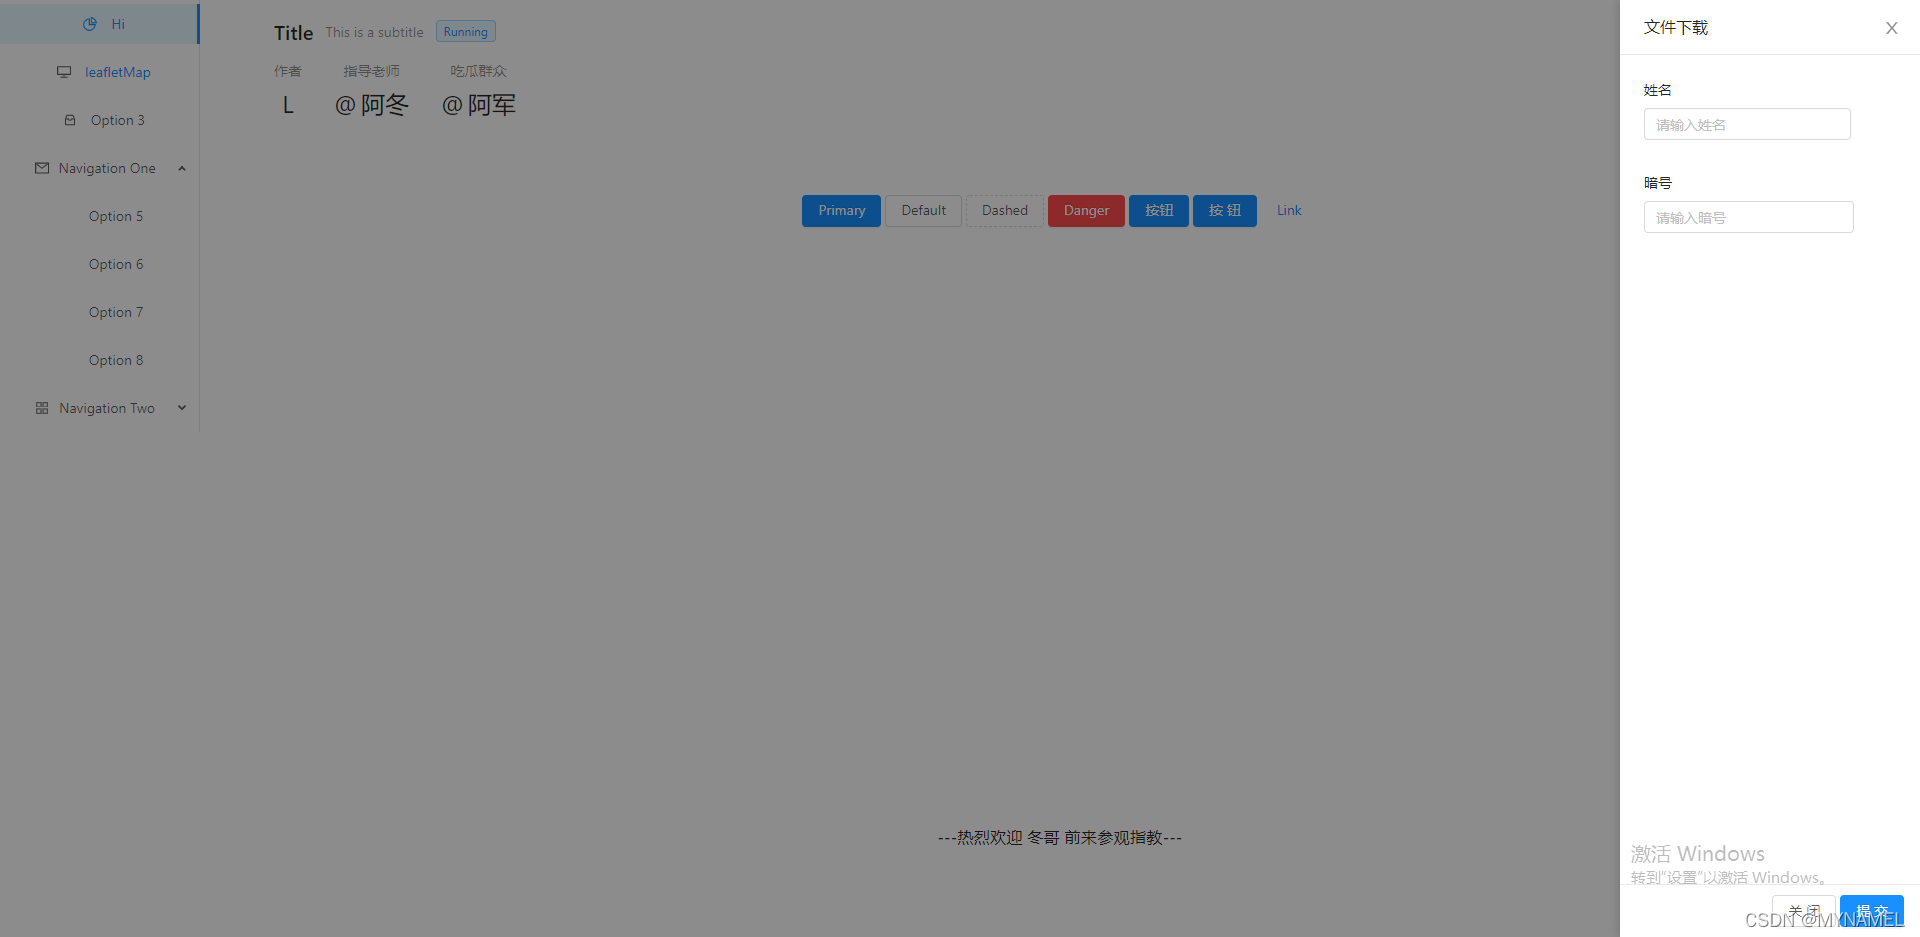
这个名字和暗号是我准备以后用的,和现在的功能点没什么关系,你们随便乱填就行了


 被折叠的 条评论
为什么被折叠?
被折叠的 条评论
为什么被折叠?
 到【灌水乐园】发言


