


1、创建一个虚拟环境(python版本没有要求,但尽量不要太高也不要太低)
2、克隆代码到本地,如下:
https://github.com/mindspore-lab/mindyolo
3、进入mindyolo,pip install -r requirements.txt,还要安装mindspore,这里直接pip install mindspore可以,但是在后面import mindspore时会报一个错,只需要把这个错误复制到优快云上就行,有一个帖子讲解了解决方法,换成了使用conda命令安装。
4、标注数据集,创建数据集文件夹,具体路径如下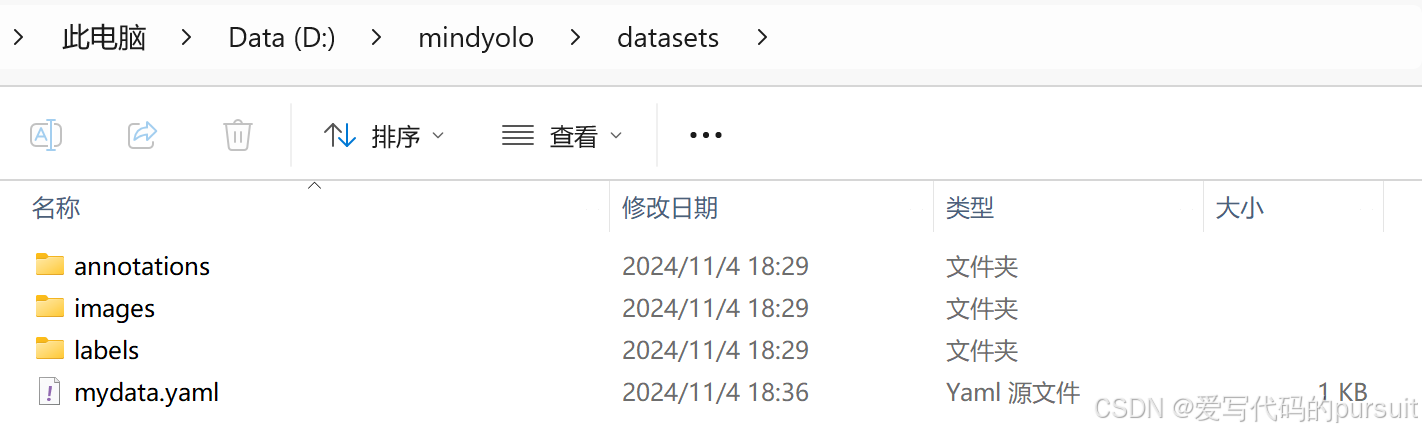
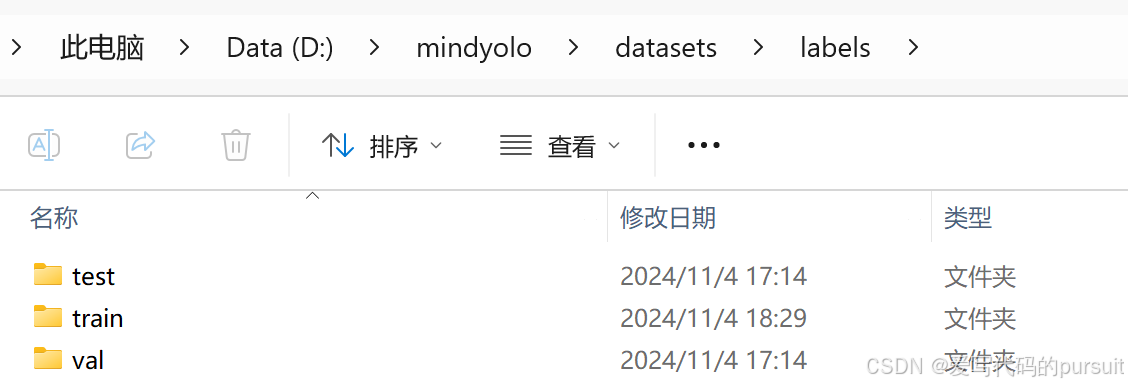
标注数据集,可以使用labelimg,先标注为yolo格式的标签,图片命名暂时不用管。然后将图片和标签都放进对应的文件夹里。为了方便,我只放进train里面,后面yaml的路径也都使用train,annotations里面只需要放后面处理后的json文件,不需要创建文件夹。
5、修改数据集至json文件。
这一步主要是对上一步的标签和图片进行处理。首先要做的是对图片和标签的名称进行更改。我们使用的是examples目录下的rename.py文件,由于路径需要做一些修改,我修改了rename.py文件。(这里的几个文件都很有用,一会还要用)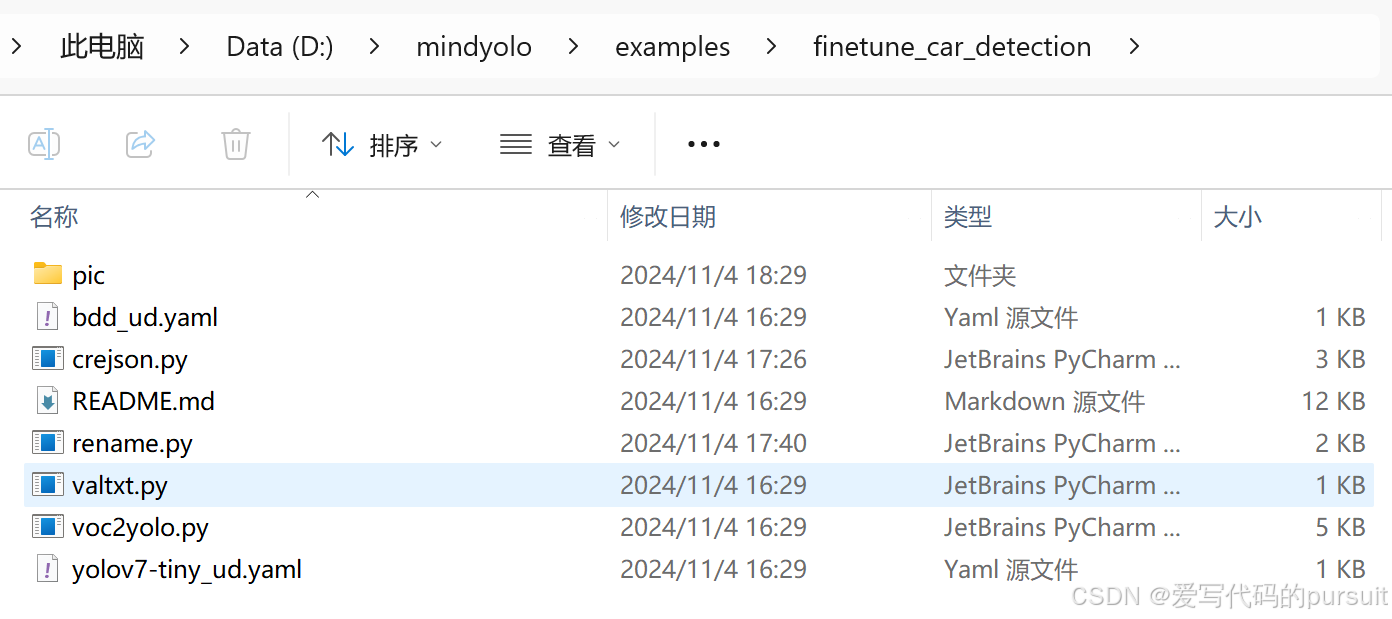
修改后的rename.py文件:
import os

# 指定图片和标签的目录
image_dir = 'D:\\mindyolo\\datasets\\images\\train'
label_dir = 'D:\\mindyolo\\datasets\\labels\\train'

# 指定文件扩展名和起始编号
image_extension = '.jpg'
label_extension = '.txt'
start_num = 1

# 获取当前目录下所有的图片文件
image_files = [f for f in os.listdir(image_dir) if f.endswith(image_extension)]

# 检查标签文件是否存在
label_files = [f.replace(image_extension, label_extension) for f in image_files]

# 确保图片和标签文件列表长度一致
assert len(image_files) == len(label_files), "Images and labels count mismatch"

# 重命名文件
for i, (image_file, label_file) in enumerate(zip(image_files, label_files), start=start_num):
    # 构造新的文件名,使用zfill填充前导零
    new_image_filename = f"{i:06d}{image_extension}"
    new_label_filename = f"{i:06d}{label_extension}"

    # 构建完整的文件路径
    old_image_path = os.path.join(image_dir, image_file)
    new_image_path = os.path.join(image_dir, new_image_filename)
    old_label_path = os.path.join(label_dir, label_file)
    new_label_path = os.path.join(label_dir, new_label_filename)

    # 使用os.rename重命名图片和标签文件
    os.rename(old_image_path, new_image_path)
    os.rename(old_label_path, new_label_path)
    print(f"Renamed '{image_file}' to '{new_image_filename}' and '{label_file}' to '{new_label_filename}'")

print("All images and labels have been renamed.")
修改过名字后,我们继续使用这里的crejson.py文件,将yolo格式的标签转换为COCO格式的json文件,注意这里会生成一个固定名字的json文件,尽量不要改,这样就不需要改其它的py文件。这里还是做一些crejson.py代码的修改:
import os
import json
from PIL import Image

# 设置数据集路径
dataset_path = "D:/mindyolo/datasets"
images_path = os.path.join(dataset_path, "images/train")
labels_path = os.path.join(dataset_path, "labels/train")

# 类别映射
categories = [
{"id": 0, "name": "apple"},
{"id": 1, "name": "banana"},
{"id": 2, "name": "orange"},
{"id": 3, "name": "pear"},
    # 添加更多类别
]


# YOLO格式转COCO格式的函数
def convert_yolo_to_coco(x_center, y_center, width, height, img_width, img_height):
    x_min = (x_center - width / 2) * img_width
    y_min = (y_center - height / 2) * img_height
    width = width * img_width
    height = height * img_height
    return [x_min, y_min, width, height]


# 初始化COCO数据结构
def init_coco_format():
    return {
        "images": [],
        "annotations": [],
        "categories": categories
    }


# 处理每个数据集分区
split=''
coco_format = init_coco_format()
annotation_id = 1
for img_name in os.listdir(os.path.join(images_path, split)):
    if img_name.lower().endswith(('.png', '.jpg', '.jpeg')):
        img_path = os.path.join(images_path, split, img_name)
        label_path = os.path.join(labels_path, split, img_name.replace("jpg", "txt"))

        img = Image.open(img_path)
        img_width, img_height = img.size
        image_info = {
            "file_name": img_name,
            "id": len(coco_format["images"]) + 1,
            "width": img_width,
            "height": img_height
        }
        coco_format["images"].append(image_info)

        if os.path.exists(label_path):
            with open(label_path, "r") as file:
                for line in file:
                    category_id, x_center, y_center, width, height = map(float, line.split())
                    bbox = convert_yolo_to_coco(x_center, y_center, width, height, img_width, img_height)
                    annotation = {
                        "id": annotation_id,
                        "image_id": image_info["id"],
                        "category_id": int(category_id) ,
                        "bbox": bbox,
                        "area": bbox[2] * bbox[3],
                        "iscrowd": 0
                    }
                    coco_format["annotations"].append(annotation)
                    annotation_id += 1

    # 为每个分区保存JSON文件
with open(f"D:/mindyolo/datasets/annotations/instances_val2017.json", "w",encoding='utf-8') as json_file:
    json.dump(coco_format, json_file, indent=4)
注意,所有文件路径,不要出现中文!!!
6、创建mydata.yaml文件,格式仿照如下:
__BASE__: [
  'D:/JupyterNotebook/mindyolo-master/configs/yolov7/yolov7-tiny.yaml', #使用默认的yaml配置文件路径
]
per_batch_size: 16 # 16 * 8 = 128
weight: D:/JupyterNotebook/mindyolo-master/configs/yolov7-tiny.ckpt   # 指定初始权重的位置
strict_load: False
data:
  dataset_name: datasets  # 名字顺便取,但是路径为自己电脑上的
  train_set: D:/JupyterNotebook/mindyolo-master/datasets/images/train
  val_set: D:/JupyterNotebook/mindyolo-master/datasets/images/val
  test_set: D:/JupyterNotebook/mindyolo-master/datasets/images/test
  nc: 2 # 标签个数
  # class names
  names: ['apple', 'banana',]   # 对应你的标签数目
optimizer:
  lr_init: 0.001  # initial learning rate 初始学习率
7、下载D:/JupyterNotebook/mindyolo-master/configs/yolov7-tiny.ckpt ,使用如下地址下载:
https://download.mindspore.cn/toolkits/mindyolo/yolov7/yolov7-tiny_300e_mAP375-d8972c94.ckpt
如果自己有的话也可以直接使用自己的。
8、修改train.py内的device为“CPU”,进行训练。
python train.py --config D:/JupyterNotebook/mindyolo-master/datasets/mydata.yaml --epochs=5 --iou_thres=0.6 --conf_thres=0.25
如果报路径错误,那就一点一点改,报哪个路径错,就改哪个路径。我的数据集大小是近500张图片,四分类,所以在cpu上训练一个epoch要14分钟左右,后面我还会发布在华为云ModelArts上运行的步骤,同样的一个epoch仅需要0.25分钟。
9、去github里面旧版本里下载demo里面的predict.py文件,直接放在mindyolo下就行,要不然会报错。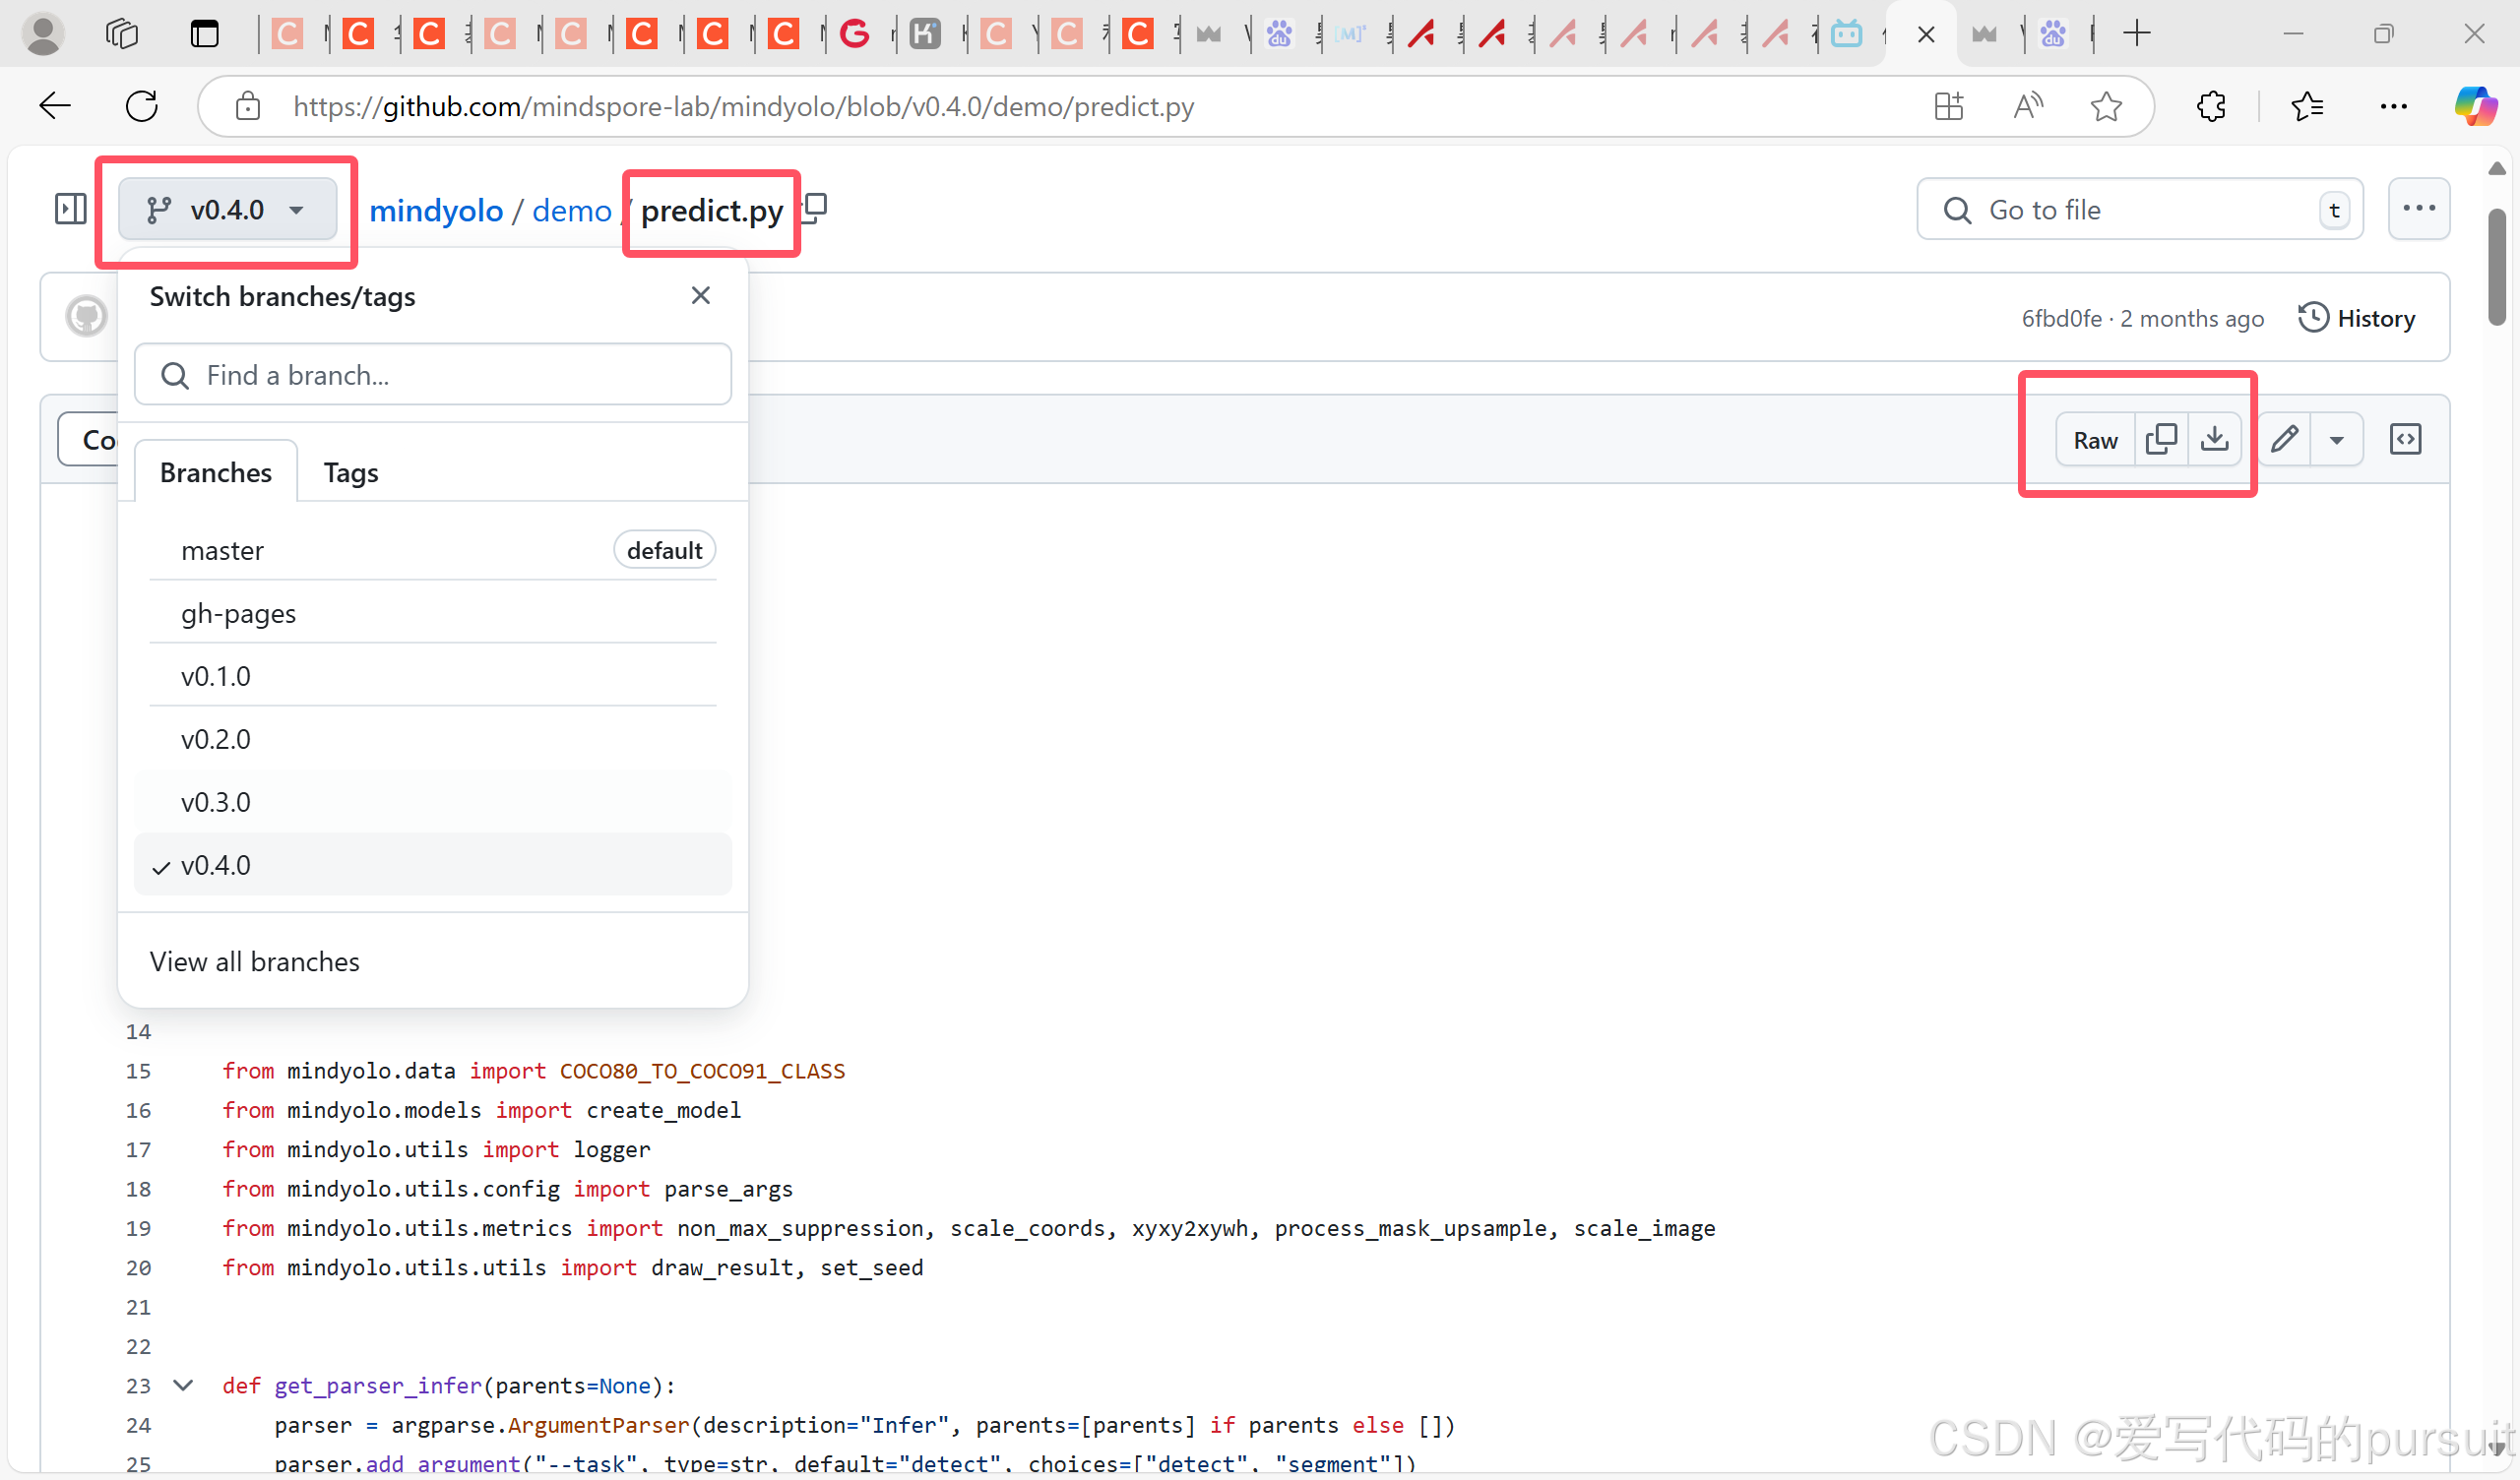
10、运行predict.py文件。
python predict.py --config D:/JupyterNotebook/mindyolo-master/datasets/mydata.yaml --weight=D:/JupyterNotebook/mindyolo-master/datasets/mydata.ckpt --image_path D:/JupyterNotebook/mindyolo-master/datasets/images/train/011.jpg --device_target=CPU --iou_thres=0.5 --conf_thres=0.01


 5001
5001

 被折叠的 条评论
为什么被折叠?
被折叠的 条评论
为什么被折叠?
 到【灌水乐园】发言


