


 本文详细介绍如何在系统中安装Git及SpaceVim,包括使用命令行进行Git的安装,通过curl命令一键安装与卸载SpaceVim,以及SpaceVim在首次启动时自动下载并安装所需插件的过程。
一、安装配置SpaceVim
安装Git
安装SpaceVim前提是主机需要安装git
$ sudo yum install git
安装SpaceVim
$ curl -sLf https://spacevim.org/install.sh | bash
卸载SpaceVim
$ curl -sLf https://spacevim.org/install.sh | bash -s -- --uninstall
安装结束后,初次打开 vim时, SpaceVim 会自动下载并安装插件。
二、更换yum源
1、备份
mv /etc/yum.repos.d/CentOS-Base.repo /etc/yum.repos.d/CentOS-Base.repo.backup
2、下载新的CentOS-Base.repo 到/etc/yum.repos.d/
CentOS 5
wget -O /etc/yum.repos.d/CentOS-Base.repo http://mirrors.aliyun.com/repo/Centos-5.repo
或者
curl -o /etc/yum.repos.d/CentOS-Base.repo http://mirrors.aliyun.com/repo/Centos-5.repo
CentOS 6
wget -O /etc/yum.repos.d/CentOS-Base.repo http://mirrors.aliyun.com/repo/Centos-6.repo
或者
curl -o /etc/yum.repos.d/CentOS-Base.repo http://mirrors.aliyun.com/repo/Centos-6.repo
CentOS 7
wget -O /etc/yum.repos.d/CentOS-Base.repo http://mirrors.aliyun.com/repo/Centos-7.repo
或者 curl -o /etc/yum.repos.d/CentOS-Base.repo http://mirrors.aliyun.com/repo/Centos-7.repo `
3、生成缓存
$ yum clean all
$ yum makecache
三、更换Linux内核
启用ELRepo仓库
# rpm --import https://www.elrepo.org/RPM-GPG-KEY-elrepo.org
# rpm -Uvh http://www.elrepo.org/elrepo-release-7.0-3.el7.elrepo.noarch.rpm
列出可用内核
# yum --disablerepo="*" --enablerepo="elrepo-kernel" list available
安装最新的稳定版本
# yum --enablerepo=elrepo-kernel install kernel-ml
设置默认的内核版本
# vim /etc/default/grub
GRUB_DEFAULT=0
重新创建内核配置
# grub2-mkconfig -o /boot/grub2/grub.cfg
移除旧的内核
# yum remove kernel-3.10.0-862.el7.x86_64
四、修改Linux SSH端口
修改SELinux
如果不修改SELinux直接修改ssh端口,会导致服务无法成功重启
查看SELinux状态
$ sestatus
SELinux status:                 enabled
SELinuxfs mount:                /sys/fs/selinux
SELinux root directory:         /etc/selinux
Loaded policy name:             targeted
Current mode:                   permissive
Mode from config file:          disabled
Policy MLS status:              enabled
Policy deny_unknown status:     allowed
Max kernel policy version:      31
如果SELinux状态为enabled则需要进行第二步添加SSH允许端口,否则可以直接跳过第二步
添加SSH允许端口
# 查看当前允许的ssh端口
$ semanage port -l | grep ssh
# 添加ssh允许端口
$ semanage port -a -t ssh_port_t -p tcp 2222
## 验证ssh端口是否添加成功
$ semanage port -l | grep ssh
ssh_port_t                     tcp      2222, 22
修改ssh配置文件
$ vi /etc/ssh/sshd_config
Port 2222
$ service sshd restart
五、Linux挂载磁盘
1、查看磁盘是否分配
$ fdisk -l
磁盘路径为/dev/vdc
2. 建立分区
$ fdisk /dev/vdc
Welcome to fdisk (util-linux 2.23.2).
Changes will remain in memory only, until you decide to write them.
Be careful before using the write command.
Device does not contain a recognized partition table
Building a new DOS disklabel with disk identifier 0xa7343e4f.
Command (m for help): m
Command action
a toggle a bootable flag
b edit bsd disklabel
c toggle the dos compatibility flag
d delete a partition
g create a new empty GPT partition table
G create an IRIX (SGI) partition table
l list known partition types
m print this menu
n add a new partition
o create a new empty DOS partition table
p print the partition table
q quit without saving changes
s create a new empty Sun disklabel
t change a partition's system id
u change display/entry units
v verify the partition table
w write table to disk and exit
x extra functionality (experts only)
Command (m for help): n
Partition type:
p primary (0 primary, 0 extended, 4 free)
e extended
Select (default p):
Using default response p
Partition number (1-4, default 1):
First sector (2048-209715199, default 2048):
Using default value 2048
Last sector, +sectors or +size{K,M,G} (2048-209715199, default 209715199):
Using default value 209715199
Partition 1 of type Linux and of size 100 GiB is set
Command (m for help): w
The partition table has been altered!
Calling ioctl() to re-read partition table.
Syncing disks.
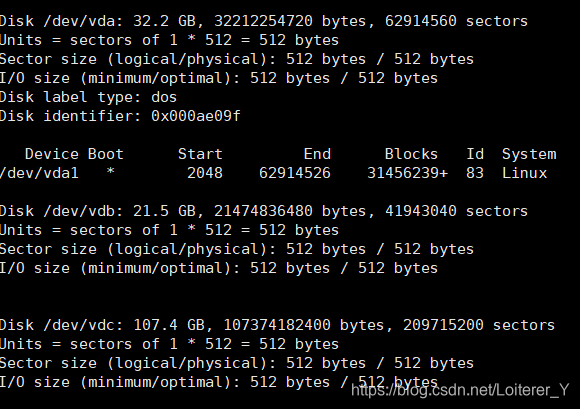
$ fdisk -l
Disk /dev/vda: 32.2 GB, 32212254720 bytes, 62914560 sectors
Units = sectors of 1 * 512 = 512 bytes
Sector size (logical/physical): 512 bytes / 512 bytes
I/O size (minimum/optimal): 512 bytes / 512 bytes
Disk label type: dos
Disk identifier: 0x000ae09f
Device Boot Start End Blocks Id System
/dev/vda1 * 2048 62914526 31456239+ 83 Linux
Disk /dev/vdb: 21.5 GB, 21474836480 bytes, 41943040 sectors
Units = sectors of 1 * 512 = 512 bytes
Sector size (logical/physical): 512 bytes / 512 bytes
I/O size (minimum/optimal): 512 bytes / 512 bytes
Disk /dev/vdc: 107.4 GB, 107374182400 bytes, 209715200 sectors
Units = sectors of 1 * 512 = 512 bytes
Sector size (logical/physical): 512 bytes / 512 bytes
I/O size (minimum/optimal): 512 bytes / 512 bytes
Disk label type: dos
Disk identifier: 0xa7343e4f
Device Boot Start End Blocks Id System
/dev/vdc1 2048 209715199 104856576 83 Linux
3、格式化分区
$ mkfs.xfs -f /dev/vdc1
4、挂载
临时挂载:通过mount命令手动将磁盘或分区挂载到指定目录,系统重启后,挂载关系就会丢失;
永久性挂载:通过配置文件/etc/fstab,使磁盘在系统启动时自动挂载到指定目录。这样,无论何时重启系统,硬盘都会按照预设规则自动挂载,无需用户干预,大大提升了数据访问的便捷性和系统的稳定性。
$ mkdir /data
$ mount /dev/vdc1 /data
$ vi /etc/fstab
/dev/vdc1    /data    xfs    defaults    0    0
各字段含义如下:
/dev/vdb1:待挂载的硬盘设备或分区。设备名(如/dev/sda1)可能会因系统环境变化而改变,导致fstab配置失效。使用blkid命令获取硬盘UUID,并在fstab中使用UUID代替设备名,可确保挂载的稳定性。
/data:挂载点,即硬盘将挂载到的目录。
xfs:文件系统类型,根据实际情况填写,如XFS、Btrfs等。
defaults:挂载选项,包括rw(读写)、auto(自动挂载)、exec(允许执行)、suid(保留SUID位)等默认设置。可根据需要添加其他选项,如noatime、nodiratime优化性能。
0:dump备份工具的检查级别,0表示不进行备份。
0:fsck磁盘检查顺序,根分区为1,其余按需递增,0表示不进行检查。
5、查看挂载是否成功
$ df -hl
Filesystem      Size  Used Avail Use% Mounted on
/dev/vda1        30G  1.4G   29G   5% /
devtmpfs         32G     0   32G   0% /dev
tmpfs            32G     0   32G   0% /dev/shm
tmpfs            32G   25M   32G   1% /run
tmpfs            32G     0   32G   0% /sys/fs/cgroup
tmpfs           6.3G     0  6.3G   0% /run/user/0
/dev/vdc1       100G   33M  100G   1% /data
借助dmesg、journalctl、systemctl status等命令或工具监控系统启动时的挂载过程,及时发现并解决挂载问题。


 1662
1662

 被折叠的 条评论
为什么被折叠?
被折叠的 条评论
为什么被折叠?
 到【灌水乐园】发言


