


swagger的使用
1.在springboot项目中引入依赖
<dependency>
    <groupId>io.springfox</groupId>
    <artifactId>springfox-swagger2</artifactId>
    <version>2.9.2</version>
</dependency>
<dependency>
    <groupId>io.springfox</groupId>
    <artifactId>springfox-swagger-ui</artifactId>
    <version>2.9.2</version>
</dependency>
2.然后创建一个配置类
package com.liron.config;

import org.springframework.boot.autoconfigure.condition.ConditionalOnProperty;
import org.springframework.context.annotation.Bean;
import org.springframework.context.annotation.Configuration;
import springfox.documentation.builders.ApiInfoBuilder;
import springfox.documentation.builders.PathSelectors;
import springfox.documentation.builders.RequestHandlerSelectors;
import springfox.documentation.service.ApiInfo;
import springfox.documentation.service.Contact;
import springfox.documentation.spi.DocumentationType;
import springfox.documentation.spring.web.plugins.Docket;
import springfox.documentation.swagger2.annotations.EnableSwagger2;

import java.util.HashSet;

@Configuration
@EnableSwagger2
public class SwaggerConfiguration {

   @Bean
   public Docket buildDocket() {
      HashSet<String> strings = new HashSet<>();
      strings.add("application/json");

      return new Docket(DocumentationType.SWAGGER_2)
              .apiInfo(buildApiInfo())
              //设置返回值数据类型为json
              .produces(strings)
              .select()
              // 要扫描的API(Controller)基础包
              .apis(RequestHandlerSelectors.basePackage("com.liron"))
              .paths(PathSelectors.any())
              .build();
   }

   private ApiInfo buildApiInfo() {
      Contact contact = new Contact("liron","","");
      return new ApiInfoBuilder()
              .title("liron`s project interface document")
              .description("测试案例api")
              .contact(contact)
              .version("1.0.0").build();
   }
}
3.然后在你的项目里面打上注解,比如
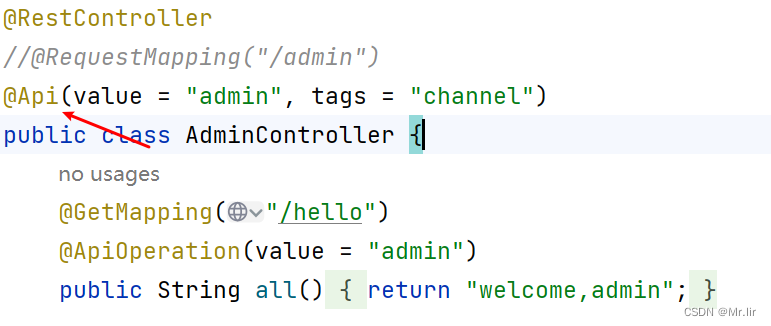
提供了可以在类上的注解,方法的注解以及参数和字段的注解,就是介绍这些的含义就可以了
常见的注解如下:
@Api:修饰整个类,描述Controller的作用
@ApiOperation:修饰类的一个方法 标识 操作信息 接口的定义
@ApiParam:单个参数的描述信息
@ApiModel:描述使用到的对象信息
@ApiModelProperty:描述使用到的对象的属性信息
@ApiResponse:HTTP响应其中1个描述
@ApiResponses:HTTP响应整体描述
@ApiIgnore:使用该注解忽略这个API
@ApiError :发生错误返回的信息
@ApiImplicitParam:一个请求参数
@ApiImplicitParams:多个请求参数的描述信息
如果还想更加了解注解可以去官网查询:
https://github.com/swagger-api/swagger-core/wiki/Annotations-1.5.X
4.查看swagger生成的接口文档
注意:你要把swagger中扫描的包名换成自己的
配置完成了之后:直接访问你的项目地址+/swagger-ui.html
比如http://localhost:8001/swagger-ui.html

自此便成功生成接口文档啦


 1914
1914

 被折叠的 条评论
为什么被折叠?
被折叠的 条评论
为什么被折叠?
 到【灌水乐园】发言


