


 本文介绍了如何在Android Studio中为相机预览添加取景蒙板/浮层。通过自定义View,将蒙板置于SurfaceView之上,并在onCreate中计算并设置坐标来实现。作者分享了遇到的问题及解决方案,如显示颜色异常和界面卡顿,并提供了完整的代码示例。
写在前面的话:每一个实例的代码都会附上相应的代码片或者图片,保证代码完整展示在博客中。最重要的是保证例程的完整性!!!方便自己也方便他人~欢迎大家交流讨论~本文为博主原创文章,未经博主允许不得转载。
在相机预览时增加取景蒙板/浮层的思路是自定义View,用framelayout把自定义view放在surfaceview上面,在oncreat方法中计算坐标位置,调用自定义view中的set…方法设置坐标,根据坐标绘图。
接下来把上篇的自定义相机和增加蒙板那篇的代码结合起来,为相机增加取景蒙板/浮层,上代码!
新建一个Android项目
取名为Cameratwo,具体文件的命名如下
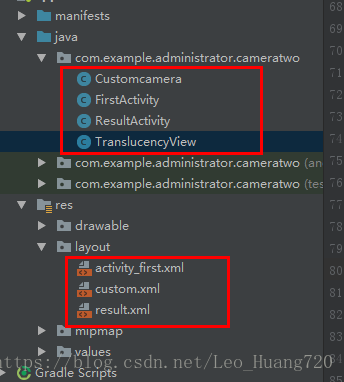
values文件夹
strings.xml
<resources>
    <string name="app_name">Cameratwo</string>
    <string name="button_name">开始拍照</string>
</resources>
layout文件夹
activity_first.xml
<?xml version="1.0" encoding="utf-8"?>
<LinearLayout xmlns:android="http://schemas.android.com/apk/res/android"
    xmlns:tools="http://schemas.android.com/tools"
    android:layout_width="match_parent"
    android:layout_height="match_parent"
    android:orientation="vertical"
    tools:context=".FirstActivity">

    <Button
        android:id="@+id/button"
        android:layout_width="match_parent"
        android:layout_height="wrap_content"
        android:onClick="customCamera"
        android:text="@string/button_name" />

    <ImageView
        android:id="@+id/iv"
        android:layout_width="match_parent"
        android:layout_height="match_parent" />

</LinearLayout>
custom.xml
<?xml version="1.0" encoding="utf-8"?>
<RelativeLayout
    xmlns:android="http://schemas.android.com/apk/res/android" android:layout_width="match_parent"
    android:layout_height="match_parent"
    android:orientation="vertical">

    <FrameLayout
        android:layout_width="match_parent"
        android:layout_height="match_parent"
        android:layout_alignParentTop="true">

        <SurfaceView
            android:id="@+id/preview"
            android:layout_width="match_parent"
            android:layout_height="match_parent"
            android:visibility="visible" />

        <com.example.administrator.cameratwo.TranslucencyView
            android:id="@+id/transView"
            android:layout_width="match_parent"
            android:layout_height="match_parent" />
    </FrameLayout>

    <ImageButton
        android:id="@+id/button3"
        android:layout_width="wrap_content"
        android:layout_height="wrap_content"
        android:layout_alignParentBottom=
最低0.47元/天 解锁文章


 832
832

 被折叠的 条评论
为什么被折叠?
被折叠的 条评论
为什么被折叠?
 到【灌水乐园】发言


