


 本文详细介绍了JAVA中多线程的概念和编程实践,包括run方法、Runnable接口、sleep方法的使用,以及线程创建的不同方式,如继承Thread类、实现Runnable接口以及使用lambda表达式。同时,文章还讨论了线程的状态转换和join方法的作用。
目录
什么是多线程
在上文中我们介绍了什么是进程和线程,在JAVA这门语言中,比较流行的是多线程开发,而对于多进程开发,JAVA虽然支持,但进程是一个相对来说比较重量级的存在,,且JAVA对于多进程的开发并不流行和完善,所以选择更为轻量的多线程开发更为高效。
简单来说,多线程就是在一个程序中,同时运行多个功能,例如大名鼎鼎的B站,在看视频时,播放视频、发送弹幕、调节音量等功能就是一个个的线程,他们同时执行却又执行不同的任务,并且多个线程配合统筹执行,很好的利用了CPU的处理能力
JAVA进行多线程编程
在JAVA标准库中,提供了一个类:Thread,来表示一个线程。
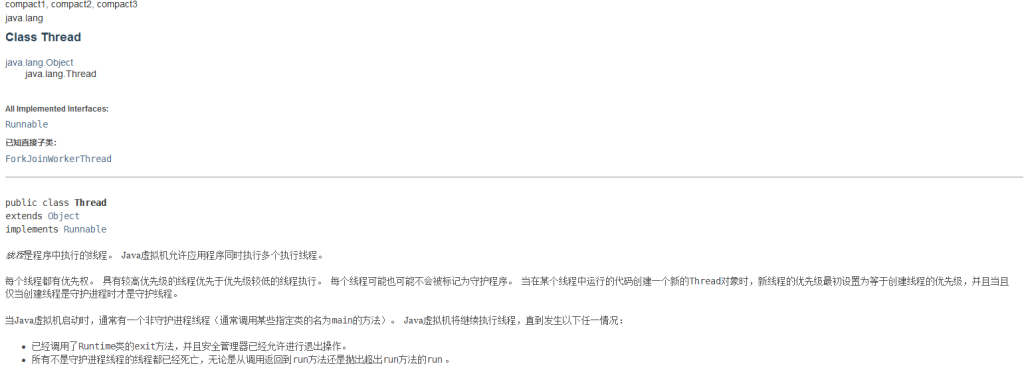
Thread类是创建线程必须要使用到的类,创建线程的方法有许许多多种,但归根结底,都需要使用。
在介绍如何创建线程之前,先来认识一下线程构造必须要重写的run方法
run方法
run方法相当于main方法,是线程的入口,线程的创建必须要重写run方法,虽然Thread类不是接口也不是抽象类,但如果不重写run方法,线程中就不会执行任何逻辑,就像一个主类中没有main方法,即使逻辑在复杂,没有入口也无法执行。
Runnable接口

在Java中,Runnable接口被用来定义一个可以被线程执行的任务。它是一个只有一个run()方法的接口,用于描述线程运行的任务。在Thread类的构造方法中,就有一个参数是实现了runable接口的类的构造方法。
Runnable接口中只有一个run方法,实现Runnable接口重写这个方法即可。
sleep方法
在Thread有一个方法sleep(),作用是让线程休眠一段时间,在使用sleep时会抛出InterruptedException异常,这个异常是多线程中的常见异常,这个异常必须显示处理,使用try/catch捕获或者通过throw 异常的方法来抛出异常,在本文中一律使用try/catch来捕获处理异常。在后续中会对sleep方法进行更详细的解释,这里只需要了解sleep方法仅仅是用于线程休眠的即可。
线程创建的方法
子类继承Thread类
class Mythread extends Thread{
    @Override
    public void run(){
        ;
    }
}


public class show {
    public static void main(String[] args) {
        Thread t = new Mythread();
        t.start();
    }
}
这个方法创建了一个子类名为Mythread继承了Thread类并重写了run方法,在构造线程时使用了向上转型的写法,这里的向上转型其实没什么实际含义,单纯这么写比较流行而已。
我们可以让这个线程循环打印来实现线程可视化
class Mythread extends Thread{
    @Override
    public void run(){
        while (true){
            try {
                System.out.println("hello t");
                Thread.sleep(1000);
            } catch (InterruptedException e) {
                e.printStackTrace();
            }
        }
    }
}


public class show {
    public static void main(String[] args) {
        Thread t = new Mythread();
        t.start();
        while (true){
            try {
                System.out.println("hello world");
                Thread.sleep(1000);
            } catch (InterruptedException e) {
                e.printStackTrace();
            }
        }
    }
}
这里的输出结果为:
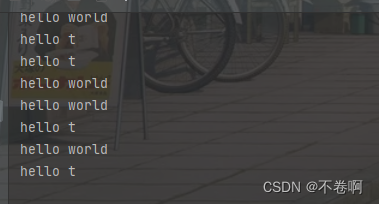
我们可以看到,hello world和hello t随机循环输出,这说明了主线程和t线程交替运行,而打印的顺序是随机的,这是因为:cpu的调度是随机的,这是一个非常重要的概念,会在后面详细介绍
至此一个线程被创建完毕了
继承Thread,使用匿名内部类
public class threaddemo5 {
    public static void main(String[] args) {
        Thread t = new Thread(){
          @Override
          public void run(){
              while (true){
                  System.out.println("hello t");
                  try {
                      Thread.sleep(1000);
                  } catch (InterruptedException e) {
                      throw new RuntimeException(e);
                  }
              }
          }
        };


        t.start();

        while (true){
            System.out.println("hello world");
            try {
                Thread.sleep(1000);
            } catch (InterruptedException e) {
                throw new RuntimeException(e);
            }
        }
    }
}
这里使用了匿名内部类,原理和上面的的继承Thread类一样,只不过这个是使用了匿名内部类,这个内部类继承了Thread方法并且重写了run方法,两个线程交替打印。
实现Runnable接口
class MyRunnable implements Runnable{
    @Override
    public void run(){
        while (true){
            System.out.println("hello t");
            try {
                Thread.sleep(1000);
            } catch (InterruptedException e) {
                throw new RuntimeException(e);
            }
        }
    }
}


public class threadDemo2 {
    public static void main(String[] args) {
        MyRunnable myRunnable = new MyRunnable();
        Thread thread = new Thread(myRunnable);
        thread.start();

        while (true){
            System.out.println("hello world");
            try {
                Thread.sleep(1000);
            } catch (InterruptedException e) {
                throw new RuntimeException(e);
            }
        }
    }
}
这个方法中创建了一个MyRunnable类并且实现了Runnable接口,并且在主类中实例化了MyRunnable类并将其作为参数在构造线程时传入。在上文中我们说了创建线程的一个构造方法是传入一个实现了Runable接口的类作为参数。这就是那个构造方法。同样两个线程交替打印,可以在控制台中查看两个线程的打印过程。
实现Runnable接口并且使用匿名内部类
public class threaddemo6 {
    public static void main(String[] args) {
        Thread t = new Thread(new Runnable() {
            @Override
            public void run() {
                while (true){
                    System.out.println("hello t");
                    try {
                        Thread.sleep(1000);
                    } catch (InterruptedException e) {
                        throw new RuntimeException(e);
                    }
                }
            }
        });

        t.start();

        while (true){
            System.out.println("hello world");
            try {
                Thread.sleep(1000);
            } catch (InterruptedException e) {
                throw new RuntimeException(e);
            }
        }
    }
}
这里也同样使用匿名内部类,但不同的是,这个内部类创建在了Thread构造方法中,这个内部类实现了Runnable接口,当作参数传入构造方法中并重写了run方法。与上面的匿名内部类不同的是,这个匿名内部类构建在了参数中。
使用lambda表达式创建线程
lambda表达式也被称为匿名函数,是JAVA8引入的特性。
要想理解lambda表达式,首先要明白一个概念:函数式接口
函数式接口是JAVA8中的新概念,指的是只包含一个抽象方法的接口,Runnable接口就是一个函数式接口,因为其中只包含了一个run()抽象方法,函数接口是可以用lambda表达式来创建实例化对象的,这里的原理就是使用lambda表达式构造了Runnable这个函数式接口,然后将其作为参数传给Thread类构建线程。
先介绍lambda表达式的基本写法:
()->{ }括号中放参数,{}放函数体,参数用,隔开。
public class threaddemo3 {
    public static void main(String[] args) {
        Thread t = new Thread(()-> {
            while (true){
                System.out.println("hello t");
                try {
                    Thread.sleep(1000);
                } catch (InterruptedException e) {
                    throw new RuntimeException(e);
                }
            }
        }
        );
        t.start();

        while (true){
            System.out.println("hello world");
            try {
                Thread.sleep(1000);
            } catch (InterruptedException e) {
                throw new RuntimeException(e);
            }
        }
    }
}
由于run方法是void返回值,所以括号中不写任何东西,直接在函数体中写逻辑即可。
值得注意的是,lambda表达式是JAVA中创建多线程中一种最主流的写法,至于为什么主流,我的个人猜想是,lambda表达式是JAVA8的新特性,大家使用新特性来写代码,体现了一种进步性,表示程序员们乐思好学的特征(瞎说的)。总的来说,lambda表达式代码简洁明了,可读性高,也许这才是它流行的真正原因。
Thread类常用方法
构造方法
| 方法 | 说明 |
|---|---|
| Thread() | 创建线程对象 |
| Thread(Runnable target) | 使用Runnable对象创建线程对象 |
| Thread(String name) | 创建线程对象并命名 |
| Thread(Runnable target,String name) | 使用Runnable对象创建线程对象并命名 |
这里的带name的参数仅仅是为了给线程命名,这样我们在借助一些工具查看线程时可以直观的通过线程名来定位线程。
常见属性
Thread类还有一些属性方法,可以获取Thread类的各种属性
| 属性 | 获取方法 | 说明 |
|---|---|---|
| ID | getId() | 获取线程的ID:ID是线程独一无二的标识符 |
| 名称 | getName() | 获取线程的名字:如果创建线程时没有起名系统会默认给线程起一个名字 |
| 状态 | getState() | 后文详细介绍 |
| 优先级 | getPriority() | 线程有优先级,但这些优先级仅供参考,系统调度不会严格遵循 |
| 是否后台线程 | isDaemon() | 后台线程:不会阻止进程结束,随着线程的结束而结束 前台线程:会组织进程结束,当前台线程执行完毕后进程才能结束 |
| 是否存活 | isAlive() | 线程是否存活 |
| 是否被中断 | isInterrupted() | 线程是否被其他方法中断 |
isInterrupted()和interrupt()方法
我们将这两个方法称为:线程的中断机制
来看这样一段代码:
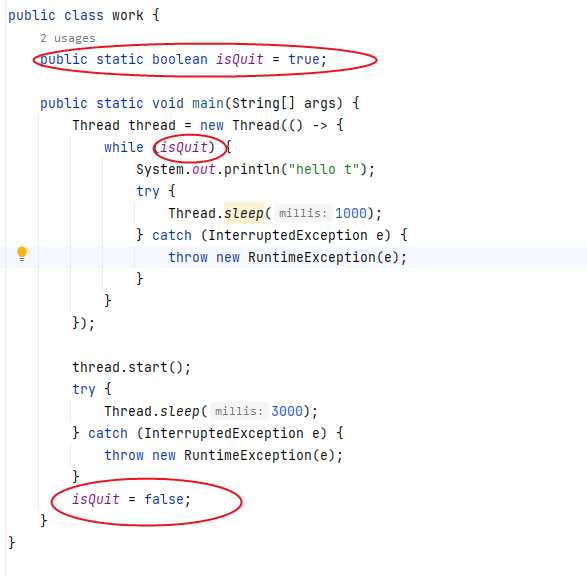
在这段代码中,在thread线程中设置了一个标志位isQuit,然后在主线程中控制这个线程,当在主线程中把这个标志位置为false时,thread线程结束循环。这就是在一个线程中控制另一个线程的运行
但在Thread类中,是有一个特殊的标志位变量来代替上述代码中的isQuit变量的,它就是:isInterrupted()
public class work {

    public static void main(String[] args) {
        Thread thread = new Thread(() -> {
            //Thread.currentThread()是获取当前线程实例
            //isInterrupted()是当前线程实例的一个标志位
            while (!Thread.currentThread().isInterrupted()) {
                System.out.println("hello t");
                try {
                    Thread.sleep(1000);
                } catch (InterruptedException e) {
                    e.printStackTrace();
                }
            }
        });

        thread.start();
        try {
            Thread.sleep(3000);
        } catch (InterruptedException e) {
            e.printStackTrace();
        }
        thread.interrupt();
    }
}
可以看到,在这段代码中,我们使用 !Thread.currentThread().isInterrupted()来设置标志位
这里的Thread.currentThread()方法的作用是获取当前线程的实例,也就是thread,isInterrupted()是当前线程实例的一个标志位。
isInterrupted()默认为false,现在我们运行这段代码,结果如下
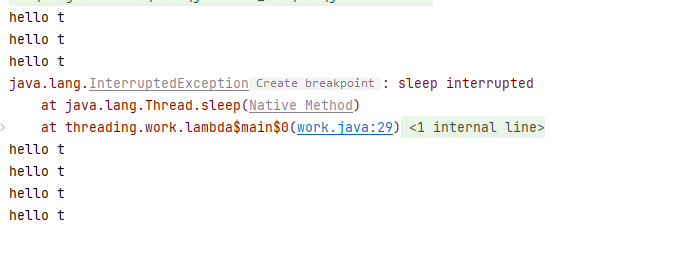
可以看到,这里先打印了3个hello t,随后抛出异常,接着继续循环打印。下面一步步讲解
首先在main函数中创建了线程thread,在thread线程中的run方法里设置为1s打印一个hello t,
随后主线程等待3s,然后执行 thread.interrupt()方法,
这个方法的作用是中断一个线程的执行,具体的表现为:将isInterrupted()的标志位设置为true,进而可以引出:isInterrupted()和interrupt()是需要搭配使用的。
当isInterrupted()的标志位设置为true时,thread的线程自然就被中止了
但在thread线程中,执行打印hello t的时间非常非常短,线程99%的时间都在执行sleep方法
我们知道,在线程执行sleep方法时,线程是处于休眠状态的,但是interrupt()方法会立刻中止线程的休眠状态,它中止休眠状态的方法是:立刻抛出InterruptException异常,唤醒线程。
而在sleep方法被唤醒时,又会执行一个操作。那就是重置isInterrupted()方法,将其重新置为false。
这就是为什么线程首先打印3个hello t,然后抛出异常,然后再次循环打印的原因。
线程等待:join()
我们需要牢牢记住:在线程中系统调度是随机的
正是这种随机性的存在,使得多线程编程多了很多不确定因素,而在编程中,不确定因素是一个很讨厌的东西,因为它会导致很多bug发生,为了解决这个问题,明确代码的执行顺序,我们可以使用join()方法。
例如:
public class work {

    public static void main(String[] args) {
        Thread thread = new Thread(() -> {
                System.out.println("hello t");
        });

        thread.start();
        System.out.println("hello main");
}
在这段代码中hello t和hello main的输出顺序是随机的,每一次执行可以都得到不同的结果。为了让hello t每一次执行都打印在hello main的前面,我们做出这样的修改
public class work {

    public static void main(String[] args) {
        Thread thread = new Thread(() -> {
                System.out.println("hello t");
        });

        thread.start();


        try {
            thread.join();
            System.out.println("hello main");
        } catch (InterruptedException e) {
            e.printStackTrace();
        }
    }
}
使用了join方法,这样使得每一次打印结果都是hello t在前hello main在后。
这样我们得出了结论:join方法的作用是等待一个线程执行结束。
注意:在哪个线程执行join方法,就会让哪个线程等待,例如在A中执行B.join(),A就会等待B结束
join还有一个带参数的版本,join(long time),这个参数的意思是超时时间,例如在A中执行B.join(1000),A会等待B1s的时间,如果1s后,B没有执行完毕,A会接着执行不继续等待。
线程的状态
线程是在执行中会遇到许许多多的状态,java Thread对系统线程的封装使得其进一步的精细化了。
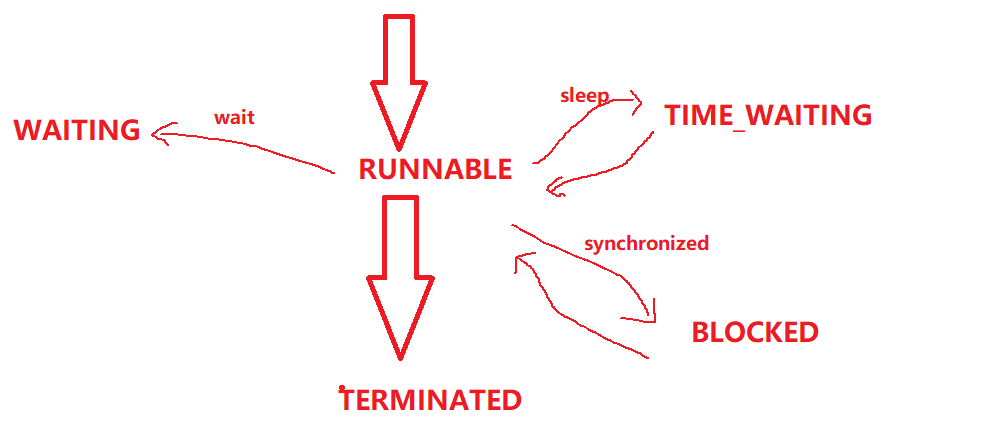
状态转换图
NEW状态
线程还没被创建出来,只有一个Threa对象
public class work {

    public static void main(String[] args) {
        Thread thread = new Thread(() -> {
        });

        System.out.println(thread.getState());
        thread.start();
    }
}
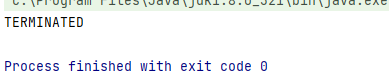
TERMINATED
线程已经执行完毕,Thread对象还在
public class work {

    public static void main(String[] args) {
        Thread thread = new Thread(() -> {
        });
        thread.start();

        try {
            Thread.sleep(1000);
        } catch (InterruptedException e) {
            e.printStackTrace();
        }
        System.out.println(thread.getState());
    }
}
RUNNABLE状态
就绪状态(正在运行/随时可以运行)
public class work {

    public static void main(String[] args) {
        Thread thread = new Thread(() -> {
            while (true){
                ;
            }
        });
        thread.start();

        System.out.println(thread.getState());
    }
}

TIME_WAITING
指定时间等待状态(sleep方法)
BLOCKED
等待锁出现的状态
WAITING
使用wait方法出现的状态


 2965
2965

 被折叠的 条评论
为什么被折叠?
被折叠的 条评论
为什么被折叠?
 到【灌水乐园】发言


