


 本文详细介绍如何使用TensorFlow的目标检测API进行物体识别模型训练。包括环境配置、数据集准备、模型配置及训练步骤等关键环节。
一、配置环境
选择TensorFlow__GPU版本
超级复杂……不愿回忆
二、下载API
GitHub TensorFlow object detection API
三、准备数据集
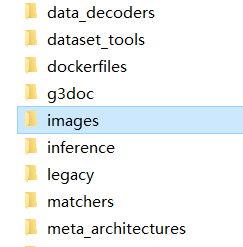
在下好的object detection文件夹下新建images文件夹以存放数据集(图片)。
![]()
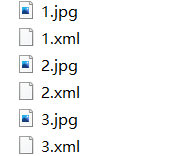
images文件夹下再新建两个文件夹分别命名:train和test

把预先准备的大量训练数据,按照一定的比例(5:1、6:1、7:1都可以)分成两部分,分别放到两个文件夹下(多的放train,少的放test)。
使用labelImg.exe对train和test里的图片进行标注(最累人的打标签,枯燥……无聊……)
![]()
标注完后会在train和test文件夹里得到同名的xml文件
对于Tensorflow,需要输入专门的 TFRecords Format形式。
利用两个小程序,将xml转换成.csv,然后将.csv转换成.record
四、配置config
从sample文件夹下找到ssd_mobilenet_v1_coco.config(这个训练最快)
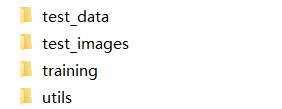
在object detection下新建一个training文件夹,把ssd_mobilenet_v1_coco.config复制进去,然后开始修改
![]()
# SSD with Mobilenet v1 configuration for MSCOCO Dataset.
# Users should configure the fine_tune_checkpoint field in the train config as
# well as the label_map_path and input_path fields in the train_input_reader and
# eval_input_reader. Search for "PATH_TO_BE_CONFIGURED" to find the fields that
# should be configured.
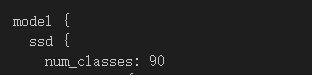
model {
ssd {
num_classes: 90
box_coder {
faster_rcnn_box_coder {
y_scale: 10.0
x_scale: 10.0
height_scale: 5.0
width_scale: 5.0
}
}
matcher {
argmax_matcher {
matched_threshold: 0.5
unmatched_threshold: 0.5
ignore_thresholds: false
negatives_lower_than_unmatched: true
force_match_for_each_row: true
}
}
similarity_calculator {
iou_similarity {
}
}
anchor_generator {
ssd_anchor_generator {
num_layers: 6
min_scale: 0.2
max_scale: 0.95
aspect_ratios: 1.0
aspect_ratios: 2.0
aspect_ratios: 0.5
aspect_ratios: 3.0
aspect_ratios: 0.3333
}
}
image_resizer {
fixed_shape_resizer {
height: 300
width: 300
}
}
box_predictor {
convolutional_box_predictor {
min_depth: 0
max_depth: 0
num_layers_before_predictor: 0
use_dropout: false
dropout_keep_probability: 0.8
kernel_size: 1
box_code_size: 4
apply_sigmoid_to_scores: false
conv_hyperparams {
activation: RELU_6,
regularizer {
l2_regularizer {
weight: 0.00004
}
}
initializer {
truncated_normal_initializer {
stddev: 0.03
mean: 0.0
}
}
batch_norm {
train: true,
scale: true,
center: true,
decay: 0.9997,
epsilon: 0.001,
}
}
}
}
feature_extractor {
type: 'ssd_mobilenet_v1'
min_depth: 16
depth_multiplier: 1.0
conv_hyperparams {
activation: RELU_6,
regularizer {
l2_regularizer {
weight: 0.00004
}
}
initializer {
truncated_normal_initializer {
stddev: 0.03
mean: 0.0
}
}
batch_norm {
train: true,
scale: true,
center: true,
decay: 0.9997,
epsilon: 0.001,
}
}
}
loss {
classification_loss {
weighted_sigmoid {
}
}
localization_loss {
weighted_smooth_l1 {
}
}
hard_example_miner {
num_hard_examples: 3000
iou_threshold: 0.99
loss_type: CLASSIFICATION
max_negatives_per_positive: 3
min_negatives_per_image: 0
}
classification_weight: 1.0
localization_weight: 1.0
}
normalize_loss_by_num_matches: true
post_processing {
batch_non_max_suppression {
score_threshold: 1e-8
iou_threshold: 0.6
max_detections_per_class: 100
max_total_detections: 100
}
score_converter: SIGMOID
}
}
}
train_config: {
batch_size: 24
optimizer {
rms_prop_optimizer: {
learning_rate: {
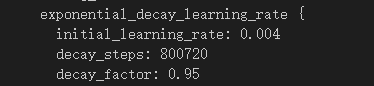
exponential_decay_learning_rate {
initial_learning_rate: 0.004
decay_steps: 800720
decay_factor: 0.95
}
}
momentum_optimizer_value: 0.9
decay: 0.9
epsilon: 1.0
}
}
fine_tune_checkpoint: "PATH_TO_BE_CONFIGURED/model.ckpt"
from_detection_checkpoint: true
# Note: The below line limits the training process to 200K steps, which we
# empirically found to be sufficient enough to train the pets dataset. This
# effectively bypasses the learning rate schedule (the learning rate will
# never decay). Remove the below line to train indefinitely.
num_steps: 200000
data_augmentation_options {
random_horizontal_flip {
}
}
data_augmentation_options {
ssd_random_crop {
}
}
}
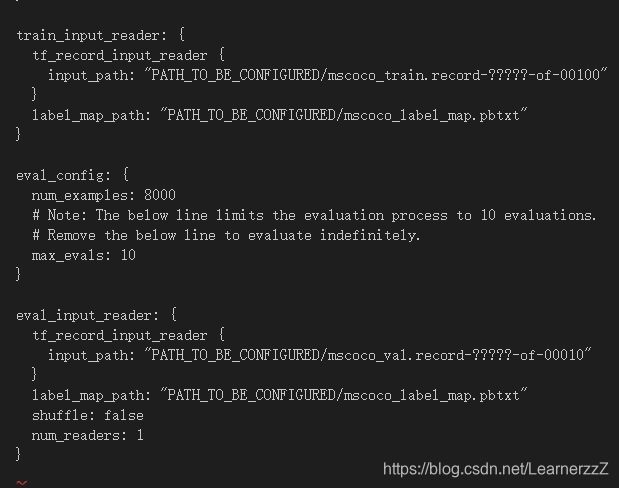
train_input_reader: {
tf_record_input_reader {
input_path: "PATH_TO_BE_CONFIGURED/mscoco_train.record-?????-of-00100"
}
label_map_path: "PATH_TO_BE_CONFIGURED/mscoco_label_map.pbtxt"
}
eval_config: {
num_examples: 8000
# Note: The below line limits the evaluation process to 10 evaluations.
# Remove the below line to evaluate indefinitely.
max_evals: 10
}
eval_input_reader: {
tf_record_input_reader {
input_path: "PATH_TO_BE_CONFIGURED/mscoco_val.record-?????-of-00010"
}
label_map_path: "PATH_TO_BE_CONFIGURED/mscoco_label_map.pbtxt"
shuffle: false
num_readers: 1
}
【修改config部分参数】
①num_classes代表要训练模型去识别几种物品,识别90种就是90,识别10种就改成10.
②batch_size:改成1(越大对于电脑性能要求越高)

③注释掉这两行
![]()
④num_steps:训练步数

⑤initial_learning_rate:学习率(如果训练结果不理想,可以修改此值调整,往小改)
⑥PATH_TO_BE_CONFIGURED改成自己的路径(注意那个是train的路径哪个是test的路径)
在你修改的“PATH_TO_BE_CONFIGURED”下创建这样一个.pbtxt
![]()
item {
  id: 1
  name: 'tiger'
}

item {
  id: 2
  name: 'lion'
}

item {
  id: 3
  name: 'dog'
}

item {
  id: 4
  name: 'whale'
}

item {
  id: 5
  name: 'monkey'
}
五、训练模型
在object detection下打开Terminal
python legacy/train.py --logtostderr --train_dir=training/ --pipeline_config_path=training/ssd_mobilenet_v1_coco.config
或者
python model_main.py \
    --pipeline_config_path=training/ssd_mobilenet_v1_coco.config \
    --model_dir=training \
    --num_train_steps=200000 \
    --num_eval_steps=10000 \
    --alsologtostderr
同时可以用:
tensorboard --logdir='training'打开Tensorboard查看训练进度。


 1407
1407

 被折叠的 条评论
为什么被折叠?
被折叠的 条评论
为什么被折叠?
 到【灌水乐园】发言


