


 本文介绍了在Linux系统中实现远程访问的方案。首先准备两台可互通的虚拟机A、B,采用克隆方式创建B。接着对虚拟机进行环境准备,包括关闭相关服务。然后更改B的网卡名称和主机名,最后完成从A以root和student身份登入B的远程访问操作。
问题
1)准备两台虚拟机A、B
2)主机A的IP地址为 192.168.8.128/24
3)主机B的IP地址为 192.168.8.15/24,与A可互通
4)完成以下远程访问操作
5)从主机A上以root身份登入主机B
6)在主机B上创建用户student,设置密码redhat
7)从主机A上以用户student登入主机B
方案
SSH的服务名为sshd,它是一个独立服务。Linux默认安装并自启动的一个服务。
准备两台虚拟机,我们采用的最简单的方式为克隆一台B。将原有的虚拟机关机名称命名为A,克隆一台B。
注意:两台虚拟机需互相通信,为了方便所以提前要把A的网络类型,更改为VMnet8。再进行克隆。
克隆后B需要更改网卡名称,这里涉及到第四阶段udev规则的知识。我们这里简单理解,udev是动态的管理设备,可以为设备起一个唯一的名字。说的简单点就是设备名字的命名规则。
步骤
实现此案例需要按照如下步骤进行。
步骤一:虚拟机克隆
将原有的虚拟机关机名称命名为A。如图-1所示,右击虚拟机A选项卡–>管理–>克隆。
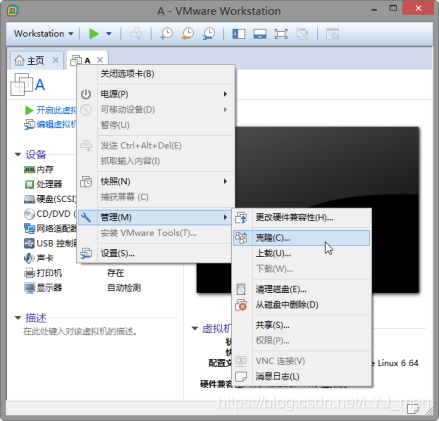
图-1
如图-2所示选择“下一步”。
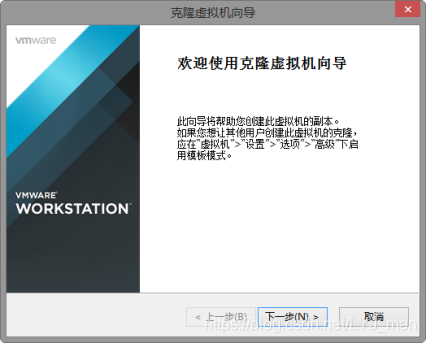
图-2
如图-3所示,选择虚拟机中的当前状态–>下一步。
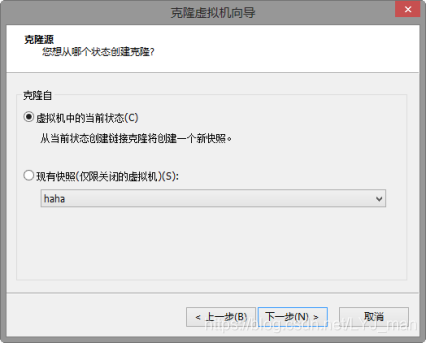
图-3
如图-4所示,选择创建链接克隆–>下一步。
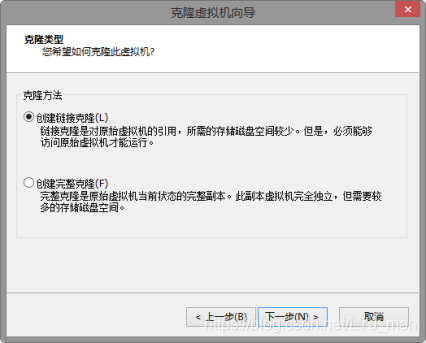
图-4
如图-5所示,克隆虚拟机名字命名成B–>更改存放位置–>完成。
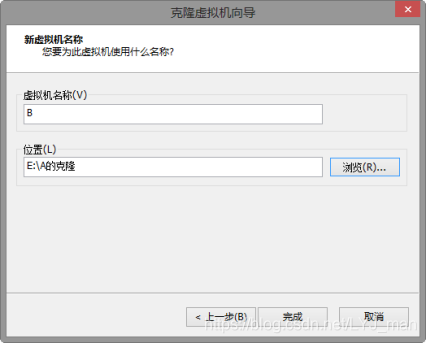
图-5
如图-6所示,克隆完成选择“关闭”。
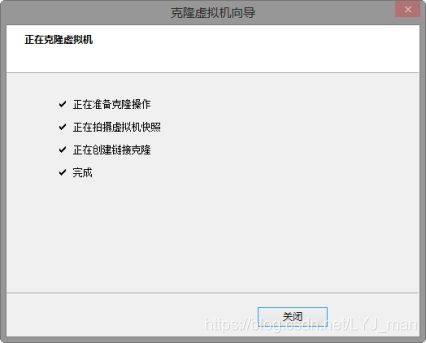
图-6
将两台虚拟机全部开机。
注意:准备环境,两台虚拟机都要操作:关闭NetworkManager、关闭防火墙、关闭SELinux。
命令操作如下所示:
    [root@svr5 /]# /etc/init.d/NetworkManager stop     	//当前关闭
    [root@svr5 /]# chkconfig NetworkManager off         //配置自起状态
    [root@svr5 /]# iptables –F                            //清空防护墙策略
    [root@svr5 /]# /etc/init.d/iptables save             //将空策略的防火墙保存
    iptables:将防火墙规则保存到 /etc/sysconfig/iptables:     [确定]
    [root@svr5 /]# /etc/init.d/iptables stop             //停止防火墙服务
    [root@svr5 /]# chkconfig iptables off                //配置自起状态
    [root@svr5 /]# getenforce                             //查看SELinux状态
    Enforcing
    [root@svr5 /]# setenforce 0                           //当前关闭SELinux
    [root@svr5 /]# getenforce                  //查看SELinux是否关闭Permissive为不启用
    Permissive
    [root@svr5 /]# cat /etc/selinux/config    //永久关闭SELinux,需修改配置文件
    ......

#     permissive - SELinux prints warnings instead of enforcing.
......
SELINUX=permissive
......
步骤二:主机B的IP地址为 192.168.8.15/24,与A可互通
分析: 会发现B网卡识别错误,没有eth0,更改udev规则重新命名网卡名称。
将B的主机名更改为pc15.tarena.com方便区分,在B上操作。
命令操作如下所示:
[root@pc15 桌面]# hostname pc15.tarena.com
[root@pc15 桌面]# vim /etc/sysconfig/network
[root@pc15 桌面]# grep pc15 /etc/sysconfig/network
HOSTNAME=pc15.tarena.com
[root@pc15 桌面]#
修改udev规则,重新命名网卡名称。
分析: 以MAC地址为准,将ifconfig命令所识别到的MAC、网卡配置文件、udev配置文件做到统一即可,以ifconfig命令所识别到的MAC为准。
命令操作如下所示:
[root@pc15 桌面]# ifconfig                           //可以看到没有eth0
lo        Link encap:Local Loopback
          inet addr:127.0.0.1  Mask:255.0.0.0
          inet6 addr: ::1/128 Scope:Host
          UP LOOPBACK RUNNING  MTU:16436  Metric:1
          RX packets:12 errors:0 dropped:0 overruns:0 frame:0
          TX packets:12 errors:0 dropped:0 overruns:0 carrier:0
          collisions:0 txqueuelen:0
          RX bytes:720 (720.0 b)  TX bytes:720 (720.0 b)

[root@pc15 桌面]# ifconfig eth1              //查看ifconfig识别的网卡MAC地址
eth1      Link encap:Ethernet  HWaddr 00:0C:29:2F:32:FA  //可以复制此处MAC方便更改
          BROADCAST MULTICAST  MTU:1500  Metric:1
          RX packets:0 errors:0 dropped:0 overruns:0 frame:0
          TX packets:0 errors:0 dropped:0 overruns:0 carrier:0
          collisions:0 txqueuelen:1000
          RX bytes:0 (0.0 b)  TX bytes:0 (0.0 b)
//修改网卡配置文件(注意要与上条命令检测的MAC地址一致)
[root@pc15桌面]# cat /etc/sysconfig/network-scripts/ifcfg-eth0
DEVICE=eth0
HWADDR=00:0C:29:2F:32:FA
TYPE=Ethernet
ONBOOT=yes
NM_CONTROLLED=no
BOOTPROTO=none
IPADDR=192.168.8.15             //ip地址保证不要冲突
NETMASK=255.255.255.0
//修改udev规则(保留与ifconfig -a eth1 所识别的MAC一致的一行,其余全部删除或注释)修改网卡名
 [root@pc15桌面]# cat /etc/udev/rules.d/70-persistent-net.rules
SUBSYSTEM=="net",ACTION=="add", DRIVERS=="?*", ATTR{address}=="00:0C:29:2F:32:FA ", ATTR{type}=="1", KERNEL=="eth*", NAME="eth0"
[root@pc15桌面]# modprobe -rv e1000       //卸载网卡驱动
[root@pc15桌面]# modprobe -v e1000        //挂载网卡驱动
[root@pc15桌面]# /etc/init.d/network restart
[root@pc15 桌面]# ifconfig eth0
eth0      Link encap:Ethernet  HWaddr 00:0C:29:2F:32:FA
          inet addr:192.168.8.15  Bcast:192.168.8.255  Mask:255.255.255.0
          inet6 addr: fe80::20c:29ff:fe2f:32fa/64 Scope:Link
          UP BROADCAST RUNNING MULTICAST  MTU:1500  Metric:1
          RX packets:0 errors:0 dropped:0 overruns:0 frame:0
          TX packets:10 errors:0 dropped:0 overruns:0 carrier:0
          collisions:0 txqueuelen:1000
          RX bytes:0 (0.0 b)  TX bytes:636 (636.0 b)

[root@pc15 桌面]#
在B上操作,测试与A通信。
命令操作如下所示:
[root@pc15 桌面]# ping -c 3 192.168.8.128
PING 192.168.8.128 (192.168.8.128) 56(84) bytes of data.
64 bytes from 192.168.8.128: icmp_seq=1 ttl=64 time=12.6 ms
64 bytes from 192.168.8.128: icmp_seq=2 ttl=64 time=0.188 ms
64 bytes from 192.168.8.128: icmp_seq=3 ttl=64 time=0.257 ms

--- 192.168.8.128 ping statistics ---
3 packets transmitted, 3 received, 0% packet loss, time 2008ms
rtt min/avg/max/mdev = 0.188/4.350/12.606/5.837 ms
[root@pc15 桌面]#
步骤三:完成以下远程访问操作
从主机A上以root身份登入主机B。
分析: 使用ssh远程连接时输入的用户名与密码永远都是对方的,本题为B的。
在A上操作,命令操作如下所示:
[root@svr5 ~]# ssh root@192.168.8.15
The authenticity of host '192.168.8.15 (192.168.8.15)' can't be established.
RSA key fingerprint is e3:48:b7:e0:d5:9d:47:01:2b:06:be:1c:ab:c0:98:63.
Are you sure you want to continue connecting (yes/no)? yes   //首次访问会提示
Warning: Permanently added '192.168.8.15' (RSA) to the list of known hosts.
//SSH服务端默认会进行DNS解析,因此为了提升速度建议编写hosts配置文件
按Ctrl+c直接结束
[root@svr5 ~]# vim /etc/hosts
[root@svr5 ~]# tail -n 1 /etc/hosts
192.168.8.15 pc15.tarena.com
[root@svr5 ~]# ssh root@192.168.8.15    	//再次尝试登录
root@192.168.8.15's password:            	//输入密码不显示
Last login: Tue Mar  3 10:07:46 2015
[root@pc15 ~]# hostname                   	//登录成功
pc15.tarena.com
[root@pc15 ~]# ifconfig eth0
eth0      Link encap:Ethernet  HWaddr 00:0C:29:2F:32:FA
          inet addr:192.168.8.15  Bcast:192.168.8.255  Mask:255.255.255.0
          inet6 addr: fe80::20c:29ff:fe2f:32fa/64 Scope:Link
          UP BROADCAST RUNNING MULTICAST  MTU:1500  Metric:1
          RX packets:241 errors:0 dropped:0 overruns:0 frame:0
          TX packets:73 errors:0 dropped:0 overruns:0 carrier:0
          collisions:0 txqueuelen:1000
          RX bytes:21391 (20.8 KiB)  TX bytes:9896 (9.6 KiB)
[root@pc15 ~]# exit                      //退出
logout
Connection to 192.168.8.15 closed.
[root@svr5 ~]#
在主机B上创建用户student,设置密码redhat。
在B上操作,命令操作如下所示:
[root@pc15 桌面]# id student
uid=500(student) gid=500(student) 组=500(student)
[root@pc15 桌面]# passwd student
更改用户 student 的密码 。
新的 密码:
无效的密码: WAY 过短
无效的密码: 是回文
重新输入新的 密码:
passwd: 所有的身份验证令牌已经成功更新。
[root@pc15 桌面]#
从主机A上以用户student登入主机B,在A上操作,命令操作如下所示:
[root@svr5 ~]# ssh student@192.168.8.15
student@192.168.8.15's password:
Last login: Mon Mar  2 13:01:16 2015
[student@pc15 ~]$ hostname
pc15.tarena.com
[student@pc15 ~]$ pwd
/home/student
[student@pc15 ~]$


 2886
2886

 被折叠的 条评论
为什么被折叠?
被折叠的 条评论
为什么被折叠?
 到【灌水乐园】发言


