


Spring Boot 学习笔记
个人学习笔记,记录Spring Boot入门过程中的重点和踩坑经验
一、Spring Boot 初印象
1.1 为什么要学Spring Boot?
传统Spring开发痛点:
- 配置繁琐,每个项目都要重复配置
- 依赖管理复杂,版本冲突频发
- 部署麻烦,需要外部Tomcat
Spring Boot优势:
- ⚡ 开箱即用,快速启动项目
- 🎯 约定优于配置,减少决策成本
- 📚 丰富的Starter,简化依赖管理
个人理解: Spring Boot就像是Spring的"快速启动包",把很多重复劳动都自动化了。
二、环境搭建实录
2.1 环境配置踩坑记录
JDK版本问题:
# 检查JDK版本
java -version
# 输出:java version "1.8.0_201"
注意: 一定要用JDK1.8+,之前用1.7各种不兼容。
IDEA设置:

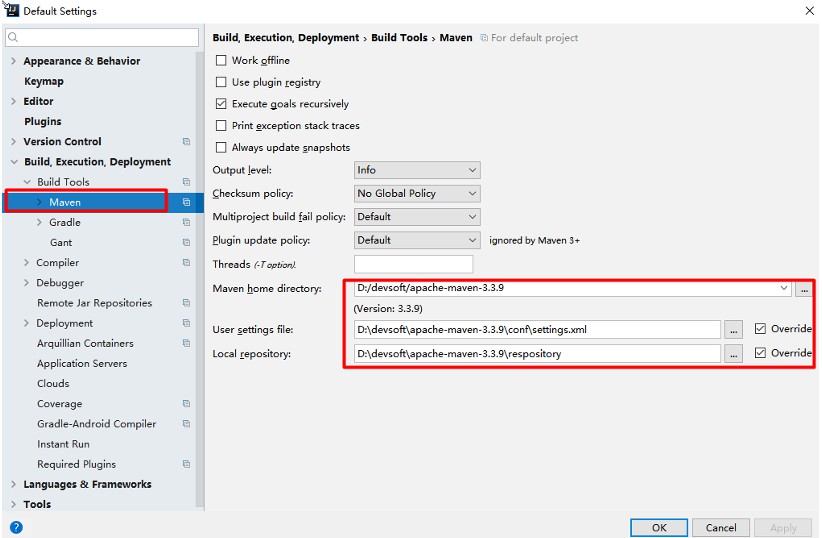
Maven配置关键点:
<!-- settings.xml 必须配置的profile -->
<profile>
    <id>jdk-1.8</id>
    <activation>
        <activeByDefault>true</activeByDefault>
        <jdk>1.8</jdk>
    </activation>
    <properties>
        <maven.compiler.source>1.8</maven.compiler.source>
        <maven.compiler.target>1.8</maven.compiler.target>
    </properties>
</profile>
三、第一个Spring Boot项目实战
3.1 项目创建过程
pom.xml核心配置:
<!-- 必须继承spring-boot-starter-parent -->
<parent>
    <groupId>org.springframework.boot</groupId>
    <artifactId>spring-boot-starter-parent</artifactId>
    <version>1.5.9.RELEASE</version>
</parent>

<!-- web starter是web开发的入口 -->
<dependency>
    <groupId>org.springframework.boot</groupId>
    <artifactId>spring-boot-starter-web</artifactId>
</dependency>
重要发现: parent POM管理了所有依赖版本,我们不需要再关心版本冲突问题。
3.2 主启动类编写
@SpringBootApplication  // 核心注解:开启自动配置
public class Application {
    public static void main(String[] args) {
        // 这行代码启动了内嵌Tomcat
        SpringApplication.run(Application.class, args);
    }
}
学习心得: @SpringBootApplication 是一个组合注解,包含了:
@SpringBootConfiguration@EnableAutoConfiguration@ComponentScan
3.3 Controller编写技巧
@RestController  // @Controller + @ResponseBody
public class HelloController {

    @RequestMapping("/hello")
    public String hello() {
        return "Hello Spring Boot!";
    }
}
踩坑记录:
- 刚开始用了
@Controller,页面返回404 - 后来发现需要配合
@ResponseBody - 直接用
@RestController最方便
3.4 运行测试结果
启动日志:
Tomcat initialized with port(s): 8080 (http)
Starting Application on DESKTOP-XXX with PID 1234
Started Application in 3.456 seconds
四、核心机制深度理解
4.1 依赖管理机制
父POM的奥秘:
<!-- 我们的pom继承了这个 -->
<parent>
    <groupId>org.springframework.boot</groupId>
    <artifactId>spring-boot-starter-parent</artifactId>
    <version>1.5.9.RELEASE</version>
</parent>

<!-- 它又继承了这个 -->
<parent>
    <groupId>org.springframework.boot</groupId>
    <artifactId>spring-boot-dependencies</artifactId>
    <version>1.5.9.RELEASE</version>
</parent>
4.2 Starter启动器理解
常用Starter整理:
| Starter | 作用 | 个人评价 |
|---|---|---|
| spring-boot-starter-web | Web开发 | ⭐⭐⭐⭐⭐ 必用 |
| spring-boot-starter-test | 测试 | ⭐⭐⭐⭐ 单元测试必备 |
| spring-boot-starter-data-jpa | 数据访问 | ⭐⭐⭐⭐ 数据库操作 |
学习心得: Starter其实就是一组依赖的打包,用哪个功能就引入对应的Starter。
五、配置文件使用心得
5.1 YAML vs Properties
YAML优势:
- 结构清晰,支持层级
- 支持数组等复杂结构
- 写起来更简洁
application.yml示例:
server:
  port: 8080
  servlet:
    context-path: /myapp

spring:
  datasource:
    url: jdbc:mysql://localhost:3306/test
    username: root
    password: 123456
个人选择: 推荐YAML,配置文件多了之后层次感很重要。
5.2 多环境配置技巧
# 默认配置
server:
  port: 8080
spring:
  profiles:
    active: dev  # 默认使用dev环境

---
# 开发环境
server:
  port: 8081
spring:
  profiles: dev
logging:
  level:
    com.example: debug  # 开发环境开启debug日志

---
# 生产环境
server:
  port: 80
spring:
  profiles: prod
logging:
  level:
    com.example: warn   # 生产环境只保留警告日志
5.3 配置文件加载顺序
记忆口诀: 外优于内,config优先
file:./config/(项目根目录/config/)file:./(项目根目录)classpath:/config/(类路径config目录)classpath:/(类路径根目录)
应用场景: 生产环境把配置文件放在jar包外面,方便修改。
六、Thymeleaf模板引擎实践
6.1 集成过程
<dependency>
    <groupId>org.springframework.boot</groupId>
    <artifactId>spring-boot-starter-thymeleaf</artifactId>
</dependency>
自动配置特性:
- 模板位置:
src/main/resources/templates/ - 文件后缀:
.html - 无需额外配置,开箱即用
6.2 基础用法
<!DOCTYPE html>
<html lang="zh" xmlns:th="http://www.thymeleaf.org">
<head>
    <meta charset="UTF-8">
    <title>学习页面</title>
</head>
<body>
    <!-- 文本输出 -->
    <h1 th:text="${title}">默认标题</h1>

    <!-- 条件判断 -->
    <div th:if="${user != null}">
        欢迎:<span th:text="${user.name}">用户名</span>
    </div>

    <!-- 循环遍历 -->
    <ul>
        <li th:each="item : ${items}" th:text="${item}">示例项</li>
    </ul>
</body>
</html>
Controller配合:
@Controller
public class LearnController {

    @GetMapping("/learn")
    public String learnPage(Model model) {
        model.addAttribute("title", "Spring Boot学习笔记");
        model.addAttribute("user", new User("张三"));
        model.addAttribute("items", Arrays.asList("Java", "Spring", "Boot"));
        return "learn"; // 对应templates/learn.html
    }
}
七、常见问题解决记录
7.1 端口被占用
server:
  port: 8081  # 换个端口
解决方案:
- 修改
application.yml中的端口 - 或者停止占用8080端口的进程
7.2 静态资源访问
默认静态资源路径:
src/main/resources/static/- CSS、JS、图片src/main/resources/public/- 公共资源src/main/resources/resources/- 其他资源
访问方式: http://localhost:8080/css/style.css
7.3 热部署配置
<dependency>
    <groupId>org.springframework.boot</groupId>
    <artifactId>spring-boot-devtools</artifactId>
    <scope>runtime</scope>
</dependency>
使用技巧:
- 修改代码后按
Ctrl+F9重新编译 - IDEA需要开启自动编译:Settings → Build → Compiler → Build project automatically
八、学习总结与反思
8.1 掌握程度自评
- ✅ 环境搭建和项目创建
- ✅ 基础Web开发
- ✅ 配置文件使用
- ✅ 模板引擎集成
- ⚠️ 数据库集成(待学习)
- ⚠️ 安全框架(待学习)
8.2 重点知识梳理
- 核心注解:
@SpringBootApplication - 启动器:各种Starter的作用
- 自动配置:约定优于配置的理念
- 内嵌容器:无需外部Tomcat
8.3 下一步学习计划
- 数据持久化:Spring Data JPA/MyBatis
- 安全控制:Spring Security
- API开发:RESTful接口设计
- 微服务:Spring Cloud入门


 2022
2022

 被折叠的 条评论
为什么被折叠?
被折叠的 条评论
为什么被折叠?
 到【灌水乐园】发言


