


 本文讲述了在Android高版本中如何创建和使用AIDL进行服务端与客户端通信,包括AIDL文件的创建、服务声明、客户端绑定及注意事项,重点在于处理高版本获取IBinder的问题。
简单记录一下,今天使用高版本测试AIDL为什么一直拿不到IBinder,十分奇怪。
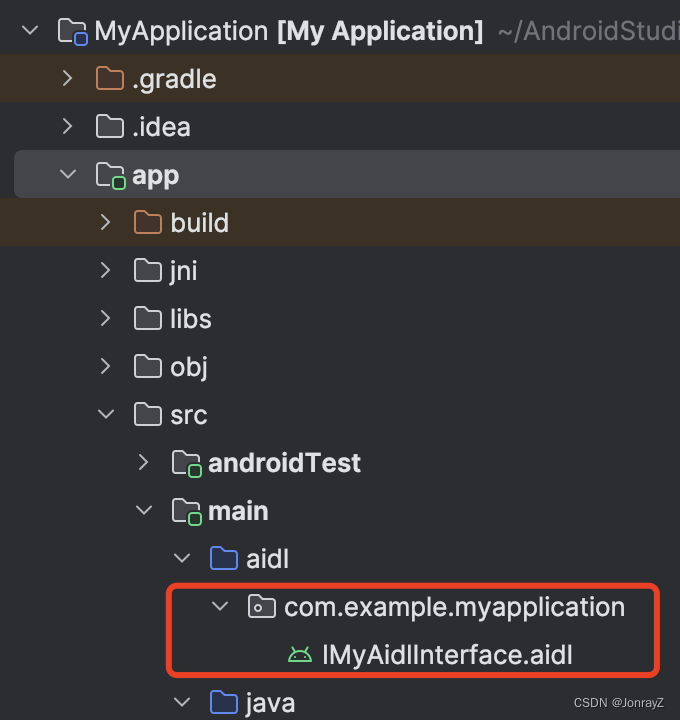
1. 服务端
首先肯定要创建AIDL文件,不讲述怎么创建该文件了,新建完毕之后,记得build一下,在build路径下会生成相应代码。

interface IMyAidlInterface {
    String helloWorld();
}
AIDL文件比较简单,在MyService中实现helloWorld方法。
public class MyService extends Service {
    private static final String TAG = MyService.class.getSimpleName();
    private static final String CHANNEL_ID = "MyService";

    @Override
    public void onCreate() {
        Log.d(TAG, "onCreate: ----");
        super.onCreate();
    }

    @Nullable
    @Override
    public IBinder onBind(Intent intent) {
        return new MyBinder();
    }

    static class MyBinder extends IMyAidlInterface.Stub {
        @Override
        public String helloWorld() throws RemoteException {
            return "hello world";
        }
    }
}
别忘记AndroidManifest文件中声明Service,export是外部可以调用,action是用来Intent 过滤。
        <service android:name=".MyService"
            android:exported="true"
            android:enabled="true">
            <intent-filter>
                <action android:name="com.example.myapplication.MyService"/>
            </intent-filter>
        </service>
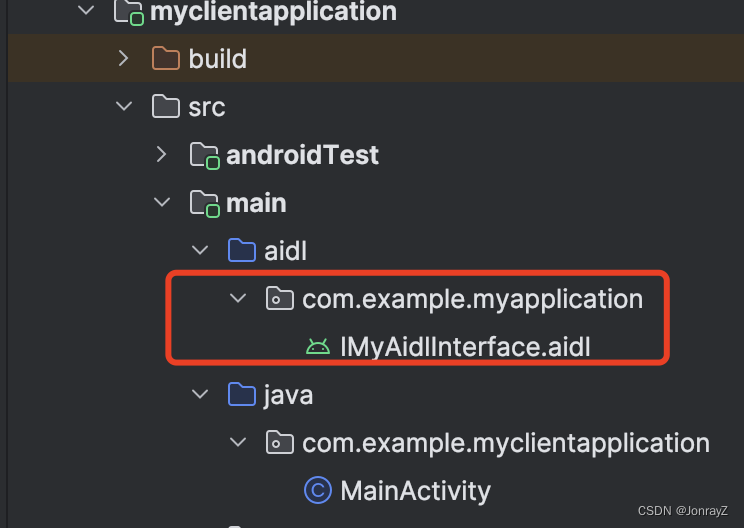
2. 客户端
复制AIDL文件夹,粘贴到客户端,记得是文件夹,路径要保持不变。build一下。
简述几个点
1.Intent要用显式;
2.setComponent和setPackage都可以;
3. bindService的时候传入一个ServiceConnection,onServiceConnected回调会携带IBinder,此时就拿到服务端MyService的MyBinder了。
package com.example.myclientapplication;


import android.content.ComponentName;
import android.content.Intent;
import android.content.ServiceConnection;
import android.os.Bundle;
import android.os.IBinder;
import android.os.RemoteException;
import android.util.Log;
import android.view.View;
import android.widget.Button;

import androidx.activity.EdgeToEdge;
import androidx.appcompat.app.AppCompatActivity;
import androidx.core.graphics.Insets;
import androidx.core.view.ViewCompat;
import androidx.core.view.WindowInsetsCompat;

import com.example.myapplication.IMyAidlInterface;

public class MainActivity extends AppCompatActivity {

    private final static String TAG = MainActivity.class.getSimpleName();
    private IMyAidlInterface mMyService;

    @Override
    protected void onCreate(Bundle savedInstanceState) {
        super.onCreate(savedInstanceState);
        EdgeToEdge.enable(this);
        setContentView(R.layout.activity_main);
        ViewCompat.setOnApplyWindowInsetsListener(findViewById(R.id.main), (v, insets) -> {
            Insets systemBars = insets.getInsets(WindowInsetsCompat.Type.systemBars());
            v.setPadding(systemBars.left, systemBars.top, systemBars.right, systemBars.bottom);
            return insets;
        });

        Button button = findViewById(R.id.bind_service);
        button.setOnClickListener(v -> {
            if (mMyService == null) {
                Log.d(TAG, "onCreate: nulll");
                Intent intent = new Intent();
                intent.setComponent(new ComponentName("com.example.myapplication",
                        "com.example.myapplication.MyService"));
                bindService(intent, mConnection, BIND_AUTO_CREATE);
            } else {
                try {
                    Log.d(TAG, "onCreate ===: " + mMyService.helloWorld());
                } catch (RemoteException e) {
                    throw new RuntimeException(e);
                }
            }
        });
    }

    private final ServiceConnection mConnection = new ServiceConnection() {
        @Override
        public void onServiceConnected(ComponentName name, IBinder service) {
            Log.d(TAG, "onServiceConnected: ---");
            mMyService = IMyAidlInterface.Stub.asInterface(service);
            try {
                Log.d(TAG, "onServiceConnected: helloWorld--- " + mMyService.helloWorld());
            } catch (RemoteException e) {
                throw new RuntimeException(e);
            }
        }

        @Override
        public void onServiceDisconnected(ComponentName name) {
            Log.d(TAG, "onServiceDisconnected: ---");
        }
    };
}
3. 注意事项
1.创建AIDL文件的时候如果发现选项是灰色,记得在build.gradle- android{}中添加如下代码,sync一下。
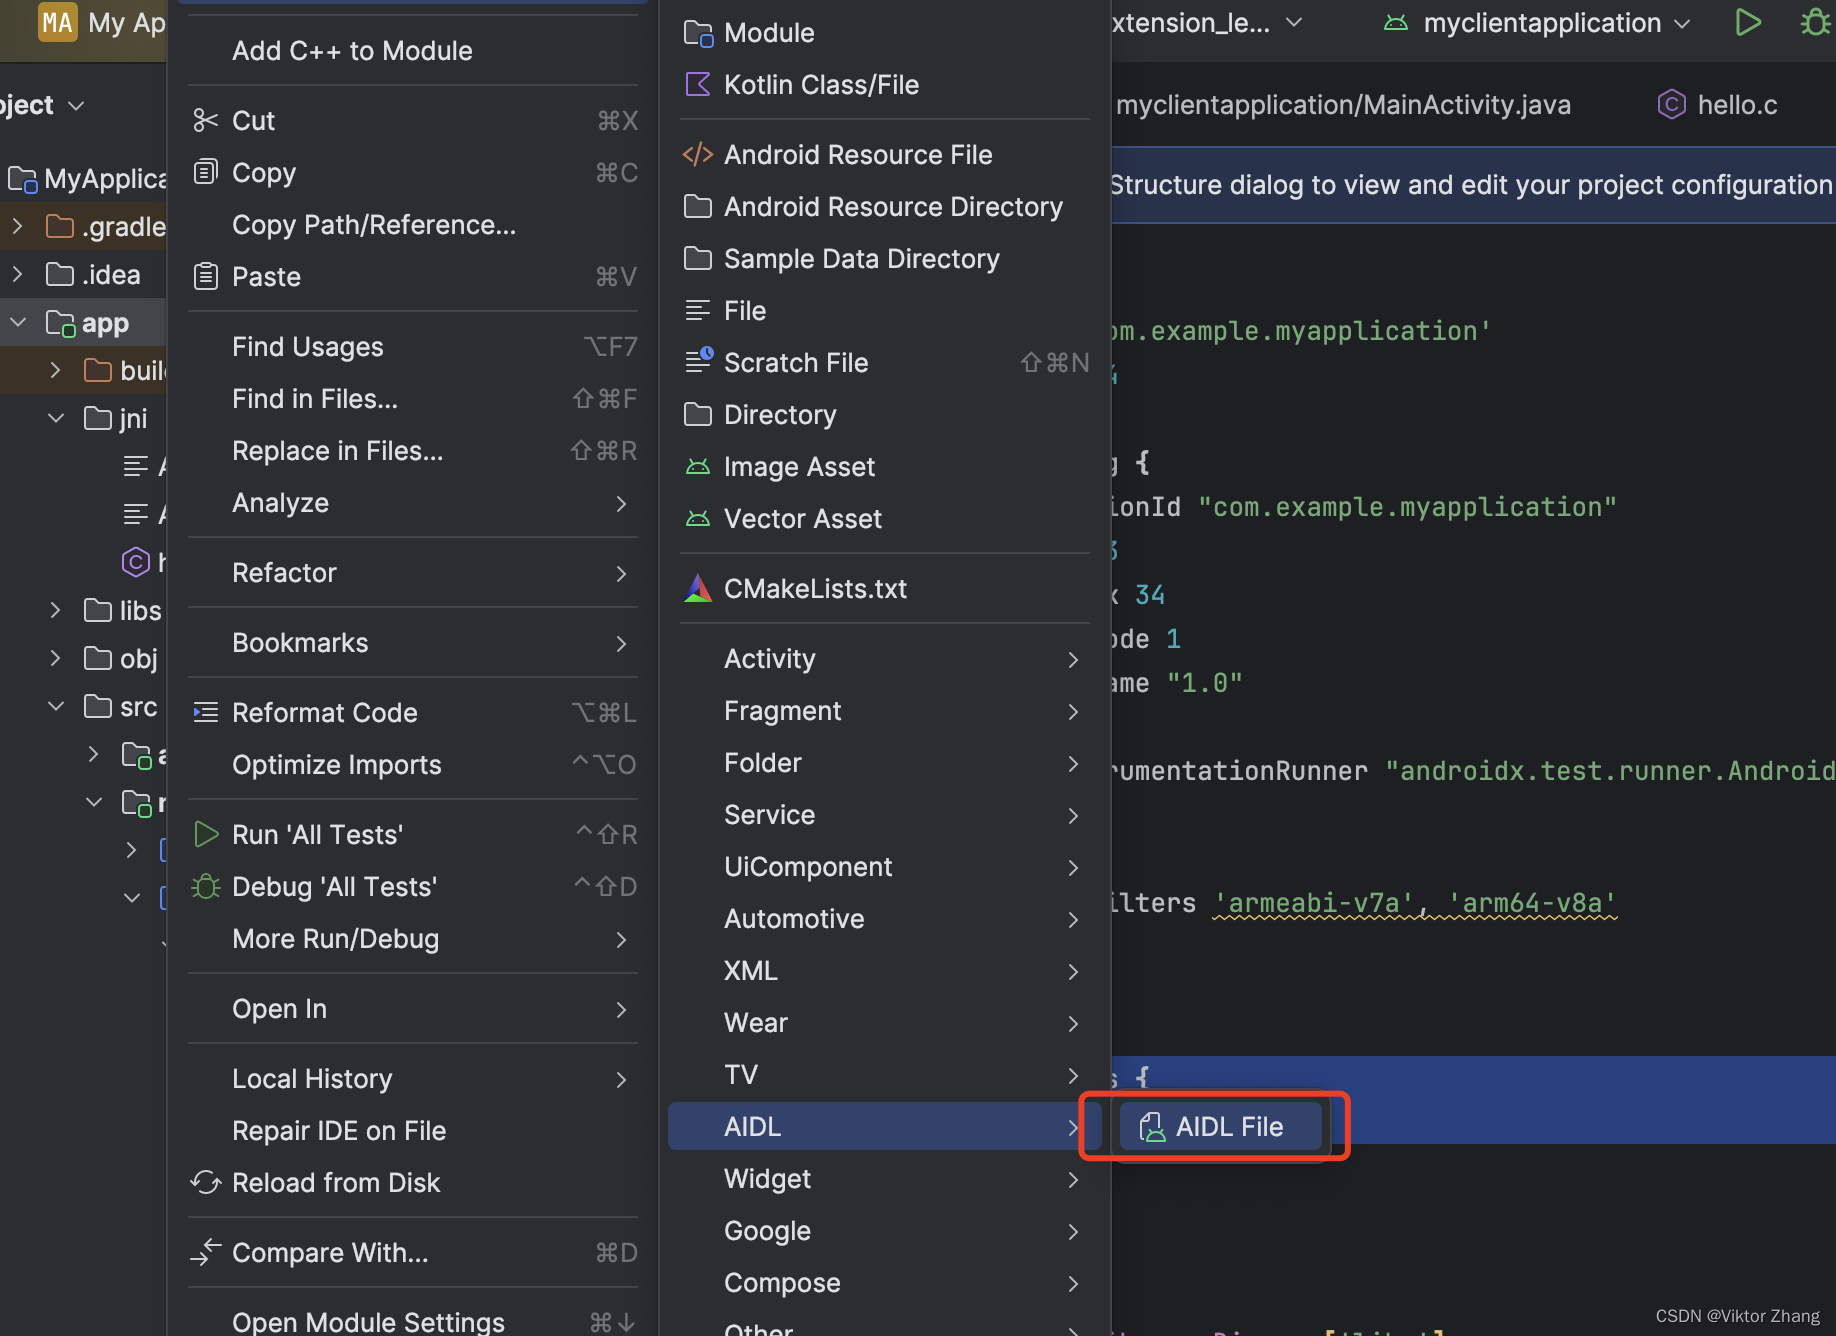
    buildFeatures {
        aidl = true
    }
2.Android高版本,目前我使用的是SDK 34,在客户端AndroidManifest.xml需要添加如下权限,目的是允许当前应用允许访问该设备上所有已安装应用的数据。
    <uses-permission android:name="android.permission.QUERY_ALL_PACKAGES"
        tools:ignore="QueryAllPackagesPermission" />

    <queries>
        <package android:name="com.example.myapplication"/>
    </queries>


 266
266


 到【灌水乐园】发言


