


pigx入门-详细部署
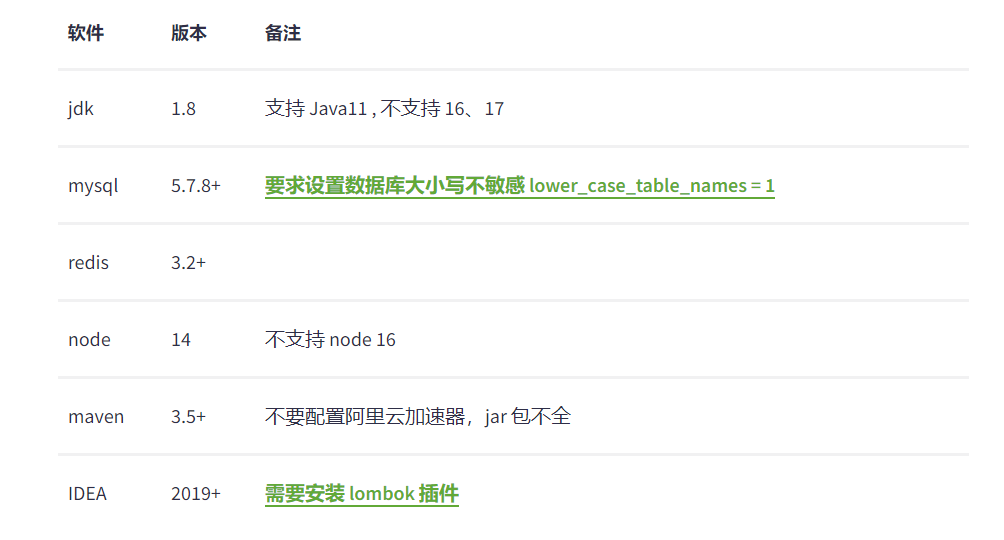
环境说明安装
- 相关下载:https://www.aliyundrive.com/s/3h6N2kh5yvV
项目下载
# 下载源代码
git clone https://git.pig4cloud.com/pig/pigx.git
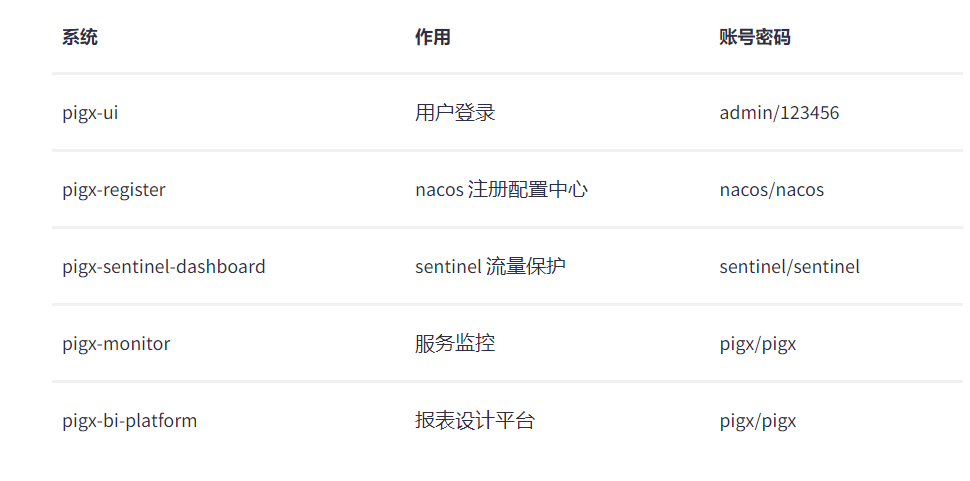
- 关于系统账号密码说明
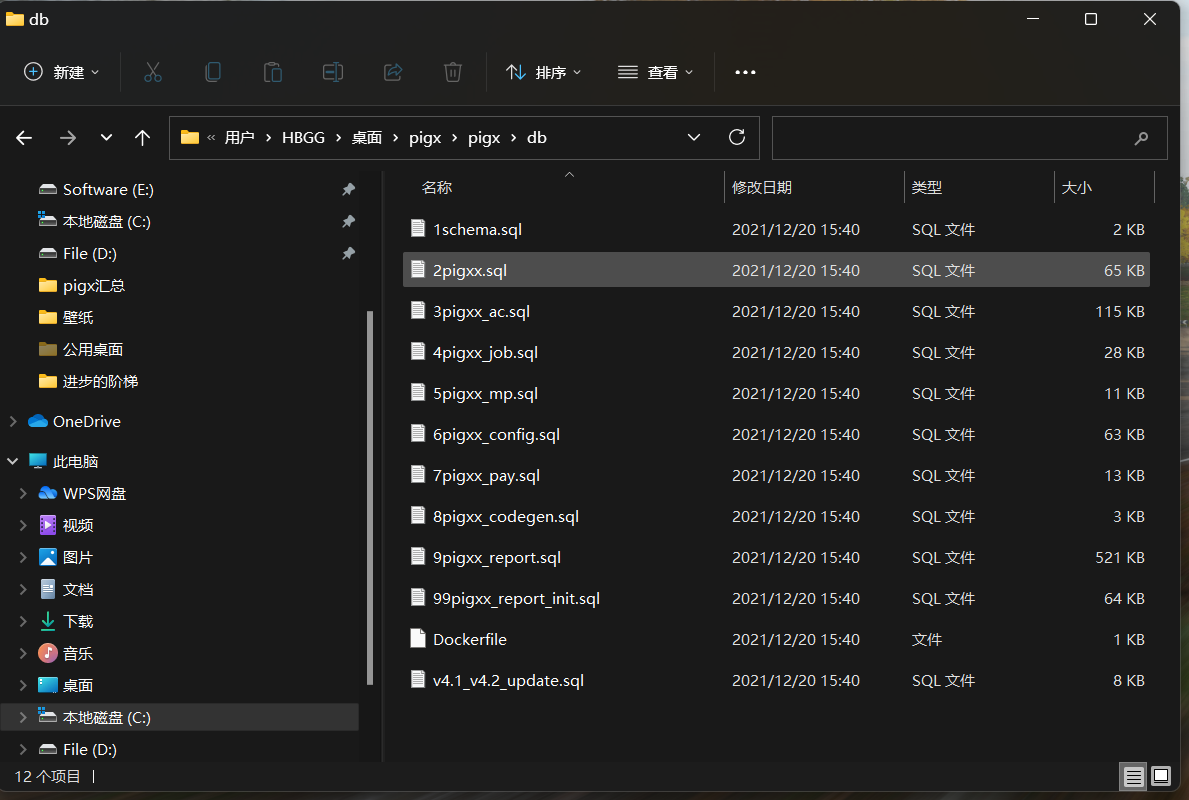
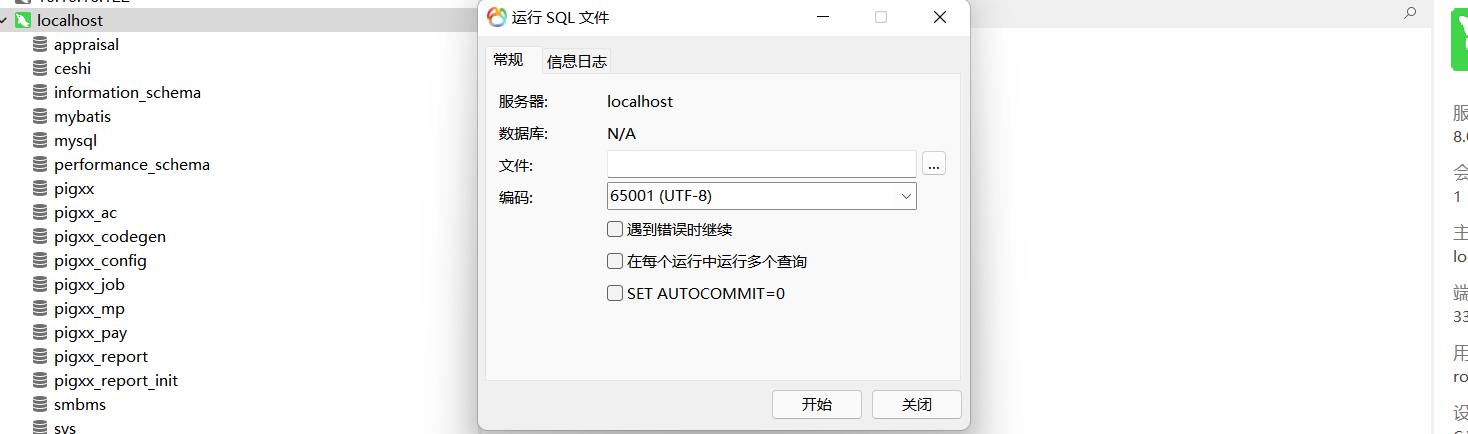
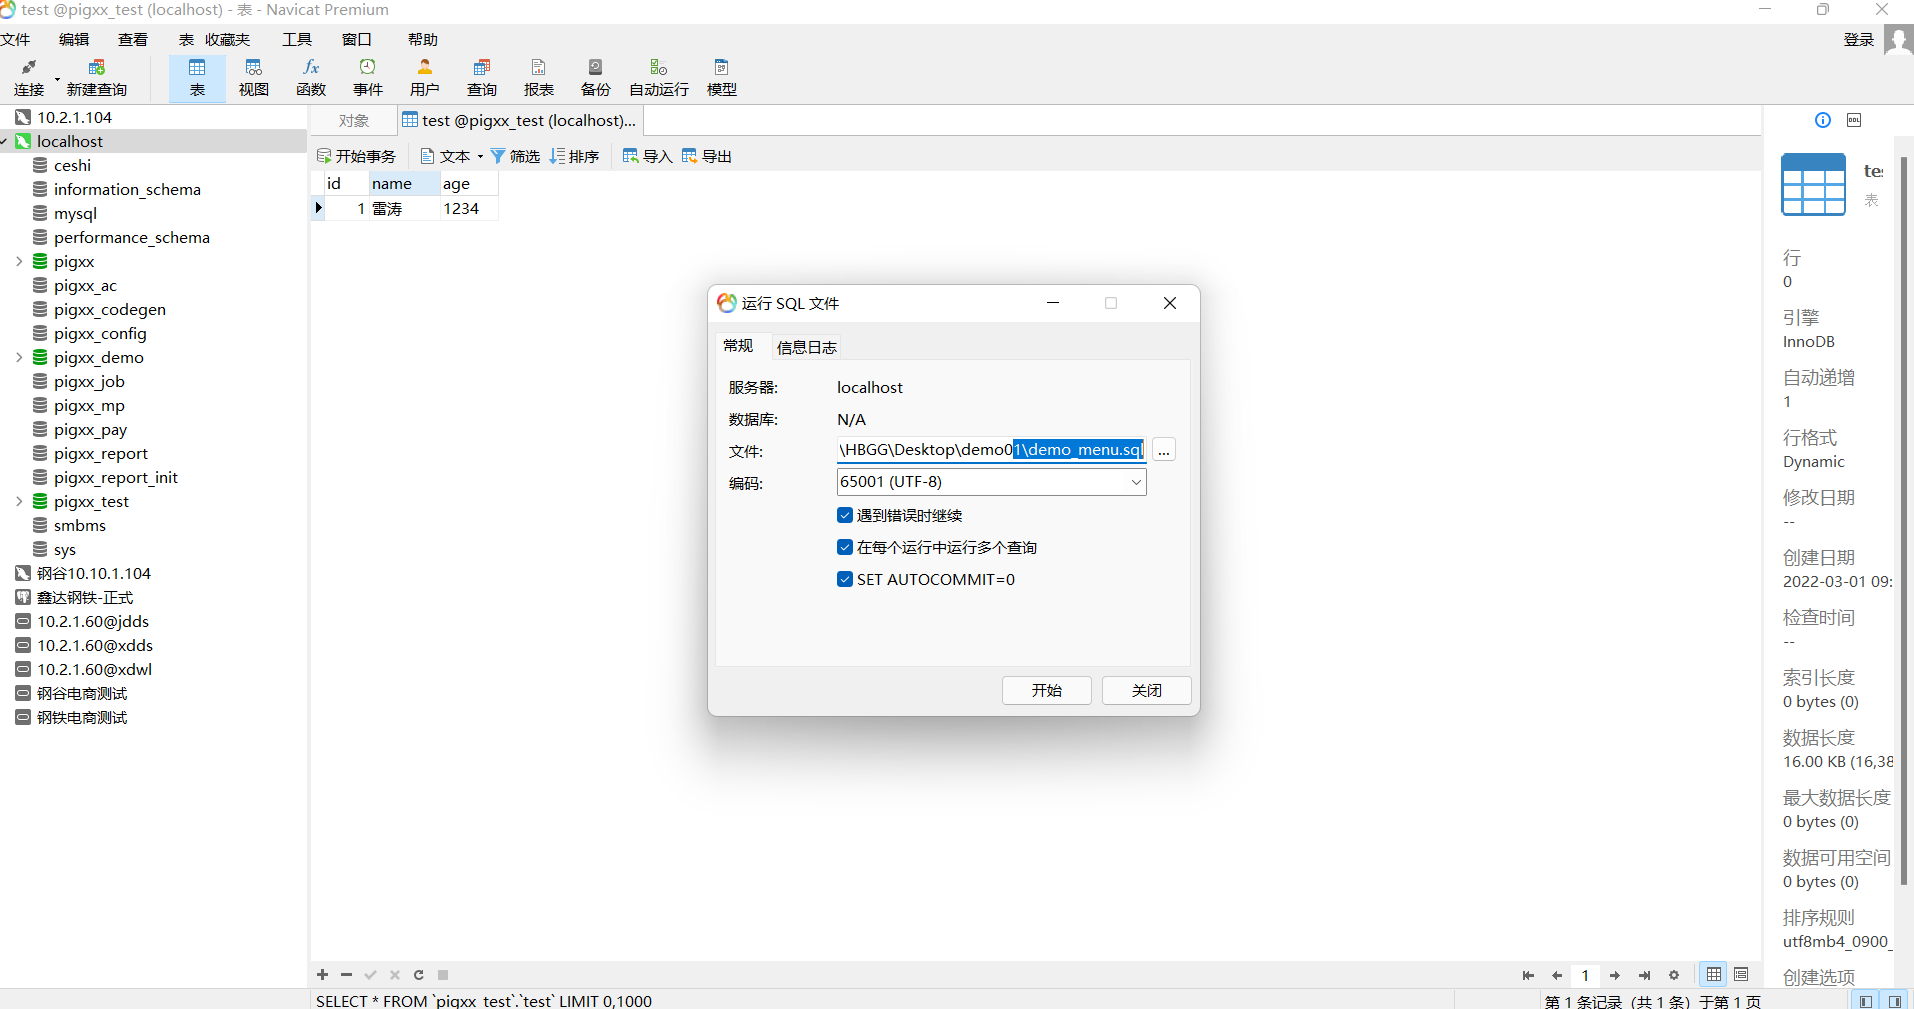
依次运行sql文件
导入除了DockerFile和Update.sql全部导入数据库
配置本地host
- win配置方法:https://www.jb51.net/os/win10/395409.html
127.0.0.1 pigx-register
127.0.0.1 pigx-gateway
127.0.0.1 pigx-redis
127.0.0.1 pigx-xxl
127.0.0.1 pigx-mysql
127.0.0.1 pigx-sentinel
127.0.0.1 pigx-monitor
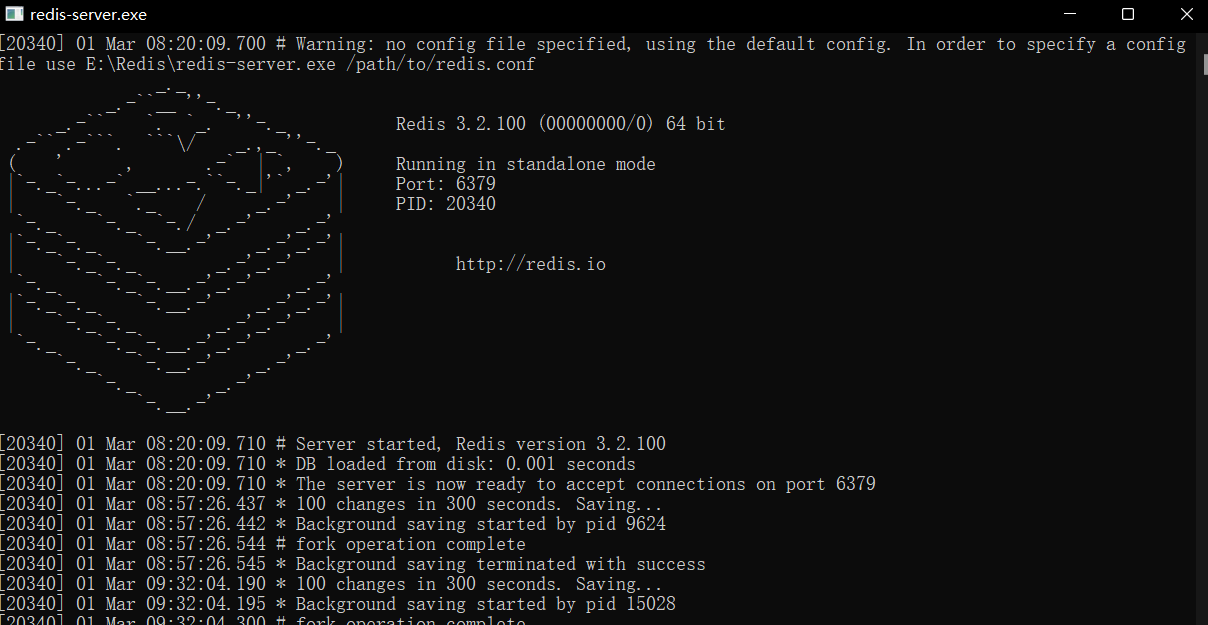
启动redis
打开配置文件修改数据库密码
运行pigx项目
-
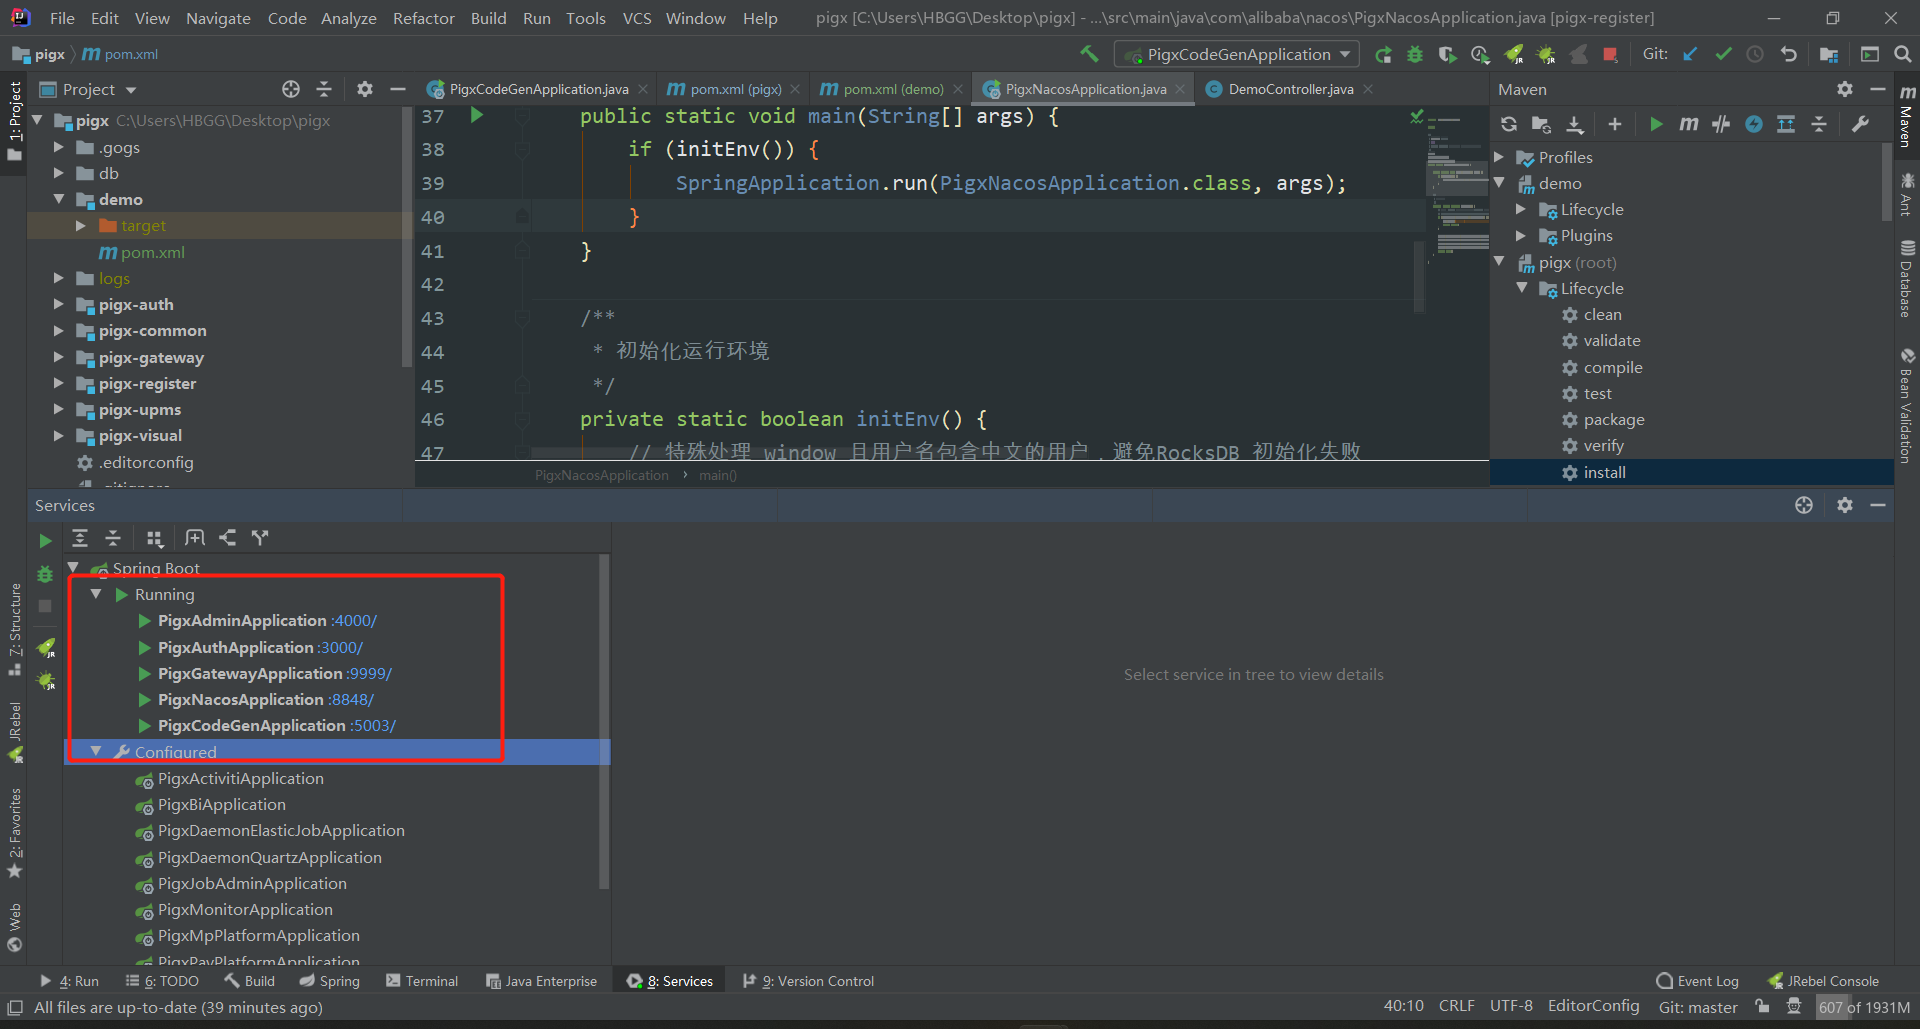
启动相关服务
- PigxNacosApplication :8848/
- PigxGatewayApplication :9999/
- PigxAuthApplication :3000/
- PigxAdminApplication :4000/
- PigxCodeGenApplication :5003/
-
启动前端
-
检查node版本
检查node版本 = 14
node -v
若高版本node 可执行n 命令切换至 14版本
n 14.18.1
-
输入命令启动
npm run dev -
浏览器访问: http://localhost:8080
默认用户名: admin
默认密码: 123456

-
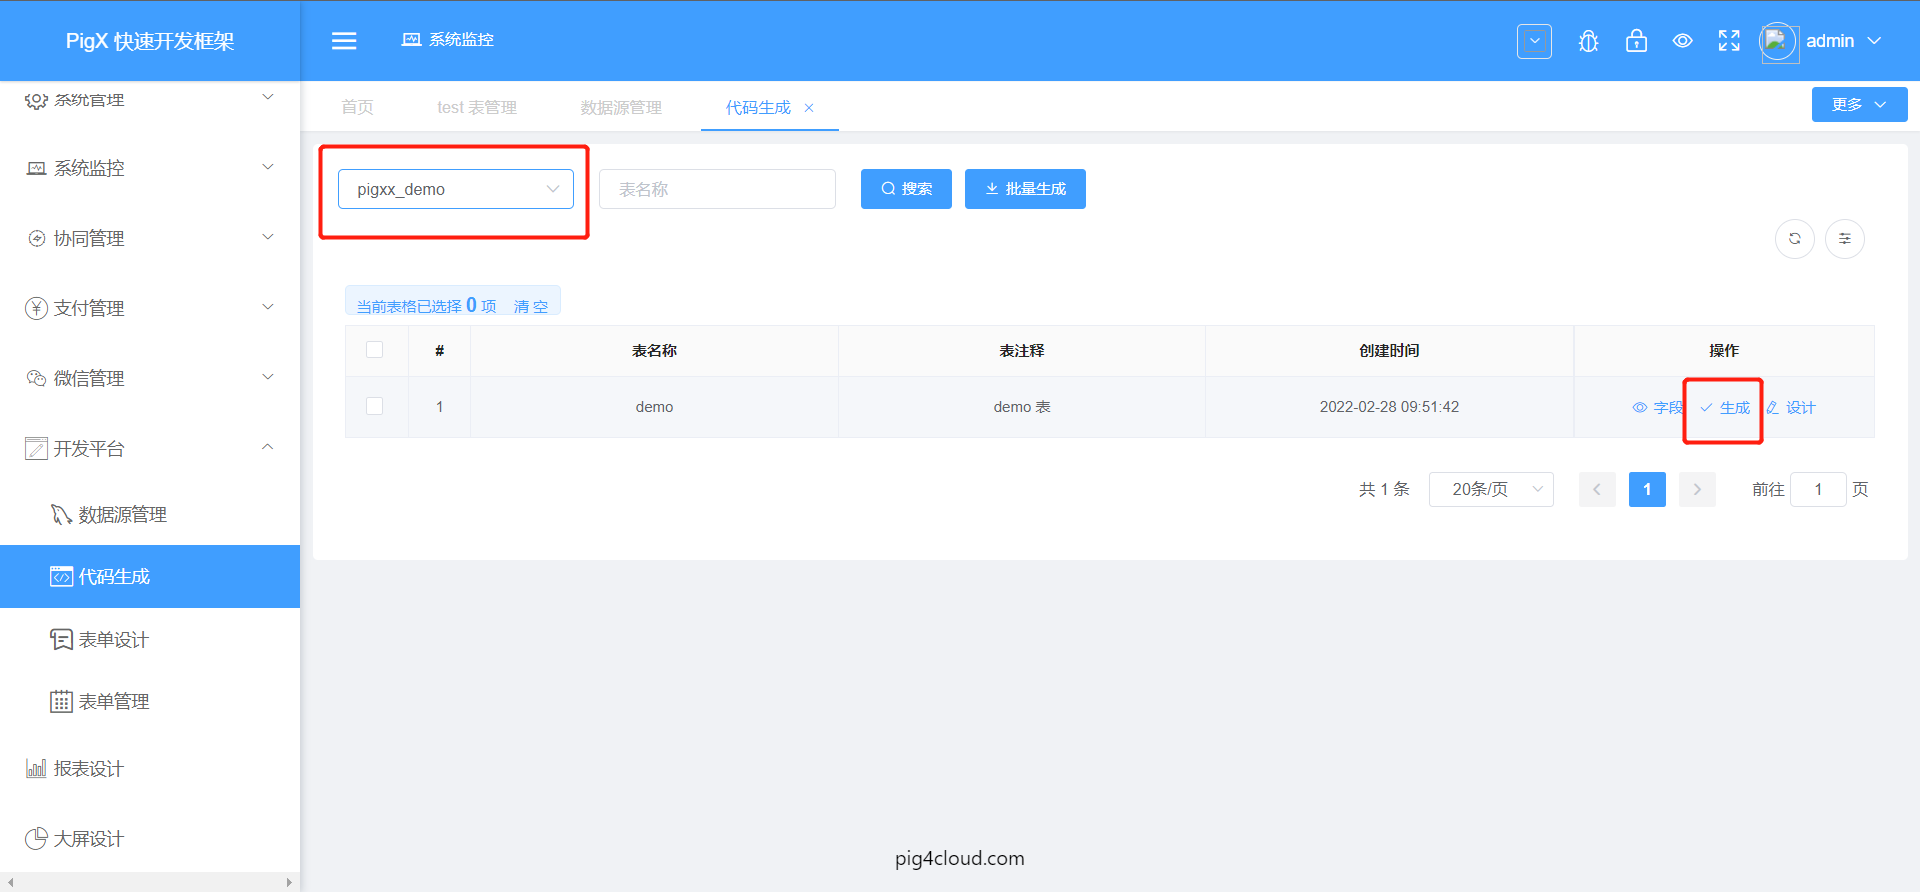
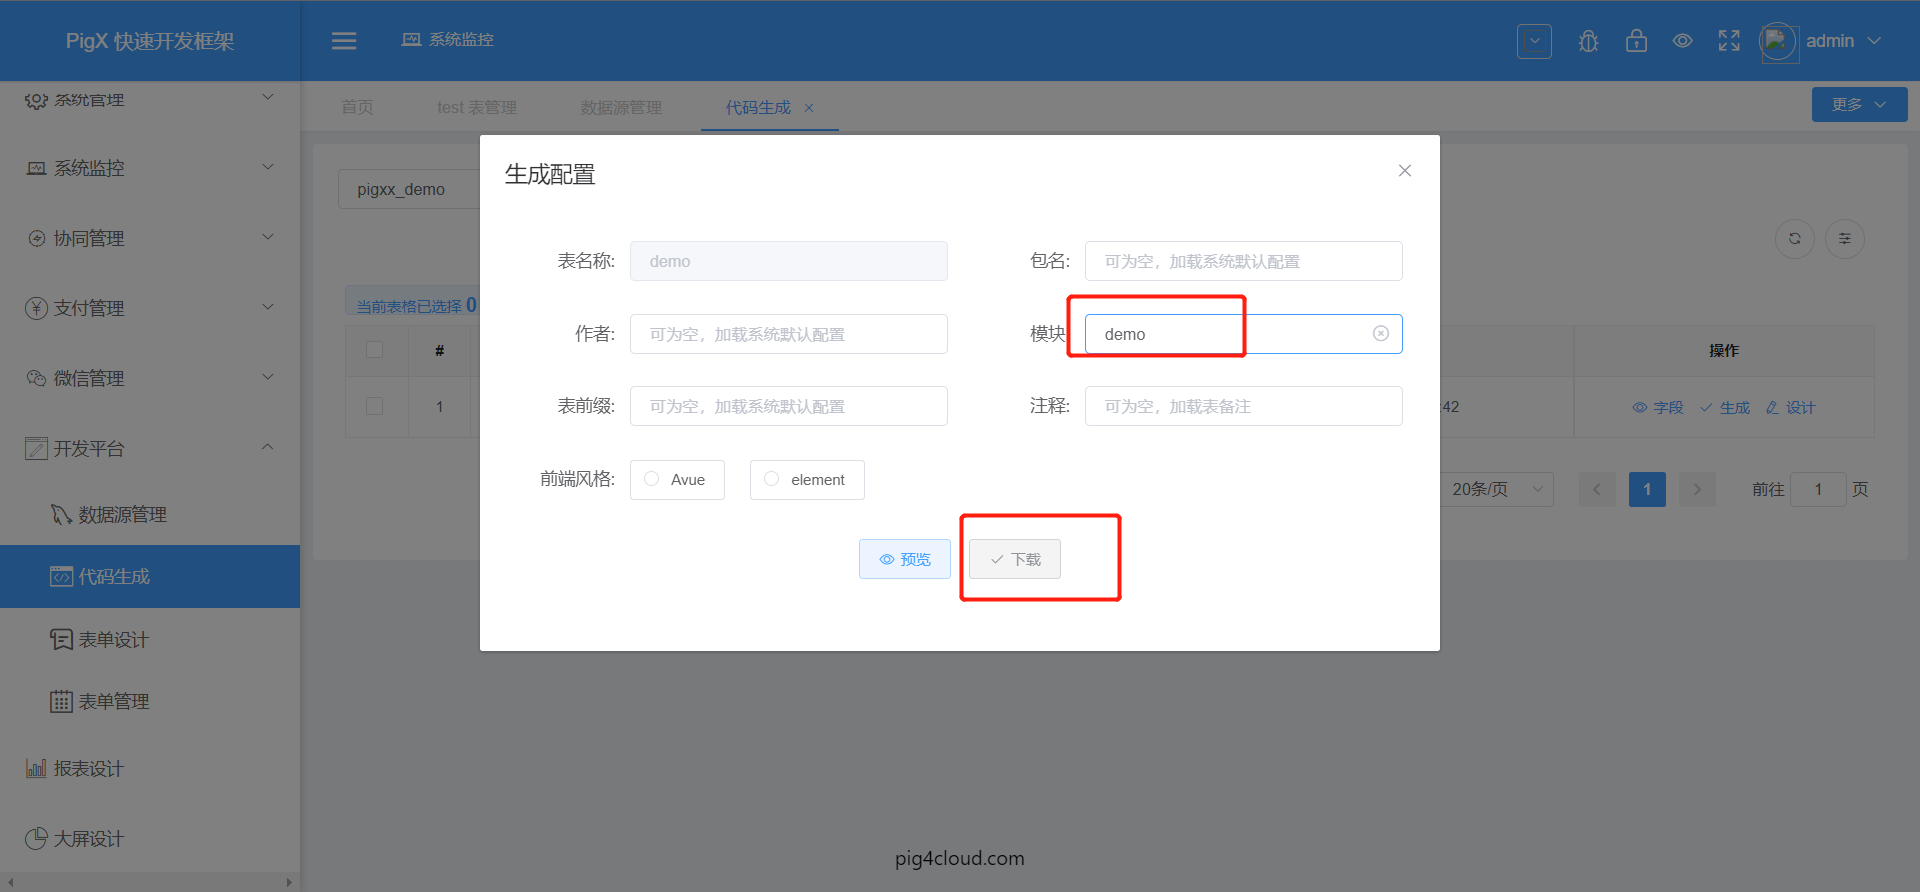
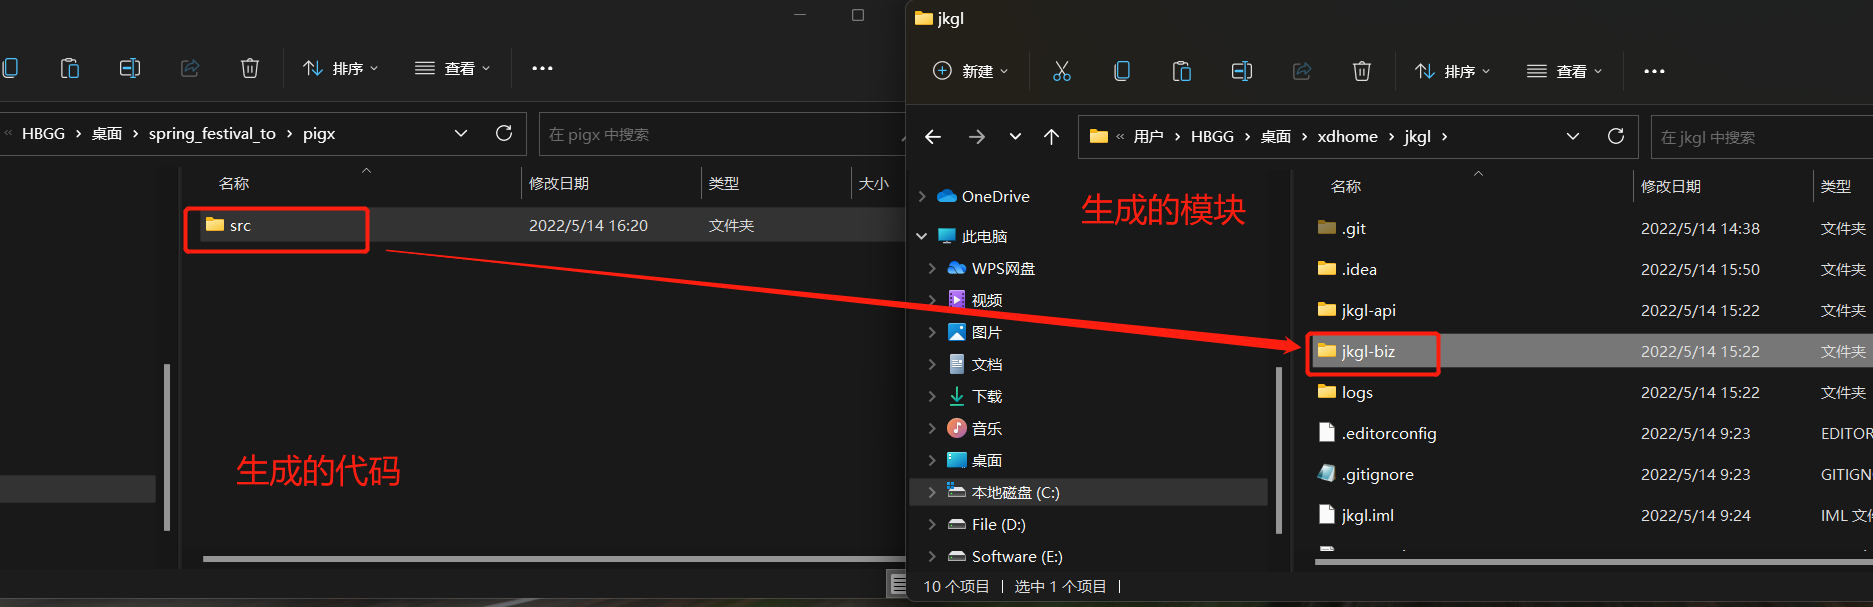
生成子项目
cd pigx/
mvn clean install
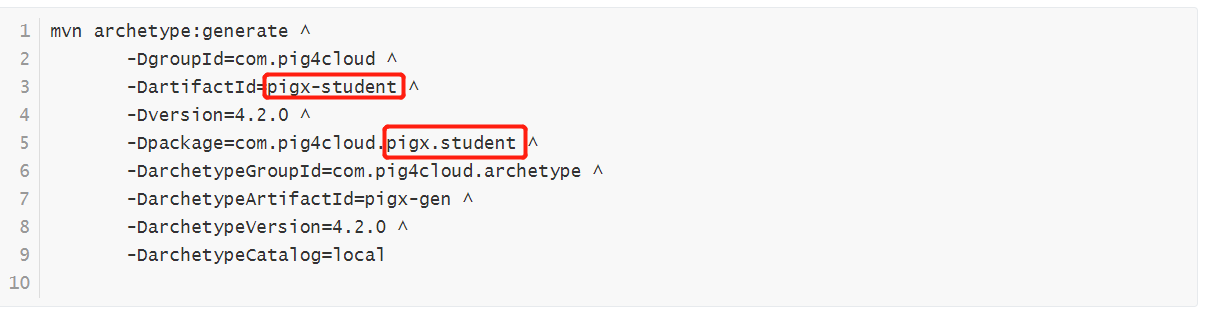
mvn archetype:generate ^
       -DgroupId=com.pig4cloud ^
       -DartifactId=pigx-ceshi ^
       -Dversion=4.2.0 ^
       -Dpackage=com.pig4cloud.pigx.ceshi ^
       -DarchetypeGroupId=com.pig4cloud.archetype ^
       -DarchetypeArtifactId=pigx-gen ^
       -DarchetypeVersion=4.2.0 ^
       -DarchetypeCatalog=local
-- 创建测试库
create database `pigxx_ceshi` default character set utf8mb4 collate utf8mb4_general_ci;

USE pigxx_ceshi;

SET NAMES utf8mb4;
SET FOREIGN_KEY_CHECKS = 0;

-- 创建测试表
DROP TABLE IF EXISTS `test`;
CREATE TABLE `test` ( `id` int(11) NOT NULL AUTO_INCREMENT COMMENT '主键',
                      `username` varchar(255) DEFAULT NULL COMMENT '用户名',
                      `password` varchar(255) DEFAULT NULL COMMENT '密码',
                       PRIMARY KEY (`id`)
) ENGINE=InnoDB AUTO_INCREMENT=1 DEFAULT CHARSET=utf8mb4 ROW_FORMAT=DYNAMIC COMMENT='test 表';
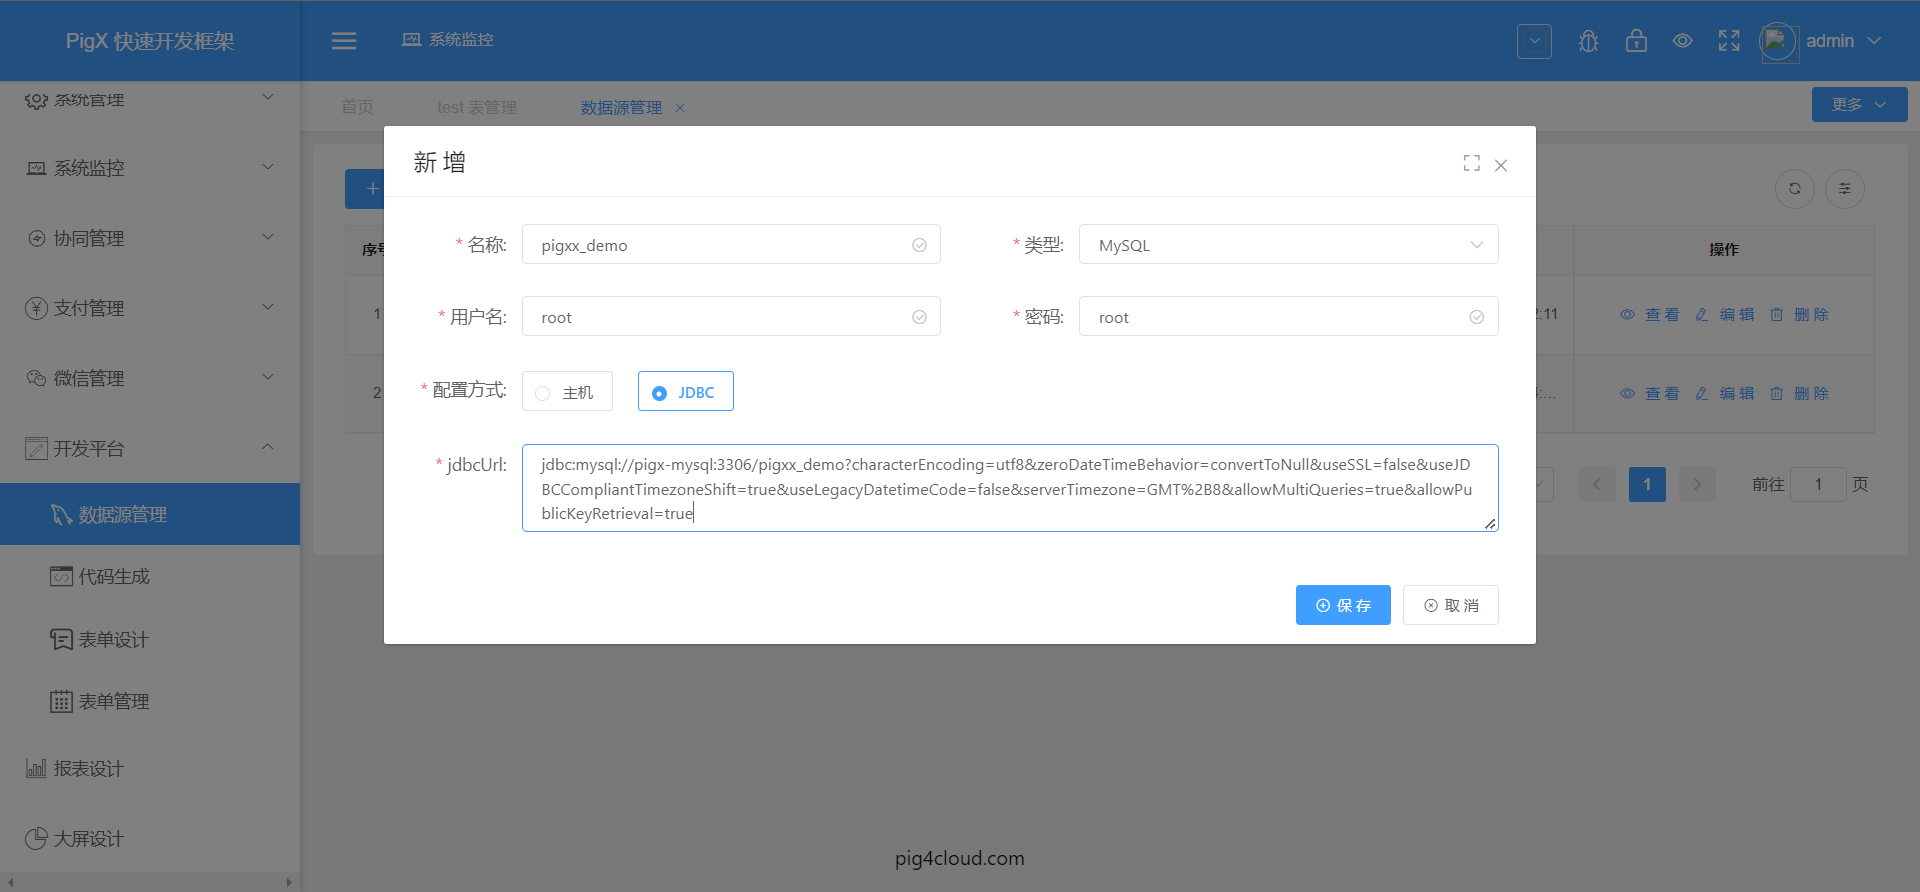
- 数据源
jdbc:mysql://pigx-mysql:3306/pigxx_ceshi?characterEncoding=utf8&zeroDateTimeBehavior=convertToNull&useSSL=false&useJDBCCompliantTimezoneShift=true&useLegacyDatetimeCode=false&serverTimezone=GMT%2B8&allowMultiQueries=true&allowPublicKeyRetrieval=true


 9416
9416


 到【灌水乐园】发言


