


 本文提供了一套详细的MariaDB升级步骤,包括数据备份、卸载旧版本、安装新版本、配置字符集、添加用户及权限、数据还原等关键环节,确保在Hadoop集群中顺利升级。
切记:升级操作需要使用yum源
1,备份相关数据库数据
mysqldump -h127.0.0.1 -uroot -ppass --databases hive ambair > /opt/tools/mariadb-10.4.10/ambari-hive.sql
2,卸载原有mariadb数据库

卸载相关rpm包,示例如下
rpm -ivh mariadb-server-5.5.60-1.el7_5.x86_64.rpm
--nodeps
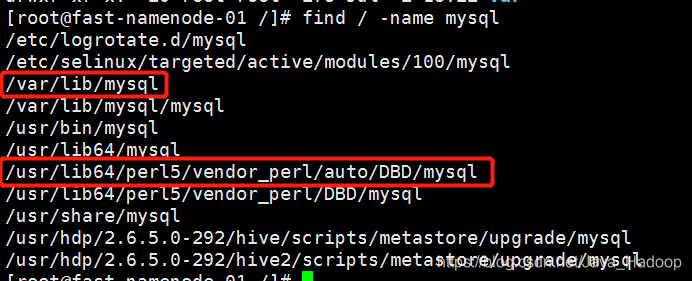
同台服务器上升级需要删除相关文件,否则有可能出现新版数据库中存在老版数据库,后期问题未知,在此清除掉
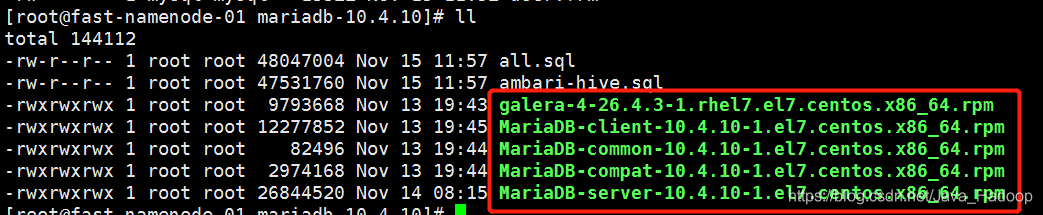
3,提前准备高版本 mariadb rpm 包
4,升级操作
4.1开始安装mariadb
在rpm包所在路径执行命令:
yum -y install ./*
安装完成MariaDB,首先启动MariaDB
systemctl start mariadb
设置开机启动
systemctl enable mariadb
生产环境下,最好执行mysql_secure_installation来做一些常规化安全设置
mysql_secure_installation
首先是设置密码,会提示先输入密码
Enter current password for root (enter for none):<–初次运行直接回车
设置密码
Set root password? [Y/n] <– 是否设置root用户密码,输入y并回车或直接回车
New password: <– 设置root用户的密码
Re-enter new password: <– 再输入一次你设置的密码
其他配置
Remove anonymous users? [Y/n] <– 是否删除匿名用户,回车
Disallow root login remotely? [Y/n] <–是否禁止root远程登录,回车,
Remove test database and access to it? [Y/n] <– 是否删除test数据库,回车
Reload privilege tables now? [Y/n] <– 是否重新加载权限表,回车
初始化MariaDB完成,接下来测试登录
mysql -uroot -ppassword
4.2配置MariaDB的字符集
文件/etc/my.cnf
在[mysqld]标签下添加
init_connect='SET collation_connection = utf8_unicode_ci'
init_connect='SET NAMES utf8'
character-set-server=utf8
collation-server=utf8_unicode_ci
skip-character-set-client-handshake
文件/etc/my.cnf.d/client.cnf
在[client]中添加
default-character-set=utf8
文件/etc/my.cnf.d/mysql-clients.cnf
在[mysql]中添加
default-character-set=utf8
全部配置完成,重启mariadb
systemctl restart mariadb
之后进入MariaDB查看字符集
mysql> show variables like "%character%";show variables like "%collation%";
4.3添加用户,设置权限,测试登录
create user hive@'localhost' identified by 'hive520';
grant all privileges on *.* to hive@'localhost';
grant all privileges on *.* to hive@'localhost' identified by 'hive520';
grant all privileges on *.* to hive@'%' identified by 'hive520';
grant all privileges on *.* to hive@'
hdp01.hadoop.com' identified by 'hive520';
flush privileges;
查看用户信息:
select user,host,password from mysql.user;
使用新建用户登录,测试是否有误.
5,将备份数据还原
MariaDB [mysql]> source /opt/tools/mariadb-10.4.10/ambari-hive.sql
6,HADOOP集群中mysql升级是否成功测试(单纯升级mysql忽略此步
)
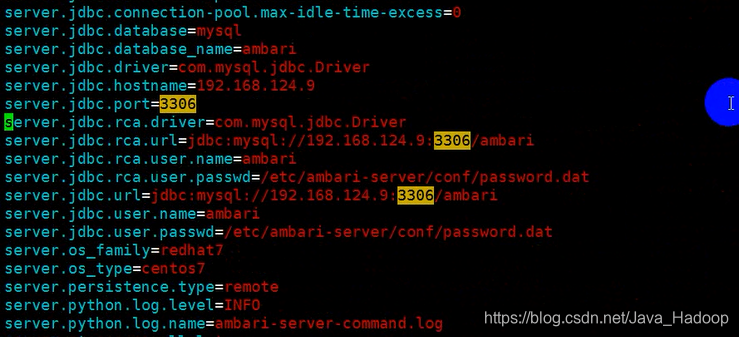
(前后升级不在同一台服务器) 修改/etc/ambari-server/conf/ambari.properties
mysq升级完成后 使用beeline模式 测试hive 连接
beeline -u "jdbc:hive2://192.168.124.9:10000/"


 4768
4768

 被折叠的 条评论
为什么被折叠?
被折叠的 条评论
为什么被折叠?
 到【灌水乐园】发言


