


介绍
Spring REST Docs官网的介绍如下
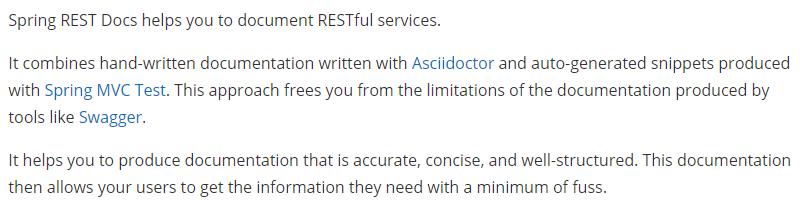
大概意思就是说通过Spring REST Docs是用Asciidoctor编写的手写文档和Spring MVC Test生成的自动生成的代码片段
结合帮助我们生成RESTful服务的接口文档。
与Swagger的对比
如果有使用自动生成接口文档工具的同学,应该对Swagger不陌生。那Spring REST docs跟Swagger有哪些差异?
对比如下:
| Spring REST Docs | Swagger | |
|---|---|---|
| 代码侵入性 | 零侵入 | 高, 需要往代码内增加@Api、@ApiOperation等注解 |
| 易用性 | 较低, 需要先生成代码片段文件后, 再编辑adoc格式的文件进行生成html, 进行查看 | 高, 直接可生成,无需其他操作 |
| 扩展性 | 高, 最终的生成的接口文档界面可自己定义。 界面样式可自定义 | 较低, 生成的接口界面为固定。无法修改 |
如何使用
本文以spingboot 2.3.10.RELEASE、Spring REST Docs 2.0.5.RELEASE为例。
新建工程
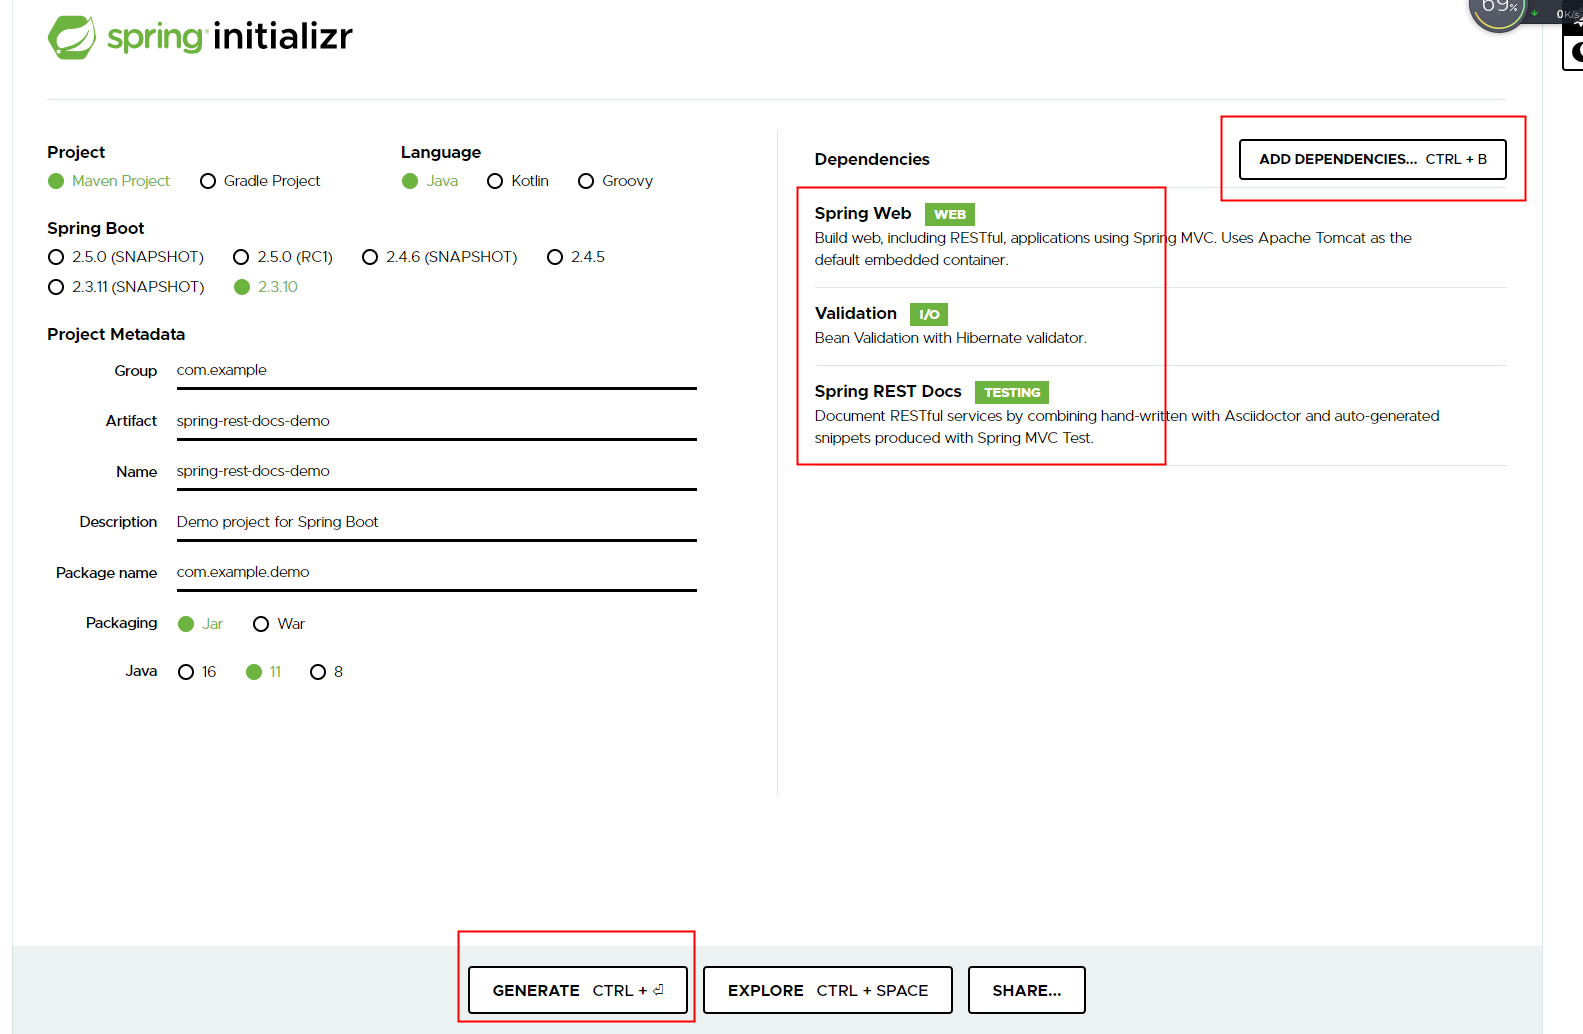
访问 https://start.spring.io/,新一个spring-rest-docs-demo的工程,并选择添加依赖。
如下图所示,点击GENERATE生成代码。将生成的代码导入IDE内。
打开pom文件添加FastJson相关jar,后面使用。完整的pom.xml文件内容如下:
<?xml version="1.0" encoding="UTF-8"?>
<project xmlns="http://maven.apache.org/POM/4.0.0" xmlns:xsi="http://www.w3.org/2001/XMLSchema-instance"
	xsi:schemaLocation="http://maven.apache.org/POM/4.0.0 https://maven.apache.org/xsd/maven-4.0.0.xsd">
	<modelVersion>4.0.0</modelVersion>
	<parent>
		<groupId>org.springframework.boot</groupId>
		<artifactId>spring-boot-starter-parent</artifactId>
		<version>2.3.10.RELEASE</version>
		<relativePath/> <!-- lookup parent from repository -->
	</parent>
	<groupId>com.example</groupId>
	<artifactId>spring-rest-docs-demo</artifactId>
	<version>0.0.1-SNAPSHOT</version>
	<name>spring-rest-docs-demo</name>
	<description>Demo project for Spring Boot</description>
	<properties>
		<java.version>1.8</java.version>
	</properties>
	<dependencies>
		<dependency>
			<groupId>org.springframework.boot</groupId>
			<artifactId>spring-boot-starter-web</artifactId>
		</dependency>

		<dependency>
			<groupId>org.springframework.boot</groupId>
			<artifactId>spring-boot-starter-test</artifactId>
			<scope>test</scope>
			<exclusions>
				<exclusion>
					<groupId>org.junit.vintage</groupId>
					<artifactId>junit-vintage-engine</artifactId>
				</exclusion>
			</exclusions>
		</dependency>
		<dependency>
			<groupId>org.springframework.restdocs</groupId>
			<artifactId>spring-restdocs-mockmvc</artifactId>
			<scope>test</scope>
		</dependency>
        <dependency>
            <groupId>junit</groupId>
            <artifactId>junit</artifactId>
            <version>4.12</version>
            <scope>test</scope>
        </dependency>
        <dependency>
            <groupId>com.alibaba</groupId>
            <artifactId>fastjson</artifactId>
            <version>1.2.70</version>
        </dependency>
        <dependency>
            <groupId>org.springframework.boot</groupId>
            <artifactId>spring-boot-starter-validation</artifactId>
        </dependency>
    </dependencies>

	<build>
		<plugins>
			<plugin>
				<groupId>org.asciidoctor</groupId>
				<artifactId>asciidoctor-maven-plugin</artifactId>
				<version>1.5.8</version>
				<executions>
					<execution>
						<id>generate-docs</id>
						<phase>prepare-package</phase>
						<goals>
							<goal>process-asciidoc</goal>
						</goals>
						<configuration>
							<backend>html</backend>
							<doctype>book</doctype>
						</configuration>
					</execution>
				</executions>
				<dependencies>
					<dependency>
						<groupId>org.springframework.restdocs</groupId>
						<artifactId>spring-restdocs-asciidoctor</artifactId>
						<version>${spring-restdocs.version}</version>
					</dependency>
				</dependencies>
			</plugin>
			<plugin>
				<groupId>org.springframework.boot</groupId>
				<artifactId>spring-boot-maven-plugin</artifactId>
			</plugin>
		</plugins>
	</build>

</project>
编辑接口相关代码
在com.example.demo包下新建controller和vo两个包,然后编写后面用到的vo类。
在vo包下新建AddVo类,代码如下
package com.example.demo.vo;


import javax.validation.constraints.NotNull;

/**
 * @author lijun
 * @Description
 */
public class AddVo {

    @NotNull
    private String data;

    public String getData() {
        return data;
    }

    public void setData(String data) {
        this.data = data;
    }
}
然后controller包下编写接入层IndexController类,并增加GET和POST接口。完整代码如下:
package com.example.demo.controller;

import com.example.demo.vo.AddVo;
import org.springframework.web.bind.annotation.GetMapping;
import org.springframework.web.bind.annotation.PostMapping;
import org.springframework.web.bind.annotation.RequestBody;
import org.springframework.web.bind.annotation.RestController;

import java.util.HashMap;
import java.util.Map;

/**
 * @author lijun
 * @Description
 * @Date 2021/4/28 16:59
 */
@RestController
public class IndexController {

    @GetMapping("/")
    public Map index(){
        Map m = new HashMap();
        m.put("test","2122");
        return m;
    }

    @PostMapping("/")
    public AddVo add(@RequestBody AddVo vo){
        return vo;
    }
}
编写生成片段测试类
在测试的包下新建一个IndexTest测试类。代码如下:
package com.example.demo;

/**
 * @author lijun
 * @Description
 */

import com.alibaba.fastjson.JSON;
import com.example.demo.vo.AddVo;
import org.junit.Before;
import org.junit.Rule;
import org.junit.Test;
import org.junit.runner.RunWith;
import org.springframework.beans.factory.annotation.Autowired;
import org.springframework.boot.test.context.SpringBootTest;
import org.springframework.http.MediaType;
import org.springframework.restdocs.JUnitRestDocumentation;
import org.springframework.restdocs.constraints.ConstraintDescriptions;
import org.springframework.test.context.junit4.SpringRunner;
import org.springframework.test.web.servlet.MockMvc;
import org.springframework.test.web.servlet.setup.MockMvcBuilders;
import org.springframework.web.context.WebApplicationContext;

import java.util.HashMap;
import java.util.Map;

import static org.springframework.restdocs.mockmvc.MockMvcRestDocumentation.document;
import static org.springframework.restdocs.mockmvc.MockMvcRestDocumentation.documentationConfiguration;
import static org.springframework.restdocs.payload.PayloadDocumentation.*;
import static org.springframework.test.web.servlet.request.MockMvcRequestBuilders.get;
import static org.springframework.test.web.servlet.request.MockMvcRequestBuilders.post;
import static org.springframework.test.web.servlet.result.MockMvcResultMatchers.status;


@SpringBootTest(classes = SpringRestDocsDemoApplication.class)
@RunWith(SpringRunner.class)
public class IndexTest {

    @Rule
    public JUnitRestDocumentation restDocumentation = new JUnitRestDocumentation();

    private MockMvc mockMvc;

    @Autowired
    private WebApplicationContext context;

    @Before
    public void setUp() {
        this.mockMvc = MockMvcBuilders.webAppContextSetup(this.context)
                .apply(documentationConfiguration(this.restDocumentation))
                .build();
    }

    @Test
    public void index() throws Exception {

        this.mockMvc.perform(get("/").accept(MediaType.APPLICATION_JSON))
                .andExpect(status().isOk())
                .andDo(document("{ClassName}/{methodName}"));

    }

    @Test
    public void add() throws Exception {
        ConstraintDescriptions userConstraints = new ConstraintDescriptions(AddVo.class);
        AddVo addVo = new AddVo();
        addVo.setData("测试");
        this.mockMvc.perform(post("/").accept(MediaType.APPLICATION_JSON)
                .contentType(MediaType.APPLICATION_JSON).content(JSON.toJSONString(addVo)))
                .andExpect(status().isOk())
                .andDo(document("{ClassName}/{methodName}",
                        requestFields(fieldWithPath("data").description(userConstraints.descriptionsForProperty("data")))));
    }
}
我们这边使用了Junit4.x。如果使用Junit5.x请把@Before注解改为@BeforeEach。
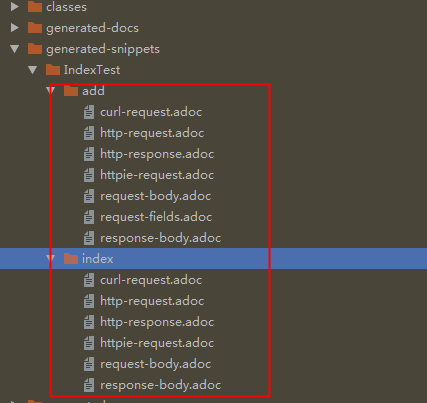
其中restDocumentation对象指定了生成的代码片段输出的目录。默认目录为target/generated-snippets,也可以自行更改。
运行IndexTest类后,可以在target/generated-snippets目录下出现相关文件。如下图所示:
编写asciidoc文件
-
首先在src/main文件夹下创建一个名称为asciidoc的文件夹,名称固定,不可变。
-
在asciidoc文件夹下,创建一个名称为index.adoc的文件,该文件名可任意
编辑需要生成的html界面,index.adoc文档的最终内容如下:
= 用 Spring REST Docs 构建文档
:author: lijun
:email: 625995897@qq.com
:revnumber: v1.0
:toc: left
:toc-title: 目录


== 测试GET
.request
include::{snippets}/IndexTest/index/http-request.adoc[]
.request-body说明
include::{snippets}/IndexTest/index/request-body.adoc[]
.response
include::{snippets}/IndexTest/index/http-response.adoc[]

== 测试POST
.request
include::{snippets}/IndexTest/add/http-request.adoc[]
.request-body
include::{snippets}/IndexTest/add/request-body.adoc[]
.request-body说明
include::{snippets}/IndexTest/add/request-fields.adoc[]
.response
include::{snippets}/IndexTest/add/http-response.adoc[]
相关asciidoc语法参考地址
官网手册链接地址:https://asciidoctor.org/docs/user-manual
asciidoctor基础语法:https://blog.youkuaiyun.com/jioujiou520/article/details/90613175
生成接口html
打开控制台。切换到工程目录。执行如下命令
mvn package -Dmaven.test.skip=true
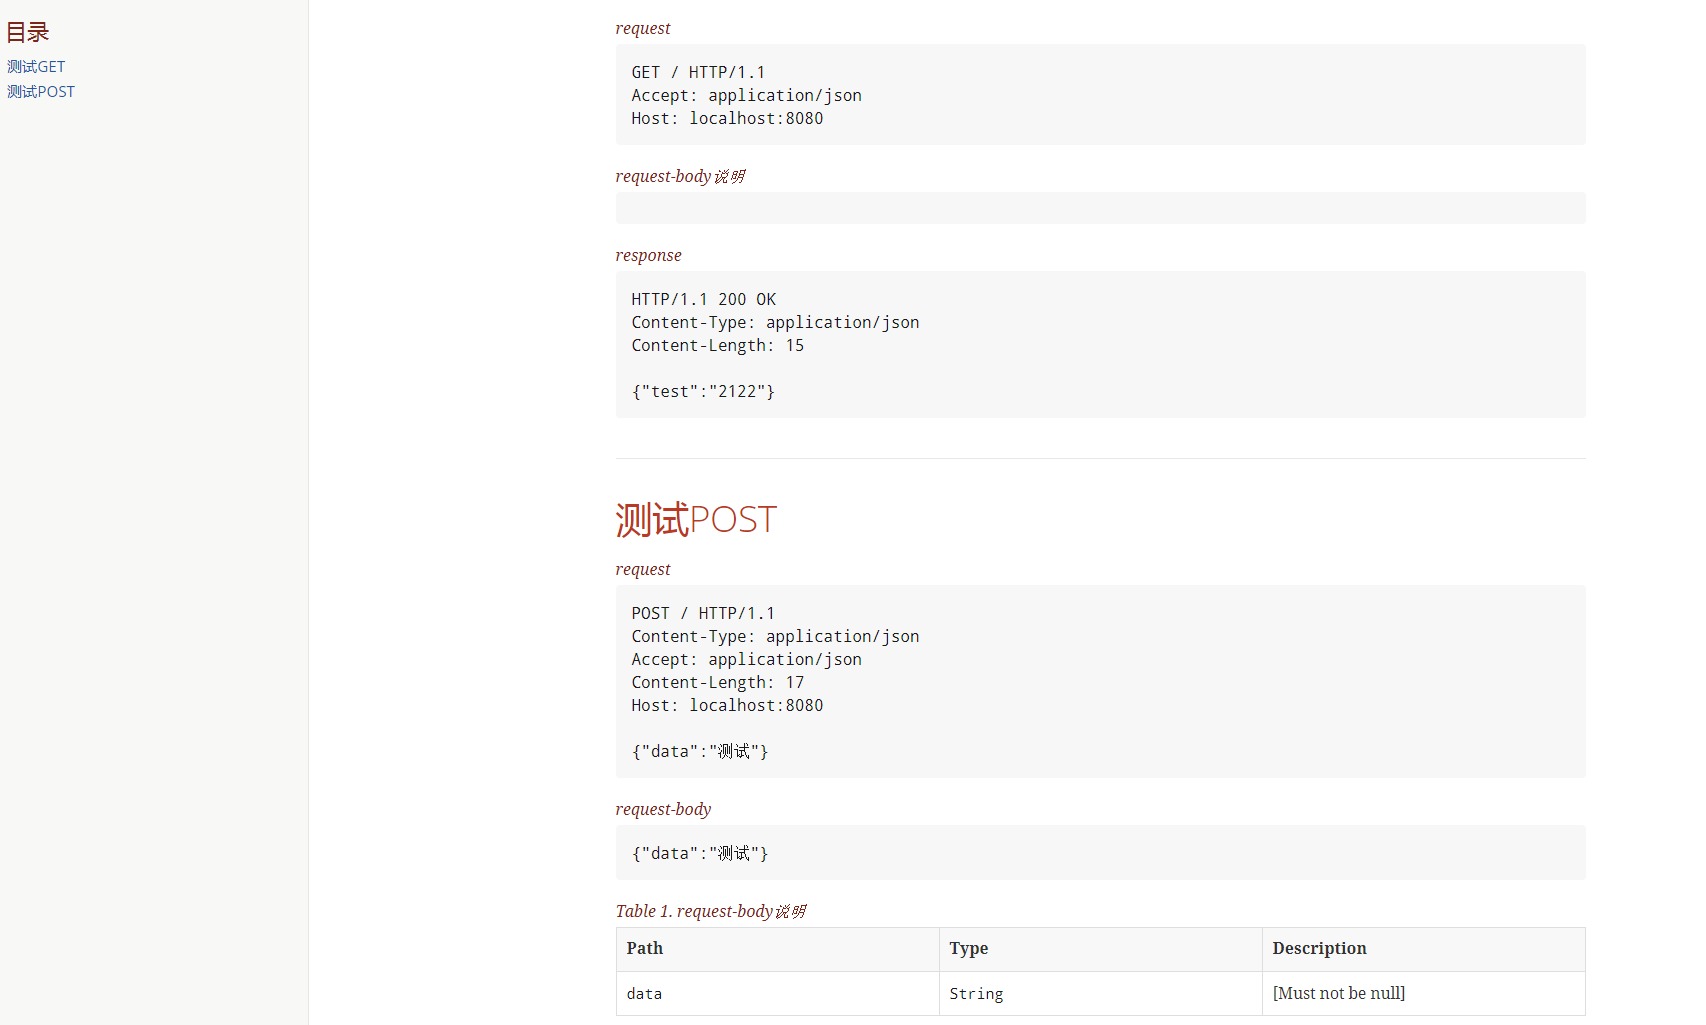
每一个xxx.adoc,最终都会生成xxx.html 存放在/target/generated-doc文件夹中,同时也会存放在/target/classes/static/docs文件中,以便访问
打开/target/generated-doc/index.html可查看生成的接口文档。如下图所示:
完!!!
欢迎扫描下图关注公众号 IT李哥,公众号经常推送一些优质的技术文章


 被折叠的 条评论
为什么被折叠?
被折叠的 条评论
为什么被折叠?
 到【灌水乐园】发言


