


 本文详细介绍ActiveMQ消息队列的原理与应用,包括解决服务间代码耦合、提升系统并发处理能力。通过实例演示如何在Java环境中配置、使用ActiveMQ进行消息传递,涵盖生产者、消费者模型及Queue、Topic数据结构。
MQ百度云下载
链接:https://pan.baidu.com/s/1h3s1RF4FE6hN7aUlLuDmkA
提取码:6bit
1、ActiveMQ简介
什么是ActiveMQ

ActiveMQ工作原理
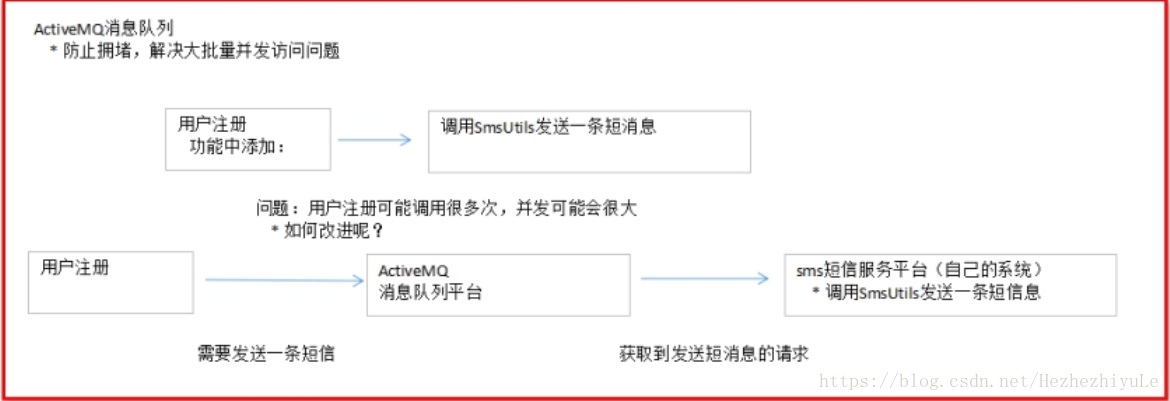
1、 解决服务之间代码耦合
2、 使用消息队列,增加系统并发处理量
ActiveMQ应用场景分析:
1、 当系统使用短信平台、邮件平台的时候。
用户注册,重点使用用户信息数据库保存,而发短信、发邮件,增加业务处理复杂度,这时候使用MQ, 将发短信、发邮箱,通知MQ,由另外服务平台完成。解决了代码的耦合问题。
2、 当系统使用搜索平台、缓存平台的时候。
查询数据,建立缓存、索引 ,当再次查询相同数据的时候,不从数据库查询,从缓存或者索引库查询
当增加、修改、删除数据时,发送消息给MQ, 缓存平台、索引平台 从MQ获取到这个信息,更新缓存或者索引
总结:使用MQ作为系统间数据调用的中转站。
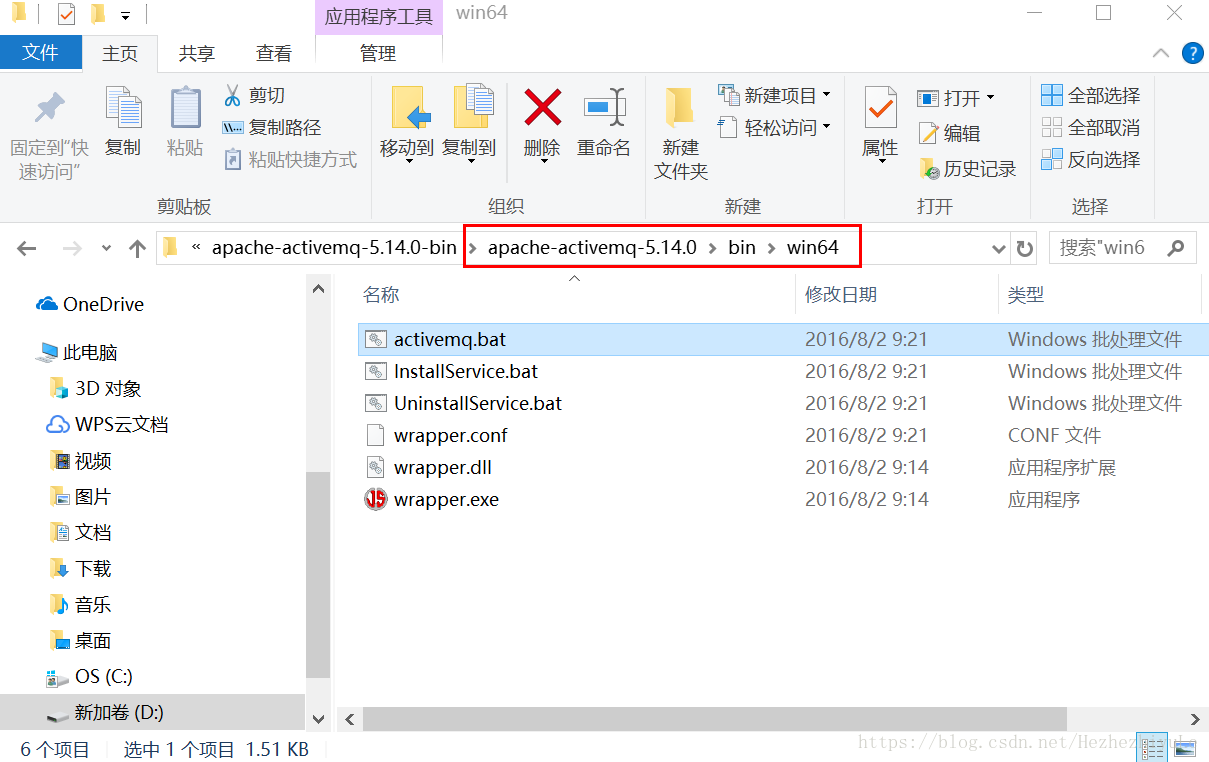
- 下载安装 运行activemq.bat文件
 3. 网页访问
访问:<http://localhost:8161/>  点击:[Manage ActiveMQ broker](http://localhost:8161/admin/)
用户名和密码 都是admin
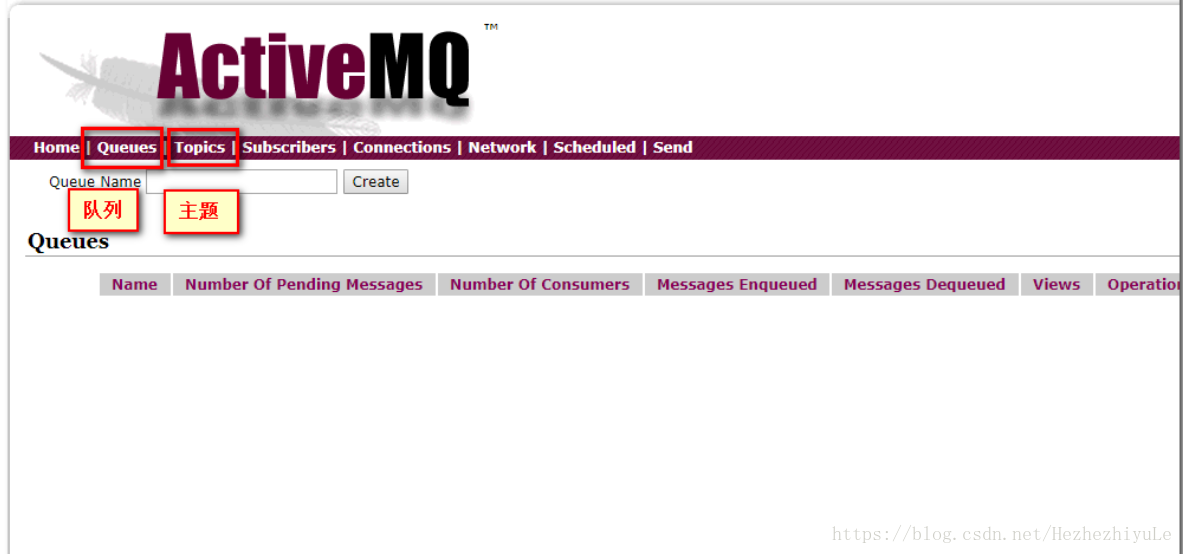
ActiveMQ使用的是标准生产者和消费者模型
有两种数据结构 Queue、Topic
1、Queue 队列 ,生产者生产了一个消息,只能由一个消费者进行消费
2、Topic 话题,生产者生产了一个消息,可以由多个消费者进行消费
- maven引入mq依赖
  <!--activemq-->
   <dependency>
         <groupId>org.springframework.boot</groupId>
         <artifactId>spring-boot-starter-activemq</artifactId>
   </dependency>
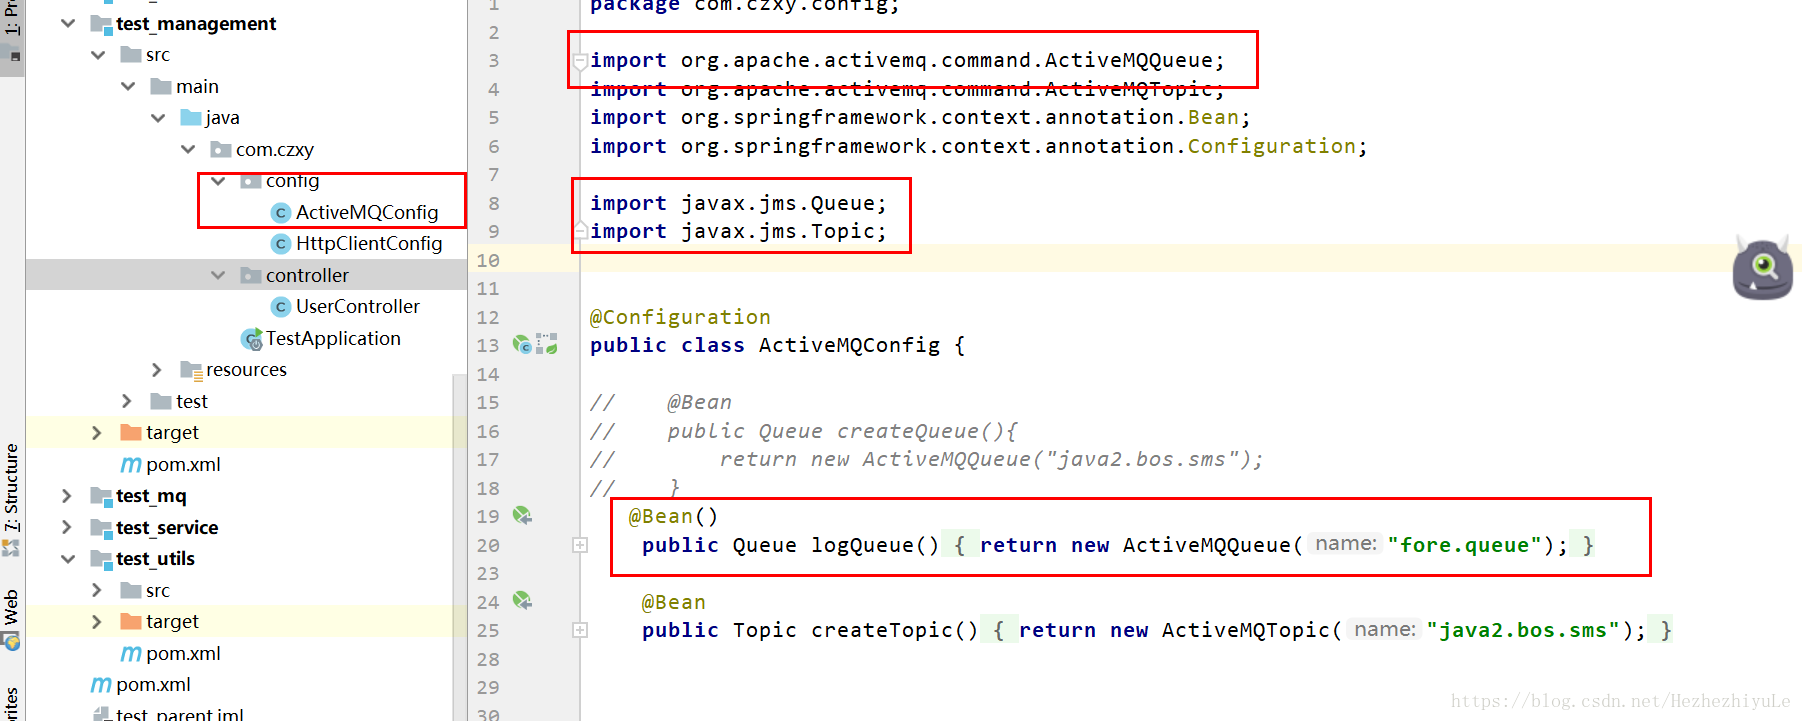
编写config配置类
加入application.properties配置
# MQ的服务器地址
spring.activemq.broker-url=tcp://127.0.0.1:61616
# 是否使用内置MQ
spring.activemq.in-memory=false
# 用户名
spring.activemq.password=admin
# 密码
spring.activemq.user=admin
import org.apache.activemq.command.ActiveMQQueue;
import org.apache.activemq.command.ActiveMQTopic;
import org.springframework.context.annotation.Bean;
import org.springframework.context.annotation.Configuration;

import javax.jms.Queue;
import javax.jms.Topic;


@Configuration
public class ActiveMQConfig {

   @Bean()
    public Queue logQueue(){
        return new ActiveMQQueue("fore.queue");
    }

    @Bean
    public Topic createTopic(){
        return new ActiveMQTopic("java2.bos.sms");
    }


}
- 编写生产者(你要将谁放入消息队列 就在谁的方法下发送)
	//使用Spring提供的模板
    @Autowired
    private JmsMessagingTemplate jmsMessagingTemplate;
	//使用队列 为什么模式 这里队列名字和配置里边一致
    @Autowired
    private Queue queue;

    @GetMapping("/login")
    public ResponseEntity<Void> login(User user) {

        User login = userService.login(user);

        if (login == null) {
            return new ResponseEntity<>(HttpStatus.INTERNAL_SERVER_ERROR);
        }
        System.out.println(login);
        ActiveMQMapMessage mapMessage = new ActiveMQMapMessage();
        try {
        	//创建消息 第一个参数是Key 第二个是传输值
            mapMessage.setString("uid",""+login.getUid());

            // 发送:向queue队列发送消息
            jmsMessagingTemplate.convertAndSend((Destination) queue,mapMessage);
        } catch (JMSException e) {
            e.printStackTrace();
        }


        return new ResponseEntity<>(HttpStatus.OK);


    }
- 编写消费者 独立编写一个Spring项目 运行 可以实时抓取message
加入application.properties配置 两边都要写
# MQ的服务器地址
spring.activemq.broker-url=tcp://127.0.0.1:61616
# 是否使用内置MQ
spring.activemq.in-memory=false
# 用户名
spring.activemq.password=admin
# 密码
spring.activemq.user=admin

package com.czxy.queue;
import org.springframework.beans.factory.annotation.Autowired;
import org.springframework.jms.annotation.JmsListener;
import org.springframework.stereotype.Component;
import javax.jms.MapMessage;
import javax.jms.Message;
/**
 * 消费者
 *
 */
@Component
public class QueueConsumer {

    /**
     *  监听器监听消息的消费
     *  当监听器从fore.queue中抓取到消息之后,直接注入到receive方    法中
     *
     */

    //参数的名字为生产者注入queue的名称 名字对应才可以抓取
    @JmsListener(destination = "fore.queue")
    public void receive(Message message) throws Exception{
        MapMessage mapMessage = (MapMessage)message;
		//通过Key 抓取信息
        String uid = mapMessage.getString("uid");
        System.out.println(mapMessage.getString("uid"));

    }
}
祝你幸福
送你一首歌: 《El ultimo indio moxicano 》最后的莫西干人
附图: 泰山 十八盘 10-21 -2018


 724
724

 被折叠的 条评论
为什么被折叠?
被折叠的 条评论
为什么被折叠?
 到【灌水乐园】发言


