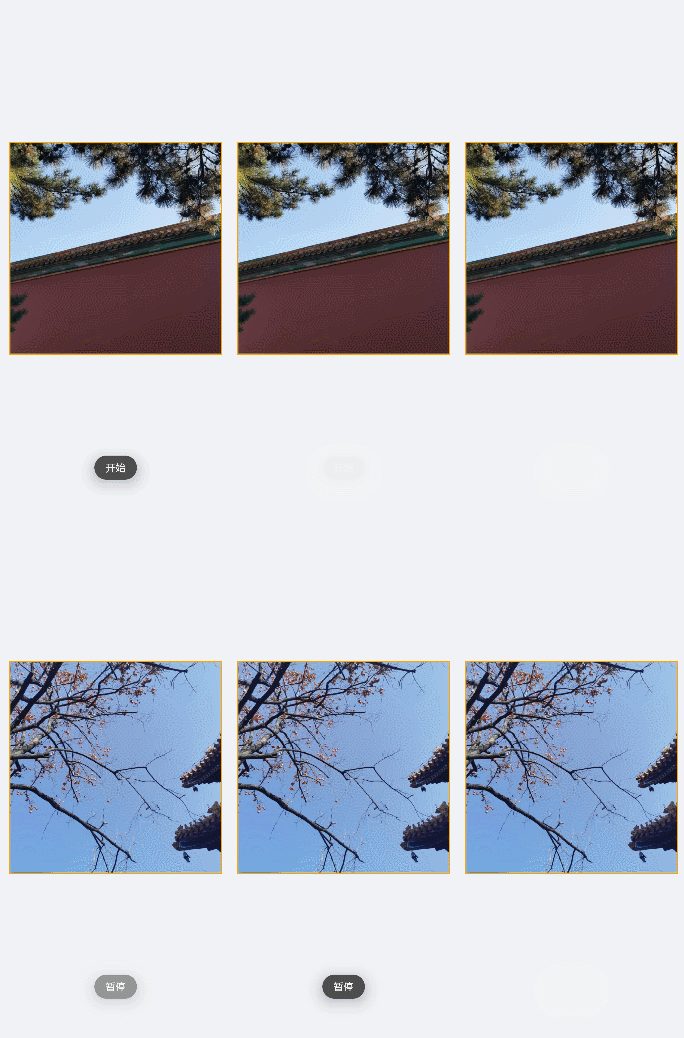
image-animator组件为图片帧动画播放器。具体用法请参考image-animator。
创建image-animator组件
在pages/index目录下的hml文件中创建一个image-animator组件,css文件中编写组件样式,js文件中引用图片。
<!-- xxx.hml -->
<div class="container">
  <image-animator class="animator" images="{{frames}}" duration="3s"/>
</div>
/* xxx.css */
.container {
  width: 100%;
  height: 100%;
  flex-direction: column;
  justify-content: center;
  align-items: center;
  background-color: #F1F3F5;
}
.animator {
  width: 500px;
  height: 500px;
}
// index.js
export default {
  data: {
    frames: [
      {
        src: "/common/landscape1.jpg",
      },
      {
        src: "/common/landscape2.jpg",
      }
    ],
  },
};

设置image-animator组件属性
添加iteration(播放次数)、reverse(播放顺序)、fixedsize(图片大小是否固定为组件大小)、duration(播放时长)和fillmode(执行结束后的状态)属性,控制图片的播放效果。
<!-- xxx.hml -->
<div class="container">
  <image-animator class="animator" fixedsize="false" iteration='2' reverse="false" ref="animator" fillmode="none" images="{{frames}}"   duration="5s" />
</div>
/* xxx.css */
.container {
  width: 100%;
  height: 100%;
  flex-direction: column;
  background-color: #F1F3F5;
}
.animator {
  width: 500px;
  height: 500px;
}
// index.js
export default {
  data: {
    frames: [
      {
        src: 'common/landscape1.jpg',
        width: '250px',
        height: '250px',
        left: '150px',
        top: '50px',
      },
      {
        src: 'common/landscape2.jpg',
        width: '300px',
        height: '300px',
        left: '150px',
        top: '100px',
      },
      {
        src: 'common/landscape1.jpg',
        width: '350px',
        height: '350px',
        left: '150px',
        top: '150px',
      },
      {
        src: 'common/landscape2.jpg',
        width: '400px',
        height: '400px',
        left: '150px',
        top: '200px',
      },
      {
        src: 'common/landscape3.jpg',
        width: '450px',
        height: '450px',
        left: '150px',
        top: '250px',
      },
      {
        src: 'common/landscape4.jpg',
        width: '500px',
        height: '500px',
        left: '150px',
        top: '300px',
      },
    ],
  },
};

说明
如果在images属性中设置了单独的duration属性,在image-animator组件中设置的duration属性无效。
如果fixedsize属性值设置为true,图片的width 、height 、top 和left属性无效。
如果reverse属性值设置为false,表示从第1张图片播放到最后1张图片。 如果reverse属性值设置为true,表示从最后1张图片播放到第1张图片。
绑定事件
向image-animator组件添加start、pause、stop和resume事件。当图片播放器开始播放时触发start事件,当图片播放器被点击时触发pause事件,长按图片播放器触发resume事件,图片播放器停止播放时触发stop事件。
<!-- xxx.hml -->
<div class="doc-page">
  <image-animator class="img" id="img" images="{{imginfo}}" iteration="1" duration="10s" onstart="popstart" onpause="poppause"   onstop="popstop" onresume="popresume" onlongpress="setresume" onclick="setpause">
  </image-animator>
</div>
/* xxx.css */
.doc-page {
  width: 100%;
  height: 100%;
  flex-direction: column;
  align-items: center;
  justify-content: center;
   background-color: #F1F3F5;
}
.img {
  width: 600px;
  height: 600px;
  border: 3px solid orange;
}
// index.js
import promptAction from '@ohos.promptAction';
export default {
  data: {
    imginfo: [
      {
        src: 'common/landscape1.jpg',
      },{
        src: 'common/landscape2.jpg',
      },{
        src: 'common/landscape3.jpg',
      },{
        src: 'common/landscape4.jpg',
      }
    ],
  },
  onInit() {
  },
  setpause(e) {
    this.$element('img').pause()
  },
  setresume(e) {
    this.$element('img').resume()
  },
  popstart(e) {
    promptAction.showToast({
      message: '开始'
    })
  },
  poppause(e) {
    promptAction.showToast({
      message: '暂停'
    })
  },
  popstop(e) {
    promptAction.showToast({
      message: '停止'
    })
  },
  popresume(e) {
    promptAction.showToast({
      message: '恢复'
    })
  }
}

场景示例
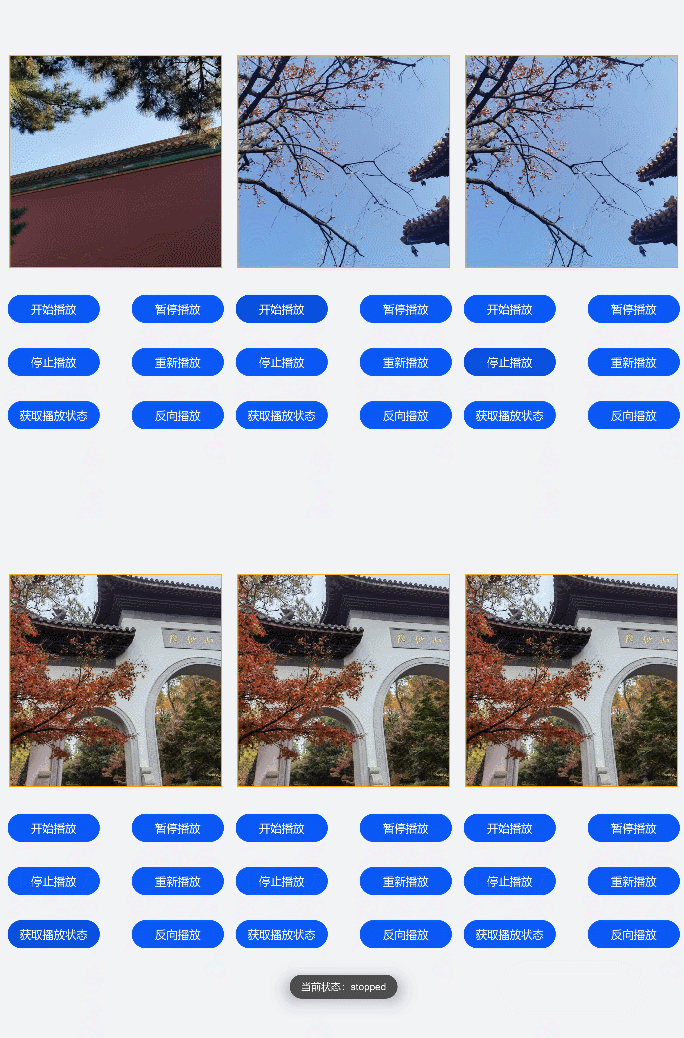
在本场景中,开发者可通过开始播放、停止播放等按钮切换图片的播放状态。
image-animator组件通过调用start、pause、stop和resume方法控制图片的开始、暂停、停止和重新播放,通过getState方法查询图片的播放状态。
<!-- xxx.hml -->
<div class="doc-page">
  <image-animator class="img" id="img" images="{{imginfo}}" iteration="2" reverse="{{rev}}" duration="10s">
  </image-animator>
  <div style="width: 700px;height:450px;margin-top: 40px;flex-direction:column;justify-content:space-around;">
    <div class="container">
      <button type="capsule" value="开始播放" onclick="startimg"></button>
      <button type="capsule" value="暂停播放" onclick="pauseimg"></button>
    </div>
    <div class="container">
      <button type="capsule" value="停止播放" onclick="stopimg"></button>
      <button type="capsule" value="重新播放" onclick="resumeimg"></button>
    </div>
    <div class="container">
      <button type="capsule" value="获取播放状态" onclick="getimgstate"></button>
      <button type="capsule" value="{{revVal}}" onclick="revimg"></button>
    </div>
  </div>
</div>
/* xxx.css */
.doc-page {
  width: 100%;
  height: 100%;
  flex-direction: column;
  align-items: center;
  justify-content: center;
  background-color: #F1F3F5;
}
.img {
  width: 600px;
  height: 600px;
  border: 3px solid orange;
}
button{
  width: 260px
}
.container {
  width: 100%;
  height: 120px;
  align-items: center;
  justify-content: space-around;
}
// index.js
import promptAction from '@ohos.promptAction';
export default {
  data: {
    rev:false,
    imginfo: [
      {
        src: 'common/landscape1.jpg',
      },{
        src: 'common/landscape2.jpg',
      },{
        src: 'common/landscape3.jpg',
      },{
        src: 'common/landscape4.jpg',
      }
    ],
    revVal: '反向播放'
  },
  onInit() {
  },
  startimg(e) {
    this.$element('img').start()
  },
  pauseimg(e) {
    this.$element('img').pause()
  },
  stopimg(e) {
    this.$element('img').stop()
  },
  resumeimg(e) {
    this.$element('img').resume()
  },
  getimgstate(e) {
    promptAction.showToast({
      message: '当前状态:' + this.$element('img').getState()
    })
  },
  revimg(e) {
    this.rev = !this.rev
    if (this.rev) {
      this.revVal = '正向播放'
    } else {
      this.revVal = '反向播放'
    }
  }
}

写在最后
有很多小伙伴不知道学习哪些鸿蒙开发技术?不知道需要重点掌握哪些鸿蒙应用开发知识点?而且学习时频繁踩坑,最终浪费大量时间。所以有一份实用的鸿蒙(HarmonyOS NEXT)文档用来跟着学习是非常有必要的。
希望这一份鸿蒙学习文档能够给大家带来帮助,有需要的小伙伴自行领取,限时开源,先到先得~无套路领取!!
如果你是一名有经验的资深Android移动开发、Java开发、前端开发、对鸿蒙感兴趣以及转行人员,可以直接领取这份资料
鸿蒙(HarmonyOS NEXT)5.0最新学习路线

路线图适合人群:
IT开发人员:想要拓展职业边界
零基础小白:鸿蒙爱好者,希望从0到1学习,增加一项技能。
技术提升/进阶跳槽:发展瓶颈期,提升职场竞争力,快速掌握鸿蒙技术
获取以上完整版高清学习路线,请点击→纯血版全套鸿蒙HarmonyOS学习文档
《鸿蒙 (HarmonyOS)开发入门教学视频》

《鸿蒙生态应用开发V3.0白皮书》

《鸿蒙 (OpenHarmony)开发基础到实战手册》
OpenHarmony北向、南向开发环境搭建

《鸿蒙开发基础》
●ArkTS语言
●安装DevEco Studio
●运用你的第一个ArkTS应用
●ArkUI声明式UI开发
.……

《鸿蒙开发进阶》
●Stage模型入门
●网络管理
●数据管理
●电话服务
●分布式应用开发
●通知与窗口管理
●多媒体技术
●安全技能
●任务管理
●WebGL
●国际化开发
●应用测试
●DFX面向未来设计
●鸿蒙系统移植和裁剪定制
……

《鸿蒙进阶实战》
●ArkTS实践
●UIAbility应用
●网络案例
……

获取以上完整鸿蒙HarmonyOS学习文档,请点击→纯血版全套鸿蒙HarmonyOS学习文档


 1198
1198

 被折叠的 条评论
为什么被折叠?


