


 本文详细介绍使用Python的matplotlib和numpy库进行函数图形绘制的方法,包括如何调整坐标轴、标注关键点及其坐标,并通过虚线突出显示。同时,介绍了如何为图形添加标题、保存图片,以及如何将坐标轴调整到原点位置。
Rendering
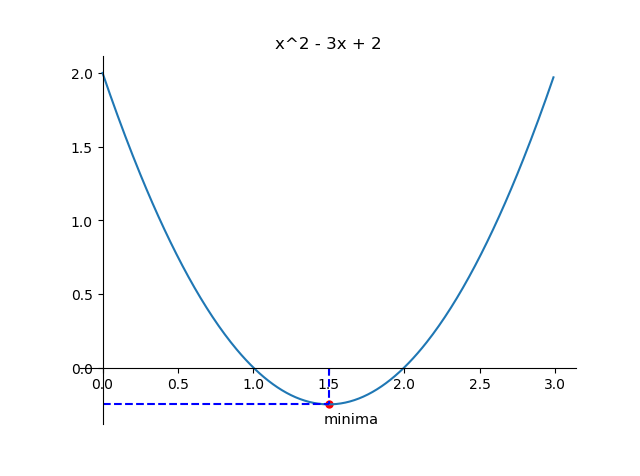
这是想要的效果:
Notes
记录几个功能的做法:
- 函数作图
- 座标轴(下、左边框)移到过原点,上、右边框去掉
- 标出一个点
- 虚线描出这个点的横、纵坐标所在
- 给这个点打标签
- 图片标题
- 保存
Code
import matplotlib.pyplot as plt
import numpy as np

fig = plt.figure()

# 函数图
x = np.arange(0, 3, 0.01)
y = x ** 2 - 3 * x + 2
plt.plot(x, y)

# 标题
plt.title('x^2 - 3x + 2')

# 标点
plt.scatter([1.5], [-0.25], s=25, c='r')  # stroke, colour

# 虚线定位:两点确定一条直线
plt.plot([0, 1.5], [-0.25, -0.25], c='b', linestyle='--')
plt.plot([1.5, 1.5], [0, -0.25], c='b', linestyle='--')

# 点的标签(座标中加减的 `0.15` 是显示位置的偏移,避免挡住点)
plt.text(1.5+0.15, -0.25-0.15, 'minima', ha='center', va='bottom', fontsize=10.5)  # horizontal alignment
# 座标轴调位
ax = plt.gca()
# 去掉上、右边框
ax.spines['top'].set_color('none')
ax.spines['right'].set_color('none')
# 移到原点
ax.xaxis.set_ticks_position('bottom')
ax.yaxis.set_ticks_position('left')
ax.spines['bottom'].set_position(('data', 0))
ax.spines['left'].set_position(('data', 0))

# 显示、保存
plt.show()
fig.savefig('fun.png')


 1679
1679


 到【灌水乐园】发言


