


 本文详细介绍了如何在Windows上通过压缩包方式安装MySQL8.0.29,包括配置my.ini文件、安装步骤及系统环境变量设置。同时,也提到了Navicat15的安装过程,以及如何对MySQL进行初始化和密码设置。
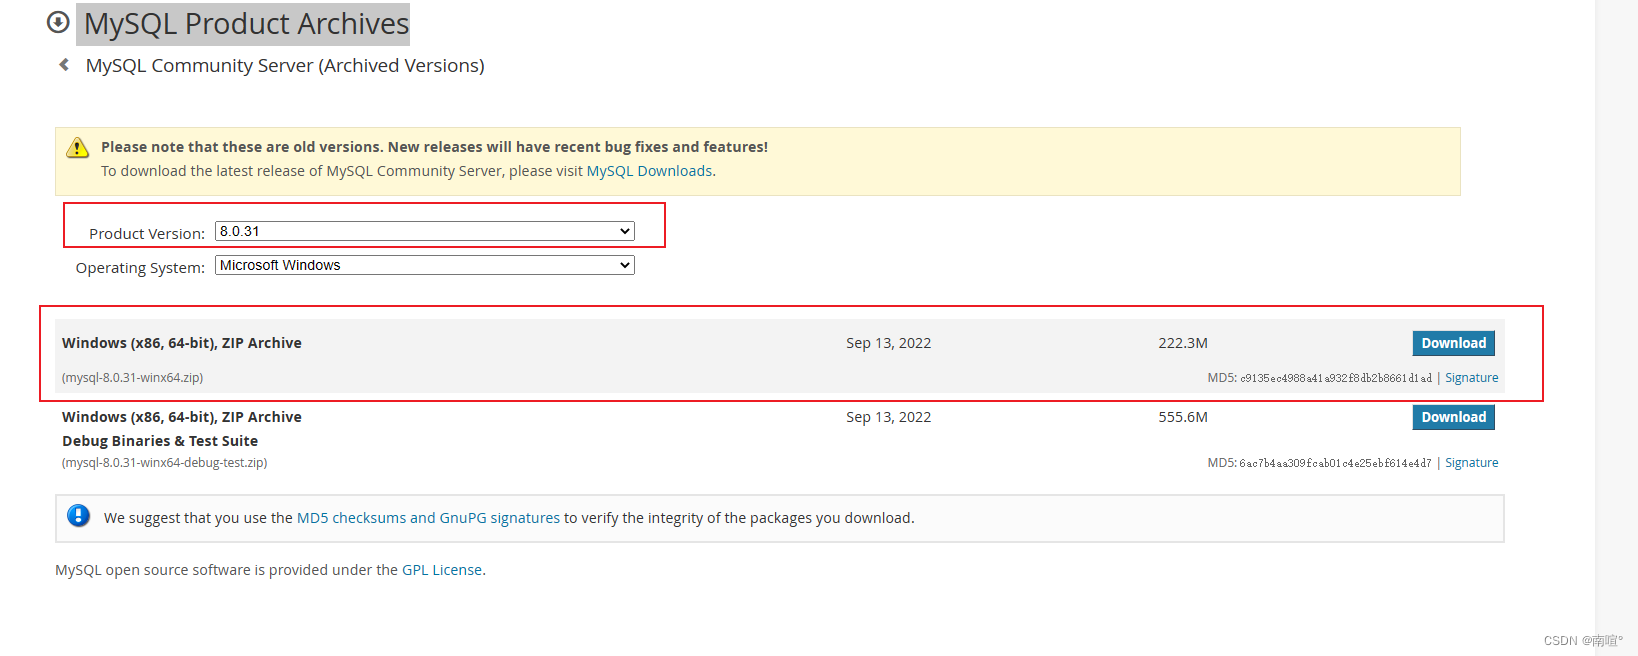
Mysql压缩包安装流程+系统环境配置+Navicat15安装和破解
mysql-8.0.29-winx64压缩包安装流程和系统环境配置
1. 下载Mysql压缩包
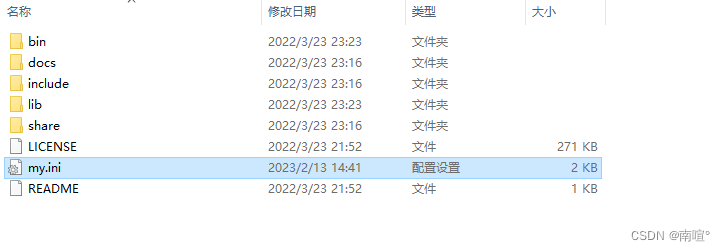
2. 配置my.ini文件
在mysql-8.0.29-winx64目录下新建一个文本,将下面内容复制并保存文件,最后修改文本文件名称为
my.ini
[client]
# 设置mysql客户端连接服务端时默认使用的端口
#port=3306
# 设置mysql客户端默认字符集
default-character-set=UTF8MB4

[mysqld]
# 设置3306端口
port = 3306
# 设置mysql的安装目录
basedir=D:\\mysql-8.0.29-winx64
# 设置 mysql数据库的数据的存放目录,MySQL 8+ 不需要以下配置,系统自己生成即可,否则有可能报错
datadir=D:\\mysql-8.0.29-winx64\\Data
# 允许最大连接数
max_connections=4000
# 服务端使用的字符集默认为8比特编码的latin1字符集
character-set-server=UTF8MB4
# 创建新表时将使用的默认存储引擎
default-storage-engine=INNODB
character-set-client-handshake = FALSE
character-set-server = utf8mb4
collation-server = utf8mb4_unicode_ci
init_connect=`SET NAMES utf8mb4`
default_authentication_plugin=mysql_native_password

log-output=FILE
general-log=0
slow-query-log=0
long_query_time=10

[mysql]
# 设置mysql客户端默认字符集
default-character-set=utf8mb4
# 安装流程
#mysqld --initialize --console
#mysqld --install
#net start mysql
#mysql -u root -p
#alter user root@localhost identified by 'phaMghjoa0*O'
#ALTER USER 'root'@'localhost' IDENTIFIED WITH mysql_native_password BY "haosql";
#use mysql
#update user set host='%' where user='root';
#flush privileges;
#select host,user,plugin from user;
#flush privileges;


# 非安装操作
#mysqld --console --skip-grant-tables --shared-memory
#mysql -uroot -p

#sc delete mysql
#mysqld -remove

#update user set password=password('haosql') where user='rot';
##alter user root@localhost identified by 'haosql';
#update user set plugin='mysql_native_password' where user='root';
#ALTER USER 'root'@'%' IDENTIFIED WITH mysql_native_password BY "haosql";
3. 安装流程
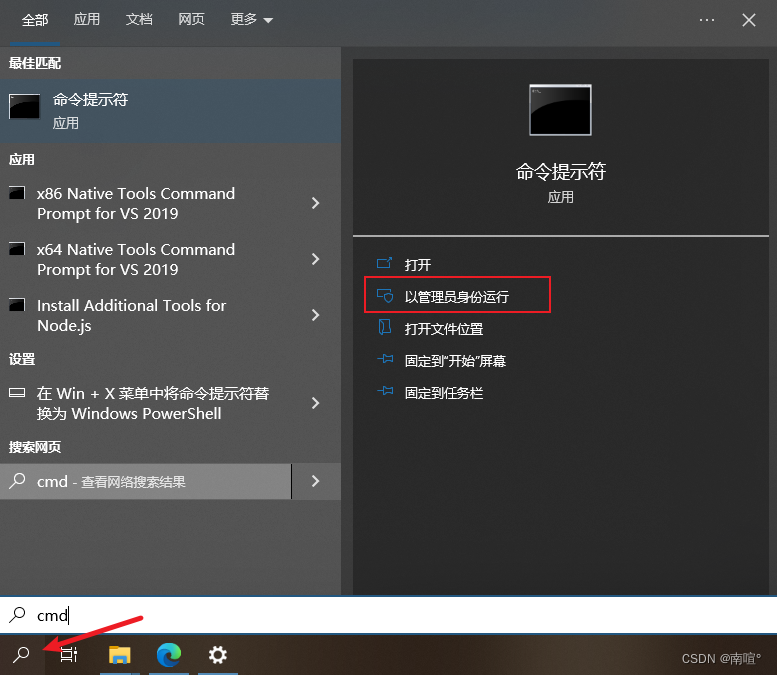
通过搜索CMD,以管理员身份运行
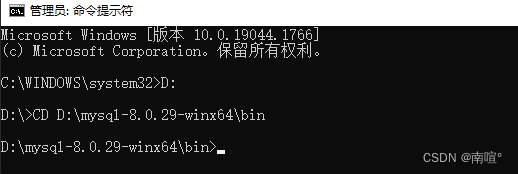
**转到Mysql目录下,请确保地址位置与my.ini文件的安装地址一致!**
#mysqld --initialize --console
#mysqld --install
#net start mysql
#mysql -u root -p
#alter user root@localhost identified by 'phaMghjoa0*O'
#ALTER USER 'root'@'localhost' IDENTIFIED WITH mysql_native_password BY "haosql";
#use mysql
#update user set host='%' where user='root';
#flush privileges;
#select host,user,plugin from user;
#flush privileges;
按顺序输入上述指令
-
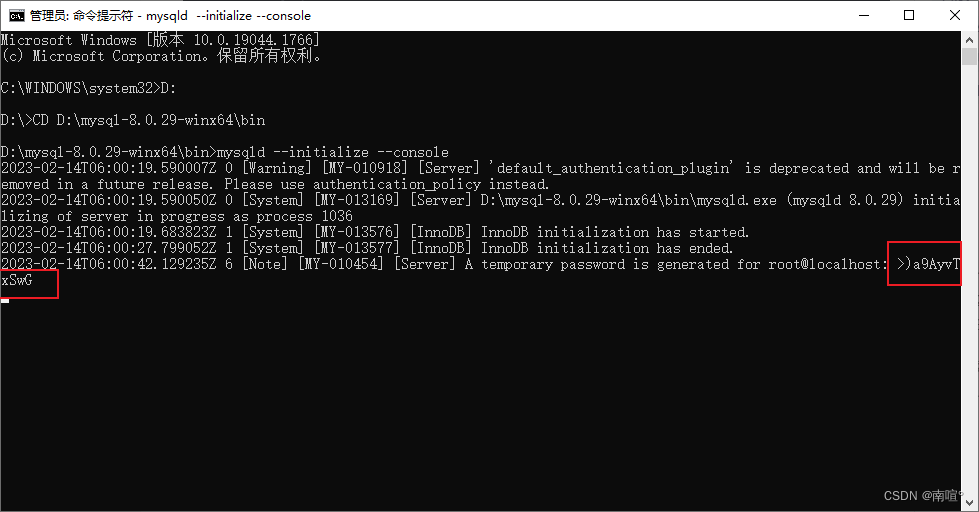
mysqld --initialize --console
保存红色框内的密码,该密码为临时生成的密码
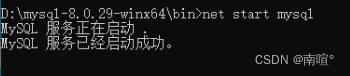
- mysqld --install

- net start mysql
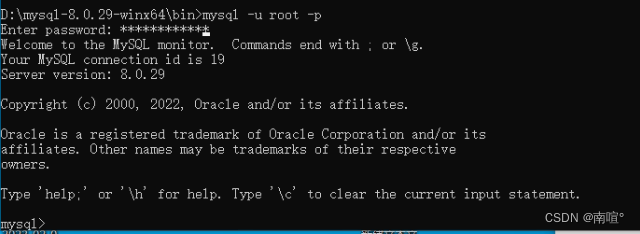
- mysql -u root -p
密码输入上面红框生成的临时密码
- ALTER USER ‘root’@‘localhost’ IDENTIFIED WITH mysql_native_password BY “haosql”;
修改密码成:haosql (可自定义)

-
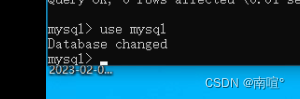
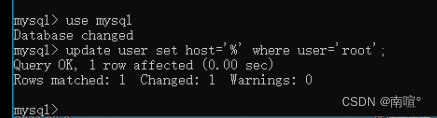
use mysql
-
update user set host=‘%’ where user=‘root’;
-
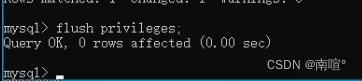
flush privileges;
-
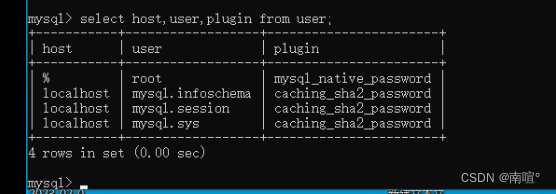
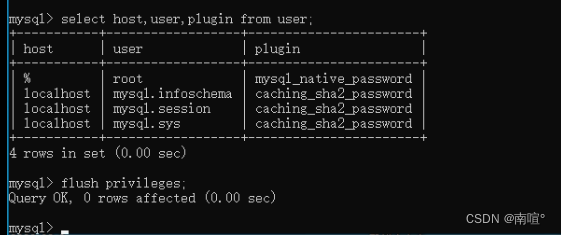
select host,user,plugin from user;
-
flush privileges;
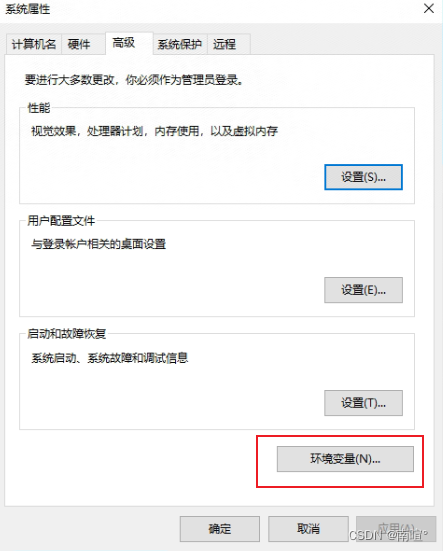
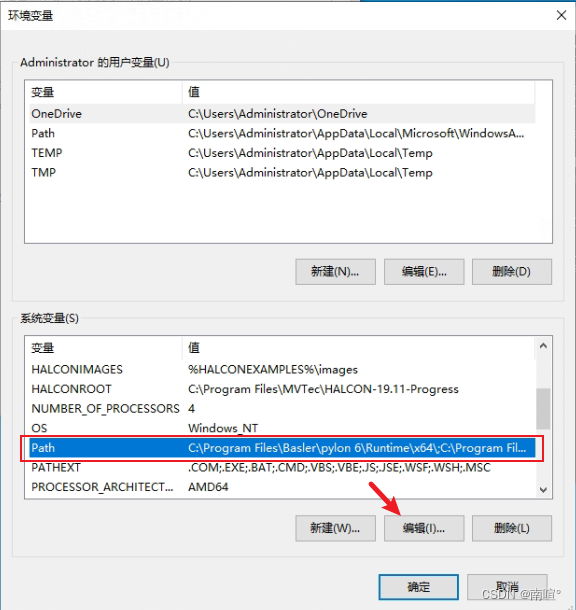
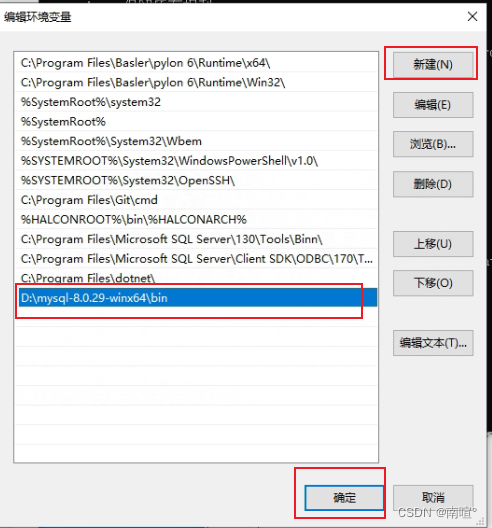
4.系统环境变量添加
- 开启系统环境变量设置

- 设置环境变量
-
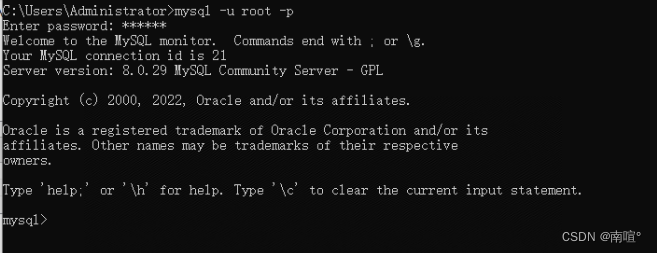
验证输入mysql -u root -p
通过WIN+R运行CMD后输入mysql -u root -p,输入密码 haosql
最后通过即成功安装MYSQL
-
若出现 ERROR 1045 (28000): Access denied for user ‘ODBC’@'localhost

出现这个异常是因为你没有指定账号密码进入 -
基础命令:mysql -u root -p
root是用户名,输入这条命令按回车键后系统会提示你输入密码。 -
指定端口号登录MySQL数据库:mysql -u root -p -P 3306。
注意指定端口的字母P为大写,而标识密码的p为小写,- MySQL默认端口号为3306
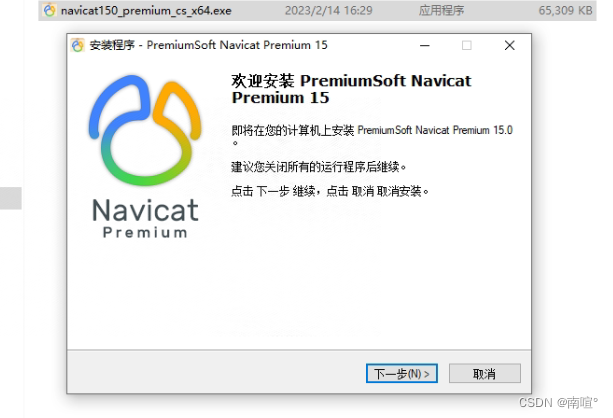
Navicat15安装
1.Navicat15安装

Navicat15(0214)
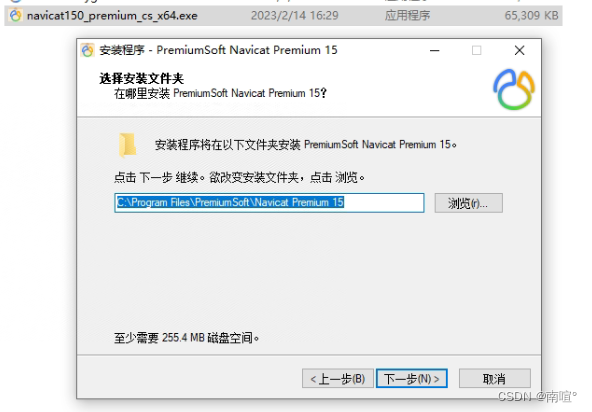
可自定义位置,建议默认安装位置
C:\Program Files\PremiumSoft\Navicat Premium 15
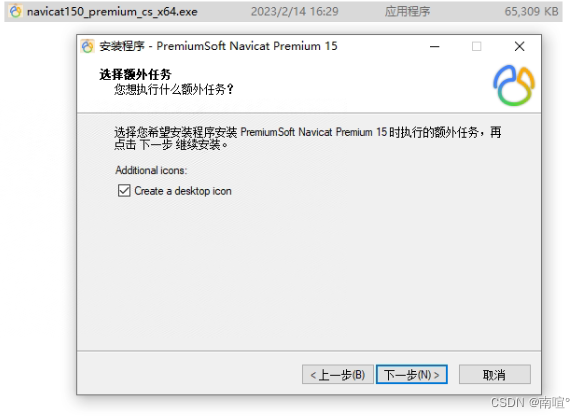
- 其余默认下一步即可


 被折叠的 条评论
为什么被折叠?
被折叠的 条评论
为什么被折叠?
 到【灌水乐园】发言


