


Vue 进阶系列教程将在本号持续发布,一起查漏补缺学个痛快!若您有遇到其它相关问题,非常欢迎在评论中留言讨论,达到帮助更多人的目的。若感本文对您有所帮助请点个赞吧!
2013年7月28日,尤雨溪第一次在 GItHub 上为 Vue.js 提交代码;2015年10月26日,Vue.js 1.0.0版本发布;2016年10月1日,Vue.js 2.0发布。
最早的 Vue.js 只做视图层,没有路由, 没有状态管理,也没有官方的构建工具,只有一个库,放到网页里就可以直接用了。
后来,Vue.js 慢慢开始加入了一些官方的辅助工具,比如路由(Router)、状态管理方案(Vuex)和构建工具(Vue-cli)等。此时,Vue.js 的定位是:The Progressive Framework。翻译成中文,就是渐进式框架。
Vue.js2.0 引入了很多特性,比如虚拟 DOM,支持 JSX 和 TypeScript,支持流式服务端渲染,提供了跨平台的能力等。Vue.js 在国内的用户有阿里巴巴、百度、腾讯、新浪、网易、滴滴出行、360、美团等等。
Vue 已是一名前端工程师必备的技能,现在就让我们开始深入学习 Vue.js 内部的核心技术原理吧!
面向的场景
后台管理系统需要上传企业 Logo,并要求固定尺寸(如 150×50)。
用户中心要让用户上传头像,并自动裁剪成正方形。
移动端 H5需要兼容图片上传,并支持裁剪后压缩。
第一步:安装依赖
npm install vue-cropper第二步:组件代码
<template>  <div class="logo-upload">    <el-upload      action=""      :show-file-list="false"      :on-change="handleFileChange"      accept=".jpg,.jpeg,.png,.gif"    >      <div class="avatar-wrapper">        <img v-if="imageUrl" :src="imageUrl" class="avatar" />        <i v-else class="el-icon-plus avatar-uploader-icon"></i>      </div>    </el-upload>
    <el-dialog      title="图片裁剪"      :visible.sync="showCropper"      width="800px"      append-to-body      @close="closeCropper"    >      <div class="cropper-container">        <vue-cropper          ref="cropper"          :img="cropperImg"          :auto-crop="true"          :auto-crop-width="cropWidth"          :auto-crop-height="cropHeight"          :fixed="fixedRatio"          :fixed-box="fixedBox"          :center-box="centerBox"          :info="true"        ></vue-cropper>      </div>      <span slot="footer" class="dialog-footer">        <el-button @click="showCropper = false">取 消</el-button>        <el-button type="primary" @click="confirmCrop">确 定</el-button>      </span>    </el-dialog>  </div></template>
<script>import VueCropper from 'vue-cropper/src/vue-cropper.vue';
export default {  name: "ImgCropper",  components: { VueCropper },  props: {    value: { type: String, default: "" },    cropWidth: { type: Number, default: 150 },    cropHeight: { type: Number, default: 50 },    fixedRatio: { type: Boolean, default: false },    fixedBox: { type: Boolean, default: true },    centerBox: { type: Boolean, default: false },  },  data() {    return {      showCropper: false,      cropperImg: "",      imageUrl: this.value,    };  },  watch: {    value(newVal) {      this.imageUrl = newVal;    },  },  methods: {    handleFileChange(file) {      if (!file) return;      const reader = new FileReader();      reader.onload = (e) => {        this.cropperImg = e.target.result;        this.showCropper = true;      };      reader.readAsDataURL(file.raw);    },    confirmCrop() {      this.$refs.cropper.getCropBlob((blob) => {        const croppedUrl = URL.createObjectURL(blob);        this.imageUrl = croppedUrl;        this.$emit("input", croppedUrl);        this.showCropper = false;      });    },    closeCropper() {      this.cropperImg = "";    },  },};</script>
<style scoped>.logo-upload {  display: inline-block;}.avatar-wrapper {  width: 178px;  height: 178px;  border: 1px dashed #d9d9d9;  border-radius: 6px;  cursor: pointer;  position: relative;  overflow: hidden;}.avatar-wrapper:hover {  border-color: #409eff;}.avatar {  width: 100%;  height: 100%;  display: block;  object-fit: contain;}.avatar-uploader-icon {  font-size: 28px;  color: #8c939d;  width: 178px;  height: 178px;  line-height: 178px;  text-align: center;}.cropper-container {  width: 100%;  height: 400px;}</style>
第三步:使用方式
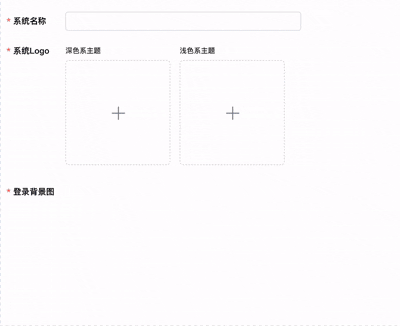
<ImgCropper v-model="logo" :crop-width="150" :crop-height="50" />第四步:效果演示
Vue 进阶系列教程将在本号持续发布,一起查漏补缺学个痛快!若您有遇到其它相关问题,非常欢迎在评论中留言讨论,达到帮助更多人的目的。若感本文对您有所帮助请点个赞吧!

叶阳辉
HFun 前端攻城狮
往期精彩:


 399
399

 被折叠的 条评论
为什么被折叠?
被折叠的 条评论
为什么被折叠?
 到【灌水乐园】发言


