


 本文介绍如何使用Fiddler进行插件开发,通过一个数据解密插件的实例,详细讲解了从环境搭建、接口实现到调试运行的全过程。
本文介绍了 Fiddler 插件开发的基础知识,并以一个数据解密插件开发的实例讲述了开发的过程。
文章目录
Fiddler 插件基础知识
插件的形式是一个 dll 文件,插件开发就是要生成这个 dll 文件。将生成的 dll 文件放入 Fiddler 的相应目录下,重启 Fiddler 即可生效。
Fiddler 是 C# 编写的,所以插件也要用 C# 编写,一般使用 Visual Studio。
Fiddler 提供的接口(官网):
- IFiddlerExtension,IAutoTamper,IAutoTamper2,IAutoTamper3
- 面向全局
- 出现的位置与 Inspectors、log 同级
- dll 放在 Scripts 目录下
- Inspector2,IRequestInspector2,IResponseInspector2
- 面向单个链接
- 出现在 Inspectors 的内部,与 Headers、TextView 同级
- IRequestInspector2 出现在上半部分的 request 数据面板中
- IResponseInspector2 出现在下半部分的 response 数据面板中
- dll 放在 Inspectors 目录下
- ISessionExporter,ISessionImporter
- 批量对请求进行导入导出操作
- 出现在右键菜单 Save-Selected Session 中和顶部菜单栏的 File-ImportSession 弹出的菜单中
- dll 放在 ImportExport 中
- IHandleExecAction
- 可以接收 QuickExec 命令行中的命令
- dll 放在 Scripts 目录下
开发环境
安装 Visual Studio
安装的时候会让选择下载 .net framework,选一个较高的版本下载即可。
开启 fiddler debug 功能
在命令行工具中依次输入:
prefs set fiddler.debug.extensions.showerrors True
prefs set fiddler.debug.extensions.verbose True
来显示错误和log消息。log 信息在 Fiddler 右侧的 log tab 处查看。
开发者可以在代码中使用 FiddlerApplication.Log.LogString() 来打印 log。
数据解密插件开发
需求
能够实时对请求体和返回数据进行解密,并以 JSON 的格式展示出来。
这和 Fiddler 自带的 Inspectors-TextView/JSON 差不多,所以我们希望插件出现在与 TextView/JSON 相同的层级。按照上面的基础知识,我们需要实现 Inspector2,IRequestInspector2,IResponseInspector2 这几个接口。
新建 C# 类库

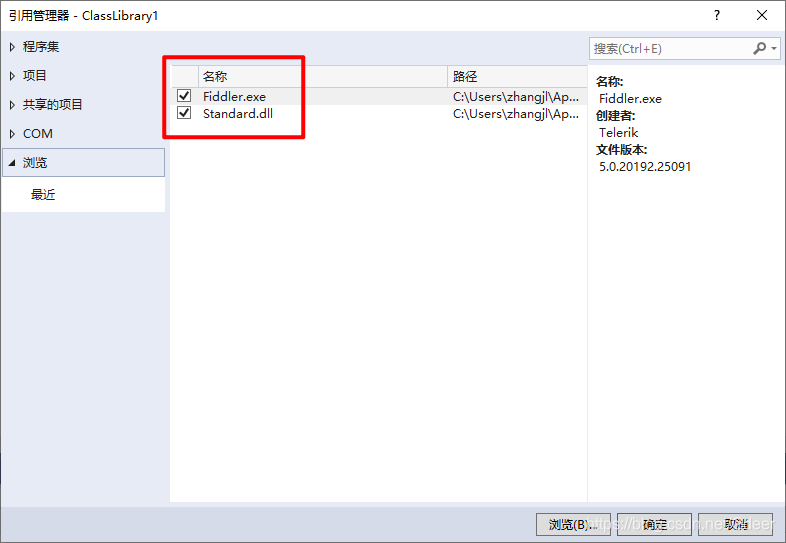
添加 Fiddler 的引用
在解决方案上右键添加:

搜索到 Fiddler.exe 和 Standard.dll 并添加。
Fiddler.exe 提供了我们需要的 Inspectors2、IRequestInspector2,IResponseInspector2 等接口,Standard.dll 提供了 Fiddler 标准的 JSONRequestViewer、JSONResponseViewer 等 UI 组件。
添加 Fiddler 版本信息
在 Properties/AssemblyInfo.cs 中添加 Fiddler 的最低版本信息(必须添加,可按实际情况修改版本号):
[assembly: Fiddler.RequiredVersion("4.6.20171.9220")]
实现接口
以 ResponseDecryption 为例,这个类会显示解密后的返回数据,核心逻辑就是在 set 页面的 body 时,执行 DoDecryption 这个方法,返回解密后的数据。
namespace Response
{
    public sealed class ResponseDecryption : Inspector2, IResponseInspector2, IBaseInspector2
    {
        private bool mBDirty;
        private bool mBReadOnly;
        private byte[] mBody;
        private HTTPResponseHeaders mResponseHeaders;
        private ResponseTextViewer mResponseTextViewer;

        public ResponseDecryption()
        {
            mResponseTextViewer = new ResponseTextViewer();
        }

        public bool bDirty
        {
            get
            {
                return mBDirty;
            }
        }

        public byte[] body
        {
            get
            {
                return mBody;
            }

            set
            {
                mBody = value;
                byte[] decodedBody = DoDecryption();
                if (decodedBody != null)
                {
                    mResponseTextViewer.body = decodedBody;
                }
                else
                {
                    mResponseTextViewer.body = value;
                }
            }
        }

        public byte[] DoDecryption()
        {
            // 将 byte[] 转成字符串
            String rawBody = System.Text.Encoding.Default.GetString(mBody);
            String showBody = rawBody;
            if (!rawBody.Contains("{"))
            {
                // 需要解密
                FiddlerApplication.Log.LogString("rawBody: " + rawBody);
                showBody = DecryptionUtil.DecryptSDKBody(rawBody);
            }
            if (showBody != null)
            {
                byte[] decodeBody = System.Text.Encoding.UTF8.GetBytes(showBody);
                return decodeBody;
            }
            else
            {
                Clear();
                return null;
            }
        }

        public bool bReadOnly
        {
            get
            {
                return mBReadOnly;
            }

            set
            {
                mBReadOnly = value;
            }
        }

        HTTPResponseHeaders IResponseInspector2.headers
        {
            get
            {
                FiddlerApplication.Log.LogString("headers get function.");
                return mResponseHeaders;
            }
            set
            {
                FiddlerApplication.Log.LogString("headers set function.");
                mResponseHeaders = value;
            }
        }

        public override void AddToTab(TabPage o)
        {
            mResponseTextViewer.AddToTab(o);
            o.Text = "Decryption";
        }

        public void Clear()
        {
            mBody = null;
            mResponseTextViewer.Clear();
        }

        // 在 Tab 上的摆放位置
        public override int GetOrder() => 100;
    }
}
运行
在顶部菜单栏点击 生成-生成解决方案,就会在当前工程的 bin/Debug 目录下生成 dll 文件,将其复制到 Fiddler 安装目录下的 Inspectors 目录,重启 Fiddler 即可运行。
为了避免每次生成 dll 都手动复制,可以在 VS 中配置 build 之后的执行动作,自动复制 dll 到指定目录。在解决方案上 右键-属性-生成事件-生成后事件命令行 中填写(具体路径需自己修改,即 Fiddler 的安装目录):
copy "$(TargetPath)" "XXX\fiddler\Inspectors\$(TargetFilename)"

调试
启动 Fiddler 后,可在 Visual Studio 顶部菜单栏点击调试-附加到进程,选择 Fiddler.exe 进行调试。

效果
选择一个返回加密数据的接口,点击 Inspectors-DecryptionJSON,可以看到已经解密过的 JSON 数据。

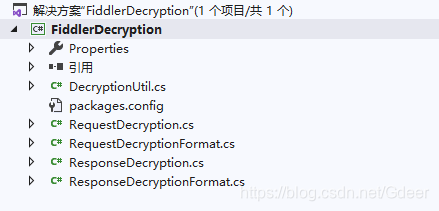
代码
完整代码在这里:Gdeer 的 GitHub
代码内容:
- DecryptionUtil.cs:解密方法
- RequestDecryption.cs:请求数据的解密插件
- RequestDecryptionFormat.cs:请求数据的解密&格式化插件
- ResponseDecryption.cs:返回数据的解密插件
- ResponseDecryptionFormat.cs:返回数据的解密&格式化插件
如需应用到自己的项目,修改 DecryptionUtil 中的解密算法即可。


 2322
2322

 被折叠的 条评论
为什么被折叠?
被折叠的 条评论
为什么被折叠?
 到【灌水乐园】发言


